
How to insert custom fields to your theme's contact form in Shopify
Drive 20-40% of your revenue with Avada
Contact Form is known as a feature that can allow visitors (newbies to a website) to immediately contact and engage with the owner of that website. The customizations for the Contact Form are not limited whether you want basic information or a even more in depth respnse.
However, please keep reading our instructional writing on How to insert custom fields to your theme’s contact form to know more deeply about this topic.
How to insert custom fields to your theme’s contact form
- Benefits of using a Contact form
- The way Contact forms work
- How to insert custom fields to your theme’s contact form
Benefits of using a Contact form
A contact form can be used for so many reasons that you may understand, as an online store administratore. Here are some reasons we listed below to use a contact form:
- Information/Service Request: You customers are able to use this to ask for more information about your products or services.
- Feedback: The contact form is used to get review and feedback from your customers.
- Questions: The form give visitors permission to immediately contact you with many different questions relating to your products and so on.
On top of that, we would like to introduce to you some of great advantages you can take from using contact forms:
- Reduce Spam: When contact forms are handled serverside and your email address is not available, spammers are completely not able to harvest it in an easy way. It is so much safer than using the mailto: tag.
- Consistency: The emails from the contact form are consistant and able to help your website stay well-organized when all the information is supplied in the similar way.
- Information Control: You are allowed to capture the accurate information that you want from the customer when you you find any interesting or necessary information.
The way Contact forms work
Please kindly note that we are not going to discuss the contact form’s actual code in this instruction.
When a visitor comes to your contact page on your website, the Contact Form will be displayed to ask them to fill in their information and questions. The information in the fields will be sent in an automatic way to you via. Email once all the information is submitted. A Perl script or PHP file will be ran once the submit button is clicked. It does read the request and then, send it to your mailbox.
All the questions that the visitor filled in will be listed fully in the mail as you can see when the mail is opened. Every time you get an email, it will be in the similar format. As all emails will have the same subject line, in your email account, you are allowed to sort all emails to filter into their own folder.
When the form is already processed by the server, you can control the place that your visitor is re-directed to and then have them return to the contact form page in which you know that you have got their request and will contact them as soon as possible.
How to insert custom fields to your theme’s contact form
Step 1:
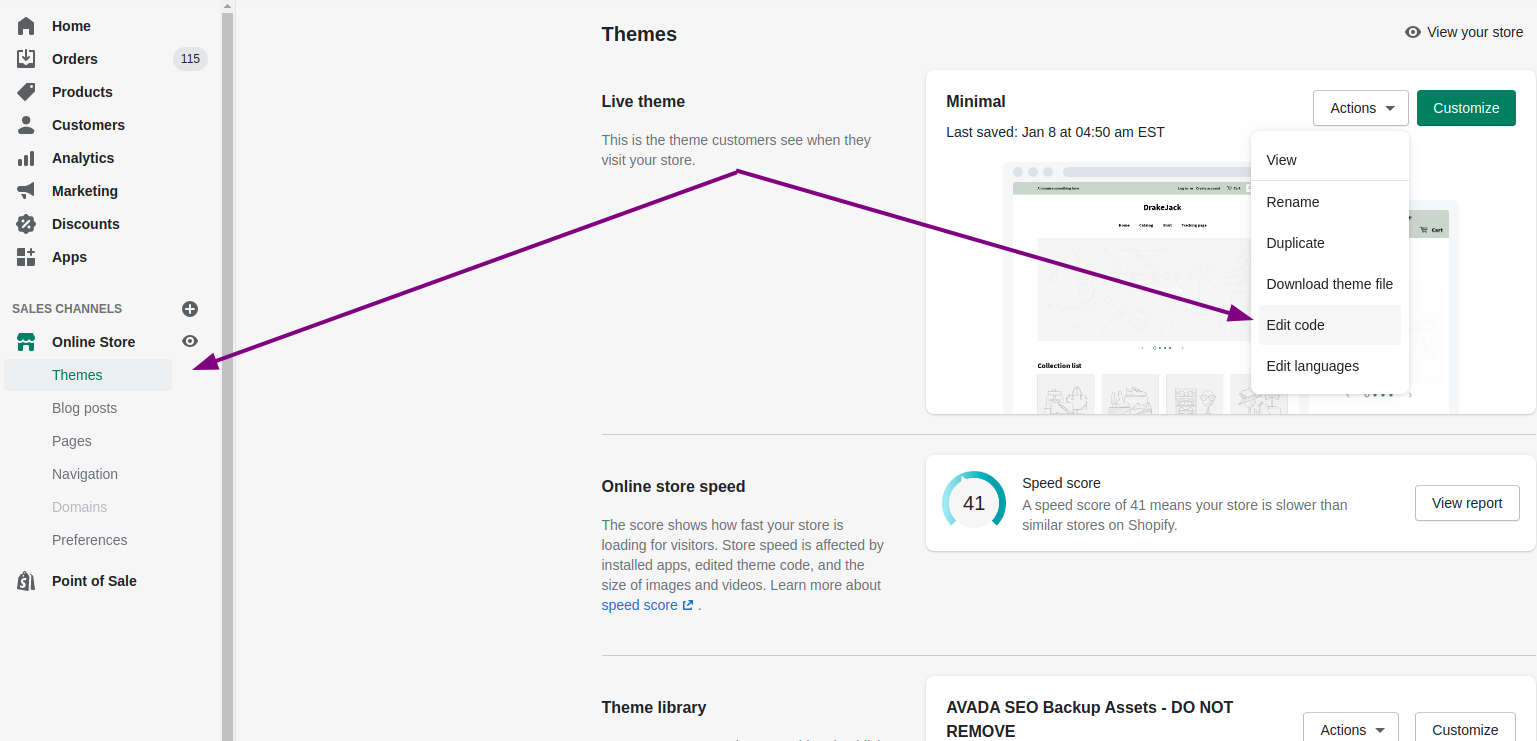
Go to Online Store > Themes from your Shopify Admin panel.
Step 2:
Look for the theme you want to edit and click Actions > Edit code.
Step 3:
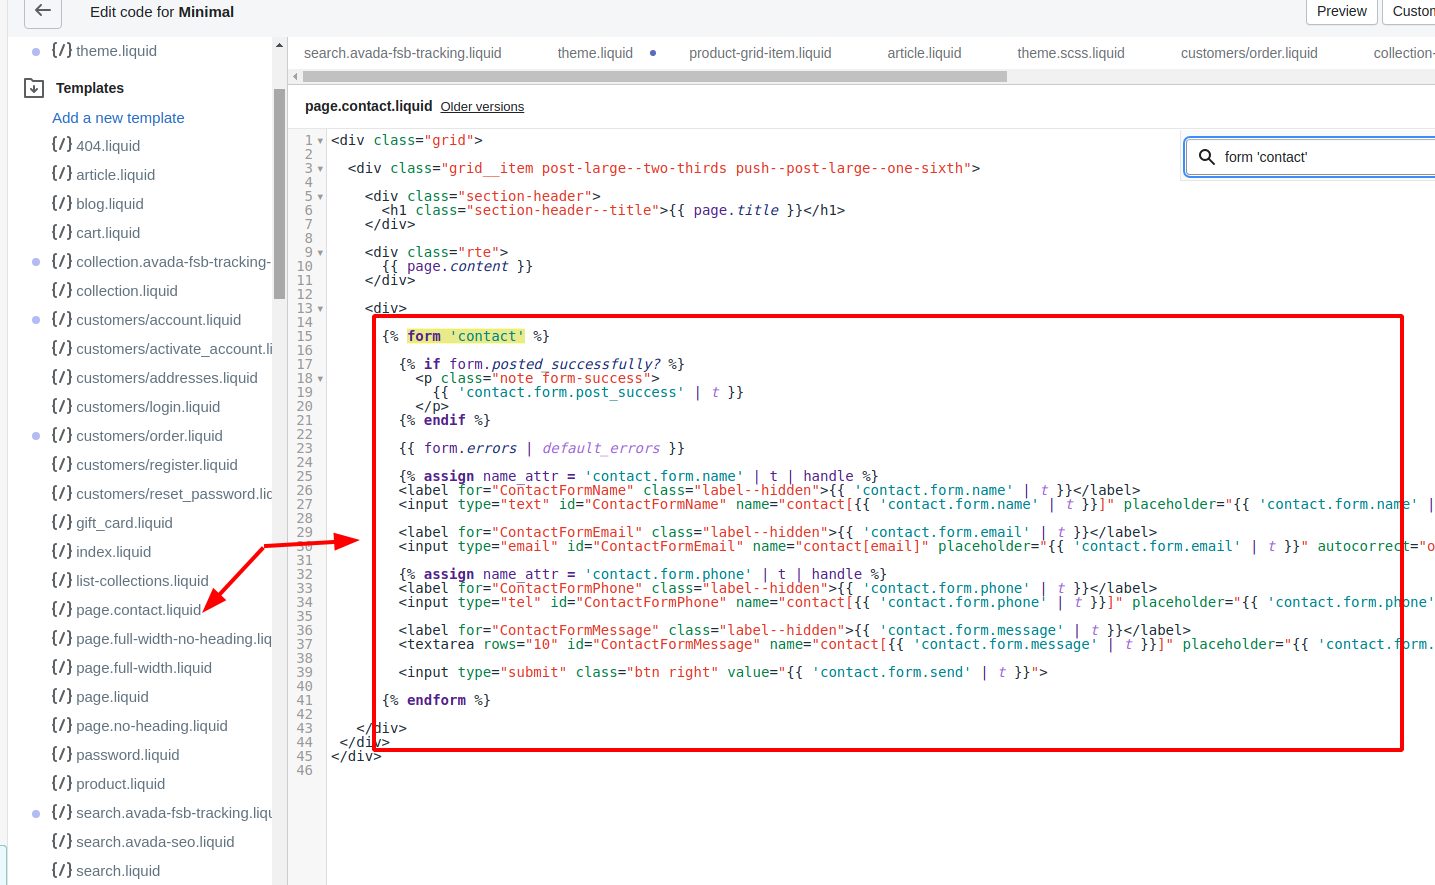
Tap page.contact.liquid located in the Templates directory.
- Step 4: Look for the Liquid tags below in the code:
{% form 'contact' %}
and
{% endform %}
Step 5:
You can find the contact form code between the Liquid tags that you found in the former step. This is the place the dafault form fields are found, with every field divided by an empty line. Each theme is different from each other but in general, a contact form field looks like this:
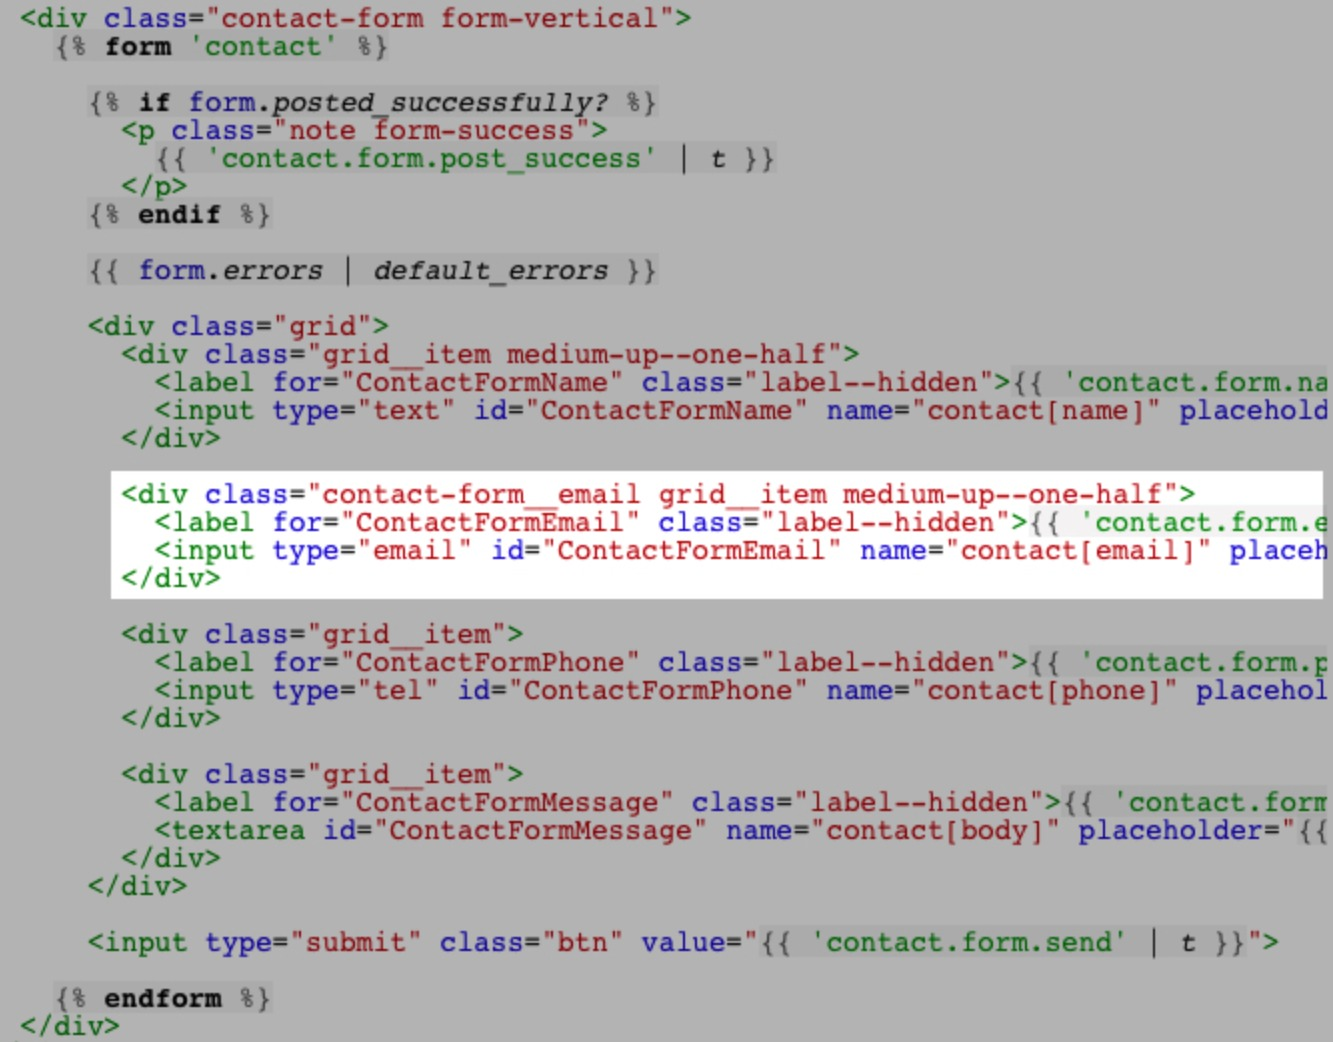
The code will be pasted for your custom fields after, before, or even in between the available fields, it depends on your preference. The code you add will rely on the form field’s type that you want to generate.
Step 6:
Tap Save after adding the code for the custom form fields.
Conclusion
Adding custom fields must be a have-to-do thing for most store administrators because there must be something necessary that you want to dipslay. We hope that you got you through all information you need.


