
How to modify the theme code to add the shipping calculator in Shopify
Drive 20-40% of your revenue with Avada
Shipping rates calculator is able to display your shipping rates on your store’s cart page. When a customer signs in, the calculator will employ that customer’s default shipping address to estimate the shipping rate. The shipping rates calculator does work with manual rates, carrier-calculated rates, or even a mix of the two.
However, please keep reading our instructional writing on How to modify the theme code to add the shipping calculator to know more deeply about this topic. Kindly note that this guide is only suitable for sectioned themes.
How to modify the theme code to add the shipping calculator
- Information and features of shipping calculator
- How to modify the theme code to add the shipping calculator
Information and features of shipping calculator
You are able to insert a shipping rates calculator to the cart page which could let your customers estimate their shipping fees before they move to the checkout page.
Nevertheless, when you set up your shipping calculator, please remember all of these things below:
- There may be no equivalent API to calculate applicable taxes on the cart page, note that applicable taxes are only shown at the checkout step.
- The calculator employs an Underscore.js template and does rely on a JSON API. Ajax is employed to fetch rates from Shopify.
- The already-displayed text will be translated.
- It could be easier to edit the HTML for the calculator is you already know the basics.
- Rates are formatted in your shop’s default currency and insist on the currency descriptor like USD or AUD.
- Under some circumstances, the rates are only approximations because only the country, state/province, and zip/postal code are ready for the calculator, rather than the full address. The exact rates will be shown at checkout.
How to modify the theme code to add the shipping calculator
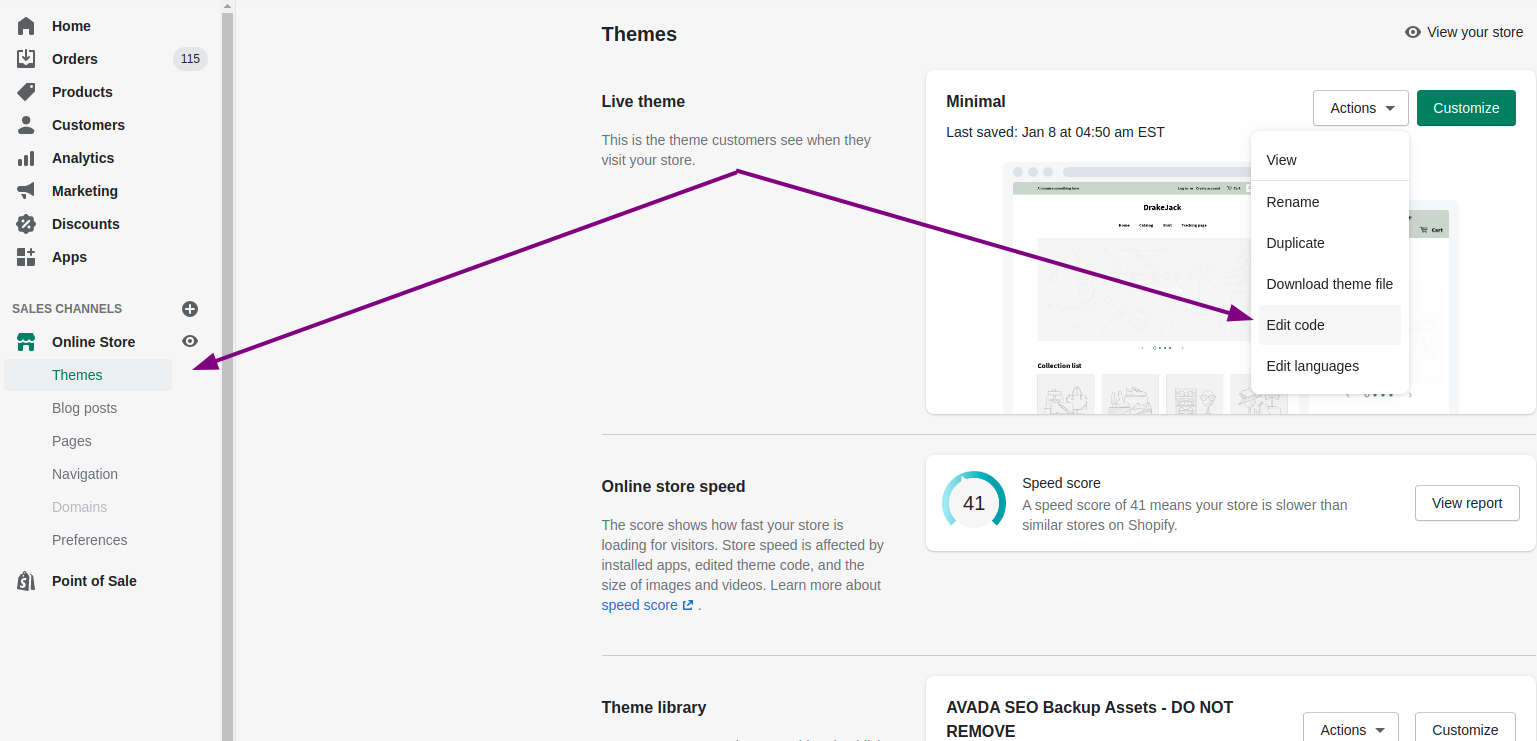
Step 1:
Go to Online Store > Themes. Or search for the theme that you need to adjust and go to Actions > Edit code.
Step 2:
Click vendor.js in the Assets directory. In case your theme does not have a vendor.js file, please choose theme.js instead.
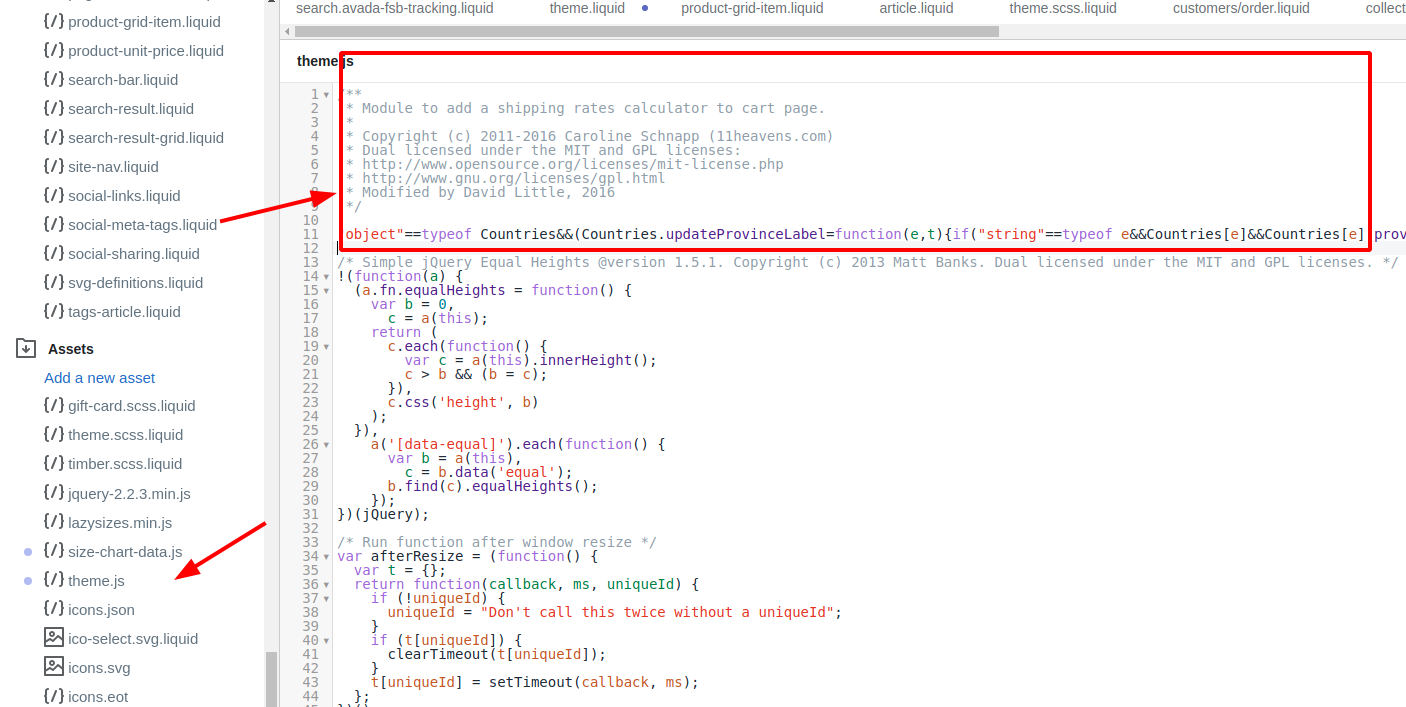
Step 3:
Paste this code hosted on GitHub to the very bottom of vendor.js. In case you are configuring theme.js instead, please paste the same code snippet at the very top of the file.
Step 4:
Choose Save.
Step 5:
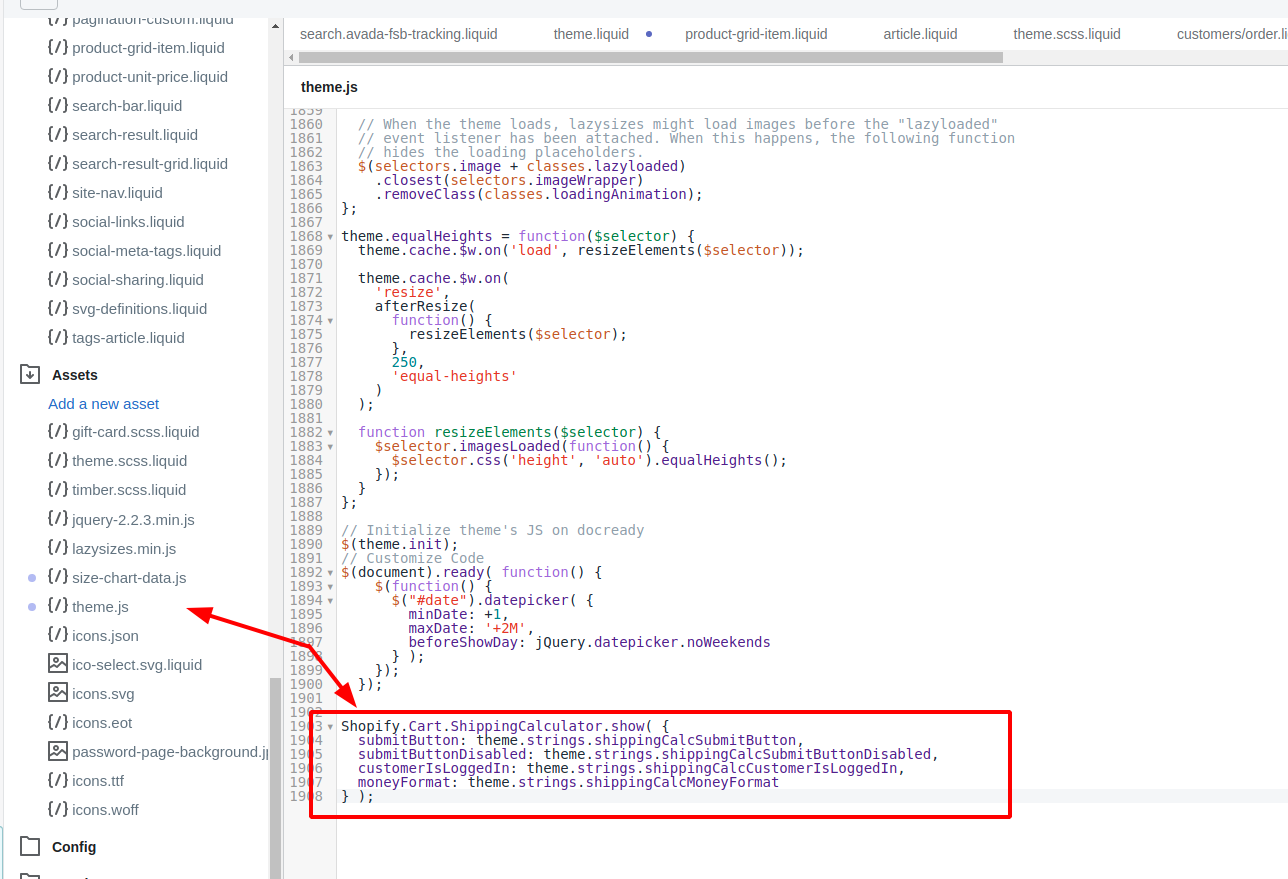
Choose theme.js in the Assets directory. Please paste the code given below to the very bottom of the file:
Shopify.Cart.ShippingCalculator.show( {
  submitButton: theme.strings.shippingCalcSubmitButton,
  submitButtonDisabled: theme.strings.shippingCalcSubmitButtonDisabled,
  customerIsLoggedIn: theme.strings.shippingCalcCustomerIsLoggedIn,
  moneyFormat: theme.strings.shippingCalcMoneyFormat
} );
Step 6:
Tap Save.
Step 7:
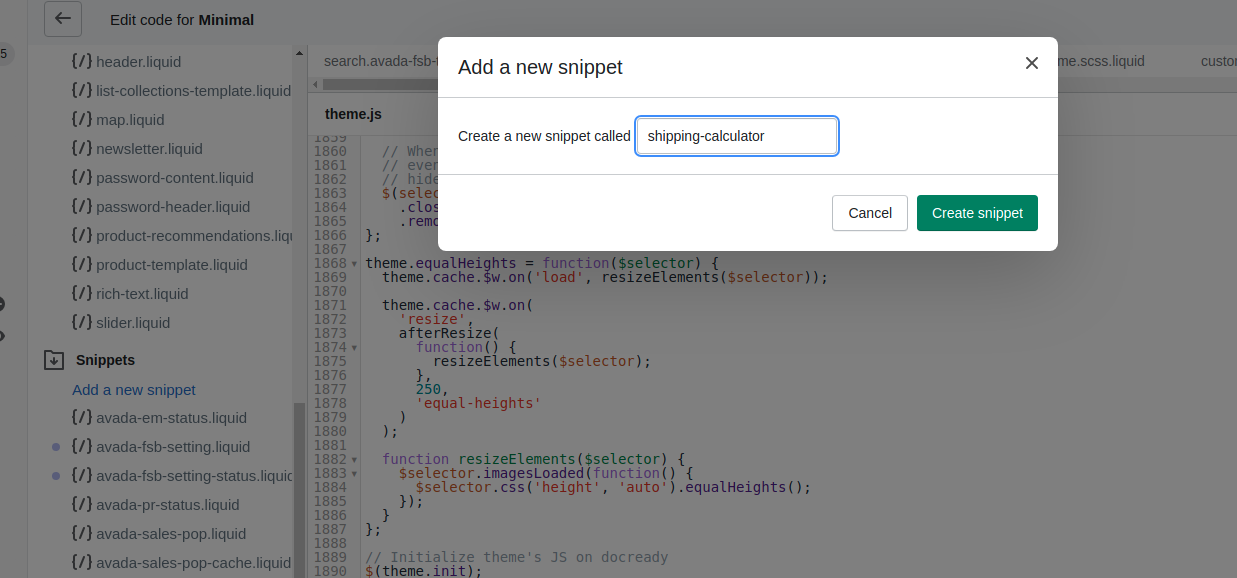
Choose Add a new snippet in the Snippets directory.
Step 8:
Click Create snippet after naming your new snippet shipping-calculator. Your new snippet will open in the code editor.
Step 9:
Please paste this code hosted on GitHub into your new shipping-calculator.liquid snippet.
Step 10:
Tap Save.
Step 11:
Tap cart-template.liquid in the Sections directory. In case your theme does not have a cart-template.liquid file, then you can click cart.liquid in the Templates directory.
Step 12:
Search for the closing </form> tag. Paste the code given below right on a new line above the closing </form> tag:
{% include 'shipping-calculator' %}
Step 13:Please paste the code given below at the very bottom of the file:
<script>
  theme.strings = {
      shippingCalcSubmitButton: {{ settings.shipping_calculator_submit_button_label | default: 'Calculate shipping' | json }},
      shippingCalcSubmitButtonDisabled: {{ settings.shipping_calculator_submit_button_label_disabled | default: 'Calculating...' | json }},
      {% if customer %}shippingCalcCustomerIsLoggedIn: true,{% endif %}
      shippingCalcMoneyFormat: {{ shop.money_with_currency_format | json }}
  }
</script>

<script src="//cdnjs.cloudflare.com/ajax/libs/handlebars.js/4.0.10/handlebars.min.js"></script>
<script src="/services/javascripts/countries.js"></script>
<script src="{{ 'shopify_common.js' | shopify_asset_url }}" defer="defer"></script>
Step 14:
Tap Save.
Step 15:
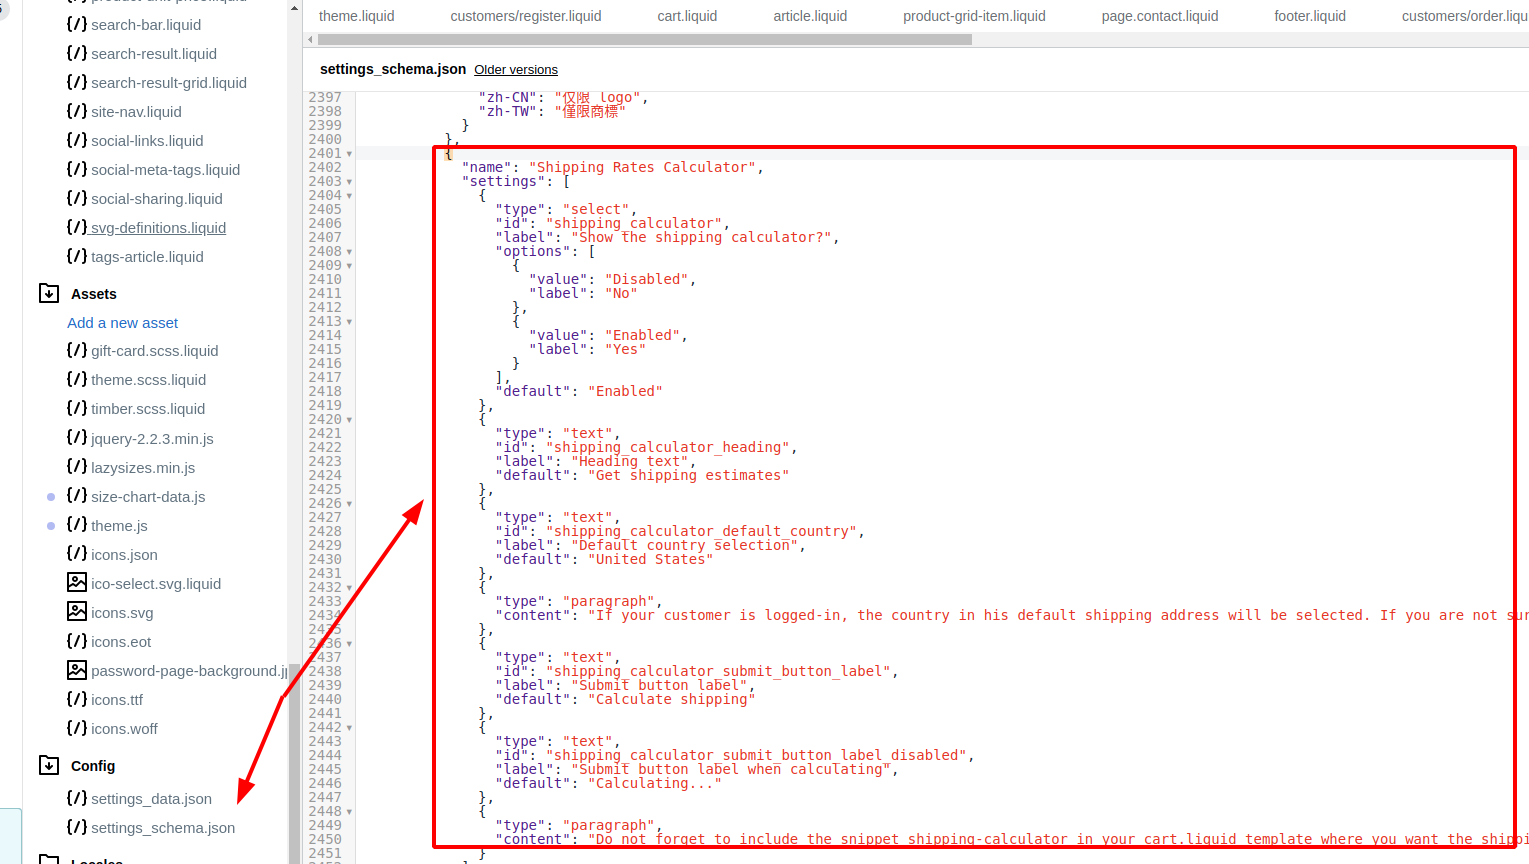
Click settings_schema.json in the Config directory. The file will open in the code editor.
Step 16:
Paste the code given below right after the last curly bracket } and before the last square bracket ], near the very bottom of the file. Be certain to include that first comma , since you are editing a JSON data structure:
,
  {
    "name": "Shipping Rates Calculator",
    "settings": [
      {
        "type": "select",
        "id": "shipping_calculator",
        "label": "Show the shipping calculator?",
        "options": [
          {
            "value": "Disabled",
            "label": "No"
          },
          {
            "value": "Enabled",
            "label": "Yes"
          }
        ],
        "default": "Enabled"
      },
      {
        "type": "text",
        "id": "shipping_calculator_heading",
        "label": "Heading text",
        "default": "Get shipping estimates"
      },
      {
        "type": "text",
        "id": "shipping_calculator_default_country",
        "label": "Default country selection",
        "default": "United States"
      },
      {
        "type": "paragraph",
        "content": "If your customer is logged-in, the country in his default shipping address will be selected. If you are not sure about the  spelling to use here, refer to the first checkout page."
      },
      {
        "type": "text",
        "id": "shipping_calculator_submit_button_label",
        "label": "Submit button label",
        "default": "Calculate shipping"
      },
      {
        "type": "text",
        "id": "shipping_calculator_submit_button_label_disabled",
        "label": "Submit button label when calculating",
        "default": "Calculating..."
      },
      {
        "type": "paragraph",
        "content": "Do not forget to include the snippet shipping-calculator in your cart.liquid template where you want the shipping  calculator to appear. You can get the snippet here: [shipping-calculator.liquid](https:\/\/github.com\/carolineschnapp\/shipping-calculator\/blob\/master\/shipping-calculator.liquid) ."
      }
    ]
  }
Conclusion
Thanks for reading! Please kindly note that the shipping calculator only works on the cart page at www.your-shop-url.com/cart. In case you are not using a cart page, you are able to edit the settings of your cart by visiting the theme editor.


