
How to apply a class to your templates in Shopify
Drive 20-40% of your revenue with Avada
Every image on each page being opened in a lightbox is not a thing that is within your expectation? Particularly, photos which are hyperlinks, should be skipped but you still want your users to be capable of clicking on those photos to be directed to another web page. On top of that, in case the original uploaded images have the same size as the image, which is displayed on the page, you may want to leave that image alone and not let it opened in a lightbox. In fact, there are 2 ways for you to implement the customization: to apply a class to your templates or to add your jQuery.
However, please keep reading our instructional writing on How to apply a class to your templates to know more deeply about the first method mentioned above.
##How to apply a class to your templates
To start, you need to customize your page.liquid, article.liquid, and blog.liquid templates. In every template, please locate the div element that contains your blog or post content. Then add class="rte"( the “rte” is for Rich Text Editor) to open the <div> tag. To go more into details, please follow these steps listed below.
Step 1:
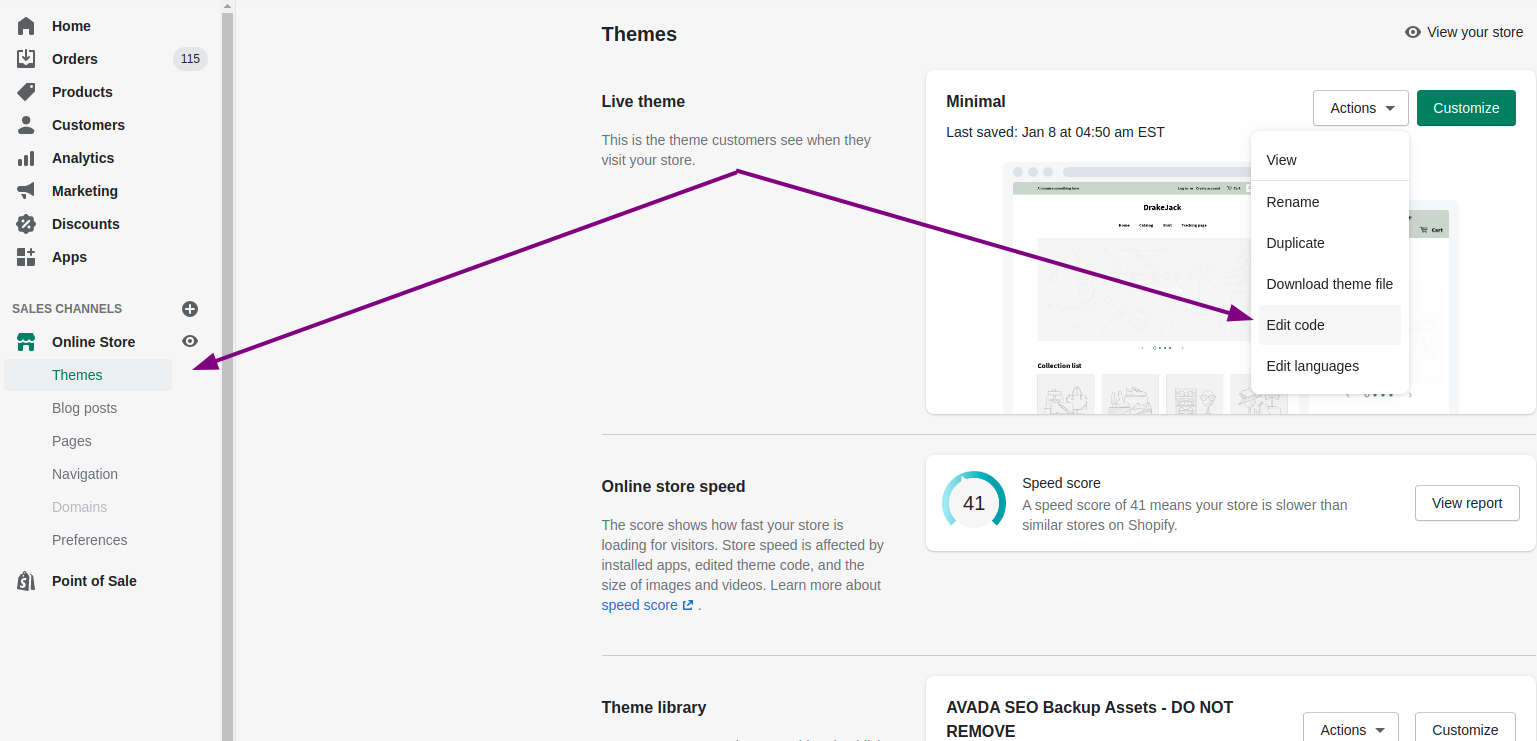
Go to Online Store > Themes from your Shopify Admin panel.
Step 2:
Choose the theme you want to edit and click Actions > Edit code.
Step 3:
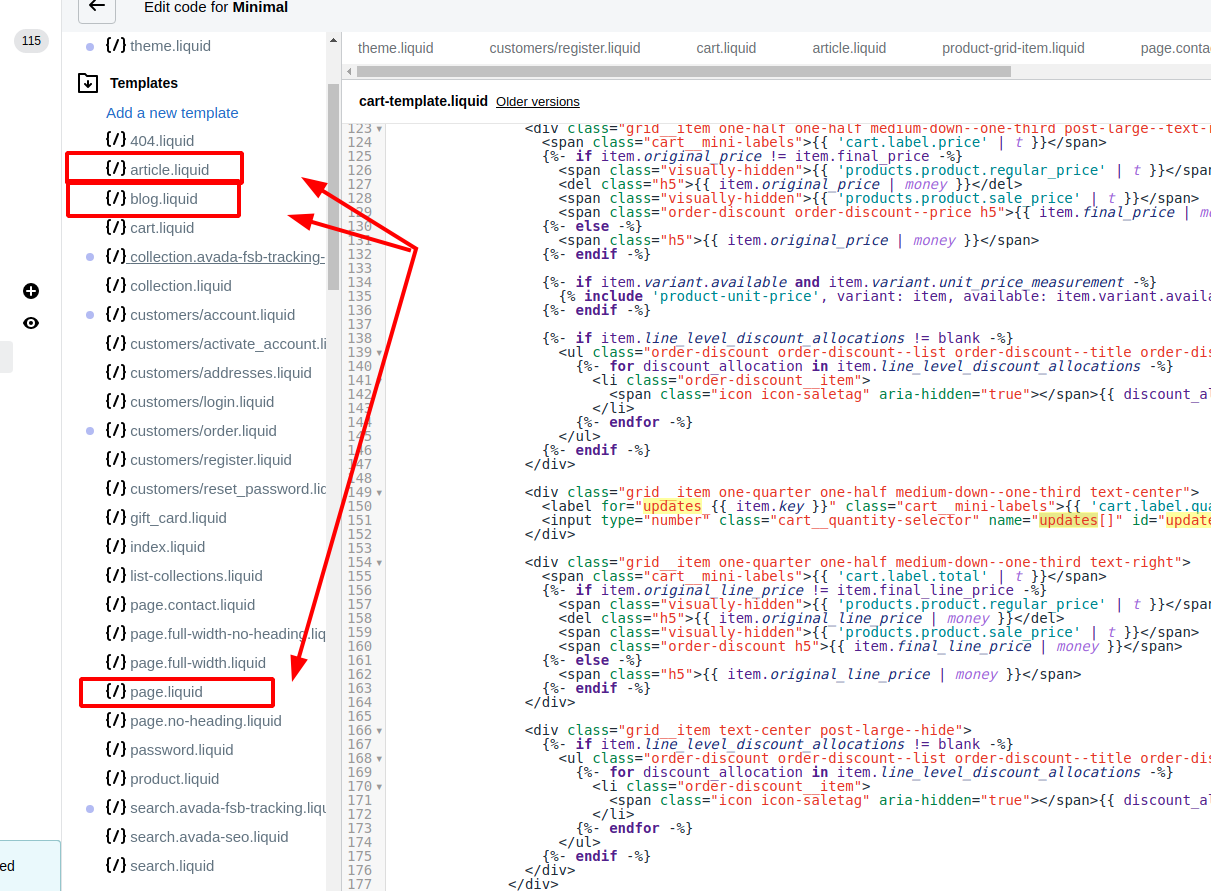
Under the Templates folder, tap page.liquid, article.liquid, and blog.liquid to let them opened in the online code editor:
- page.liquid is employed for all specialized page content.
- article.liquid is employed for every individual blog post page.
- blog.liquid is employed for the blog landing page.
Step 4:
Locate the div element which wraps your content, and insert rte to its class attribute. In case the class attribute does not exist, please add it
- In blog.liquid and article.liquid:
  <div class="rte">
    {{ article.content }}
  </div>
- In page.liquid:
  <div class="rte">
    {{ page.content }}
  </div>
Step 5:
Tap Save to save all of your changes to every template file.
Conclusion
Thank you for reading, hope this guide will help you know more about how to apply a class to your templates in Shopify, please follow all those steps listed above to get your e-commerce business fully prepared!


