
How to insert custom fields to your theme's customer registration form in Shopify
Drive 20-40% of your revenue with Avada
Do you need various fields for your registration form to collect more data when they sign up for an account? Are you wondering about how to do that?
Of course, you are completely able to insert more fields to your customer registration form as your expectation. However, please keep reading our instructional writing on How to insert custom fields to your theme’s customer registration form to know more deeply about this topic.
##How to insert custom fields to your theme’s customer registration form
Locate custom fields in the code
Step 1:
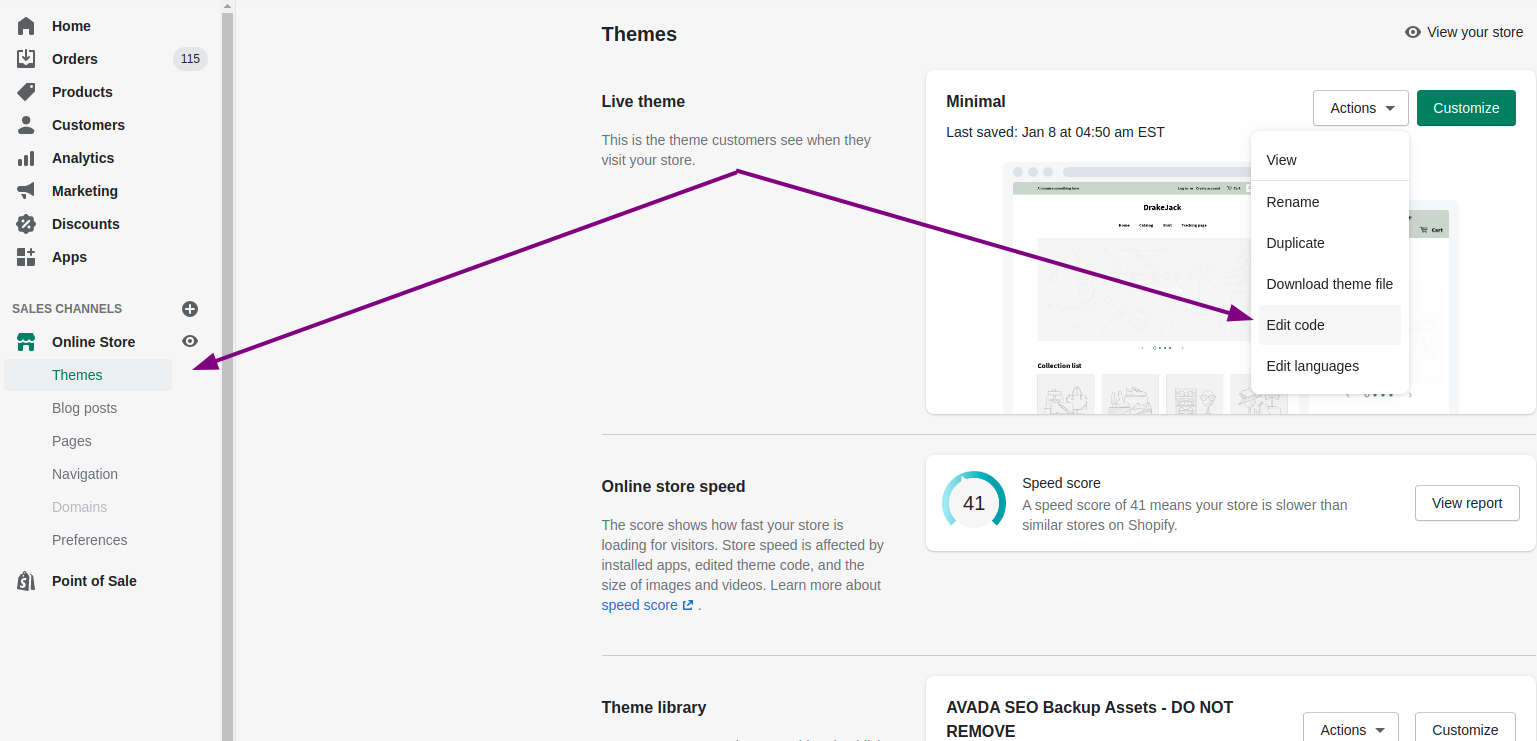
Go to Online Store > Themes from your Shopify Admin panel.
Step 2:
Look for the theme you want to edit and click Actions > Edit code.
Step 3:
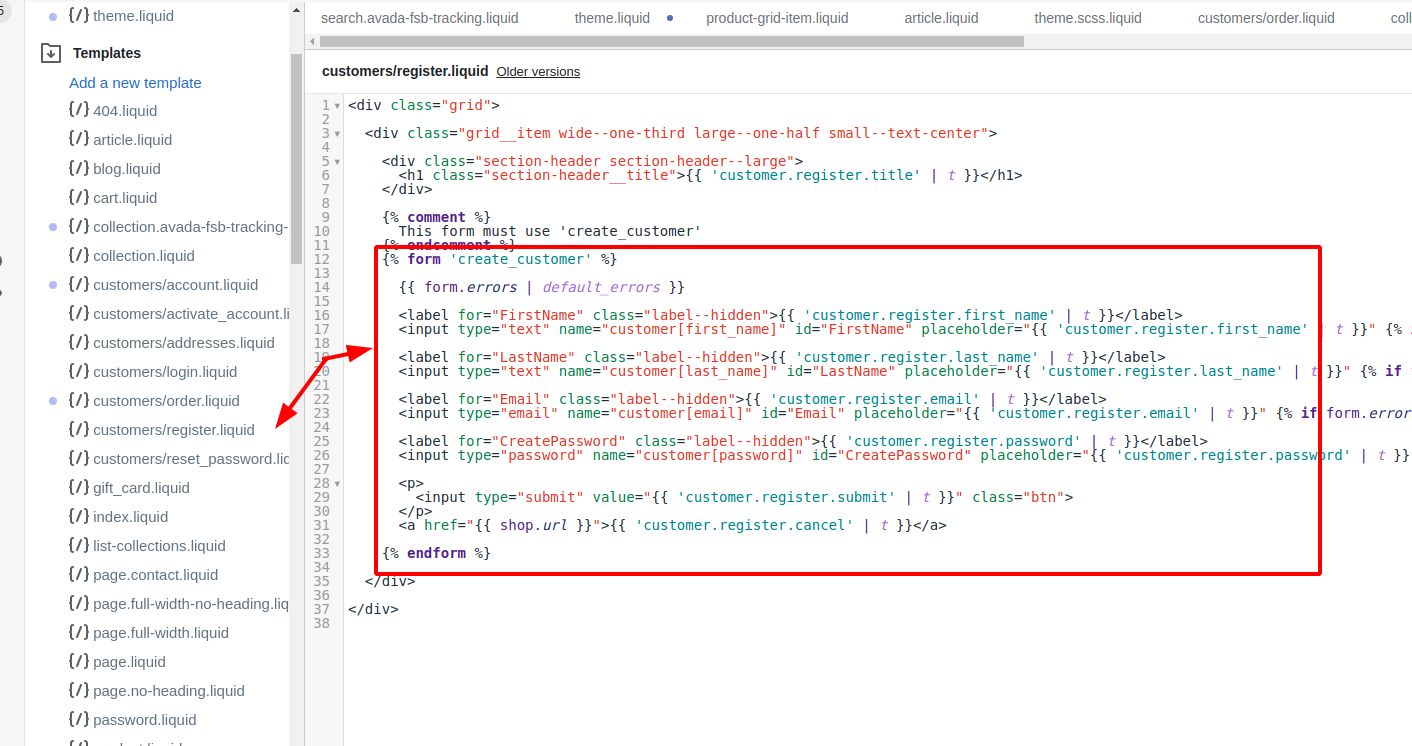
Tap customers/register.liquid located in teh Templates directory.
Step 4:
Look for the Liquid tags below in the code:
{% form 'create_customer' %}
and
{% endform %}
Step 5:
You can find the contact form code between the Liquid tags that you found in the former step. This is the place the dafault form fields are found, with every field divided by an empty line. Each theme is different from each other but in general, a customer registration form field looks like this:
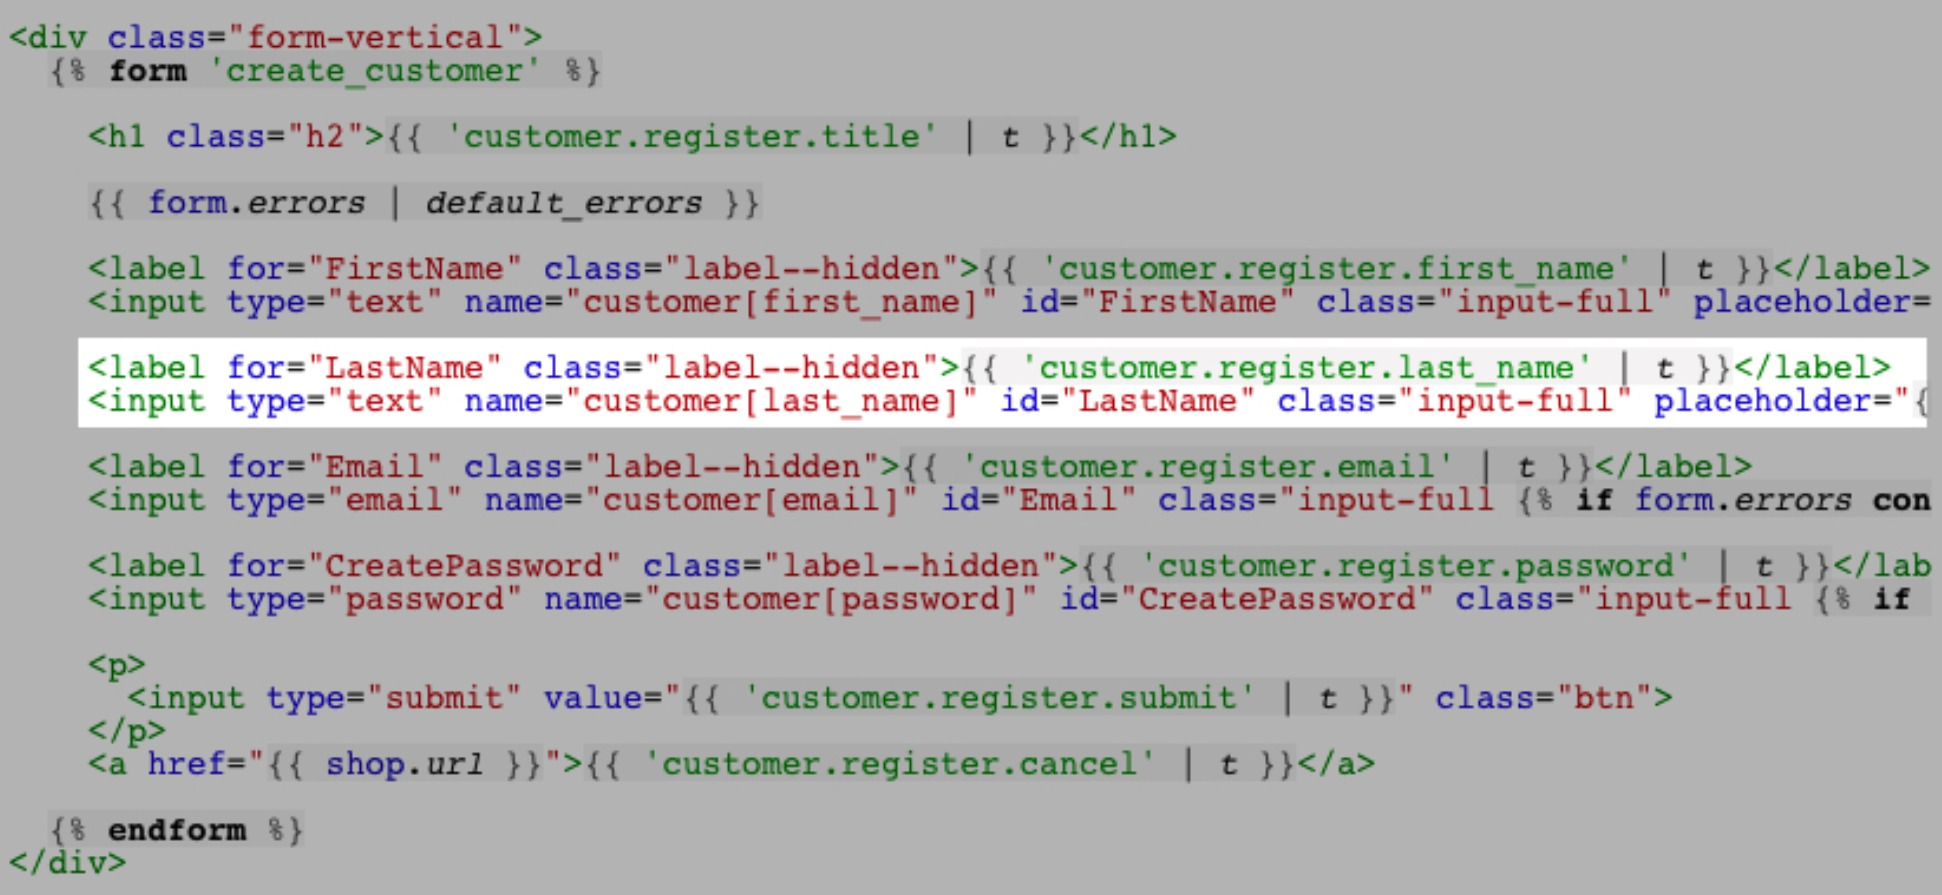
The code will be pasted for your custom fields after, before, or even in between the available fields, it depends on your preference. The code you add will rely on the form field’s type that you want to generate.
Step 6:
Tap Save after adding the code for the custom form fields.
4 Categories of form fields
Here are some examples we listed below for you:
Text field
Please paste and customize the code given below to generate a text field for the customer registration form:
<label for="CustomerFormAllergies">Allergies</label>
<input type="text" id="CustomerFormAllergies" name="customer[note][Allergies]" placeholder="Allergies">
Radio buttons
Please paste and customize the code given below to generate a set of radio buttons for the customer registration form:
<label>Do you prefer tea or coffee?</label><br>
<input type="radio" id="CustomerFormTea" name="customer[note][Tea or Coffee]" value="Tea" /> Tea<br>
<input type="radio" id="CustomerFormCoffee" name="customer[note][Tea or Coffee]" value="Coffee" /> Coffee
Drop-down menu
Please paste and customize the code given below to generate a drop-down menu for the customer registration form:
<label for="CustomerFormFlavor">Choose a flavor</label>
<select id="CustomerFormFlavor" name="customer[note][Flavor]">
  <option>Chocolate</option>
  <option>Vanilla</option>
  <option>Strawberry</option>
</select>
Checkbox
Please paste and customize the code given below to generate a checkbox for the customer registration form:
<label for="CustomerFormKitten">Would you like a free kitten?</label><br>
<input type="checkbox" id="CustomerFormKitten" name="customer[note][Kitten]" value="Yes, please!" /> Yes, please!
How to customize your form field
You may need to modify the code from the examples mentioned above before saving them to your template of customer registration form to configure your form fields.
The name attribute
We need to emphasize that it is necessary to let <select> and <input> elements have a name attribute which is set to customer[note][Some Text], the place that Some Text specifies what question the fields is findling to respond. Because the customer[note] enables the information to be submitted as a customer note so the customer[note] is considered so important that nothing will be submitted without it. The only part of the name attribute that you ought to modify must be the text located between the second set of square brackets.
The value attribute
The value attribute is included for checkboxes & radio buttons to get the value of the selection of the customers indicated. You are able to make changes to the wording to meet your expectation.
The label element
Every form field type does have an element called <label>. That label can display the title for every form field. The for attribute can link a label to an associated <select> or <input> element. The labels for form fields are hidden in some themes and in that case, only the placeholder is dipslayed.
The placeholder attribute
The placeholder attribute can be used for an <input> element. By default, the placeholder text is what displays in the text box, before a response is typed in, for a text field. The labels for form fields are hidden in some themes and in that case, only the placeholder is dipslayed.
The for attribute
The for attribute can link an element, which is called <label>, to a <select> or <input> element that does have an <id> with the similar assigned value. Let’s look at the example below:
<label for="CustomerFormAllergies">Allergies</label>
<input type="text" id="CustomerFormAllergies" name="customer[note][Allergies]" placeholder="Allergies">
In the example mentioned above, CustomerFormAllergies is the assigned for value of the <label> element, also does the id of the <input> element:
Conclusion
Collecting more and more data is a very necessary job that any e-commerce websites want to be an expert at. Please follow our guide step-by-step to receive the best result!


