
How to update the product form to support dynamic checkout buttons in Shopify
Drive 20-40% of your revenue with Avada
Are you looking for a solution to supporting dynamic checkout buttons? Then here may we know the information you need. The fact is that you are able to keep the product form updated on the product page. In case your theme has a home page featured product section, you are allowed to have the product form be up-to-date in that template as well.
However, please keep reading our instructional writing on How to update the product form to support dynamic checkout buttons to know more deeply about this topic.
Update the product form to support dynamic checkout buttons
Step 1:
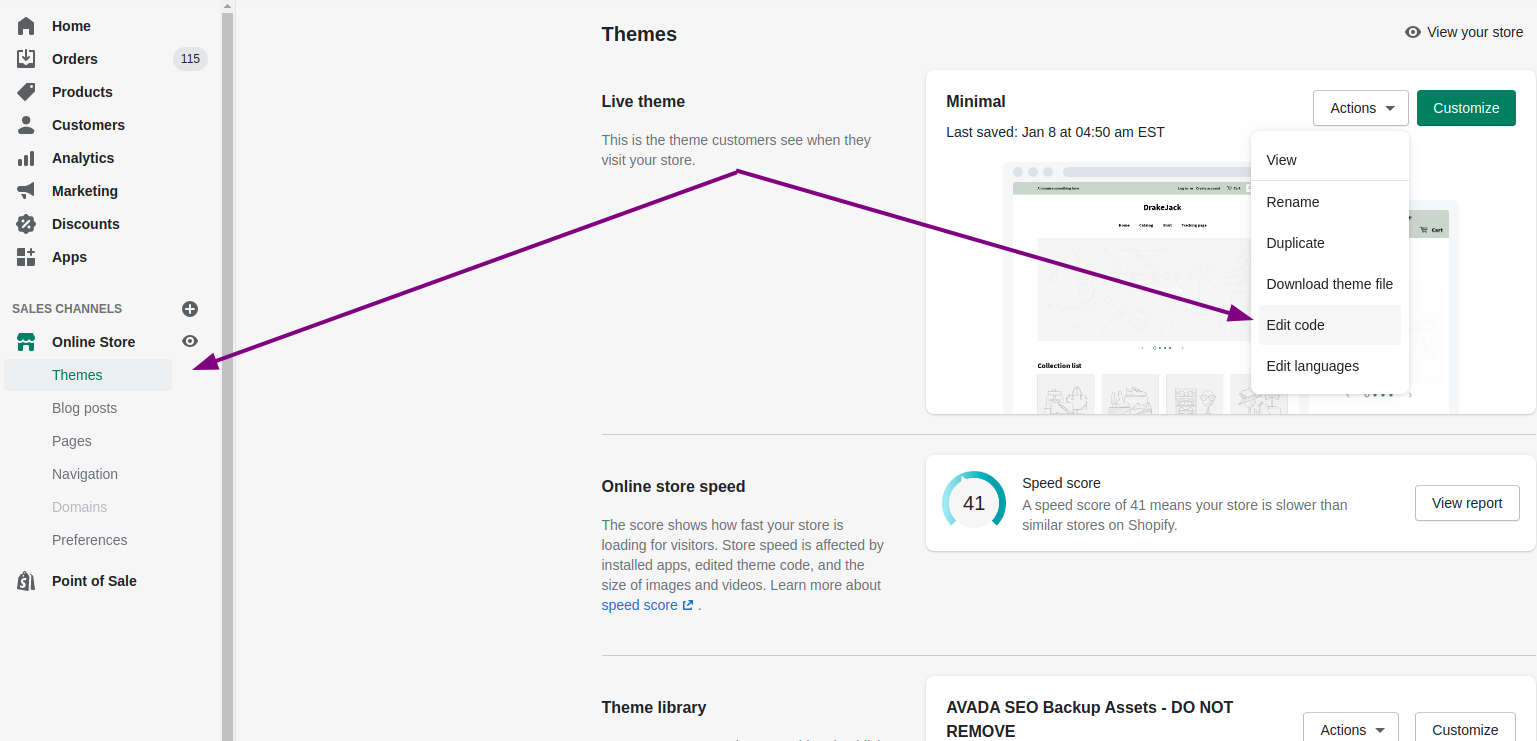
Go to Online Store > Themes from your Shopify Admin panel.
Step 2:
Choose the theme you want to edit and click Actions > Edit code.
Step 3:
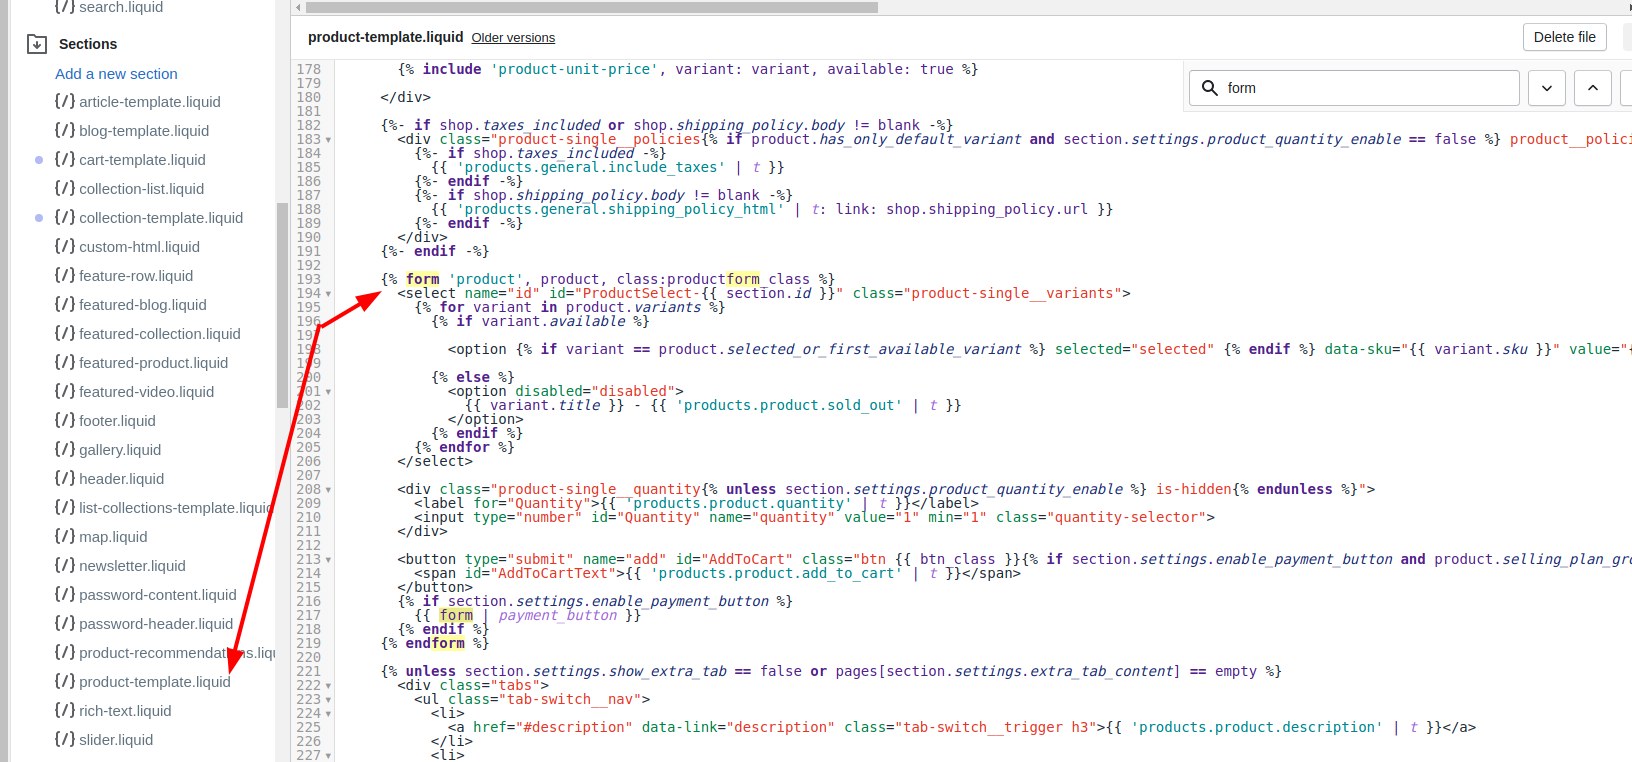
Open one of those files below in the Sections directory:
- Update the product page template by clicking product-template.liquid. Maybe in some themes, the product could have a different filename. Some cases would be the product form is contained in a file in the Snippets directory, and does have a name such as product-form.liquid.
- Update the home page featured product section by clicking featured-product.liquid.
Step 4:
Search for <form action="/cart/add" by looking for the product form. Please take note of any attributes that the form may have, like an id or a class. You are allowed to include these attributes in the product form, which is updated, that you will generate in the following step. In case you so not include the attribute, then the behavior or the styling of the form could be affected.
Step 5:
Remove the whole opening <form> tag and replace it with the Liquid below:
{% form 'product', product %}
Please add the attributes to your updated form by using the syntax below to include them from the old form:
{% form 'product', product, id: "oldID", class: "old-class" %}
Step 6:
Search for </form> to look for the closing </form>.
Step 7:
Replace the closing </form> tag with the Liquid below:
{% endform %}
Step 8:
Search for a button or an input tag that has the attribute type="submit" to look for the Add to cart button.
Step 9:
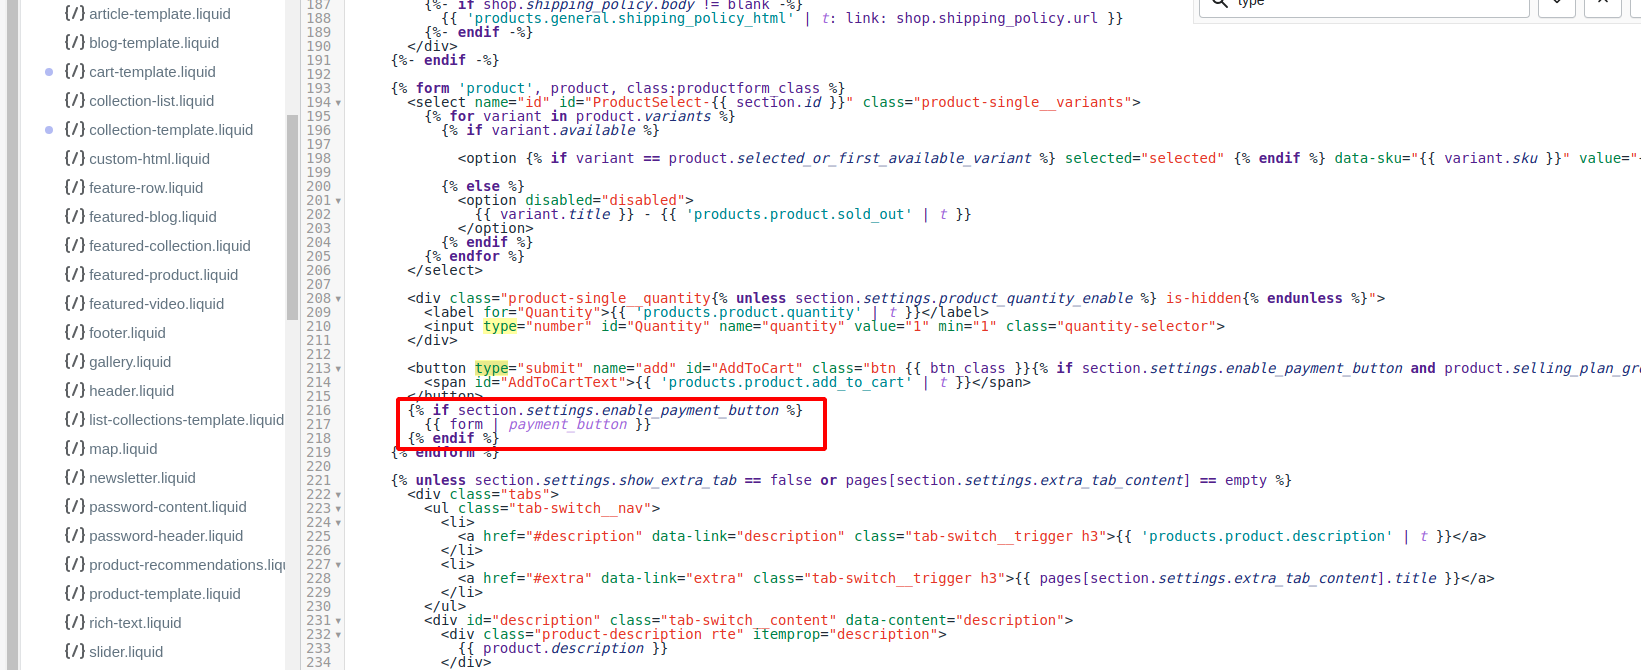
Insert the Liquid below into a new line right below the Add to cart button:
{{ form | payment_button }}
Step 10:
Tap Save. The product form, which is modified, should look similar to this:
{% form 'product', product %}
  ...
  <button type="submit">Add to cart</button>
  {{ form | payment_button }}
  ...
{% endform %}
Conclusion
Hope that we have brought to you some more necessary information on dynamic checkout buttons!


