
How to Insert currency customization options to the theme editor in Shopify
Drive 20-40% of your revenue with Avada
Theme editor is a tool that lets you convert or preview theme settings in real-time. You can use theme settings to customize some features in your store such as fonts and colors, modify your social media links and checkout settings as well. Your customers need to deeply understand the checkout or payment process. In this step, customers have a chance to choose their own local currencies to pay for their orders using methods that you’ve enabled in your store, which is much essential and convenient.
This instructional writing on How to insert currency customization options to the theme editor helps you find the quickest way to insert many selections of multiple currencies that customers can use when they visit your Shopify store. You can add options in your store on both Windows and Apple or Android.
How to insert currency customization options to the theme editor
- Step 1: Choose theme
- Step 2: Edit Code
- Step 3: Configuration theme
- Step 4: Navigate to settings_schema.json
- Step 5: Edit settings_schema.json
- Step 6: Save configuration
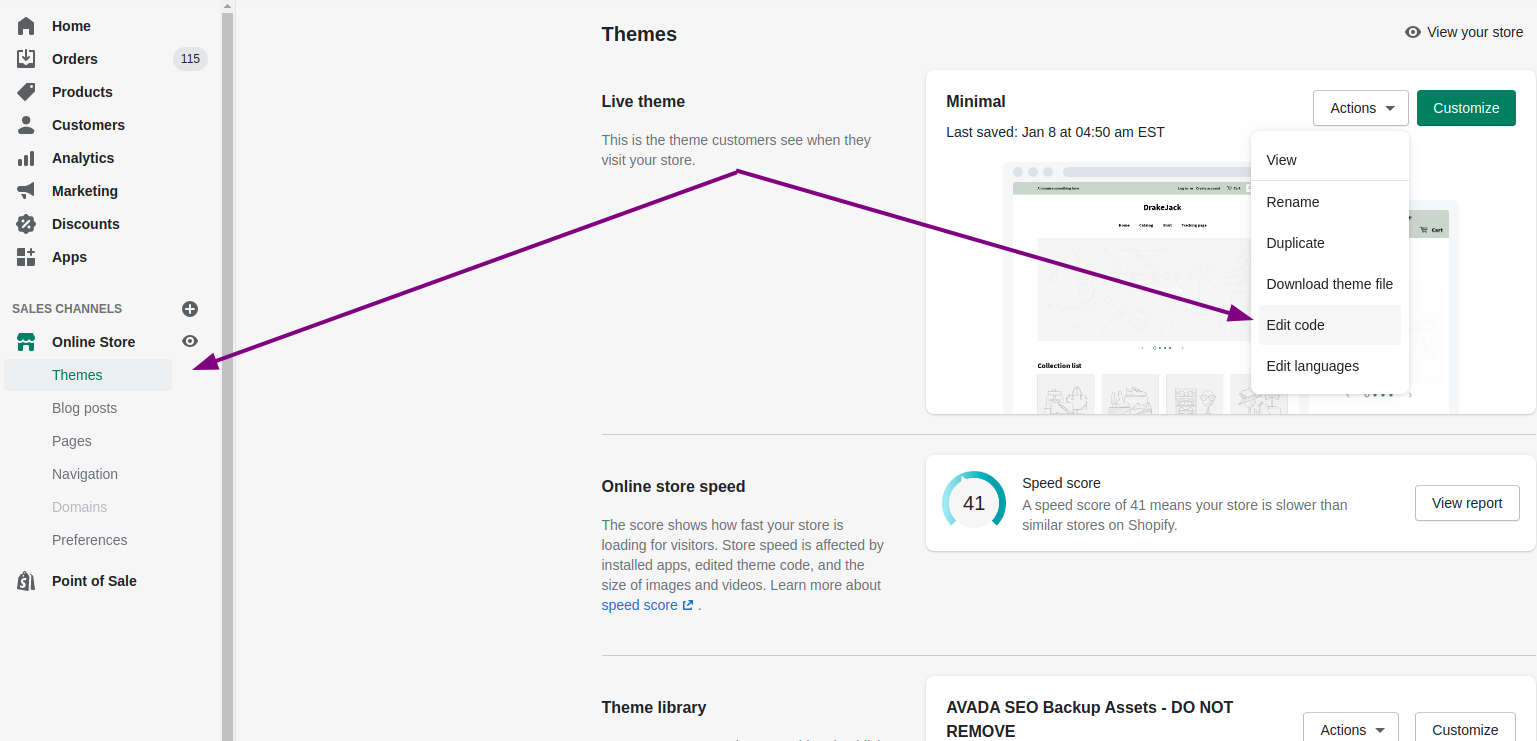
Step 1: Choose theme
At the very first step, you have to go to Online store from your Shopify administration. Then choose Themes section.
Step 2: Edit Code
After choosing the theme you want to change, you click Actions and tap Edit code.
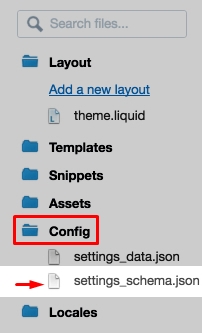
Step 3: Configuration theme
At this step, you click Config directory which means configuration of your theme.
Step 4: Navigate to settings_schema.json
You will be able to see settings_schema.json located in the Config directory of your theme. It manages the organization and subject or content of the menu in the theme director. Moreover, it shows all settings that you can utilise in your theme and categorized into different files according to setting types. Editing settings_schema.json forces you to follow the identified file format when you want to modify.
Step 5: Edit settings_schema.json
At the bottom of the settings_schema.json file, copy and paste the following code after the last } but before the last ]. This code enables you to add currency customization options to your store.
,
   {
     "name": "Currency",
     "settings": [
       {
         "type": "paragraph",
         "content": "To offer multiple currencies on your online store, you must first [edit your store's currency formatting](https://avada.io/manual/using-themes/change-the-layout/help-script-find-money-formats)."
       },
       {
         "type": "checkbox",
         "id": "show_multiple_currencies",
         "label": "Enable currency conversion",
         "default": true,
         "info": "Even though prices are displayed in different currencies, orders will still be processed in your store's currency."
       },
       {
         "type": "select",
         "id": "currency_format",
         "label": "Format",
         "options": [
           {
             "value": "money_format",
             "label": "Without currency ($10.00)"
           },
           {
             "value": "money_with_currency_format",
             "label": "With currency ($10.00 CAD)"
           }
         ],
         "default": "money_with_currency_format"
       },
       {
         "type": "text",
         "id": "supported_currencies",
         "label": "Supported currencies",
         "default": "INR GBP CAD USD AUD EUR JPY",
         "info": "Use the country's ISO [currency code](http://www.xe.com/iso4217.php). Separate your currency codes with a space."
       },
       {
         "type": "text",
         "id": "default_currency",
         "label": "Default currency",
         "default": "USD"
       }
     ]
   }
Step 6: Save configuration
After adding the code, you have to click Save to complete all steps. Actually, the settings_schema.json file is certified before being saved in order to make sure it follows the correct format.
Conclusion
Inserting many currency modification options in your theme editor helps your customers select their own local currencies for their payment in your store. I hope this writing is informative and useful enough for you to follow. Thank you for reading!


