
How to Set up the currency options in Shopify
Drive 20-40% of your revenue with Avada
Setting up currency options in Shopify is extremely necessary to determine what currency your customers are enabled to use when they pay for their orders in your store. Product prices will be shown in the local currencies that your customers choose. Especically, you can customize your store admin’s appearance if needed.
In the theme editor, some customization options are able to be modified. In terms of currency, you can set a large number of supported currency units of the corresponding countries in the world and the default one as well. Please read this post on How to set up the currency options thoroughly with some simple steps to know what you can do to configure these ones.
Set up the currency options
- Step 1: Navigate to Theme Editor
- Step 2: Choose Currency
- Step 3: Edit Currency
- Step 4: ISO currency code
- Step 5: Change the default currency
- Step 6: Save Configuration
Step 1: Navigate to Theme Editor
Log into your Shopify private account to access to your Shopify store. Then navigate to Theme.
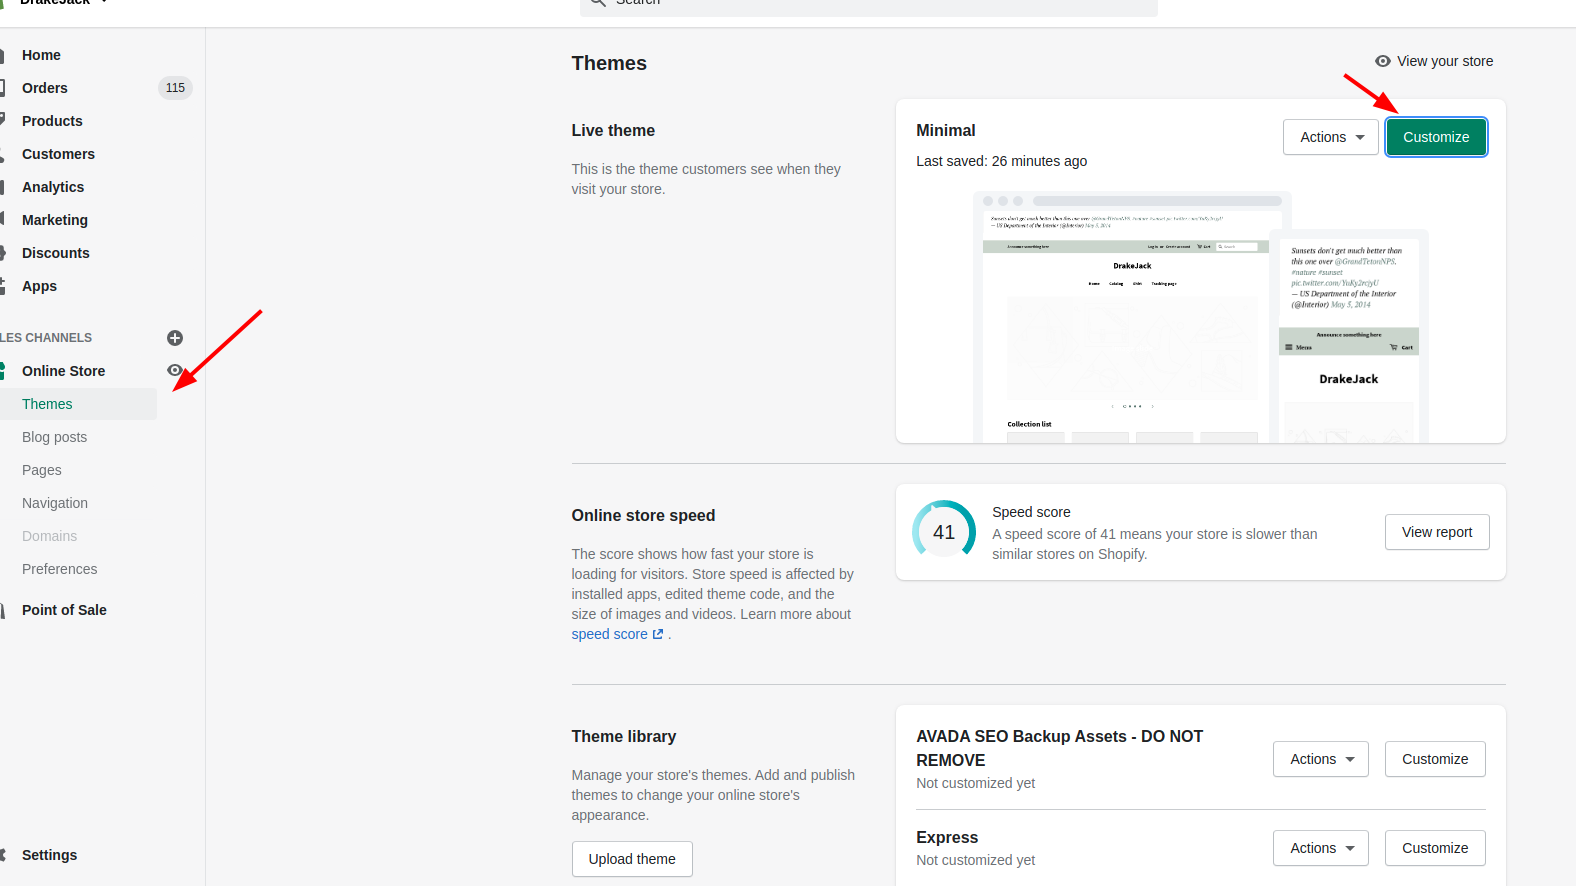
Step 2: Choose Currency
In Theme editor, some catalogues you can change like Product page, Collection page will be displayed on the screen. Then click Currency which is right above Checkout tab to view currency settings.

Step 3: Edit Currency
When you access to Currency directory, in the appeared section, you may choose to enable currency conversion or not, choose money format to show your product prices or sales, add or remove currencies and set default currency for your store.
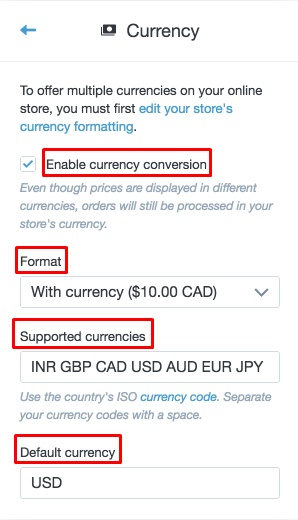
Under Format, choose whether to contain the currency descriptor like USD or CAN, with the converted currency.
Step 4: ISO currency code
In Supported currencies tap, you may add currencies you want to support or remove them by entering their codes. Remember to separate them with a space and use the ISO letter currency code as well. The list of ISO currency code is suggested below the tab. You can click the link connected to find the currency codes of your supported currencies.
For example, if you want your customers to use a variety of currencies of the United States, Canada, Australia, France, you have to type USD CAN AUD FRF.
Step 5: Change the default currency
In the Default currency tap, you may change the default currency that each new customer can see by entering its code. Almost certainly, you will want to use your store’s operating currency.
Let’s give an example of setting Canadian dollars as default currency in our store. If the default currency you used before was US dollar, you just need to replace USD with CAN in the Default currency field.
Step 6: Save Configuration
Click Save button at the bottom to publish your changes. Then, back to your store front-end and refresh your page to see changes.
Conclusion
When you complete all 6 steps above, the money format, default currency and types of currency that your customers are allowed to do checkout process will be immediately appied in your store. This configuration is the good idea to help your customers not be confusing when they pay for their orders.
Hope that this tutorial benefits you in managing your currencies and setting up a default one in your Shopify store. Please keep following our next tutorials to get more instructional and informative ideas.


