
How to modify a product page template in Shopify
Drive 20-40% of your revenue with Avada
A visitor coming to an online store, the customers will have the default variants which are totally customizable. From the way products displayed, online sellers can impress their visitors with the best performances. Moreover, by this functionality, it is easy for the users to disable the auto-selecting of default variant and replace it by the stunning template.
The Shopify store owners enable choosing the way their products are shown by its variants. All the product images, product description, or prices will be performed professionally and attractively. Besides, with available and noticeable Add to cart button, their sales will be optimal.
Before editing the theme code, admins should consider all the requirements such as checking the setting theme in the theme editor. If there is not any setting, it is necessary for the users to edit their theme code including the settings. Furthermore, the store owners can create a backup by duplicating their themes. When online sellers want to start again, it is possible for them to discard their changes.
This following article How to modify a product page template in Shopify with the simple steps will be useful for the users to configure their product page template by themselves. By changing their display, layouts, etc, the Shopify store owners create better impressions for the customers, so the sales will increase significantly.
How to create the posts in Markdown and publish them as a blog in Shopify
- Step 1: Go to Sections
- Step 2: Find the code
- Step 3: Replace the code
- Step 4: Paste code
- Step 5: Save
Step 1: Go to sections
From admin section, the users go to Sections directory. Then choose product-template.liquid
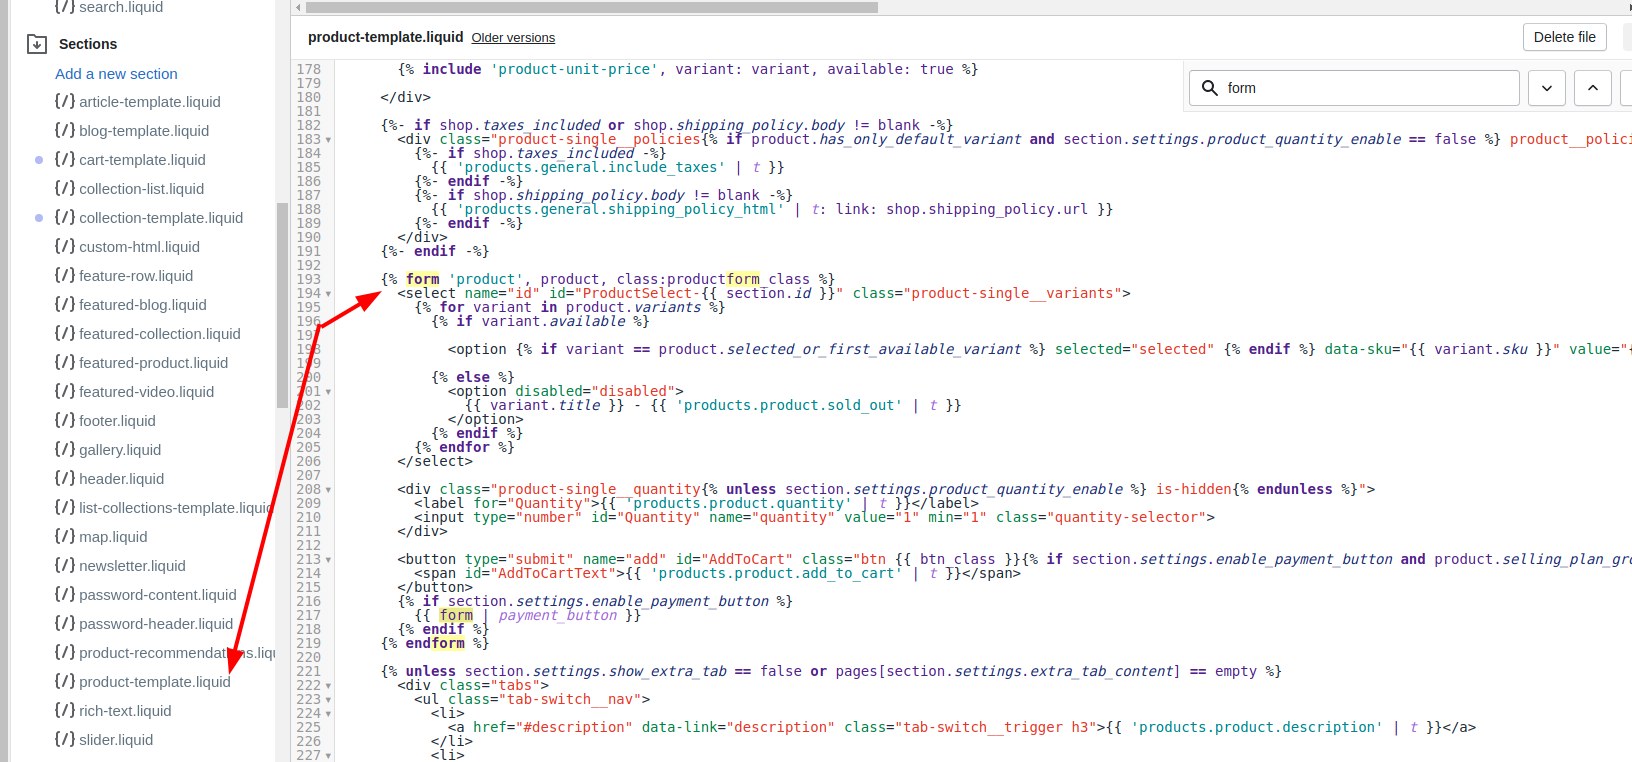
Step 2: Find the code
In this step, the store owners need to find the following code:
{% assign current_variant = product.selected_or_first_available_variant %}
Then replacing the above code with:
{% assign current_variant = product.selected_variant %}
Step 3: Replace the code
Besides, it is also necessary for the users to find the following code:
selected="selected"
Along with the Liquid logic tags, the admins need delete the above code to be like this:
{% if variant == product.selected_or_first_available_variant %} selected="selected" {% endif %}
Step 4: Paste code
In the fourth step, the after finding those above codes, admins should prepare to change their At the bottom of the file, the users just need to paste the following code:
<script>
var productOptions = [];
 {% for option in product.options %}
  var optionObj = {};
  optionObj[ {{ forloop.index0 }} ] = "{{ product.options[forloop.index0] }}";
  productOptions.push(optionObj);
 {% endfor %}
</script>
Step 5: Save
Click Save to save all the changes.
Conclusion
The way a product displayed is necessary for online sellers to maximize their own sale. By customizing their own products images, the visitors will be more attracted and be willing to buy more. Through this article How to modify a product page template in Shopify, it is easy for the Shopify store owners to change their boring default. To have more customization guiding articles, the Shopify sellers can discover with those blogs such as How to modify the theme code, How to modify theme’s JavaScript file.


