
How to generate custom form fields in Shopify
Drive 20-40% of your revenue with Avada
Custom Form Fields are a great feature to use with your Shopify site. These features contain many functions such as the ability to create an online registration form, or the option to allow customers to send you their own designs and images or some information you require. Therefore, you can use these sources to develop your business base on customers insights. In this article, we will provide you a tutorial to install this feature for your website on Shopify platform.
How to generate custom form fields in Shopify
Custom form fields creating:
You are freely to add as many custom form fields to your product page as you need. Using the Shopify UI Elements Generator tool is recommended to easily generate the HTML and Liquid code for each form field that you want to add to your cart page. Created by Shopify, this tool helps you to simplify the process of adding custom user interface elements, such as form fields and icons, to Shopify themes.
- Go to the Shopify UI Elements Generator
- In the Set your form field section, choose the Type of form field drop-down menu, select the type of form element that you want to use.
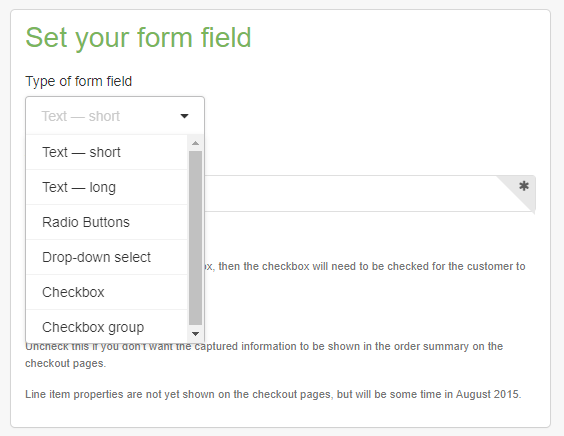
- To prevent customers from adding a product to the cart before they have filled in your form field, check Required.
- You are able to see a preview of your form field in the Preview section

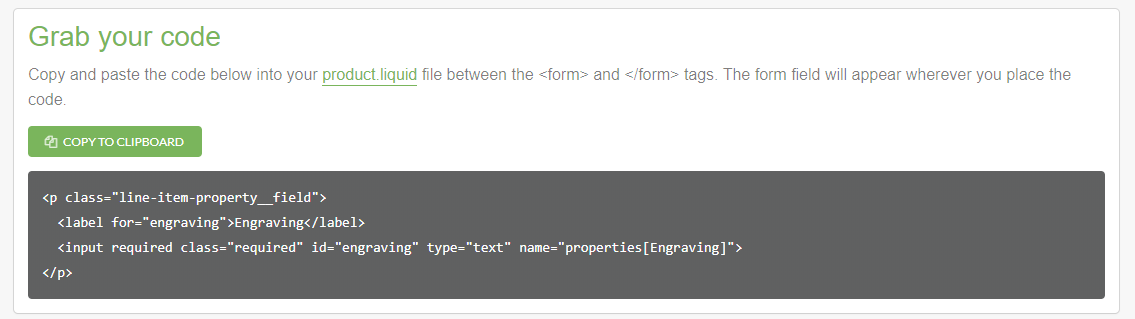
- Copy the generated code from the box in the Grab your code section
Applying your new template to a product:
- Go to your Shopify admin, choose Products.
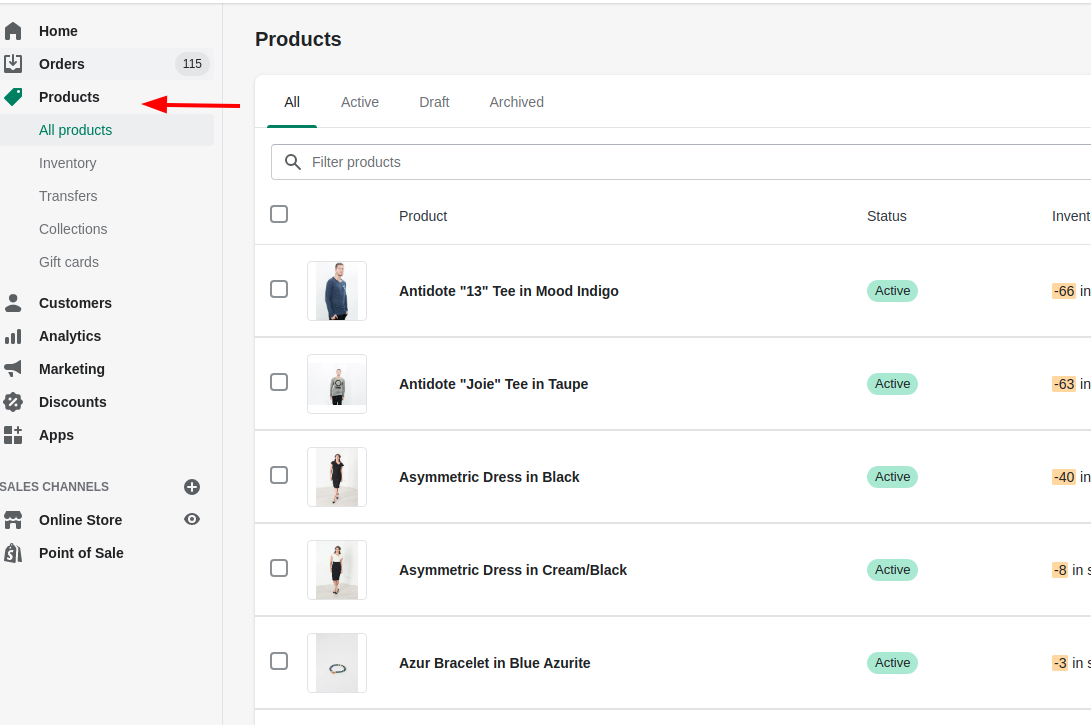
- Choose the name of the product that will use your new template.
- Choose
product.customizablefrom the Product template menu in the Theme templates section. - Click Save.
Consequently, the custom form fields that you created will now appear on that product’s page. You can easily use the bulk editor to enable your template on many products at once.
Allow file uploads:
The customer’s browser will show a file upload button for that form field if you create a form field input with type="file". If the form in your product-template.liquid contains a file upload field, the form tag in your customizable product template must contain enctype="multipart/form-data".
Conclusion
This custom form fields are great features for your business website if you know how to exploit it correctly. You can view any files that your customers upload as store owner. Letting customers upload files allows for some creative store ideas — such as printing customer artwork onto canvas or accepting custom graphics to print on clothes.
However, this is not an easy task to follow and is not supported by Shopify. In order to master these functions, it is required a lot of skills about web design languages such as HTML, CSS, Javascript and Liquid. Therefore if you feel uncomfortable with this tutorial, it is recommended to contact a Shopify expert to help you out.


