
How to generate the menu controlling which collections are shown in Shopify
Drive 20-40% of your revenue with Avada
Overview
In Shopify platform, collection is a means for you to show your customized business page all of your products in categories, you can display a lot of collection on your page, such as in alphabet order, or in function. If you own a business website for products such as clothes, accessories and so on, it is important to show up your collections on your page, you can display your collection for top, short wear, dress, etc.
However, you sometimes might not want to show all of your collection and products in one template page, therefore to control what collection should be displayed, you need to create a menu to manipulate it.
After create a page template by using theme codes, there you need to do more than that to control your products collection appearance on your business page.
In this article, you will know how to generate a menu controlling which collection are shown in Shopify. Noted that, in order to do this, you are supposed to already know how to generate a new page template in Shopify.
Generate the menu controlling which collections are shown
In order to control your collection, of course you have already know how to create template and feature your collection on template, and you have more than two collection that you already created.
We assume that you know how to do the above mentioned function, or you can refer to the previous article on how to generate a new page template and generate a page on which to feature your collections.
Following are the steps for you to practice generating control menu for collection existence.
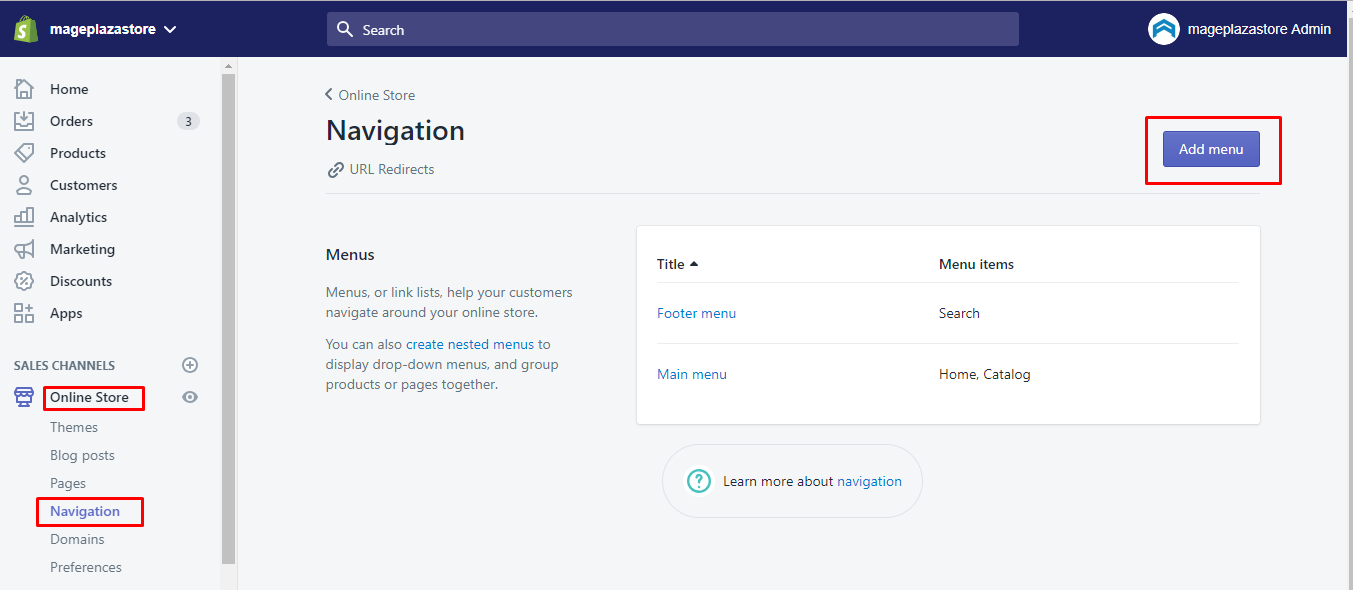
Step 1:
Open your Shopify admin, go to Online Store > Navigation.
Step 2:
Hit the Add menu button
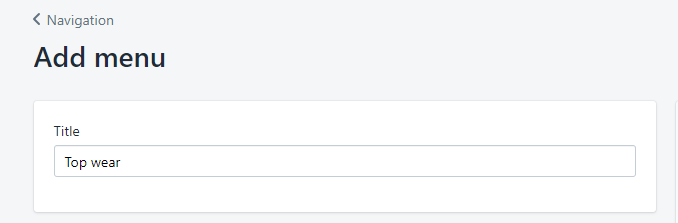
Step 3:
After the menu box appear, you need to give it the exact title as the title that you indicate the page that will feature your collections. For instance, if “Top wear” is the title you created for the page collection, then you will give your menu the title “Top wear”.
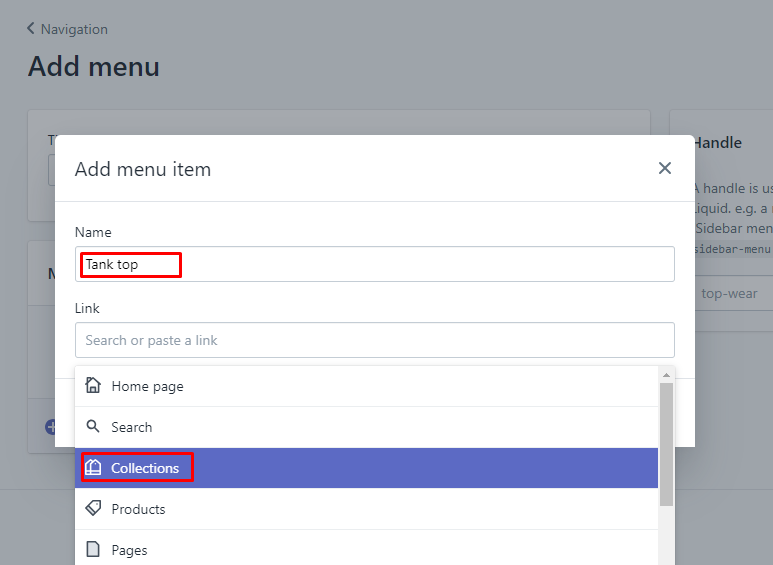
Step 4:
For each collection that you want to show, you need to add its link in the box, then clicking Add menu item. In the drop-down menu for the Link text box, you Choose collections from your store by clicking on Collections. This is an important way to link your collection like this, you do not have to add a URL to the textbox.
Step 5:
To finish, click Save menu.
Conclusion
We hope that this tutorial can help you to tailored you business page and get profit from it. Noted that in order to do this, you need to know more about page template and collections, which you can be referred to our previous tutorial in this blog. This is also an advanced technique, if you get any problem while practicing this, feel free to ask out with our support team.


