
How to convert Jekyll data to JSON in Shopify
Drive 20-40% of your revenue with Avada
This is a question frequently asked if you want to have a lightweight format for storing your content. Jekyll is a simple and extensible site generator as well as interacts greatly with JavaScript, a programing language for your website. Although Jekyll is a great tool for you to manage your blogs, portfolios on your site, when your content grows, Jekyll would run slower. Therefore, you have intention of converting Jekyll datato JSON a markdown data and well-interacted with JavaScript.
First of all, you should know what JavaScript, Jekyll and JSON are. JavaScript is a high-level programming language characterized as dynamic and weakly typed platform. Jekyll is a static site content management, which is different from dynamic site system namely Wordpress. Jekyll focuses on HTML files used immediately without pending.
JSON stands for JavaScript Object Notion. It provides lighter platform to contain much information as well as ensure the speed of the web. JavaScript can easily understand data written on JSON.
Table of content
1. Jsonify
The easiest way to convert Jekyll data into Json is using jsonify filter. For example: you can see, in the photo, colors are listed in bullet points.
---
colors:
  - red
  - blue
  - green
---
<script>
  var colors = {{ page.colors | jsonify }};
</script>
After filtering, you will receive a chain of colors coded by JSON. Colors are put in a same line which saves much space. It would be easier to view if your content is a long text.
...
var colors = ["red","blue","green"];
...
2. Liquid
You can create your own JSON object in case that you need to control your output.
var posts = [
  {% for post in site.posts %}
    {
      "title": "{{ post.title }}",
      "category": "{{ post.category }}",
      "url": "{{ post.url }}"
    }
    {% unless forloop.last %},{% endunless %}
  {% endfor %}
];
When you build your JSON control, you are freely use filters to activate variables.
[
  {
    "title":"Where Did The Cookie Come From",
    "category":"Information",
    "url":"/information/2016/01/02/where-did-the-cookie-come-from.html"
  },
  {
    "title":"What Is Sour Dough",
    "category":"Information",
    "url":"/information/2016/01/01/what-is-sour-dough.html"
  }
]
3. Case study
Converting from Jekyll into JSON is popular now because JSON is able to bring to the higher interaction with JavaScript and much information with lighter weight. The typical example of applying this technique was mentioned by Katy DeCorah in JekyllConf 2016 talk, Unconventional Use Cases for Jekyll. During the conference, she showed a map featuring all speakers at the conference and places speakers come from.

Katy emphasized that the information of map is managed by JSON’s output which was transform from Jekyll data.
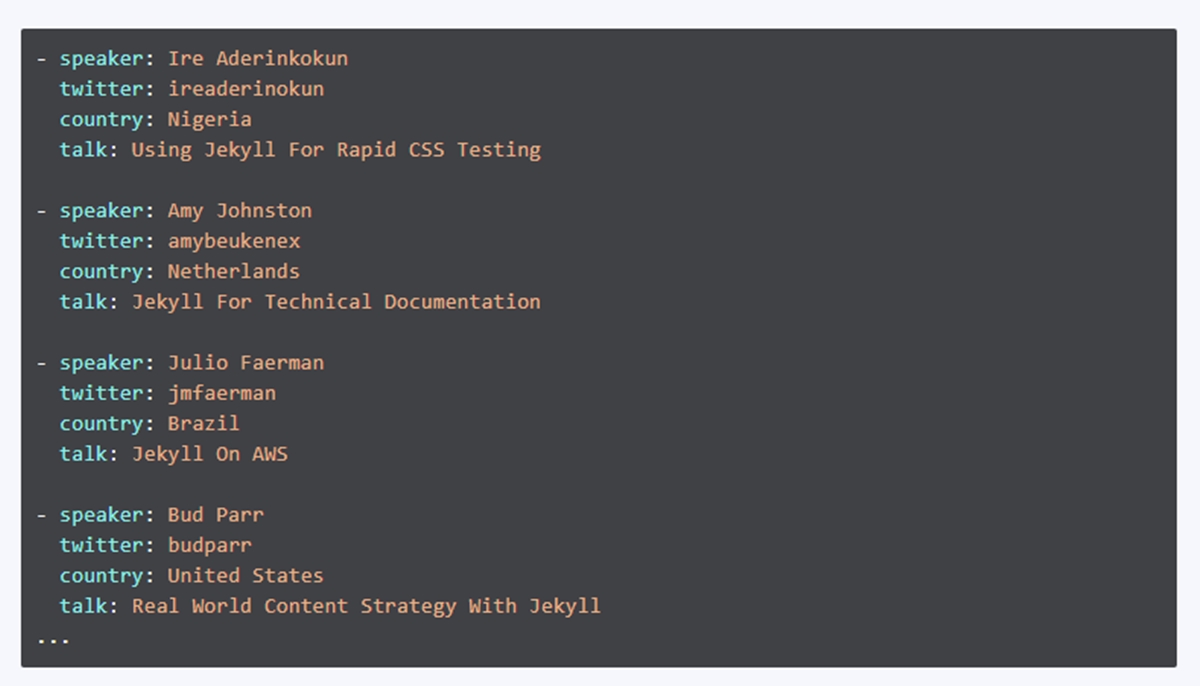
It is a great instance of content and logic. You don’t need to put much your effort to code to make your content available. The YAML file includes all presenters’ profiles, which allows you to add or edit the information.
Conclusion
Briefly, converting from Jekyll to JSON would make JavaScript run more effectively. If you find it difficult to change from Jekyll into JSON, you can look at our suggestion and solution to help your website be more interactive with users. Your content marketing are likely to be boosted by applying the conversion. Hope that you will succeed in using JSON format.


