
How to insert an email link or contact form in Shopify
By Sam Nguyen

Effective communication with customers is crucial for any online store. Many Shopify merchants struggle with adding easy ways for customers to reach out, potentially missing valuable inquiries and sales opportunities. This guide focuses on how to insert an email link or contact form in Shopify, two essential tools for customer engagement.
By mastering these techniques, you’ll create clear channels for customer inquiries, potentially boosting customer satisfaction and sales. Discover how to enhance your Shopify store’s communication capabilities and build stronger relationships with your audience.
Insert an email link or contact form
Insert an email link
Step 1: Add the HTML code for an email link
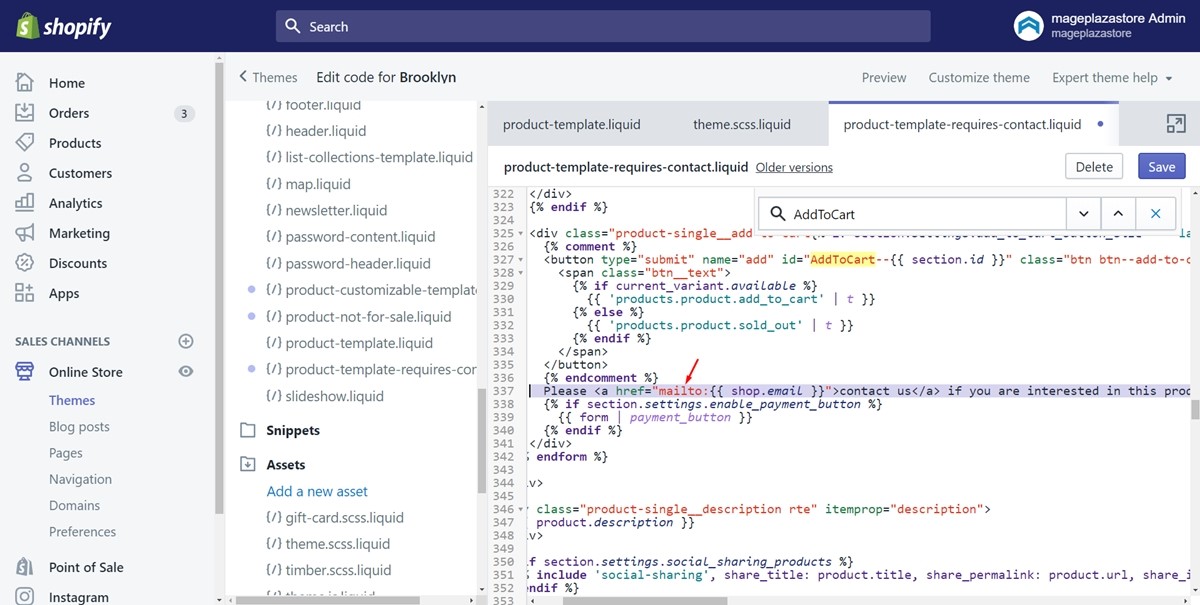
After the last step you’ve made in the writing how to hide the add to cart button, point to a new line below the Liquid {% endcomment %} tag. Then, make sure to enter the HTML code for your email link:
Please <a href="mailto:{{ shop.email }}">contact us</a> if you are interested in this product.
Don’t forget to add your own email link instead of shop.email.
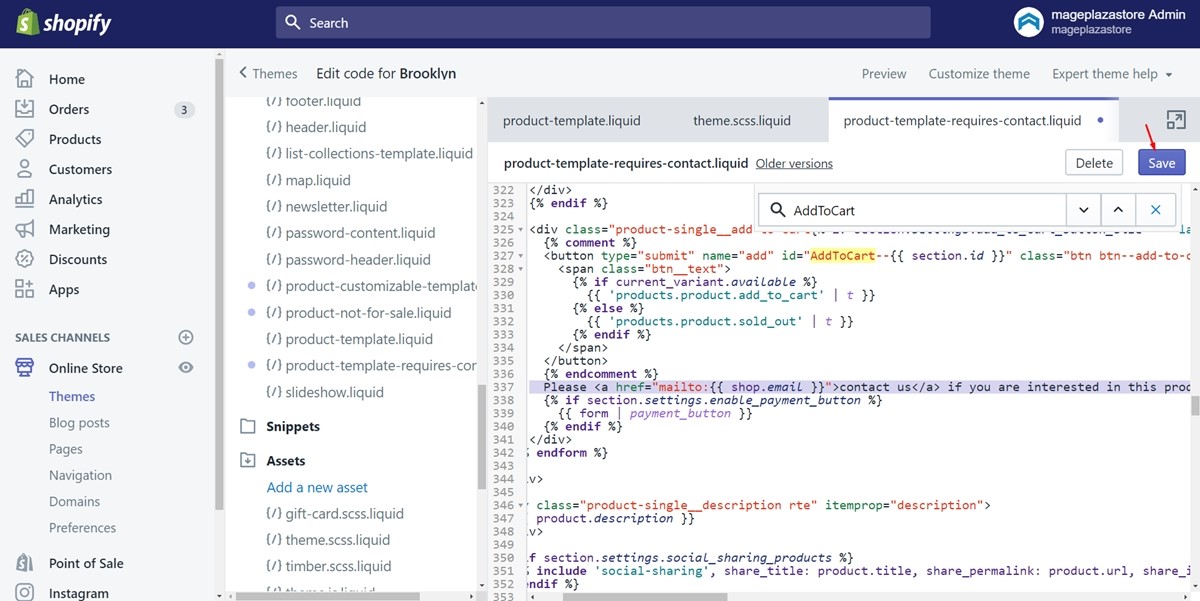
Step 2: Save
Finally, press on Save to save your work. Then, your email link will be displayed to your customers.
Insert a contact form
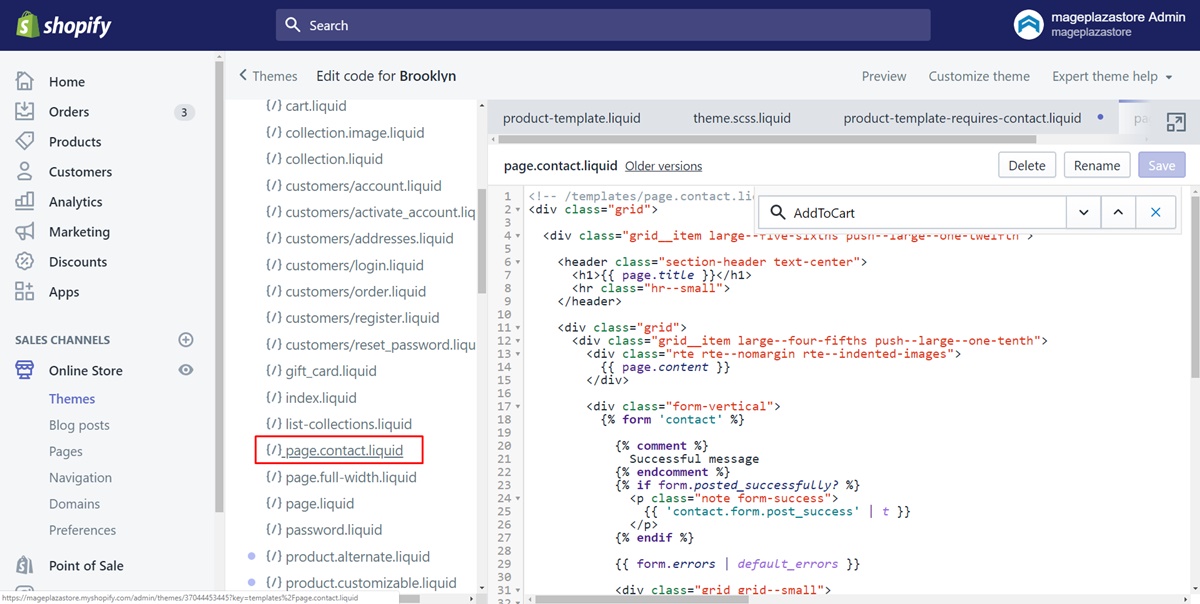
Step 1: Select the page.contact.liquid file
Click on the Templates directory firstly. Afterward, find the page.contact.liquid file and press on it.
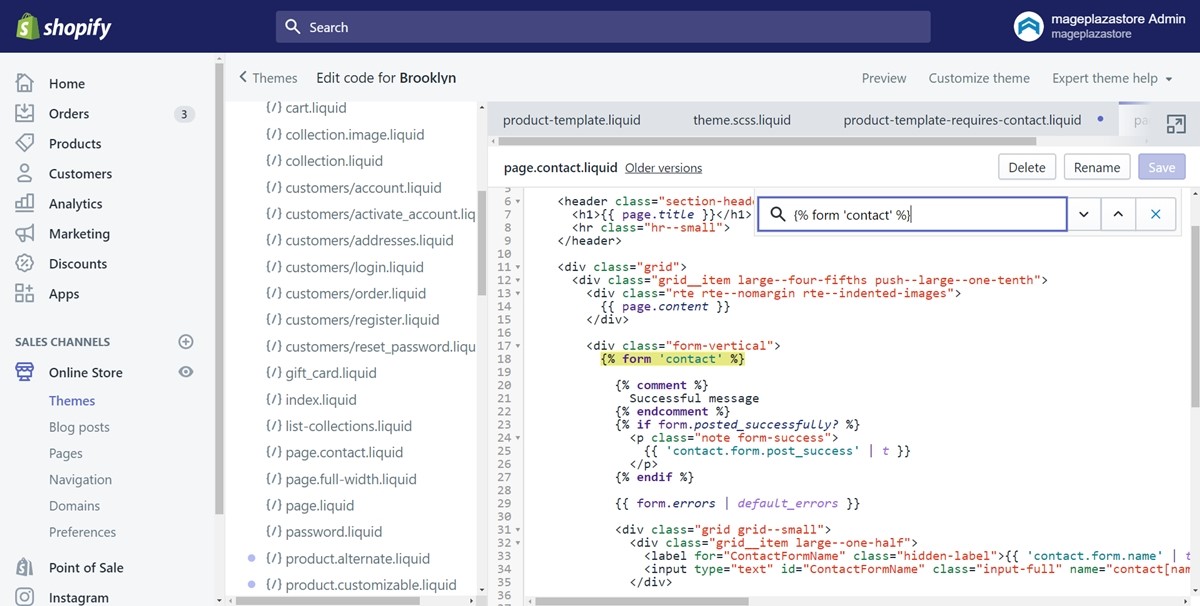
Step 2: Look for the Liquid {% form 'contact' %} tag
In the current file, make sure to look for the Liquid {% form 'contact' %} tag.
Step 3: Copy and paste the code
In this step, copy all of the code from the Liquid {% form 'contact' %} tag. Then, paste it down to the Liquid {% endform %} tag. Take a look at the following image as an example.
Step 4: Back to the product.requires-contact.liquid file
Make sure to return to the product.requires-contact.liquid file in the Templates field and move to the next step.
Step 5: Paste the code for the contact form
In the product.requires-contact.liquid file, find the closing tag called </form>. Paste the code for the contact form into a new line below the closing tag.
Step 6: Wrap the code in HTML div tags
Next, wrap the code which you’ve just added in HTML div tags. This is to ensure that your contact form will render correctly on the page. Enter the below code on a new line above {% form 'contact' %}:
<div class="form-vertical">
Enter the following code on a new line below {% endform %}:
</div>
Step 7: Save
After you’ve done all of the above, don’t forget to click Save.
Summary
Inserting an email link or contact form in your Shopify store is a crucial step in enhancing customer communication. By following the step-by-step guide provided, you can easily implement these features, creating direct channels for customer inquiries and feedback. Take action now to add these communication tools to your store.
Remember, improved accessibility for customer inquiries can lead to increased engagement, better customer satisfaction, and potentially more sales. As you continue to optimize your Shopify store, implementing effective communication channels like these will prove invaluable in building stronger relationships with your customers and growing your business.


