
How to Modify the JavaScript File for your Theme in Shopify
Drive 20-40% of your revenue with Avada
You’re going to learn how to modify the JavaScript File for your theme in this article? But why should you bother with it in the first place?
The most important part in the customer’s shopping process is checking out. The cart is where makes the actual sales, and shows all of the products added by the customers. Moroever, the Delivery Date also plays an essential role for the Shopify store owners to increase their sales because it allows the visitors to know when their products will be delivered to them. To show the delivery date, the users are necessary to edit the settings and add new features to their store’s cart page.
Besides, the store owners can add their expected date that they can received their products. That is the useful tool for the users to maximize their profit and to increase the customer’s satisfication. With the cart and a Checkout button that directs customers totally can choose what they want to add to their cart at the last minute. Therefore, the customers will buy more and more.
There are 3 files that the online merchants need to edit in their Shopify themes such as Javascript file, Cart.liquid, theme.liquid. In this article, we would like to show you about How to modify the JavaScript file for your theme in Shopify. With these simple steps by steps, we hope that even the beginners can have the best understanding about changing the delivery date.
How to modify the JavaScript file for your theme in Shopify
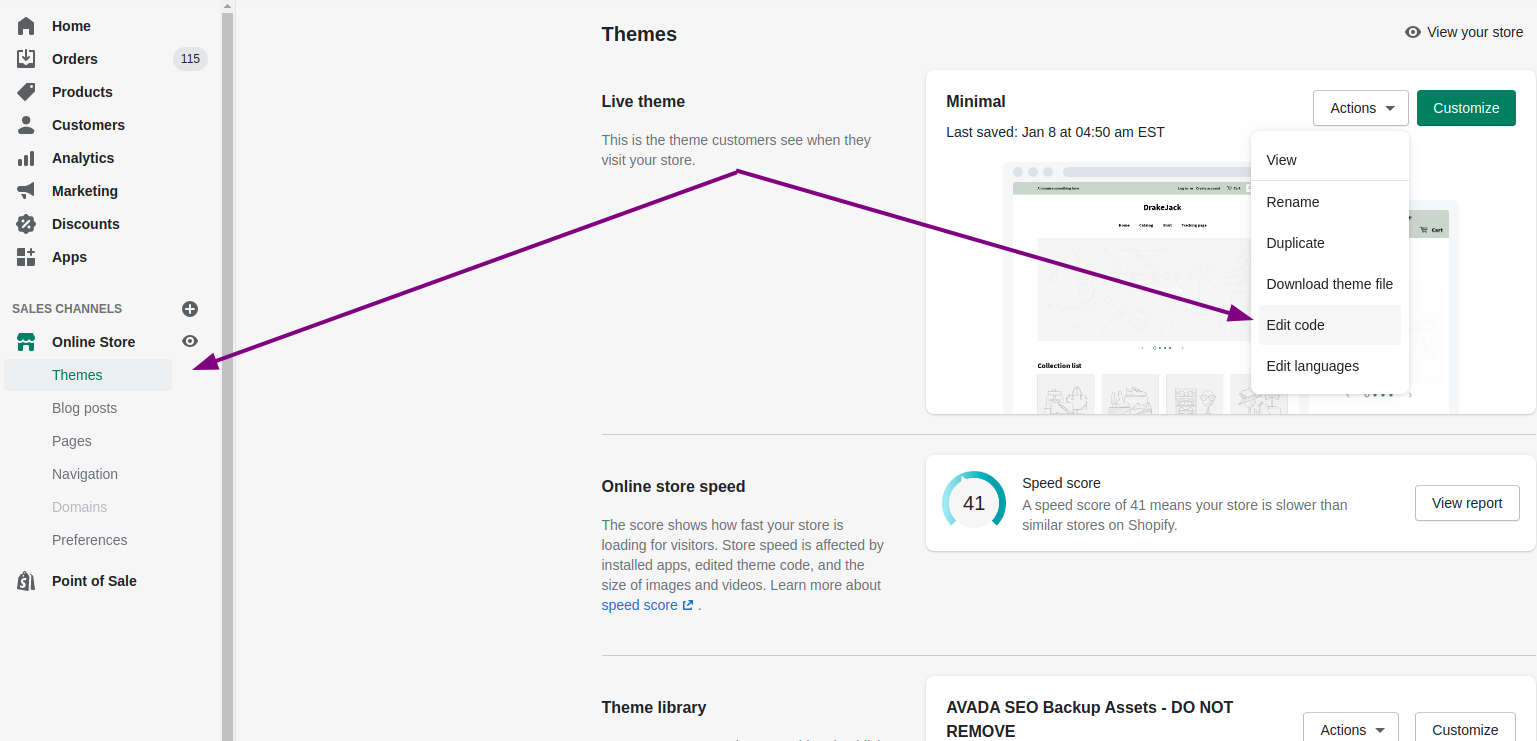
Step 1: Edit code
At the Shopify admin, the admins access to Online Store and click to Themes.
After the Shopify store owners can find the theme that they want to edit, and then they can click Actions and Edit code
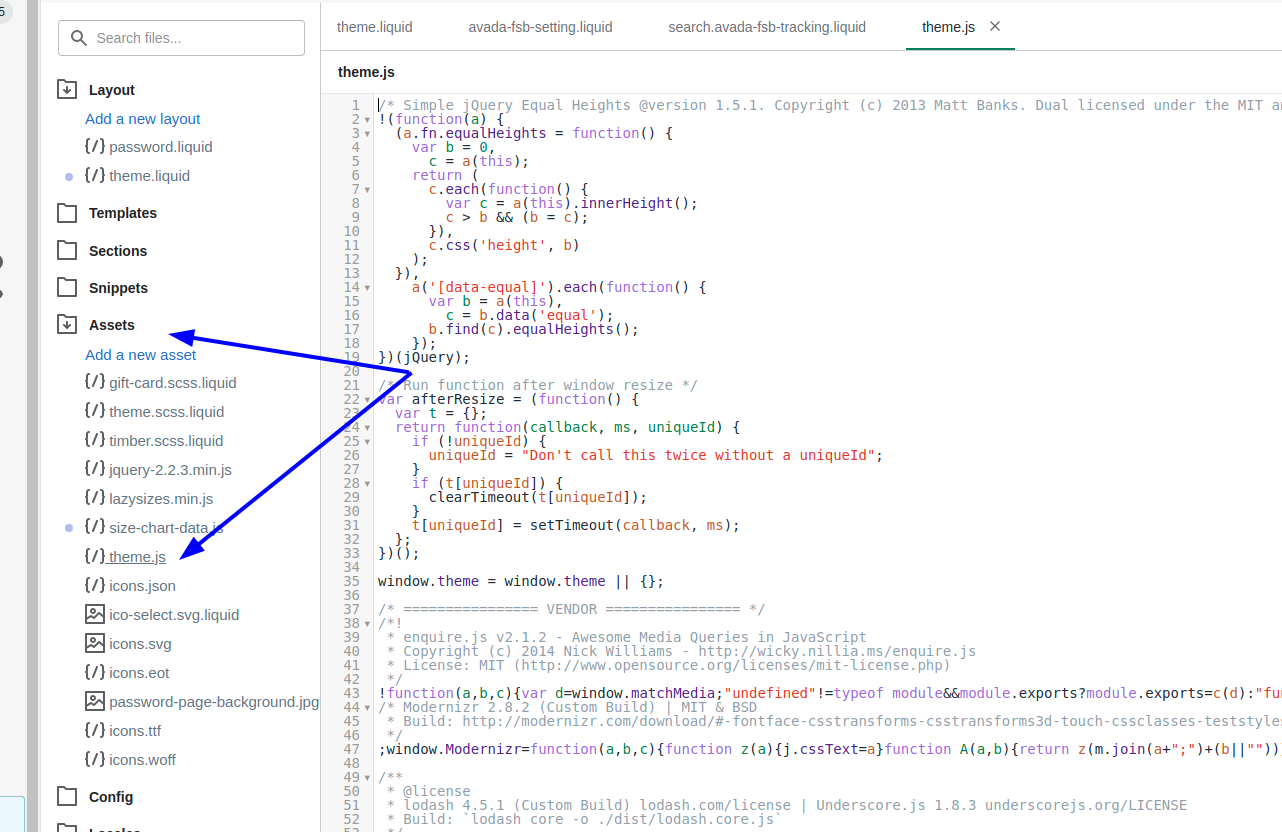
Step 2: Go to Assets
From the Asssets section, the users tap to theme.js or theme.js.liquid.
Step 3: Paste code
At the bottom of this file, the store owners can copy the code below to paste it:
  $(document).ready( function() {
    $(function() {
      $("#date").datepicker( {
        minDate: +1,
        maxDate: '+2M',
        beforeShowDay: jQuery.datepicker.noWeekends
      } );
    });
  });
Step 4: Save
Finally, to save all changes, the store owners can click Save.
Conclusion
In conclusion, the store owners have the basic understanding and simple process through this article How to modify the JavaScript file for your theme in Shopify. Moreover, the users can refer different articles about carts such as How to insert a Continue shopping link to your cart page, How to insert a delivery date picker to your cart template and How to generate a gift-wrap product. If you’re interested, we have many other Shopify guides for developers for you to read.


