
How to insert an order form to a regular page in Shopify
Drive 20-40% of your revenue with Avada
Order form is an efficient way to collect orders for your business not only offline but also online. A simple order form offers quantity, color, and size including a special gift and so on, it depends on the type of product that you are selling. In shopify platform, you can easily create an order form to your business page, there are slight differences between regular page and collection page.
You can insert your order form to a regular page in the ` /pages/order-form, or /collections/wholesale` in case you use collection page.
For a regular page, there is an intro section where you can add a banner image and some overlay text such as a headline, a brief intro and call to action, and you can customize your page as you want. While collection page is to show the collection of your products.
In this article, you will be given a tutorial of How to insert an order form to a regular page in shopify platform. Noted that this tutorial is for non-sectioned themes, it is also available for the sectioned theme, however our team does not guarantee whether it can be function properly or not, it many cases it will work, in others, it will not.
How to insert an order form to a regular page
- Step 1: Choose the theme
- Step 2: Edit code
- Step 3: Add new template
- Step 4: Open page.order-form.liquid
- Step 5: Choose collection
- Step 6: Add new page
- Step 7: Save
With order form on regular page, you are able to list all products that available from your collection in a table, or in other words, a form. It allows one product per row along with quantity box check. Within one click, you can let your customers add to the cart all product in that form that do not have quantity box set to zero.
Following is the tutorial for you to create an order form in a regular page on desktop
Step 1: Choose the theme
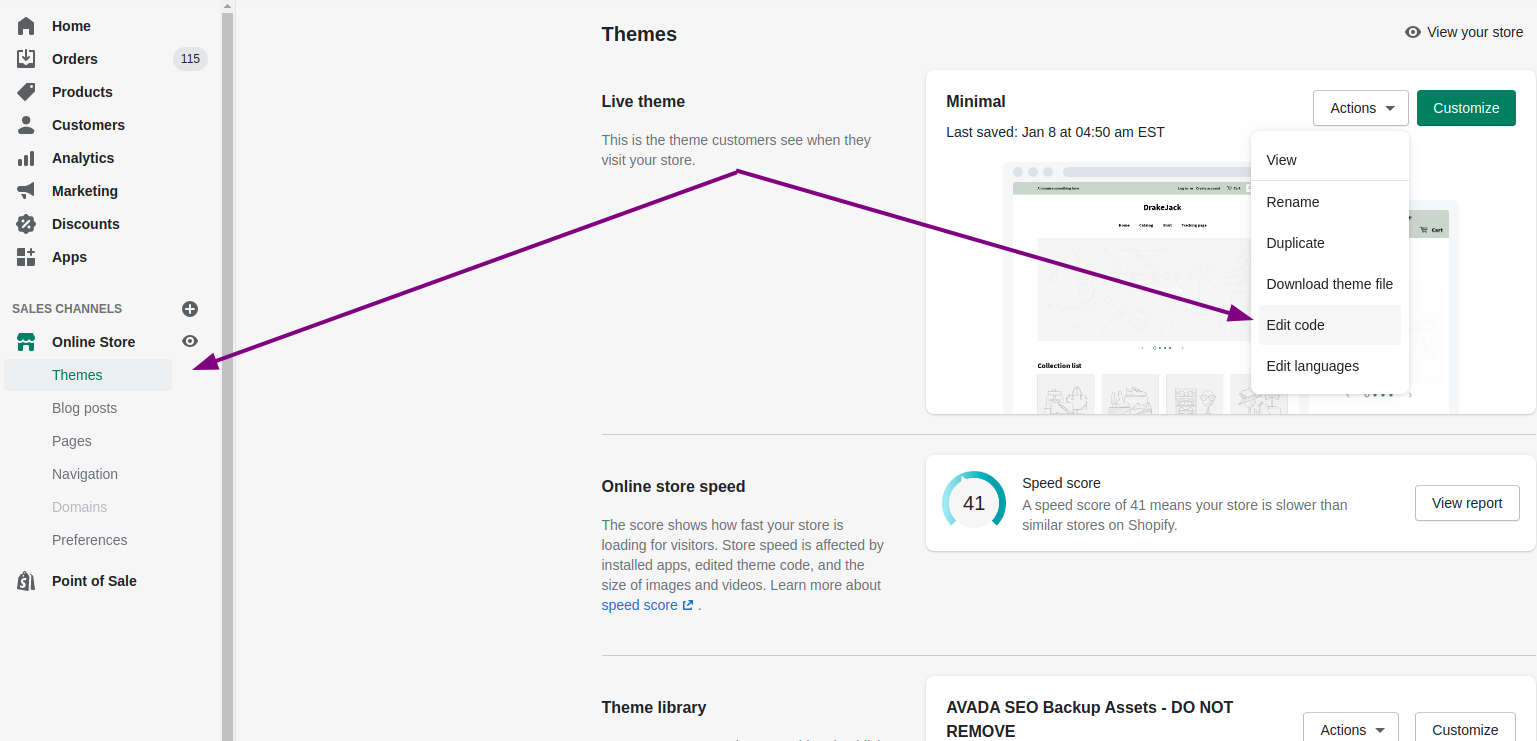
Open your Shopify admin, go to Online Store > Themes.
Step 2: Edit code
Click Actions > Edit code at the theme that need to be edited.
Step 3: Add new template
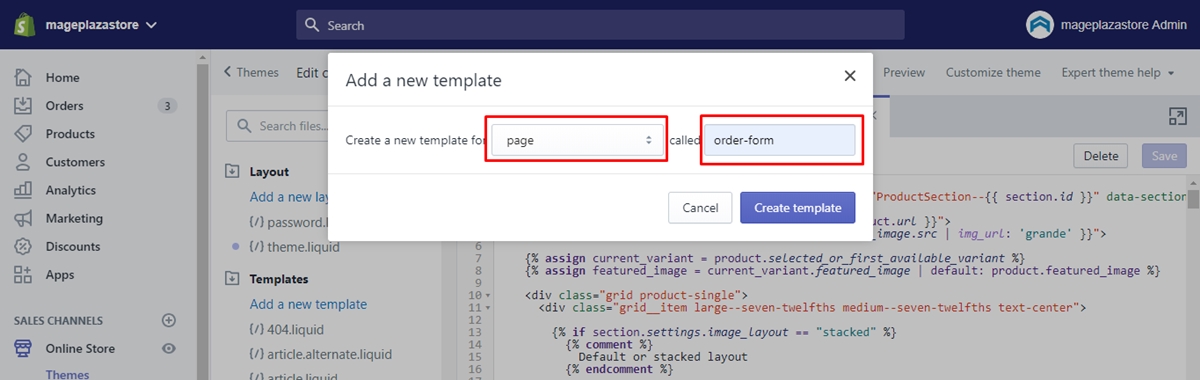
Click Add a new template under template in the left side.
When the Add a new template box open, then in Create a new template for drop-down menu, chose ‘page’, in called box, insert the name order-form.
Step 4: Open page.order-form.liquid
Open your new page.order-form.liquid template and replace the code by the content in this link.
Step 5: Choose collection
Based on your needs, choose the collection you would like to appear in your order form. You can also choose all of your collection by creating a collection with the handle all that we mentioned in other tutorial.
When you done with choosing which collection to be shown, take note of its handle and add this following code at the beginning of your template content:
{% assign collection = collections.your-collection-handle-here %}
After that, delete the your-collection-handle-here bit and insert with your collection handle. Then save.
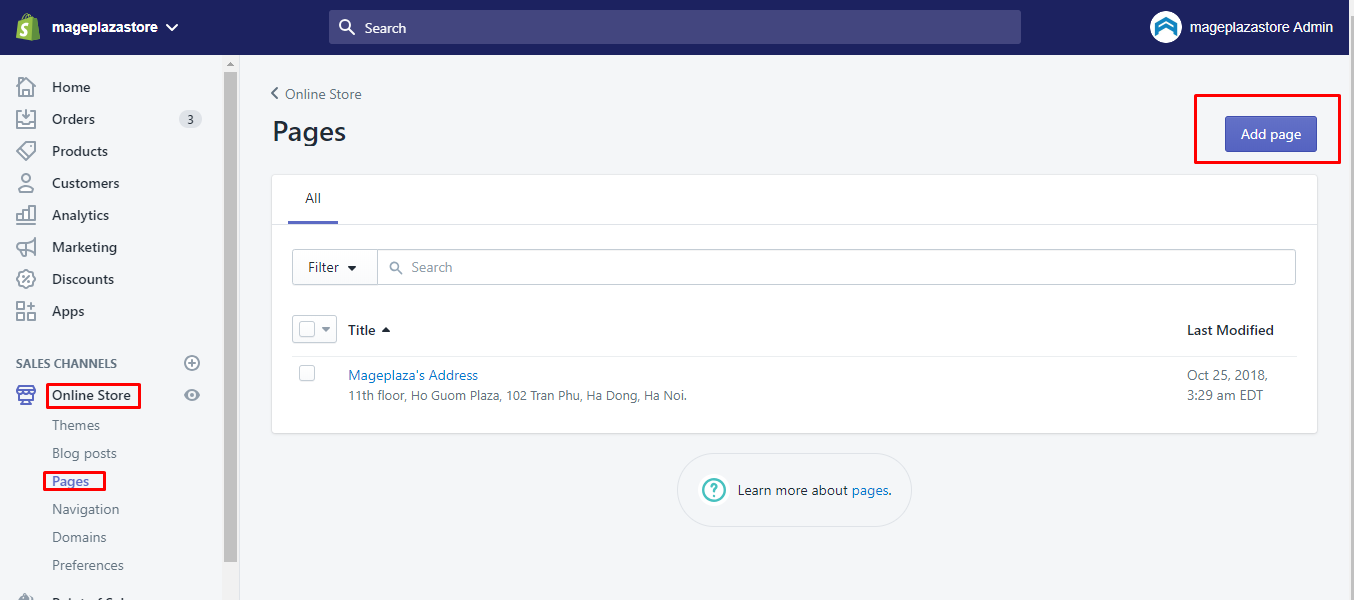
Step 6: Add new page
Add new page in your Shopify admin by open Online Store > Pages
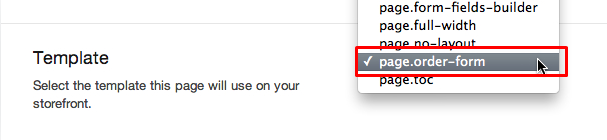
Step 7: Save
After done adding your page, at the Template section, choose “page.order-form” in the drop-down. Then save your page.
After finishing this, you might need to go to your business page to check out if this order form works or not.
Conclusion
We hope that this tutorial can help you to collect useful information from customer order in order to serve them better, if you get any trouble while practicing this, you can ask out with our support team.


