
5 Steps to Import your URL Redirects on Shopify
By Sam Nguyen

You may know how to create URL redirects on Shopify but it will be time-consuming if you do it step-by-step for each link for total hundred redirects for example. You can make a CSV file to summarize all the URL you want to add in the URL redirects and import it on Shopify. For more information, follow this article and you will know how to import your URL redirects on Shopify.
Related Posts:
- How to delete URL redirects individually on Shopify
- How to add a redirect to a shareable link on Shopify
- How to edit URL redirects on Shopify
- How to export your URL redirects on Shopify
- How to filter URL redirects by date on Shopify
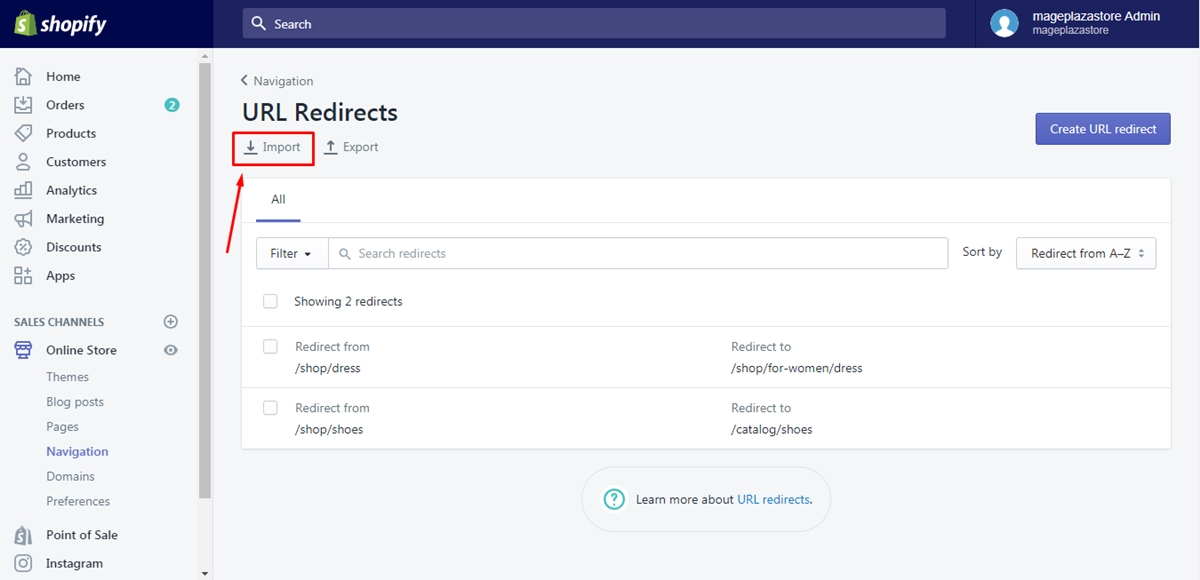
Step 1: Press on Import
From the admin page, head to Online store under the Sales channels section. The system will direct to Themes settings in the Online store that you need to choose Navigation next. After that, select the URL redirects right below the header Navigation to continue. In the URL redirects page, press on Import which has a down arrow symbol beside it.
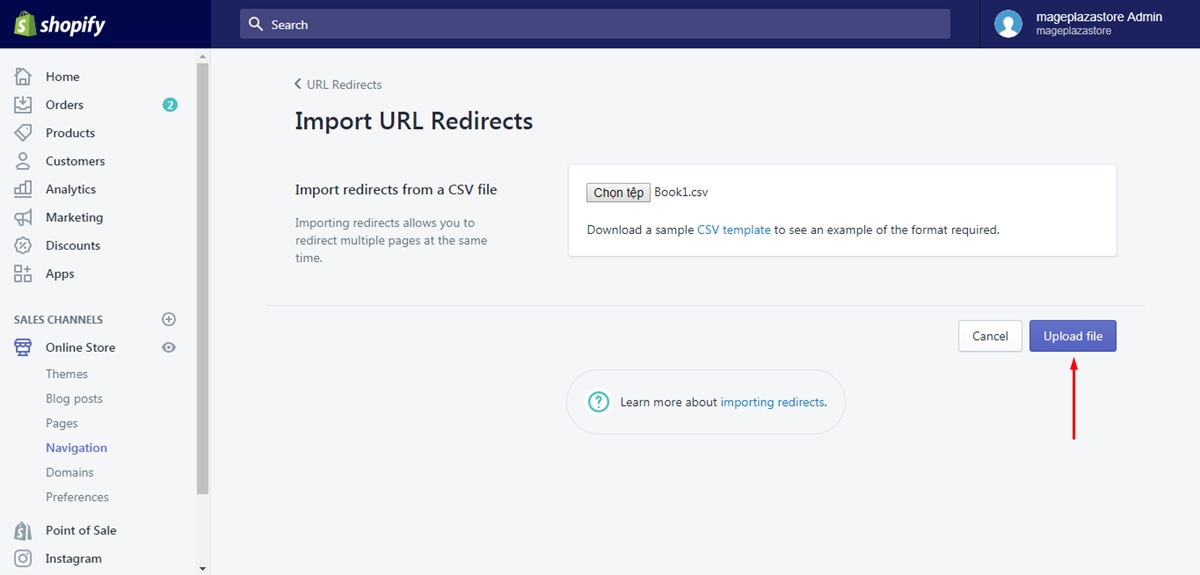
Step 2: Select a CSV file
You will see a bold title Import redirects from a CSV file and a short description below it, which is next to a Choose file button. Therefore, click on the Choose file and find the file you want to use. As the description and the header has mentioned, you must pick a file which is saved as .csv from your laptop.
Step 3: Choose Upload file
After selecting a file, you need to press on the blue Upload file button to help the system recognize the data. It will check whether the format of the folder is suitable or not. If it does not include in the data the header Redirect from and Redirect to, it will be considered as invalid and you have to use another one or edit the file. In case the one you have selected fit the requirement, it will move to a different page.
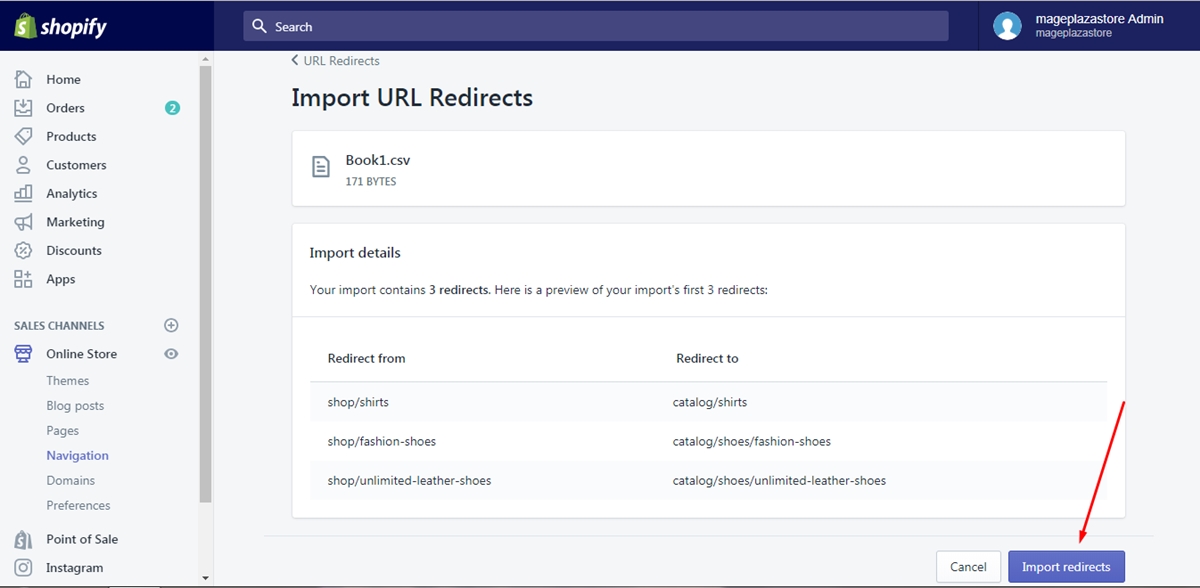
Step 4: Review the import
After the uploading, you will see the preview of the chosen file then you will know whether you use correct or wrong data. If it is not the one you want, you can go back and upload the new folder. If there are just a few mistakes in the details, you can note them down and edit these redirects later.
Step 5: Click on Import redirects
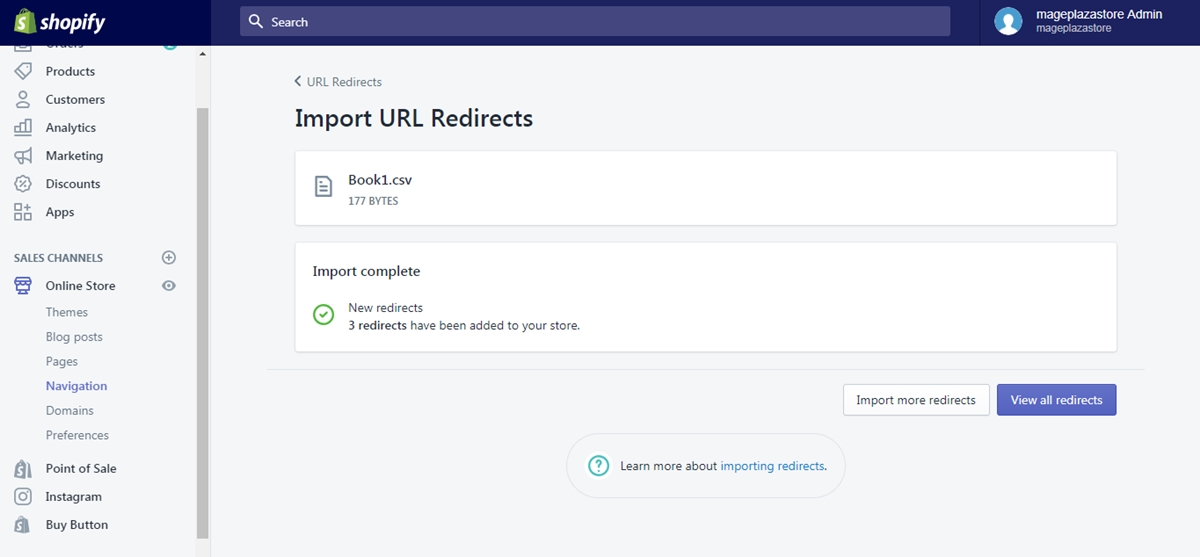
If you ensure your selection, press on Import redirects button at the end of the page to finish. Wait for the system to work until you see the notification of Import complete and the number of new redirects have been added. You can show the new list by pressing on View all redirects.
Conclusion
To sum up, this writing discusses about how to import your URL redirects on Shopify. By applying this method, you can upload more redirects at the same time instead of creating each one individually. The steps are quite easy to follow that I hope it is helpful to you.


