
Export your URL Redirects on Shopify: A Step-By-Step Guide
By Sam Nguyen

You can manage your URL redirects for your store in the Navigation section on Shopify. However, there are cases that you cannot access to the internet or you have something to do with the paperwork then you need to save these data for further uses. This kind of action refers to export URL redirects on Shopify and this is also the subject of this writing. Hence, if you want to discover the process to complete this action, check out the following steps.
Related Posts:
- How to filter URL redirects by date on Shopify
- How to delete URL redirects individually on Shopify
- How to import your URL redirects on Shopify
Step 1: Pick redirects
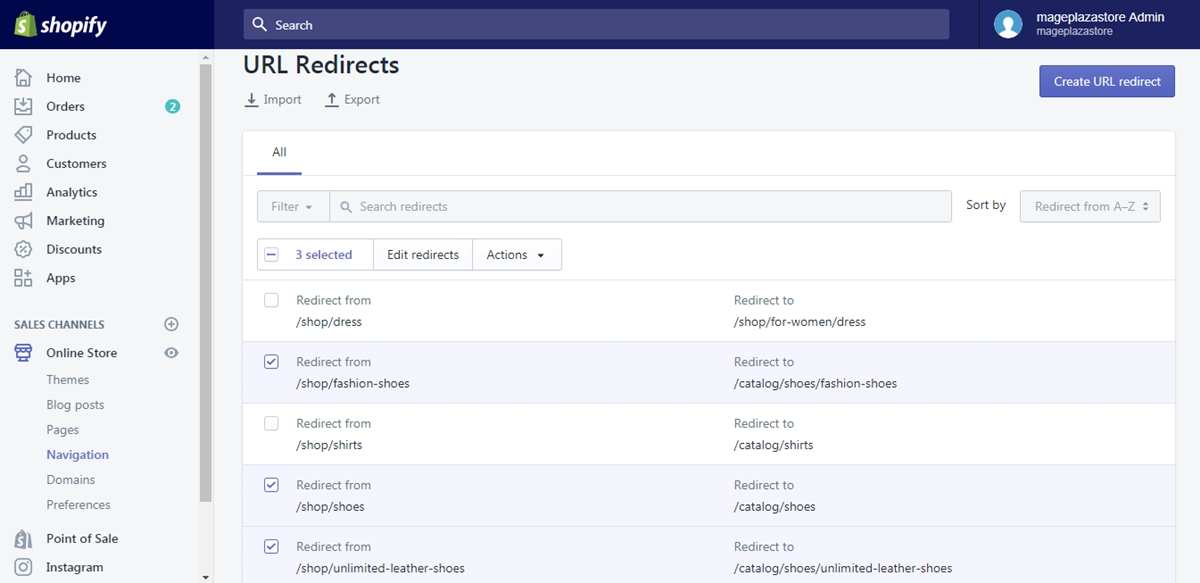
You will see the list of all the redirects you have then look for the ones that you want to export. It does not limit the number of URLs that you can export, hence, you can choose how many you like by ticking on the box next to the redirect you need. For example, I want to export three URLs, I will tick on their boxes, like the picture below:
However, if you would like to save all of your redirects, you can skip this one and move to the next step.
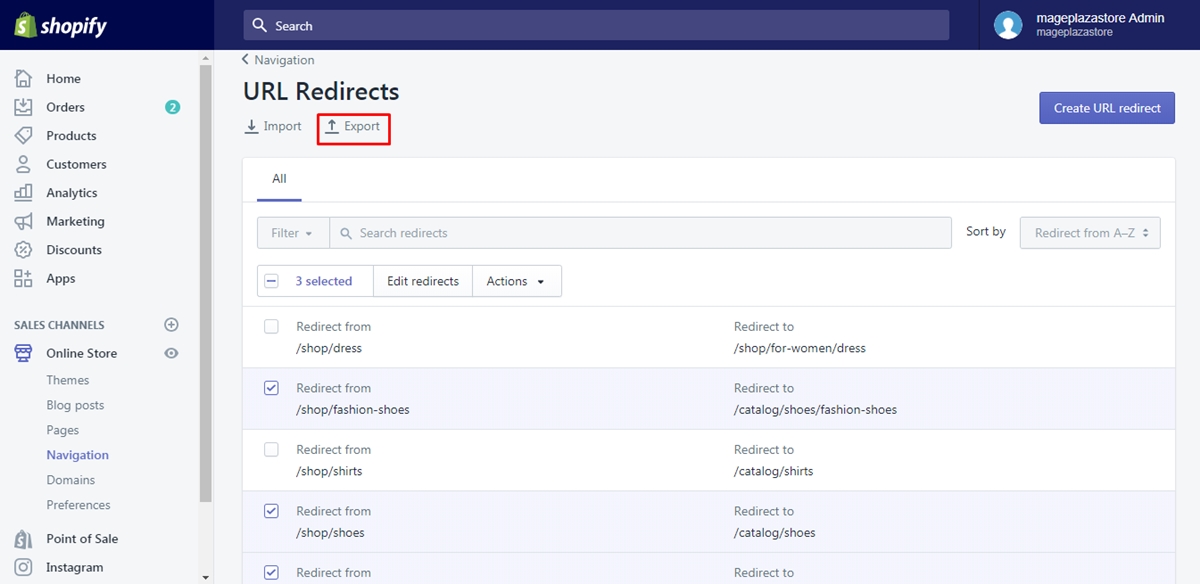
Step 2: Click on Export
After selecting the redirects, click on the Export which has an up arrow icon nearby. It stays right below the URL redirects title and next to the Import.
Step 3: Choose the type of export file
You will see another dialog box appear on your screen which asks you to confirm the size and kind of exporting the file. The size here refers to the number of redirects that you want to export. The system allows you to export the Current page, All redirects, Selected and Current search. If you have chosen the redirects already, you can check on the option Selected or you can pickAll redirects in case you want to import it all. Besides, you can save the file as CSV or Plain CSV but just decide one of them, for example, tick on the CSV for Excel, Numbers, or other spreadsheet programs to store it as CSV.
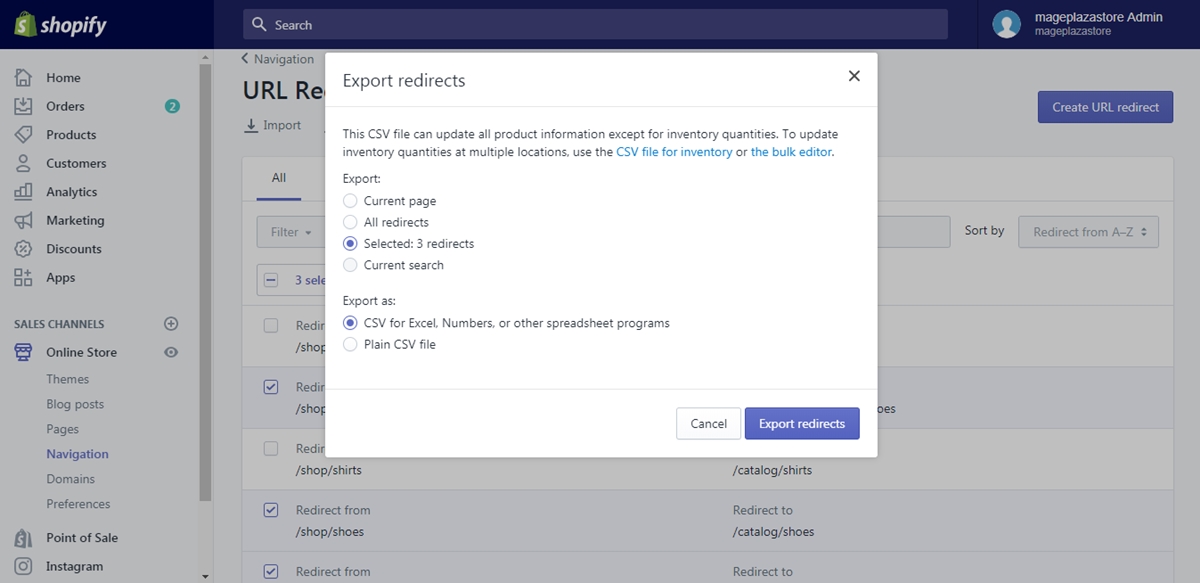
Step 4: Press on Export redirects
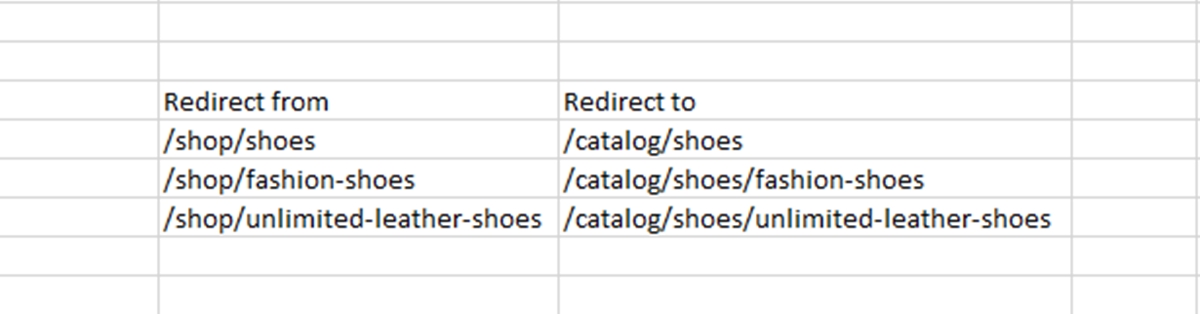
If you are satisfied with your selection, click on the blue Export redirects button to ensure your choice and wait for the system to work. The file will be saved to your default download folder then after exporting, you can open it to check whether information fits your requirements or not. You can use Microsoft Excel or other similar programs to open the file on your computer. This is an example of what your export file may look like:
Conclusion
In summary, I have shown you how to export your URL redirects on Shopify. The steps are quite simple and I also try to explain it in the clearest way to help you follow easier. In addition, I attach illustrated photos for each step that I hope you can find this writing helpful and enjoy the reading.


