
How to Filter URL Redirects by Date on Shopify
By Sam Nguyen

URL redirectshelp users to adjust the traffic from one page to another one and Shopify also allows shop owners to use these links in their stores. However, when you have a large number of redirects and you want to make changes for some of them, it’s hard for you to find them in a long list. Hence, you can use filters to shorten the list and everything will be easier. To know more about the process of how to filter URL redirects by date on Shopify, just check this post.
Related Posts:
- How to import your URL redirects on Shopify
- How to add a redirect to a shareable link on Shopify
- How to edit URL redirects on Shopify
- How to export your URL redirects on Shopify
- How to delete URL redirects individually on Shopify
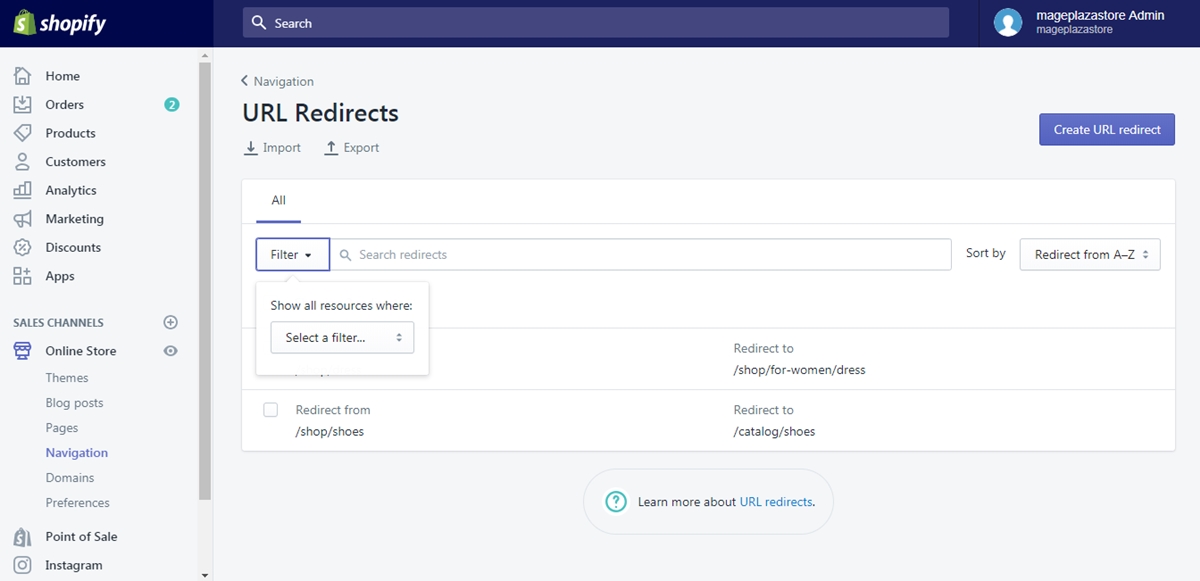
Step 1: Press on Filter
Firstly, log-in to your account on Shopify and go to Navigation under the Online store of the Sales channels section. In the Navigation details, you will see the URL Redirects right below the title page then click on it. The list of all of your redirects will appear and above them is the Filter button. Hence, press on that button.
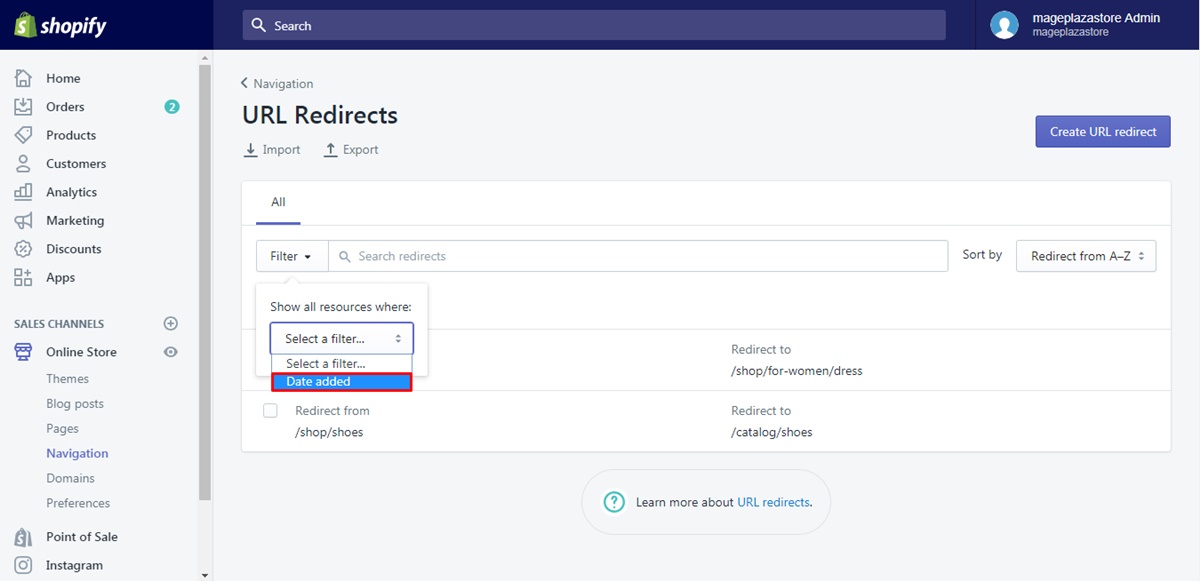
Step 2: Select Date added
A drop-down menu with the header as Select a filter... will show up then click on it. There is only one option for you to choose, which is Date added that you have to select it to move on to the next step.
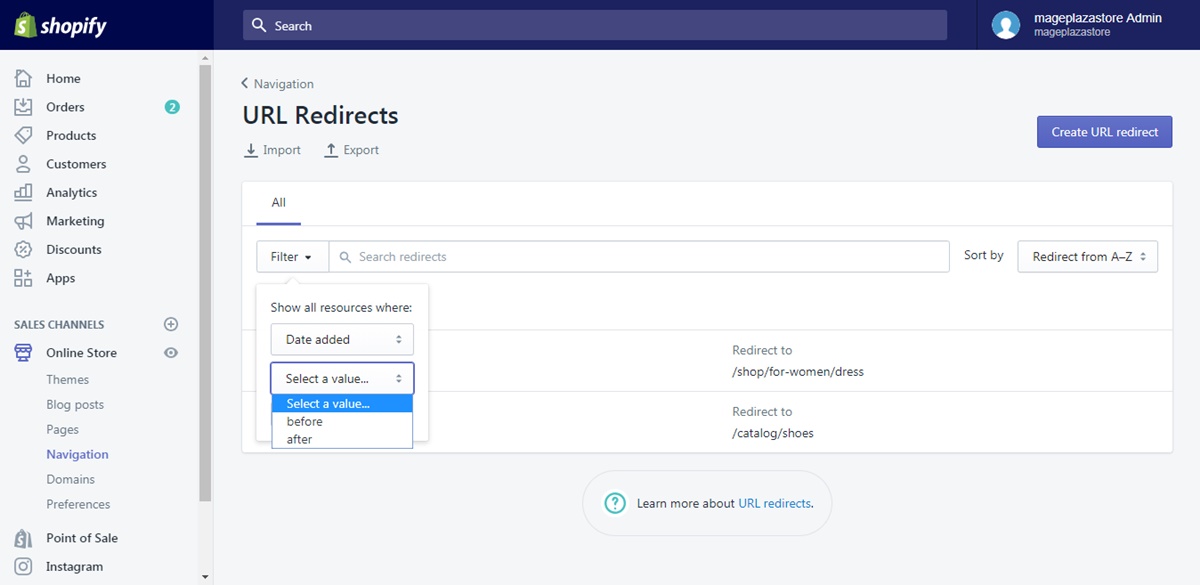
Step 3: Choose a value
Another menu named Select a value... will appear, which includes two choices before and after. Decide which one you want and press on it. You can still change it later then it’s fine even if you pick it randomly.
Step 4: Enter the date
After completing step 3, you will see a box below the value selection. Fill in that space the date you want to use with the format as year, month and day respectively. If you don’t want to type, move the mouse pointer to the box and click on it, a calendar will appear that you can choose a day in it.
Step 5: Click on Add filter
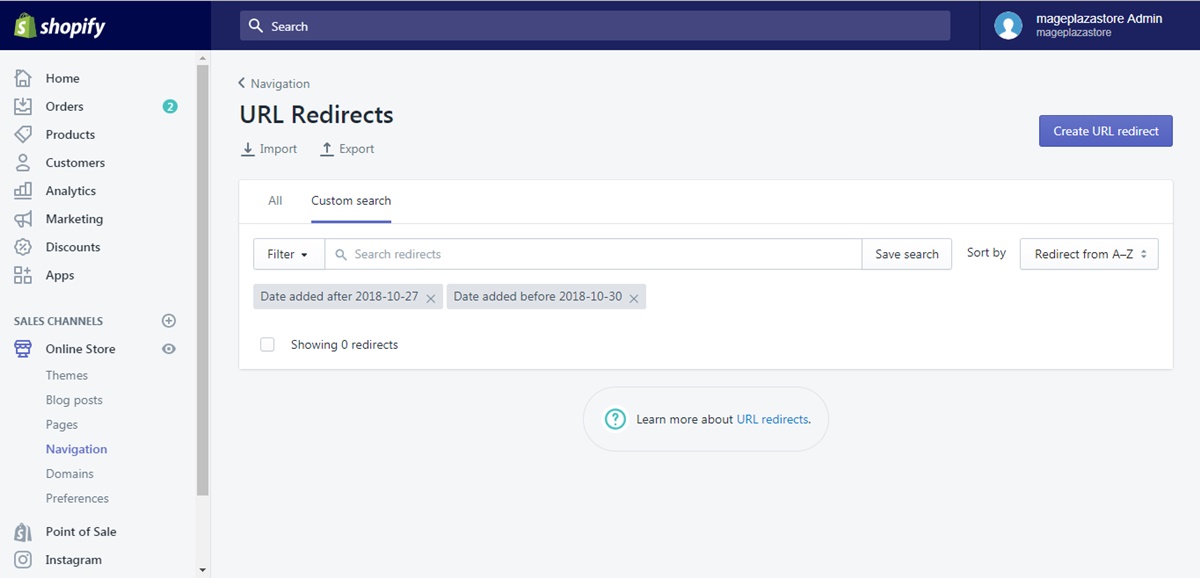
If you have finished all the above steps, select Add filter to show the result of the filter. For example, I want to filter redirects which have the date added before 2020-10-30 and this is what I get after completing the process.
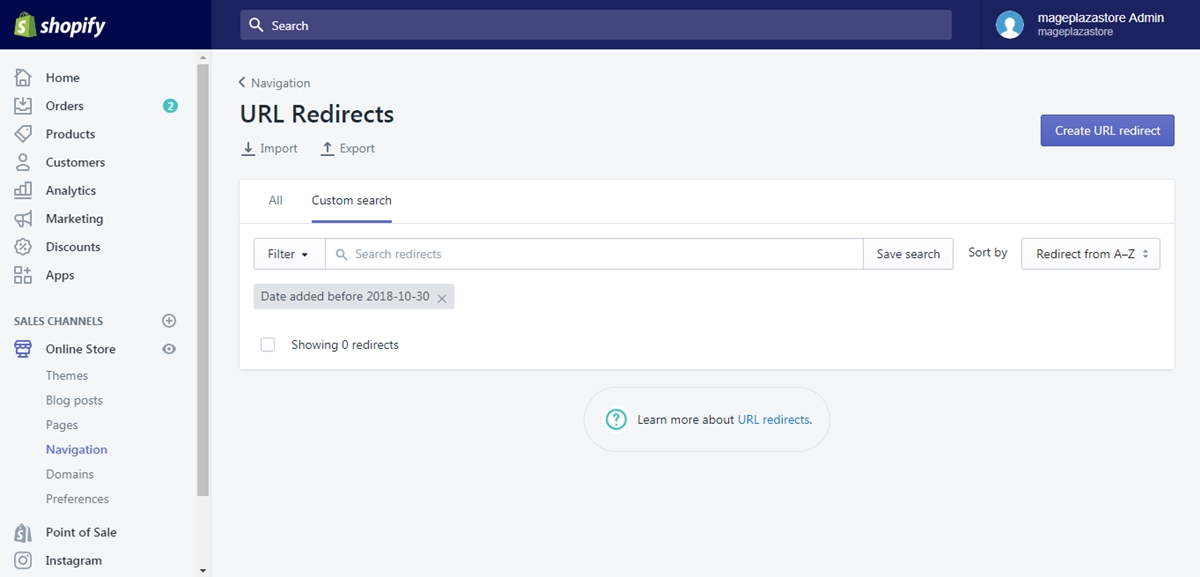
There is a tag that presents your filter condition and the X icon next to it. If you want to delete the filter, you can press on that symbol to remove it. Below the tag is the result for filtering, in this example, because no item matches the condition, it appears as 0 redirects. Moreover, you can add more than one filter to shorten the list of results. For instance, you can search for the redirects which have Date added before 2021-10-30 and Date added after 2021-10-27.
Conclusion
To conclude, this writing is all about how to filter URL redirects by date on Shopify. By following the instructions, you can apply this to search for the links that you want to delete or edit them based on your purposes. It is very easy and will take you about five minutes to complete that I hope you can practice it efficiently.


