How to Change the Featured Image of a Collection on Shopify
You may know of how to edit the information for the introduction of your collection, like the name or description. When we have a collection, it is better to have a picture which shows the spirit of it or a sample of your design for instance. It will be more attractive and help customers have a general look at your products. In this article, I will show you how to change the featured image of a collection on Shopify.
Change the featured image of a collection on Shopify
Step 1: Open Collection section from Shopify Admin
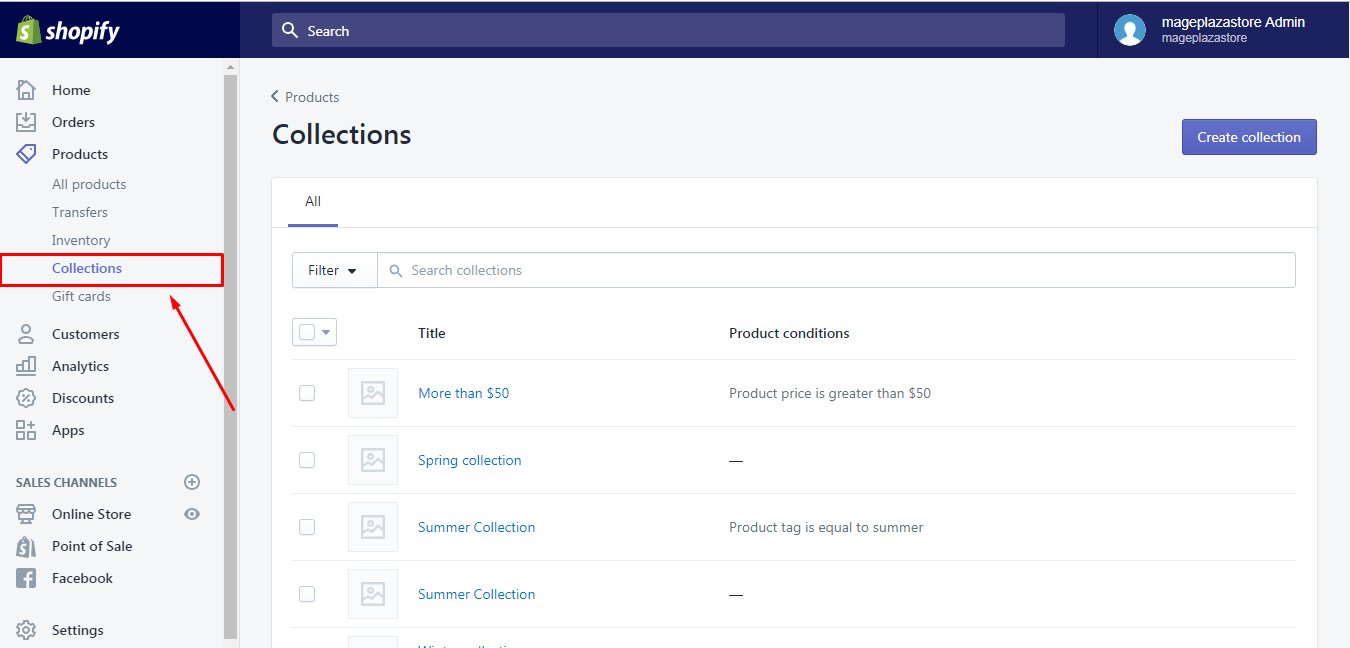
First of all, log-in to your Shopify account, then in the left side of your screen, choose Products and Collections respectively.

Step 2: Choose a collection
The list of all your collections will appear, hence, find the one that needs to be adjusted and press on its name.
Step 3: Change featured image
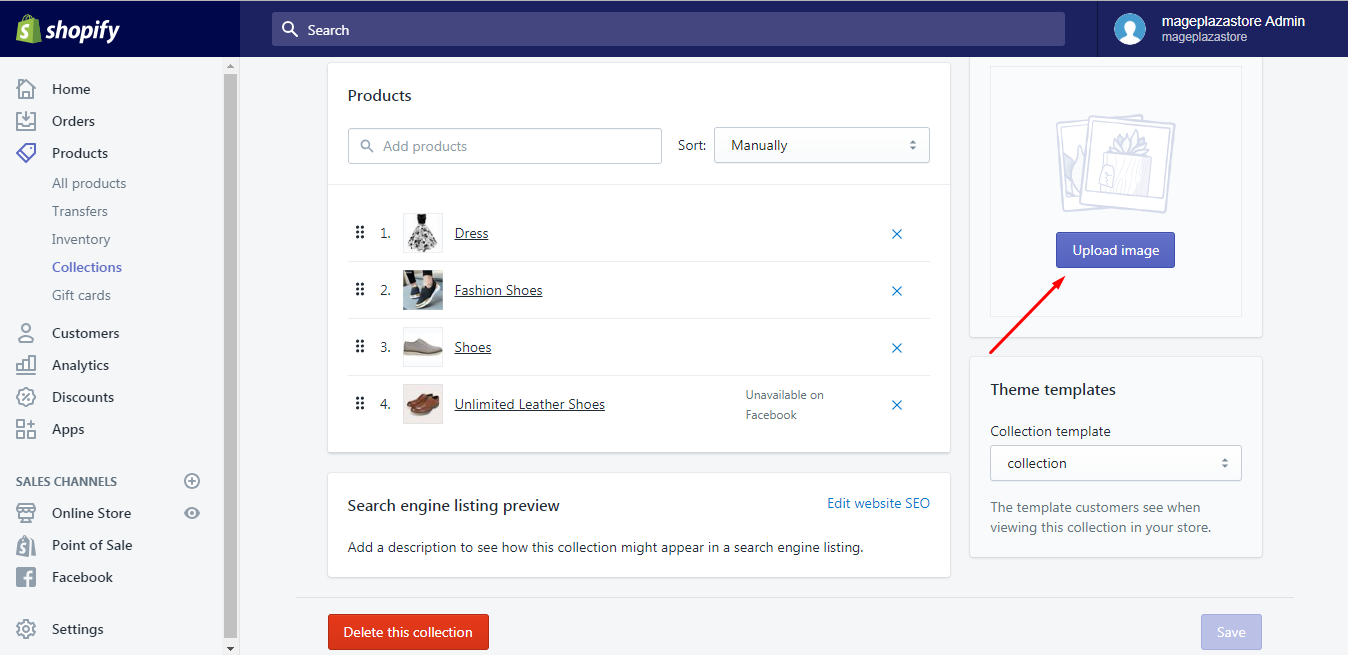
Scroll down and pay attention to the right side of the display, you will see the part named Collection image. After that, there are two more situations can be happened.
In case it is the first time you update your collection’s feature image, click on Upload image and pick out a picture on your computer to add.

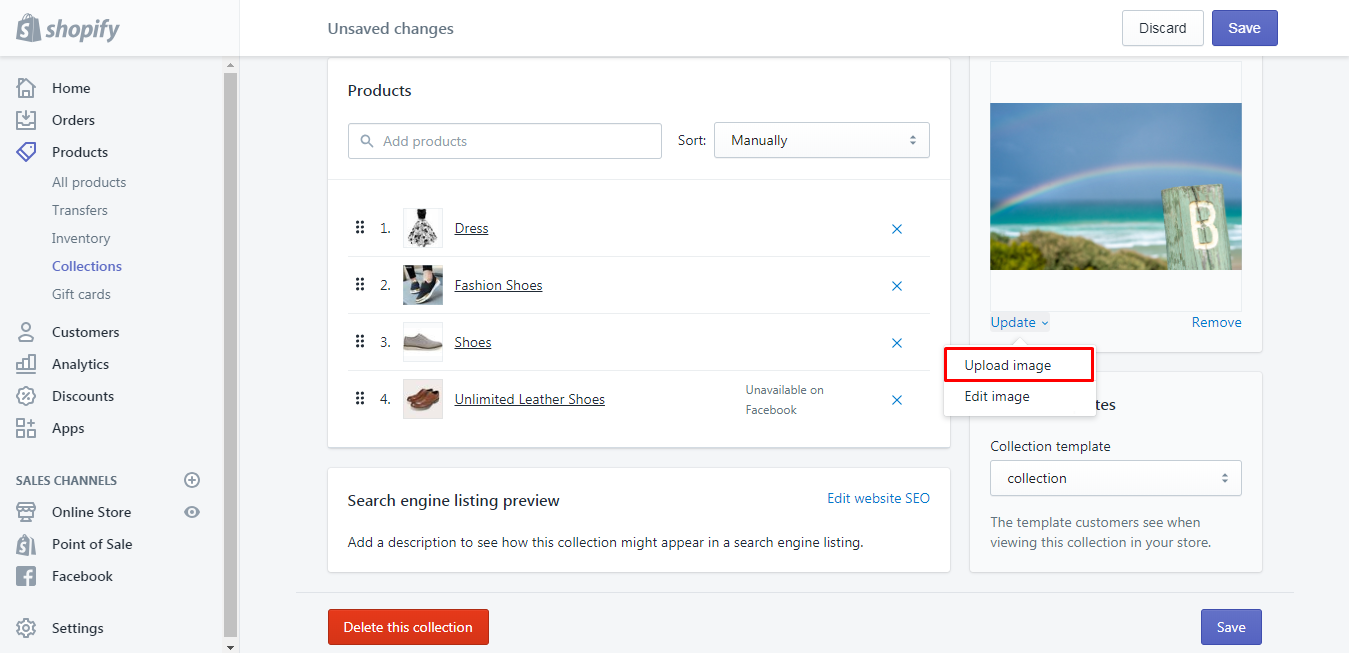
If you already had a display picture for the collection, find Update below the image and go to Upload image to select a new photo.

Step 4: Save changes to the collection
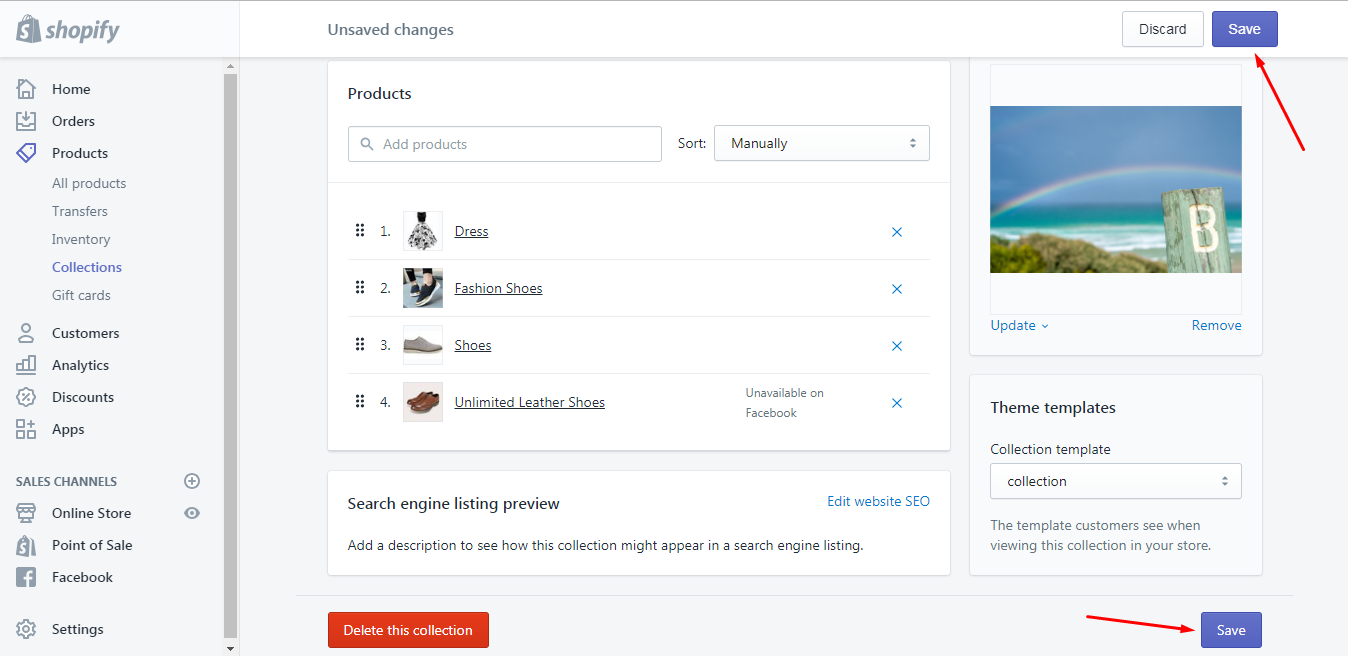
Although the new picture is presented on your page, you still have to save it so that the customers can see it. The system also reminds you of saving all your changes, therefore, do not forget to click Save. You can see two Save buttons on your screen display, choose one of them to press and finish the process.

To change featured image of a collection on iPhone (Click here)
-
Step 1: Get access to the Shopify app, tap
Productsand go toCollections. -
Step 2: Choose the collection which you care about.
-
Step 3: In the head of your display, tap
Edit -
Step 4: If the featured image has already existed, you have to remove it by tapping it, select … icon and find
Delete. However, if it is the first time uploading, you can skip this step and do the next one. -
Step 5: To add a new picture, tap the image symbol on the detail setting screen.
-
Step 6:
Saveto record all changes.
To change featured image of a collection on Android (Click here)
-
Step 1: Open the app, log-in and select
ProductsthenCollections -
Step 2: Pick out the collection that you want to make change
-
Step 3: Tap the pencil button to access to the editing part.
-
Step 4: If you do not have featured image yet, move forward to the next step. For existing display picture, tap on it and
⋮icon then chooseDeleteto remove.

-
Step 5: Tap the image icon to insert a photo. You can select one in your gallery or take a new one immediately.

-
Step 6: To end the process, tap the tick icon on the head of the screen to save.
Conclusion
By following the above guideline, you can practice making change featured image of your collection on Shopify in just a few minutes. I hope that this article benefit you, if you want to know more options to adjust your collection, please link to other articles.
Related Articles:


