
How to Create a Landing Page on Shopify
By Sam Nguyen

SEO landing pages are designed to naturally show up in the listings of an organic search engine. They are commonly known for the ability to bring better conversion rates than directing all traffic to the home page only. Why? Because you cannot force visitors to look at the information they are not looking for, meanwhile landing pages can bring people directly to the content they need. But that’s not enough when it comes to the benefits of landing pages.
You want to look for more? This is our writing on How to Create a Landing Page on Shopify and information related to Landing Pages so please do not take your eyes off of it!
What is a landing page website?
A landing page is a web page that shows up when a visitor clicks on a search result link of search engines or a pay-per-click link. However, the page of a website is not the only landing page, it could be any page on a website. As long as it has a purpose, it has the potential to be a search engine landing page. Content on a landing page should be what relates to the keyword search phrase. For instance, when searching in Google for SEO Courses for Shopify Stores, visitors should be linked to pages containing content relating to the keyword phrase SEO course or SEO Courses for Shopify Stores.
But what does a landing page differ from other pages on your online store?
Generally speaking, any pages on your website can be a landing page where a visitor is first directed to on your site. Yet it does not mean they could fit the bill of a landing page from the perspective of sales & marketing. Think of your Collections pages, Product pages, FAQ pages, About pages as landing pages. Of course, they could be.
How come? Because they are designed to attract audiences made up of many segments. They are meant to introduce, inform, and educate your customers about your brand, your services, or anything you so offer.
Landing pages, however, are a standalone page with a specific goal to attract a or many specific types of customers to take a single desired action.
Why should your online store use a landing page?
What are those Website Landing Pages for? - You may wonder.
In fact, they can be employed for so many unique purposes in so many pay per click/ marketing campaigns and search engine optimization (SEO). One of the most commonly known reasons is to better your conversion rates. More specifically, you can use landing pages to determine a campaign’s effectiveness. Append a URL that makes it easier to look at your site analytics and see how your page is doing. Kindly note that when you are advertising in many materials on the Internet by appending a URL, you are, at the same time, directing visitors to another page specifically created for that advertisement so you are allowed to measure its effectiveness.
For further information, search engines often optimize websites that contain many landing pages. That is to say, the more content, the more chances to appear in search results. More landing pages also mean more keyword phrase avenues that a website can be found under. For all of that, we can say that It is landing pages that are the solution to enlarge the number of visitors and web ranking in search engine ranking system.
A study conducted by Marketing Charts made comparisons among many e-commerce landing pages against standard product detail pages and showed that:
- Post-click landing page visitors view more pages than Product page visitors by 42% when comparing 12.5 per shopping session to 8.8 per shopping session
- Product pages convert almost half of their visitors as landing pages after clicking (conversion rate of 1.5% compared to 2.9%, respectively)
- Revenue per session on product pages is approx. half that of landing pages after clicking ($ 1.72 and $ 3.43 respectively)
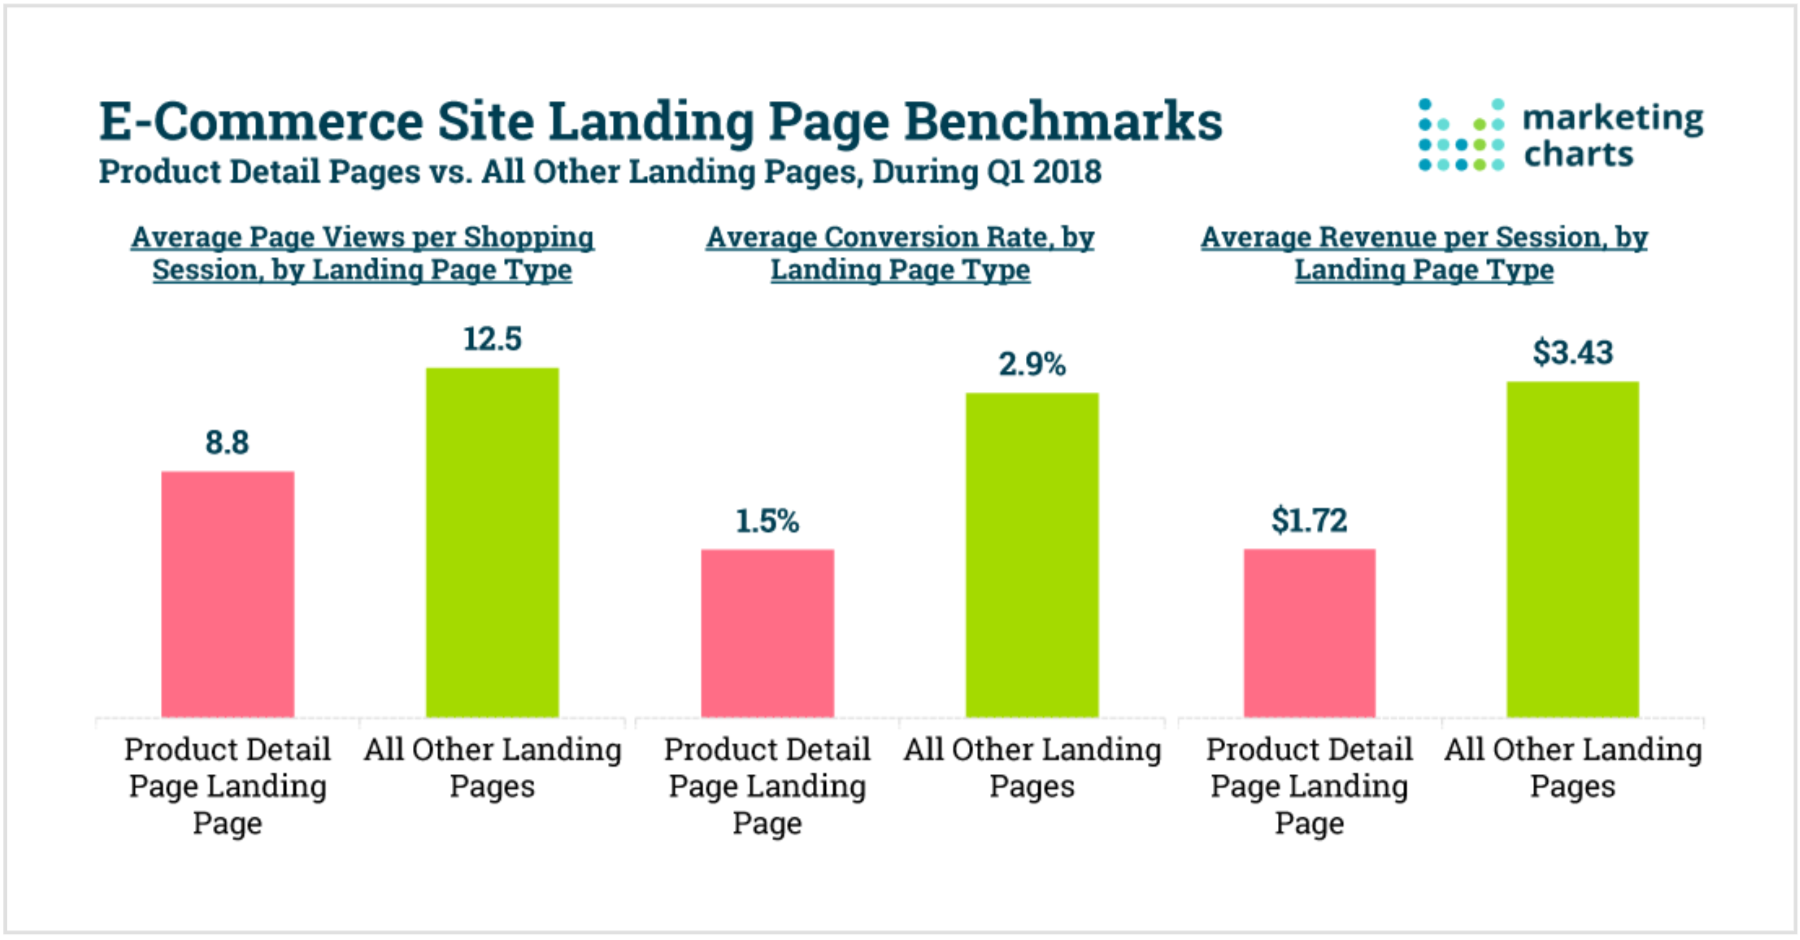
As you can see, only a small amount of consumers will really make a purchase while around 96% of them will leave. Look at all those All other landing pages fields, they show that landing pages are effective at having more customers make a purchase than a product page.
Landing pages can help you!
Can you make a landing page on Shopify?
The answer is DEFINITELY YES.
You can make a landing page right on your Shopify store. However, there are limitations to what you are allowed to do. And if you have two stores or more or want to scale your online store to a new market, you would want to invest in a landing page app or page builders.
4 Ways to Creating a landing page on Shopify
In this writing, we are getting you through all 4 ways to quickly and easily generate a landing page. Let’s check them out!
1. Use Shopify apps to create a landing page
Are you a newbie to website templates? You don’t want to spend too much time and money to hire a Shopify expert just to create custom landing pages on your store with Liquid? They are no longer problems because now you can choose the best Shopify landing page template builder.
Yes, you heard it right! You can generate many landing pages for your store with dedicated 3rd party templates. These tools can integrate directly with your e-commerce platform. About the features, these best-of-best landing page builders come with many outstanding functionalities such as video support, drag and drop, mobile-friendly design, and MailChimp compatibility (perfect if you want to build an email list).
Here are some popular names you may have heard:
GemPages
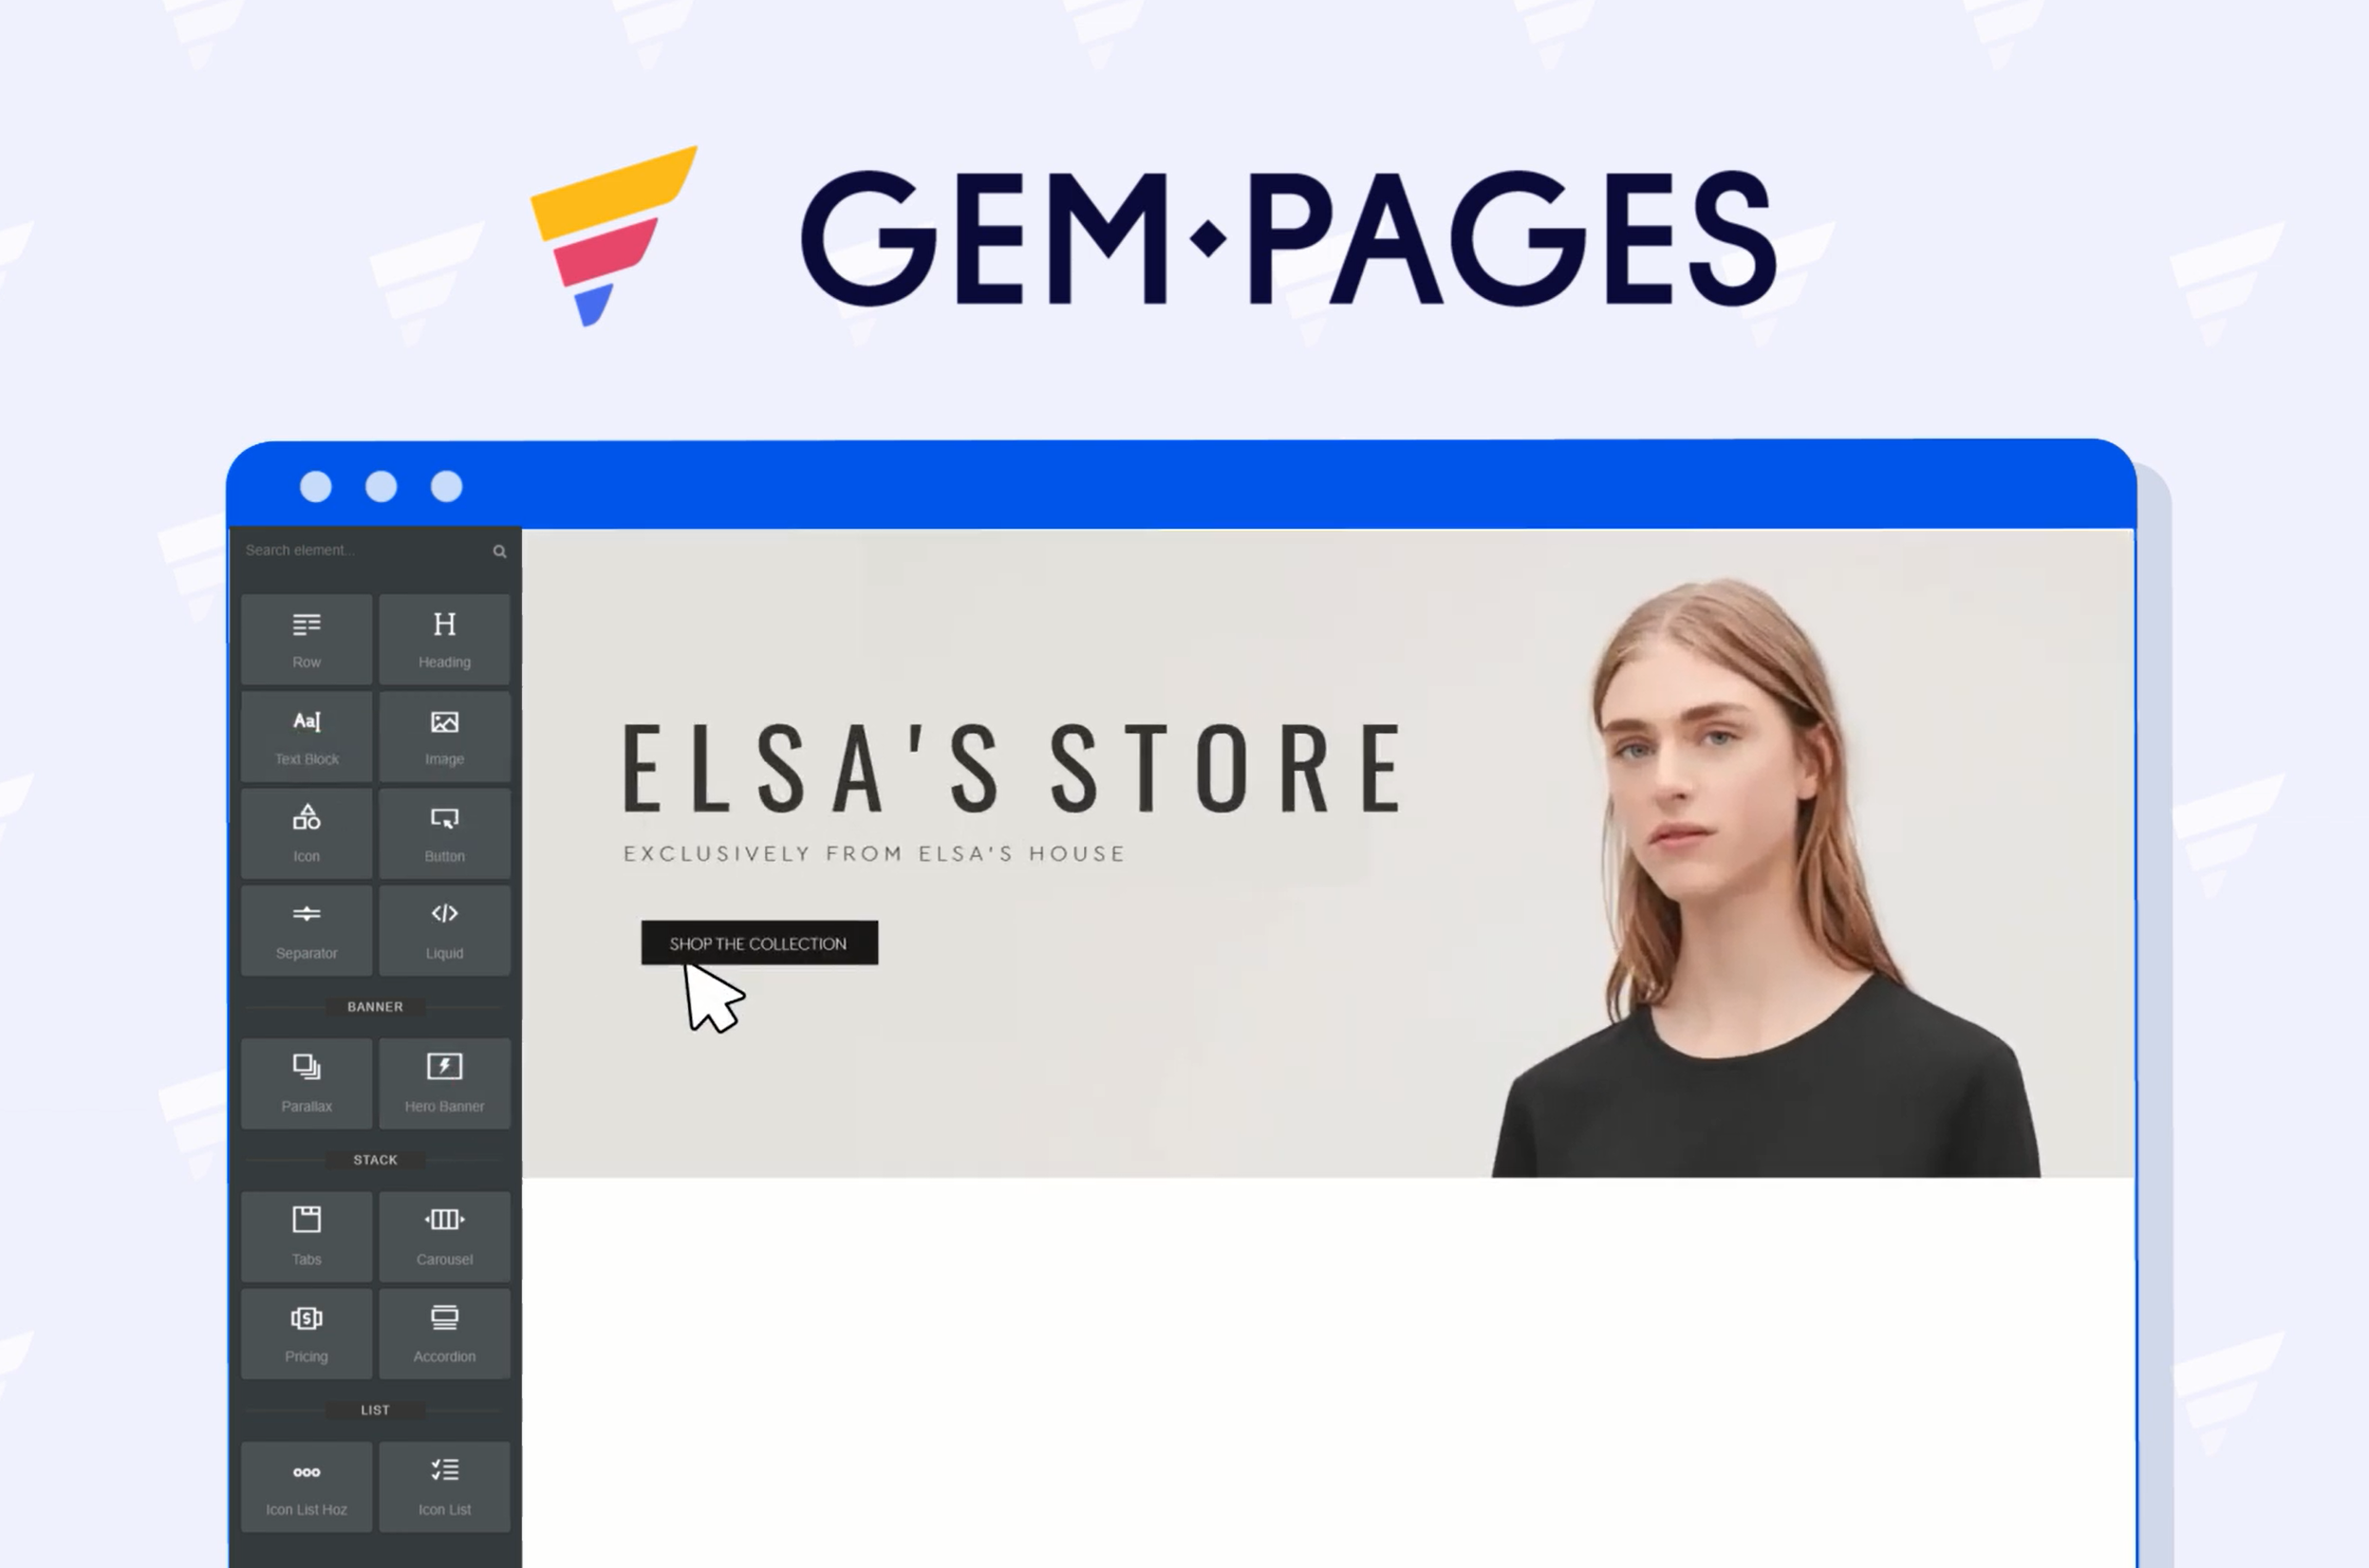
GemPages is a feature-rich, affordable landing page builder for Shopify stores without any coding experience required. It gives you more than 50 options of landing page templates to decide on. More choices mean more design freedom to personalize your brand and customize its look to attract target audiences.
The app is 100% mobile responsive and adapts to your visitors’ screen sizes. For that reason, there will be no worries that your customer will miss the Buy Now button or any necessary conversion optimization. On top of that, kindly note that GemPages’ elements do include some important buttons such as Add to Cart, Image, Price, Quantity, Countdown, to name but a few. Also, it does support MailChimp, Google Analytics, Facebook Ads, Klaviyo, and Reviews Importer App. It offers a 10-day free trial also!
HIGHLIGHT FEATURES
- Provide beautifully available templates
- Design the homepage, landing pages, etc
- Correspond with Facebook Pixel and Google Shopping catalog
- Integrate and install the mini-apps
- User-friendly and responsive with different devices
PageFly
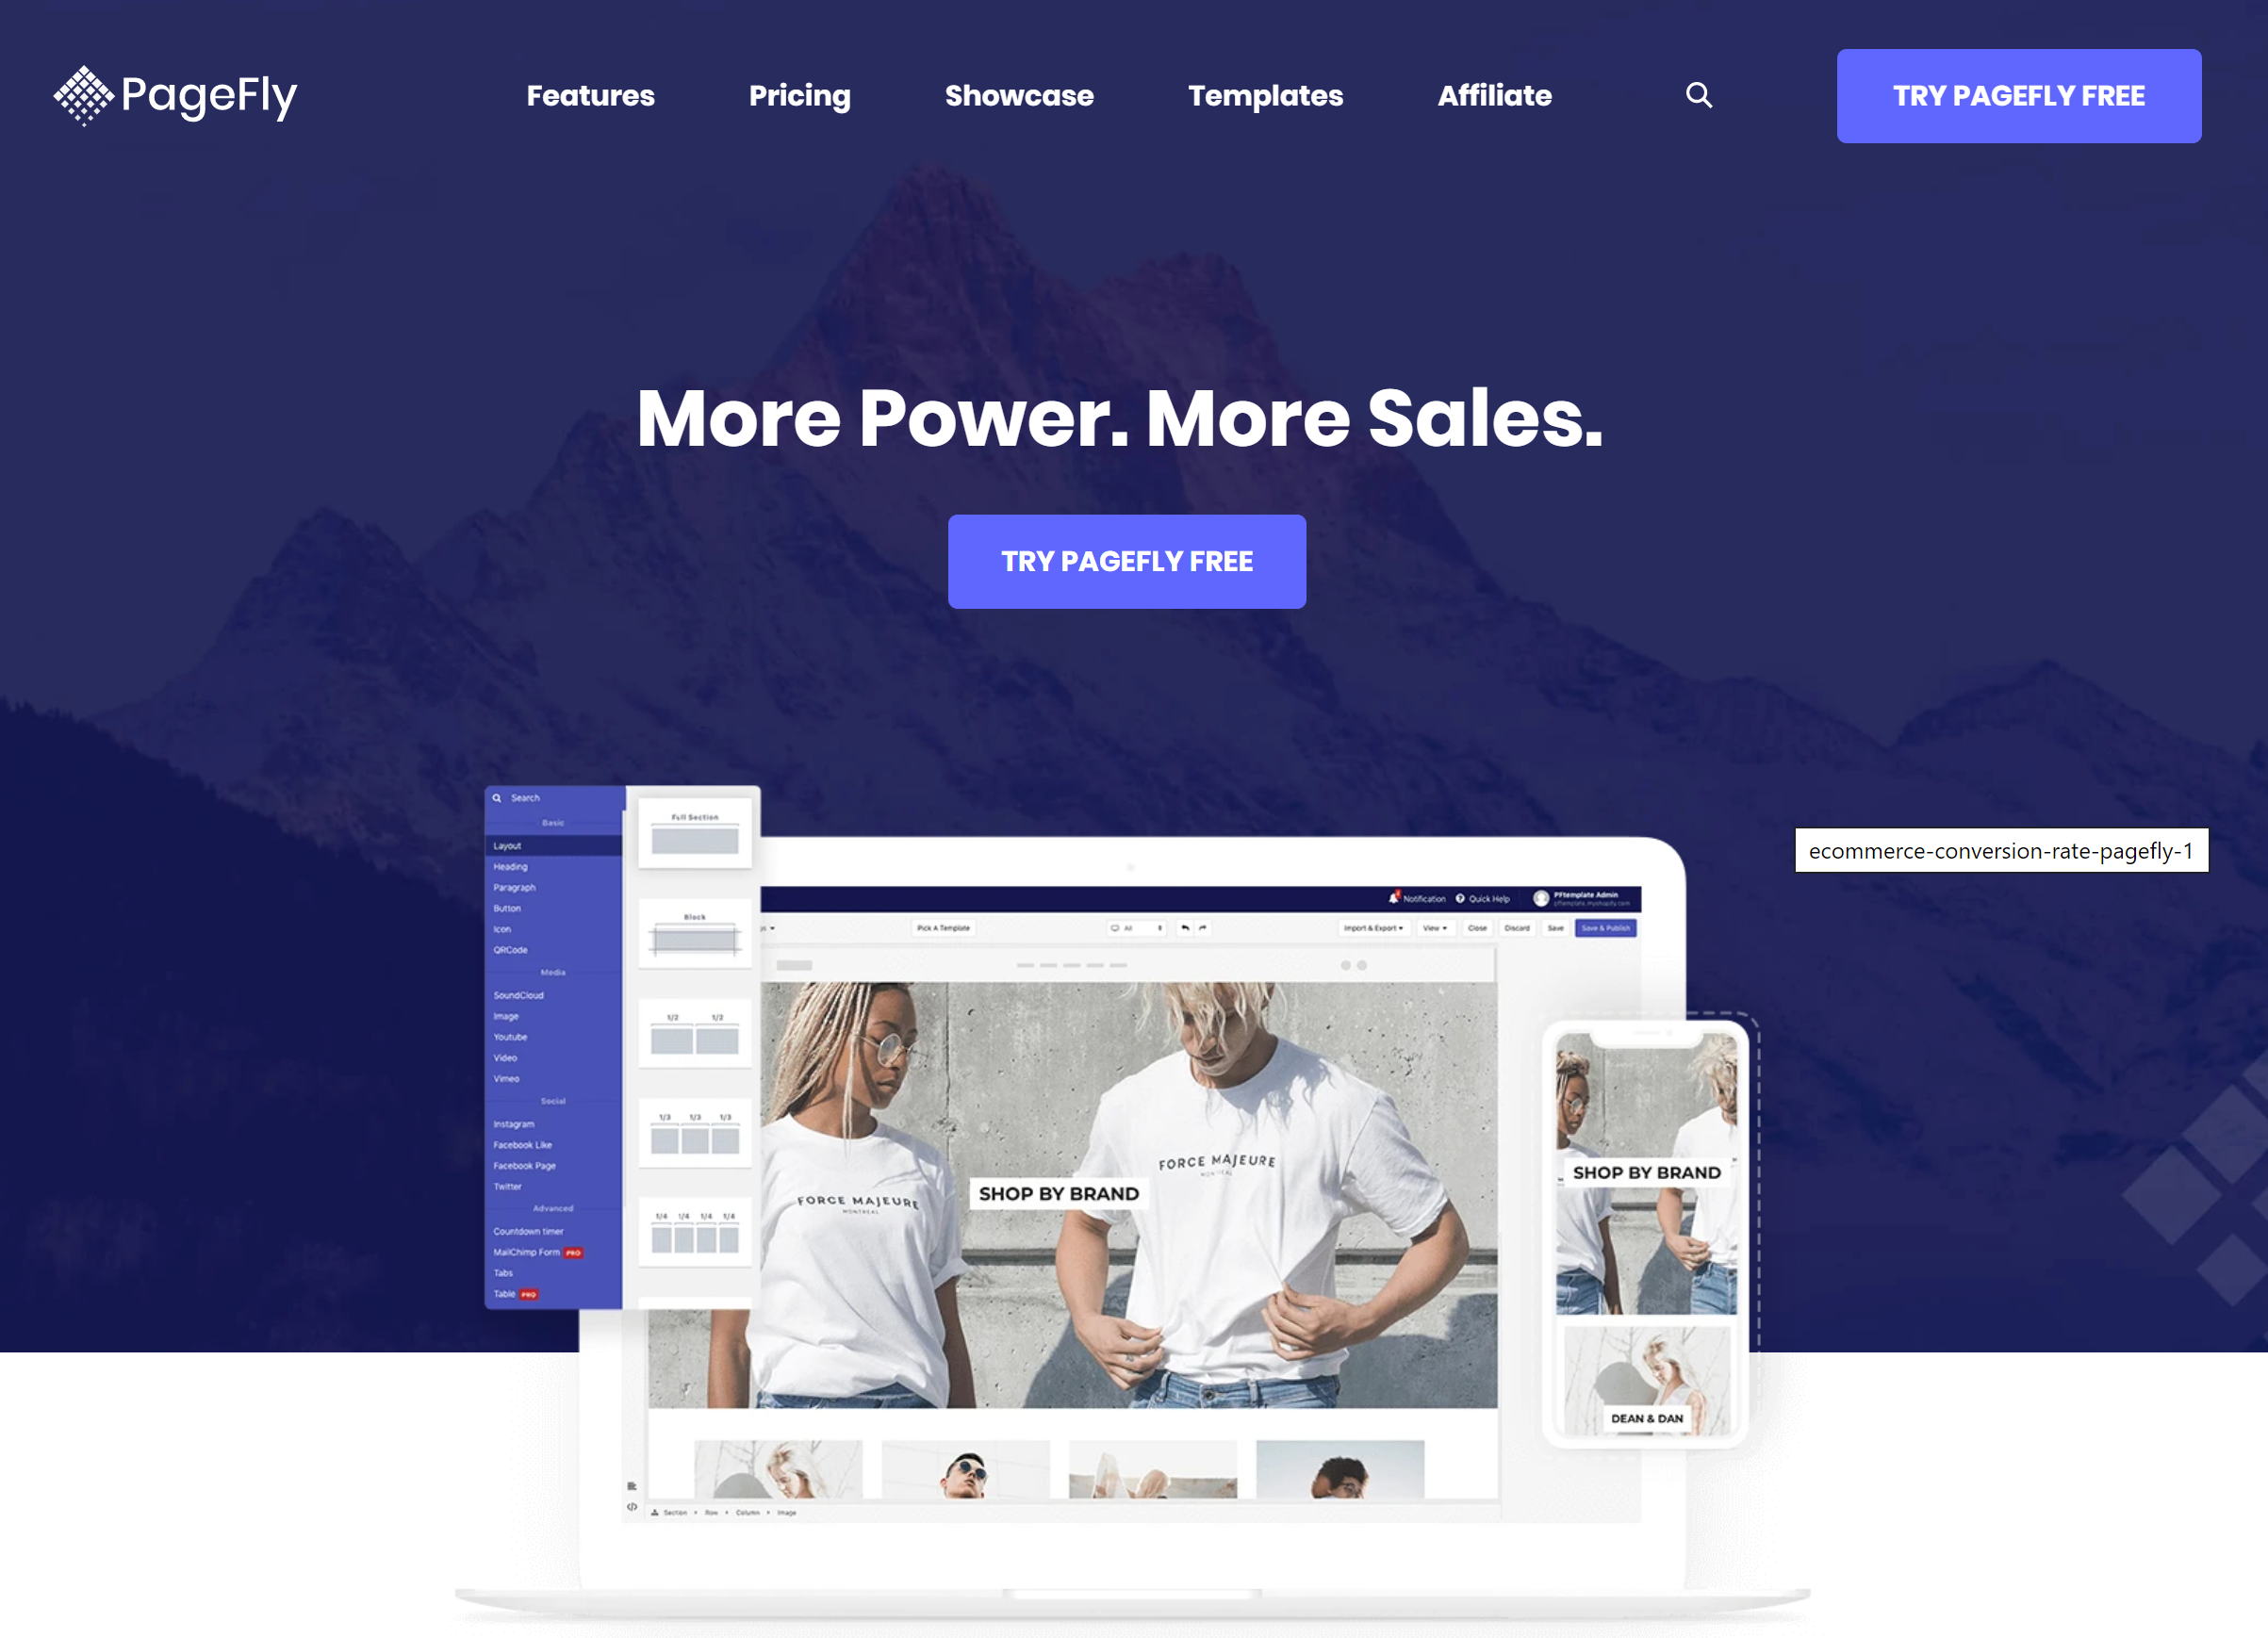
PageFly permits you to use a drag-and-drop landing page builder to generate and customize elements of your landing page on any device.
After getting it installed, you will have around 30 design elements to customize your landing page and personalize other Shopify pages such as your home page and the thank you page, if you want.
PageFly will take care of CSS and JavaScript stuff if you do not want to get in trouble with programming technicalities, so if you are a customization junkie, PageFly must be for you.
Zipify Pages
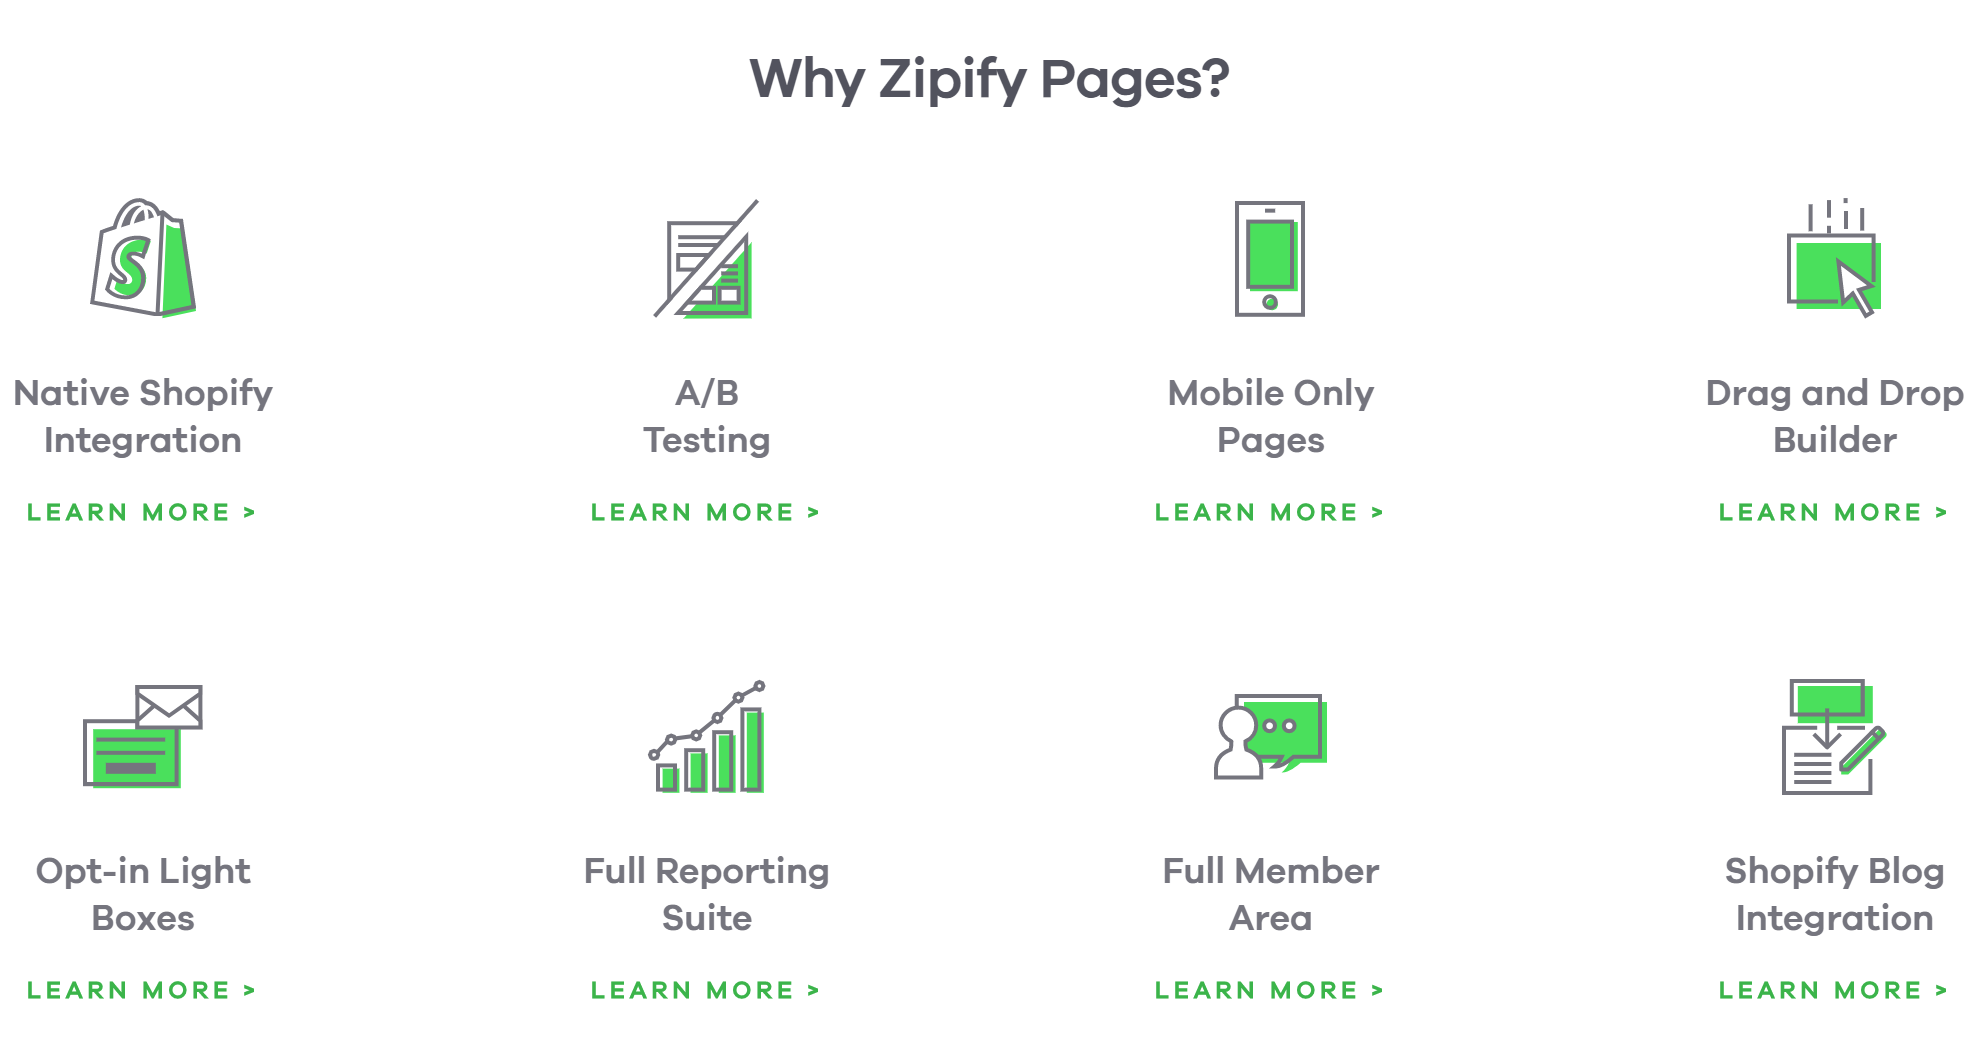
Maybe this is not the most affordable one of the Shopify landing page builders but it comes with a lot of features.
Some of the best Zipify features you are offered include its perfect integration with the Shopify platform, Facebook pixel, and Zipify’s custom Google Analytics dash. That is to say, fr any sources, you are allowed to quickly link your leads to sales messengers, email clicks included, and check how many are landing and converting in order that you can plan upfront the future for further boost conversions.
Besides, feel free to integrate it with one of the 7 most powerful CRM and market automation software including MailChimp, Ontraport, Klaviyo, ActiveCampaign, GetResponse, Infusionsoft, and Aweber. There is no need for any subdomains or plugins to set up your landing page. Do you want to see how it works? It offers a 14-day trial so why don’t you go get it now?
HIGHLIGHT FEATURES
- A suitable environment provided, guaranteed by experts.
- Comes with quality teste pages
- Better managing, displaying and tracking with native Shopify connection
- Easy to customize
- Provide an unlimited number of pages with the highest quality
Hypervisual
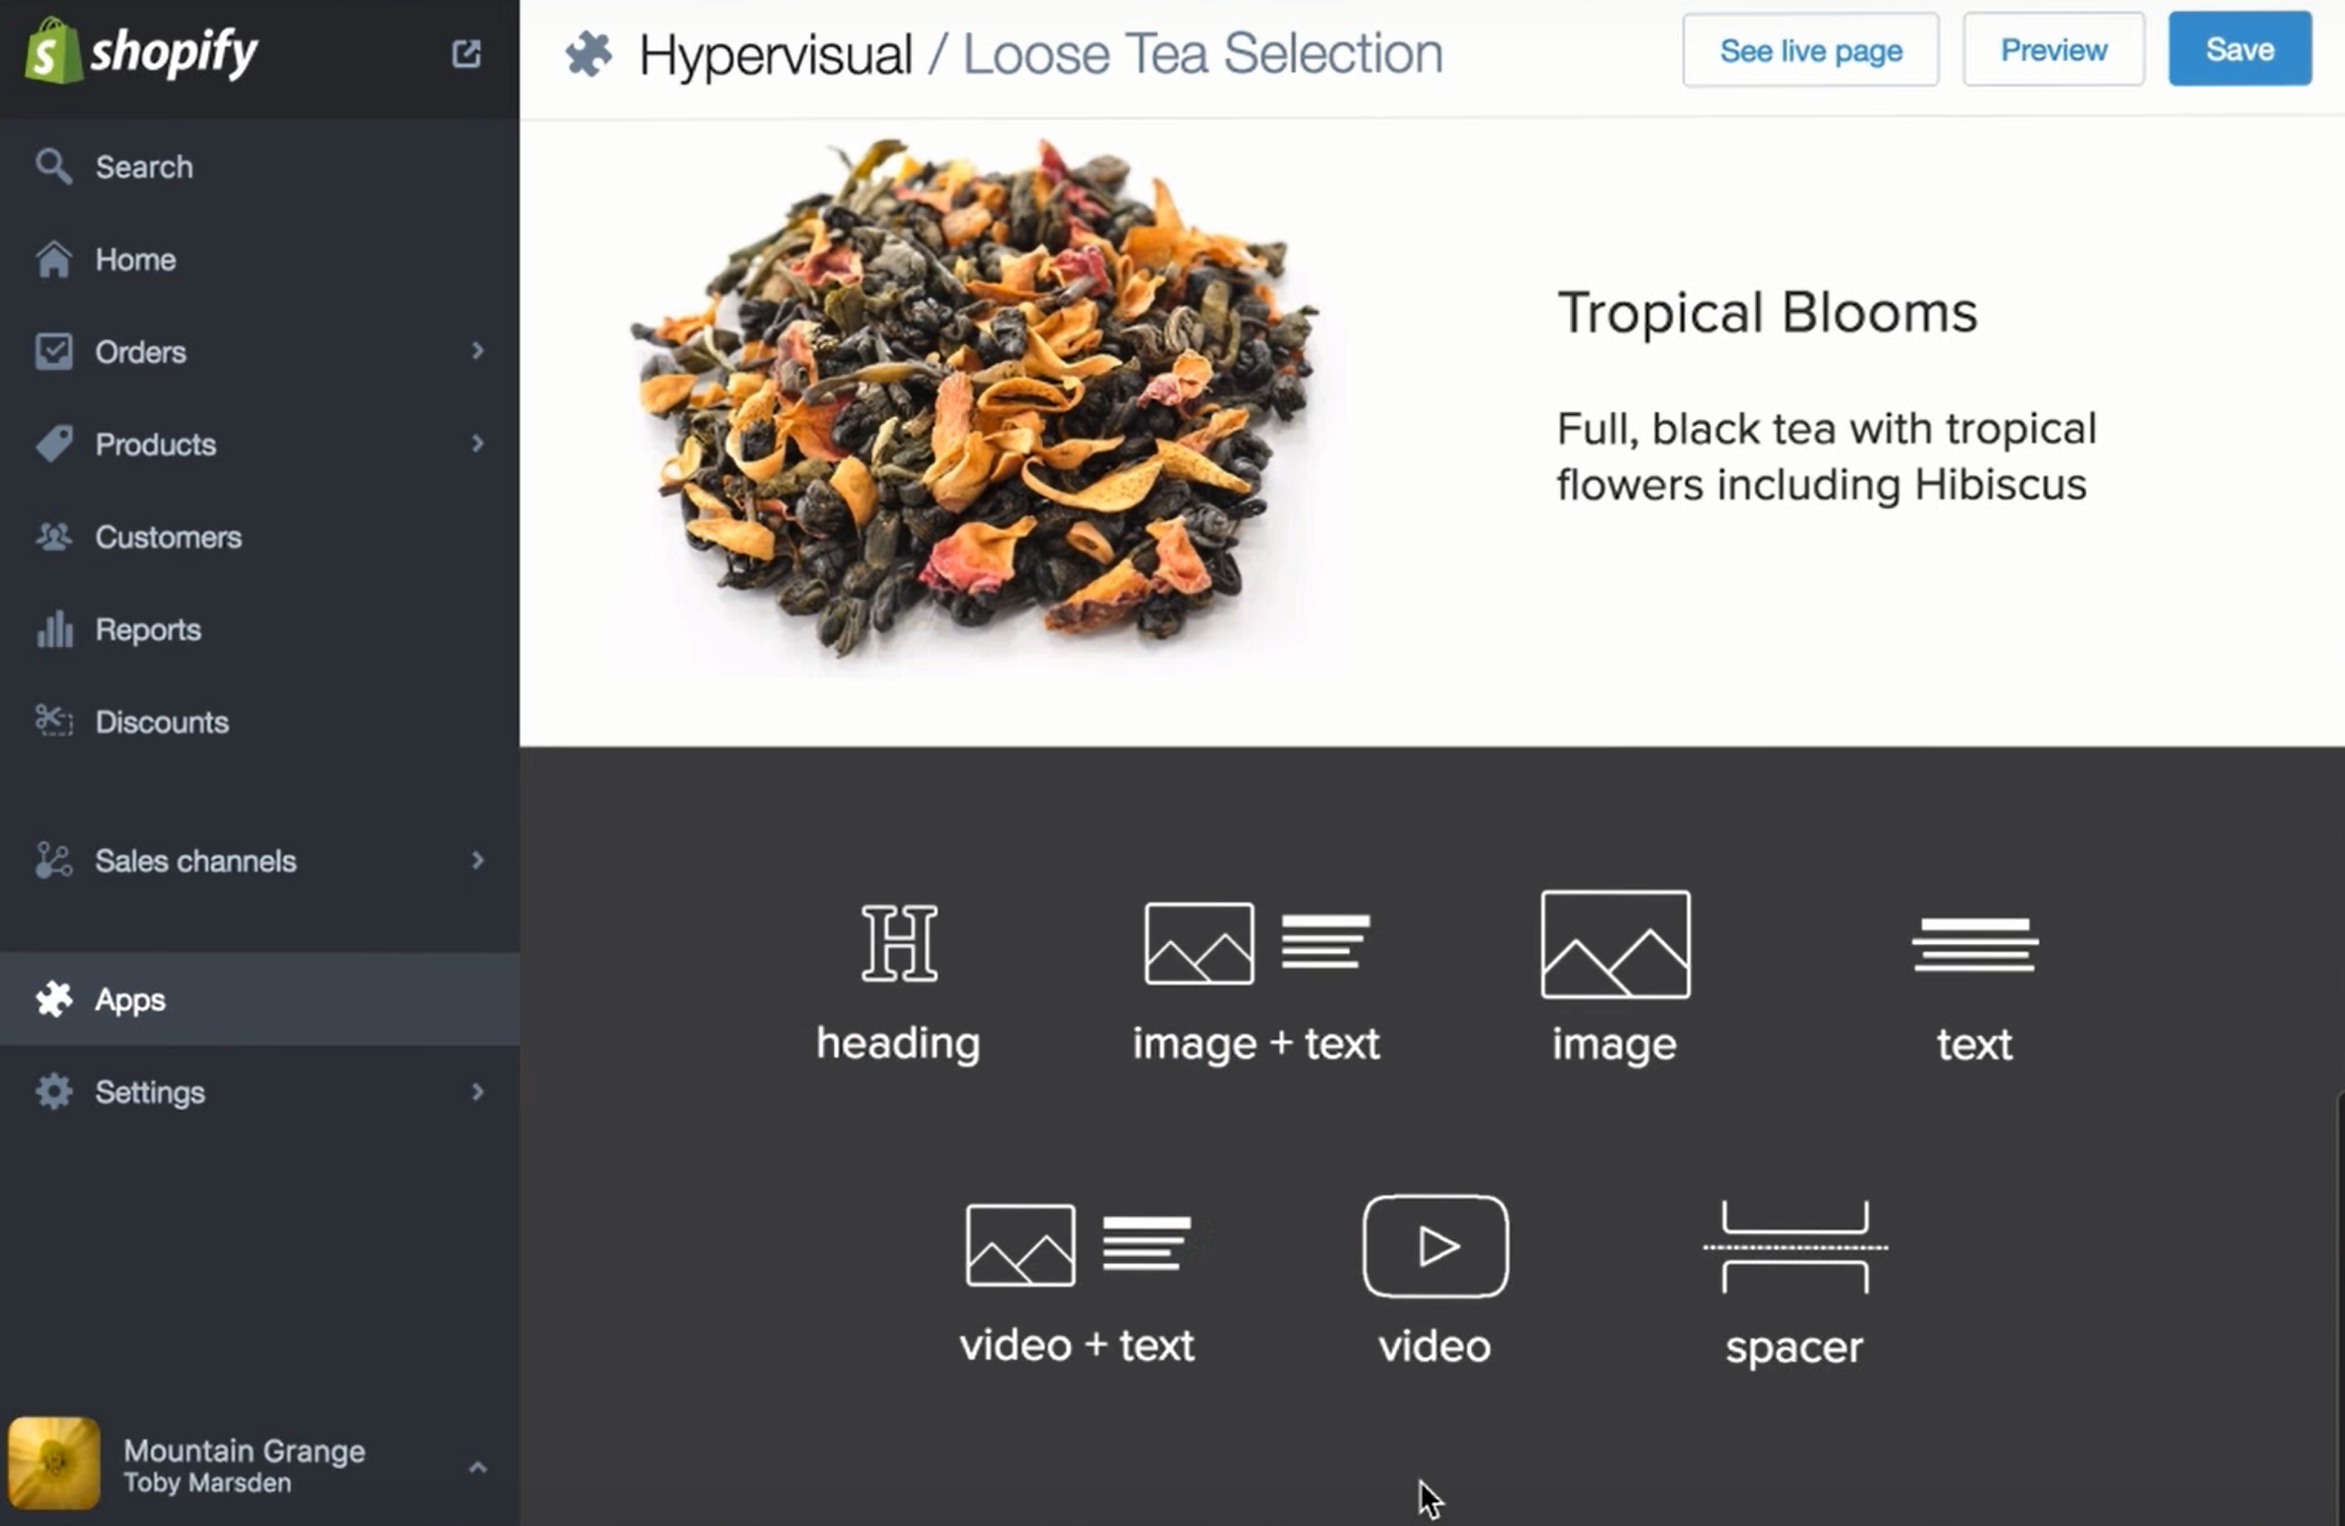
As the name indicates itself, Hypervisual helps you create stunning pages that can make your landing page stand out. For example, you can add many design elements for every page or product on your web.
To reduce distractions for your visitors, you can delete your Shopify theme’s header and footer to have full screen landing pages. Another perk of Hypervisual is it can help you add Shopify leads to your email list. Specifically, it integrates with MailChimp & Klaviyo.
Similar to all other landing page builders, this one does offer a responsive design on all devices, Google Analytics and Facebook pixel integrations, and SEO optimization for SERPs visibility.
If you are in hesitation, try their 14-day trial. When it expires, there are 3 Hypervisual pricing options for you to choose from so it’s up to you!
HIGHLIGHT FEATURES
- Customize the landing page without coding
- Add to cart forms, videos, and images
- Track the customers using the built-in email opt-in forms
- Enable writing scannable, snappy snippets of text and subheadings
- Collect email addresses and sign up to MailChimp
Shogun Landing Page Builder
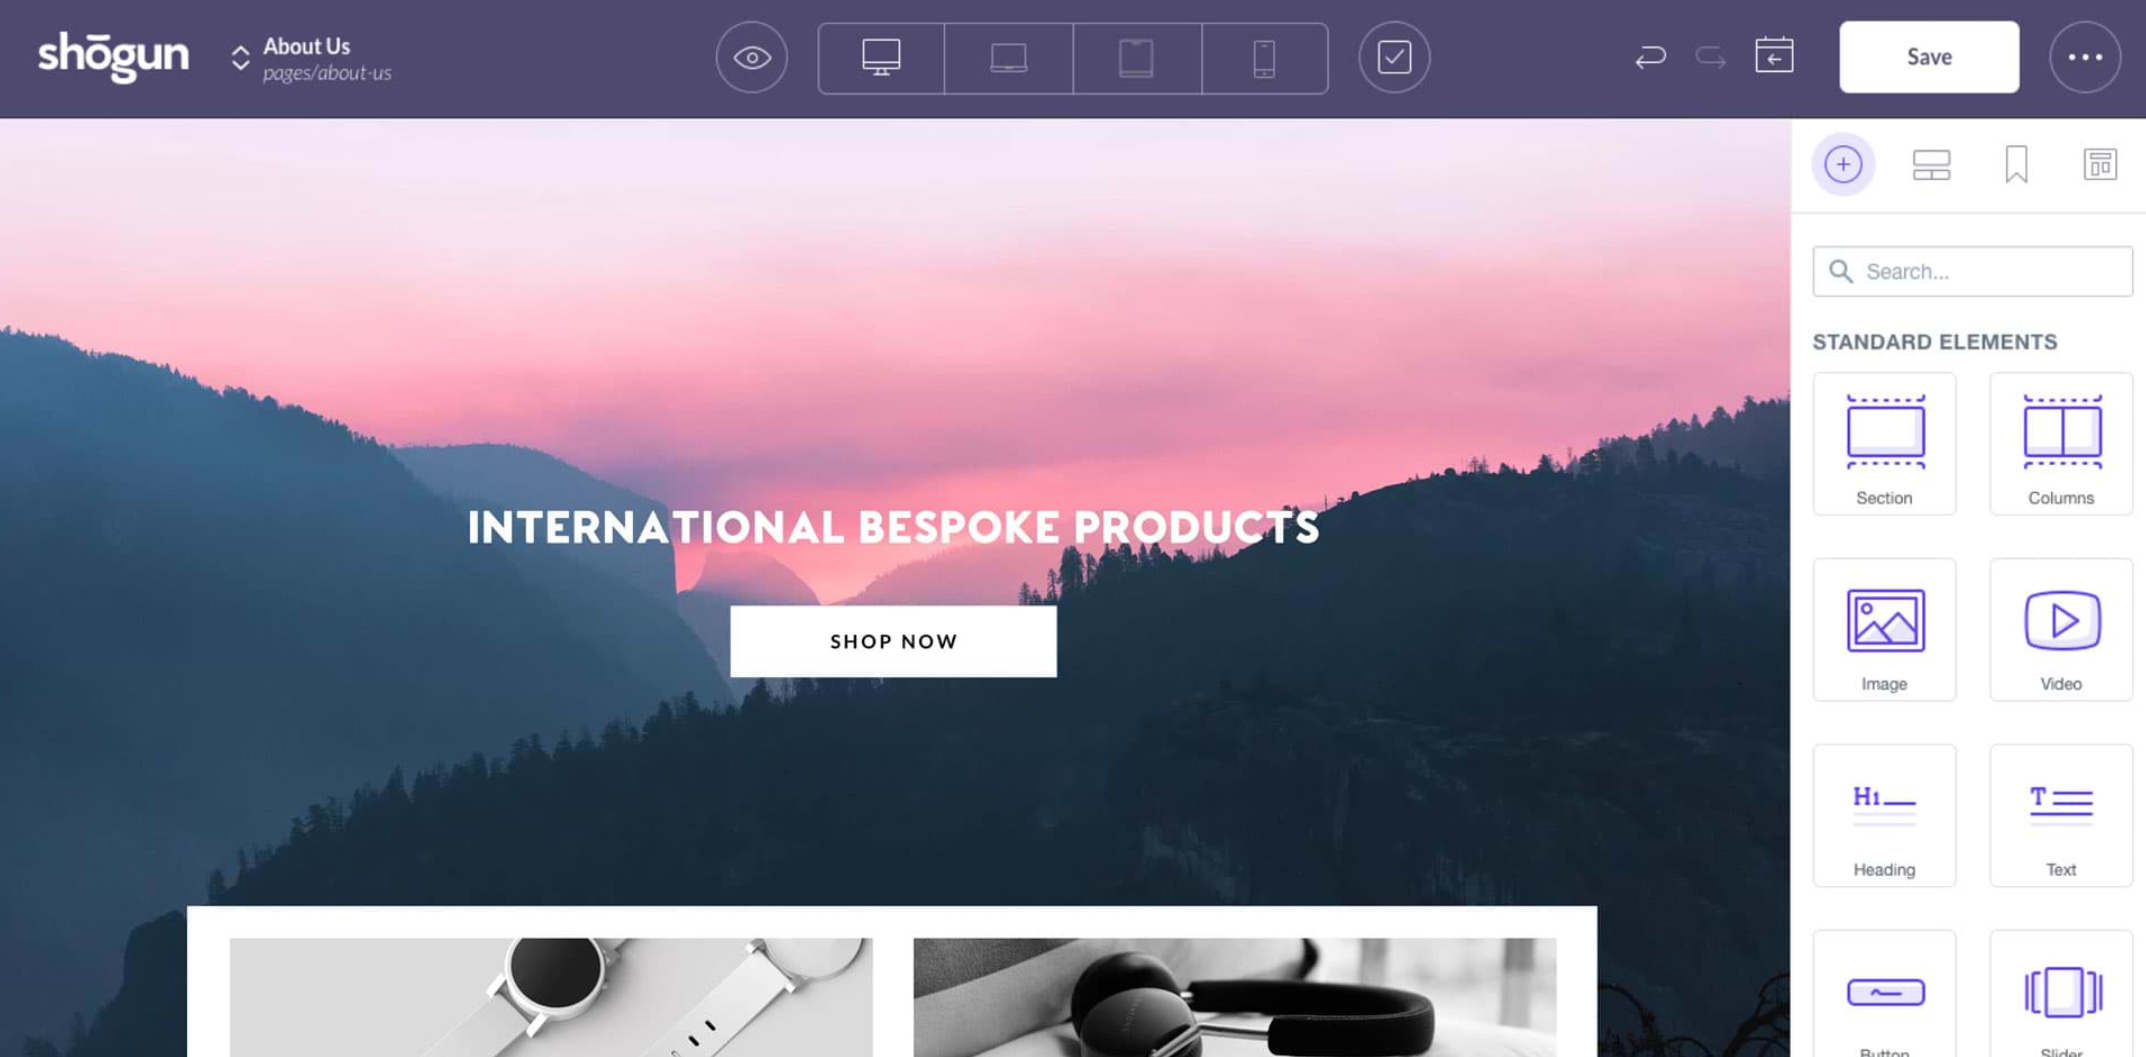
Shogun is an easy-to-use & drag and drop landing page builder. It allows you to design FAQ, coming soon, donation pages as well as contact us forms with many eye-catching templates just in minutes. Kindly note that the builder does work with any Shopify theme and you are also able to import existing pages to modify them in the Shogun editor.
Another plus is that you are allowed to use the theme editor to add custom fields and to customize thank you, terms & conditions, and also collections pages, as well as click funnels.
About search engine optimization, no worries, we guarantee that Shogun is mobile responsive and it will permit you to edit meta titles and descriptions to match your keyword strategy. Also, it does come with an image compressor too so that you can boost your landing page speed. On top of that, you can resize images to offer perfect fits that could capture people’s attention.
Another plus for the Shogun builder is its conversion optimization tools.
HIGHLIGHT FEATURES
- Personalized recommendations
- Free shipping bars
- Frequently bought together
- Countdown timer
- Add to cart button
- Size charts and product image slides
- Product video catalog
- Easy to build the page with built-in drag and drop tools
- more than 30 themes to have a professional and beautiful look
- Integrate with Google Analytics, Adobe Typekit, etc.
20 Elements are packed with it, including the Section elements (you can employ it to structure a landing page with vertical segments in the format you want). This builder does support integrations with most social media platforms and comes with a free trial of 10 days.
Do you want to schedule when new landing pages go public? You are allowed.
LeadSlide
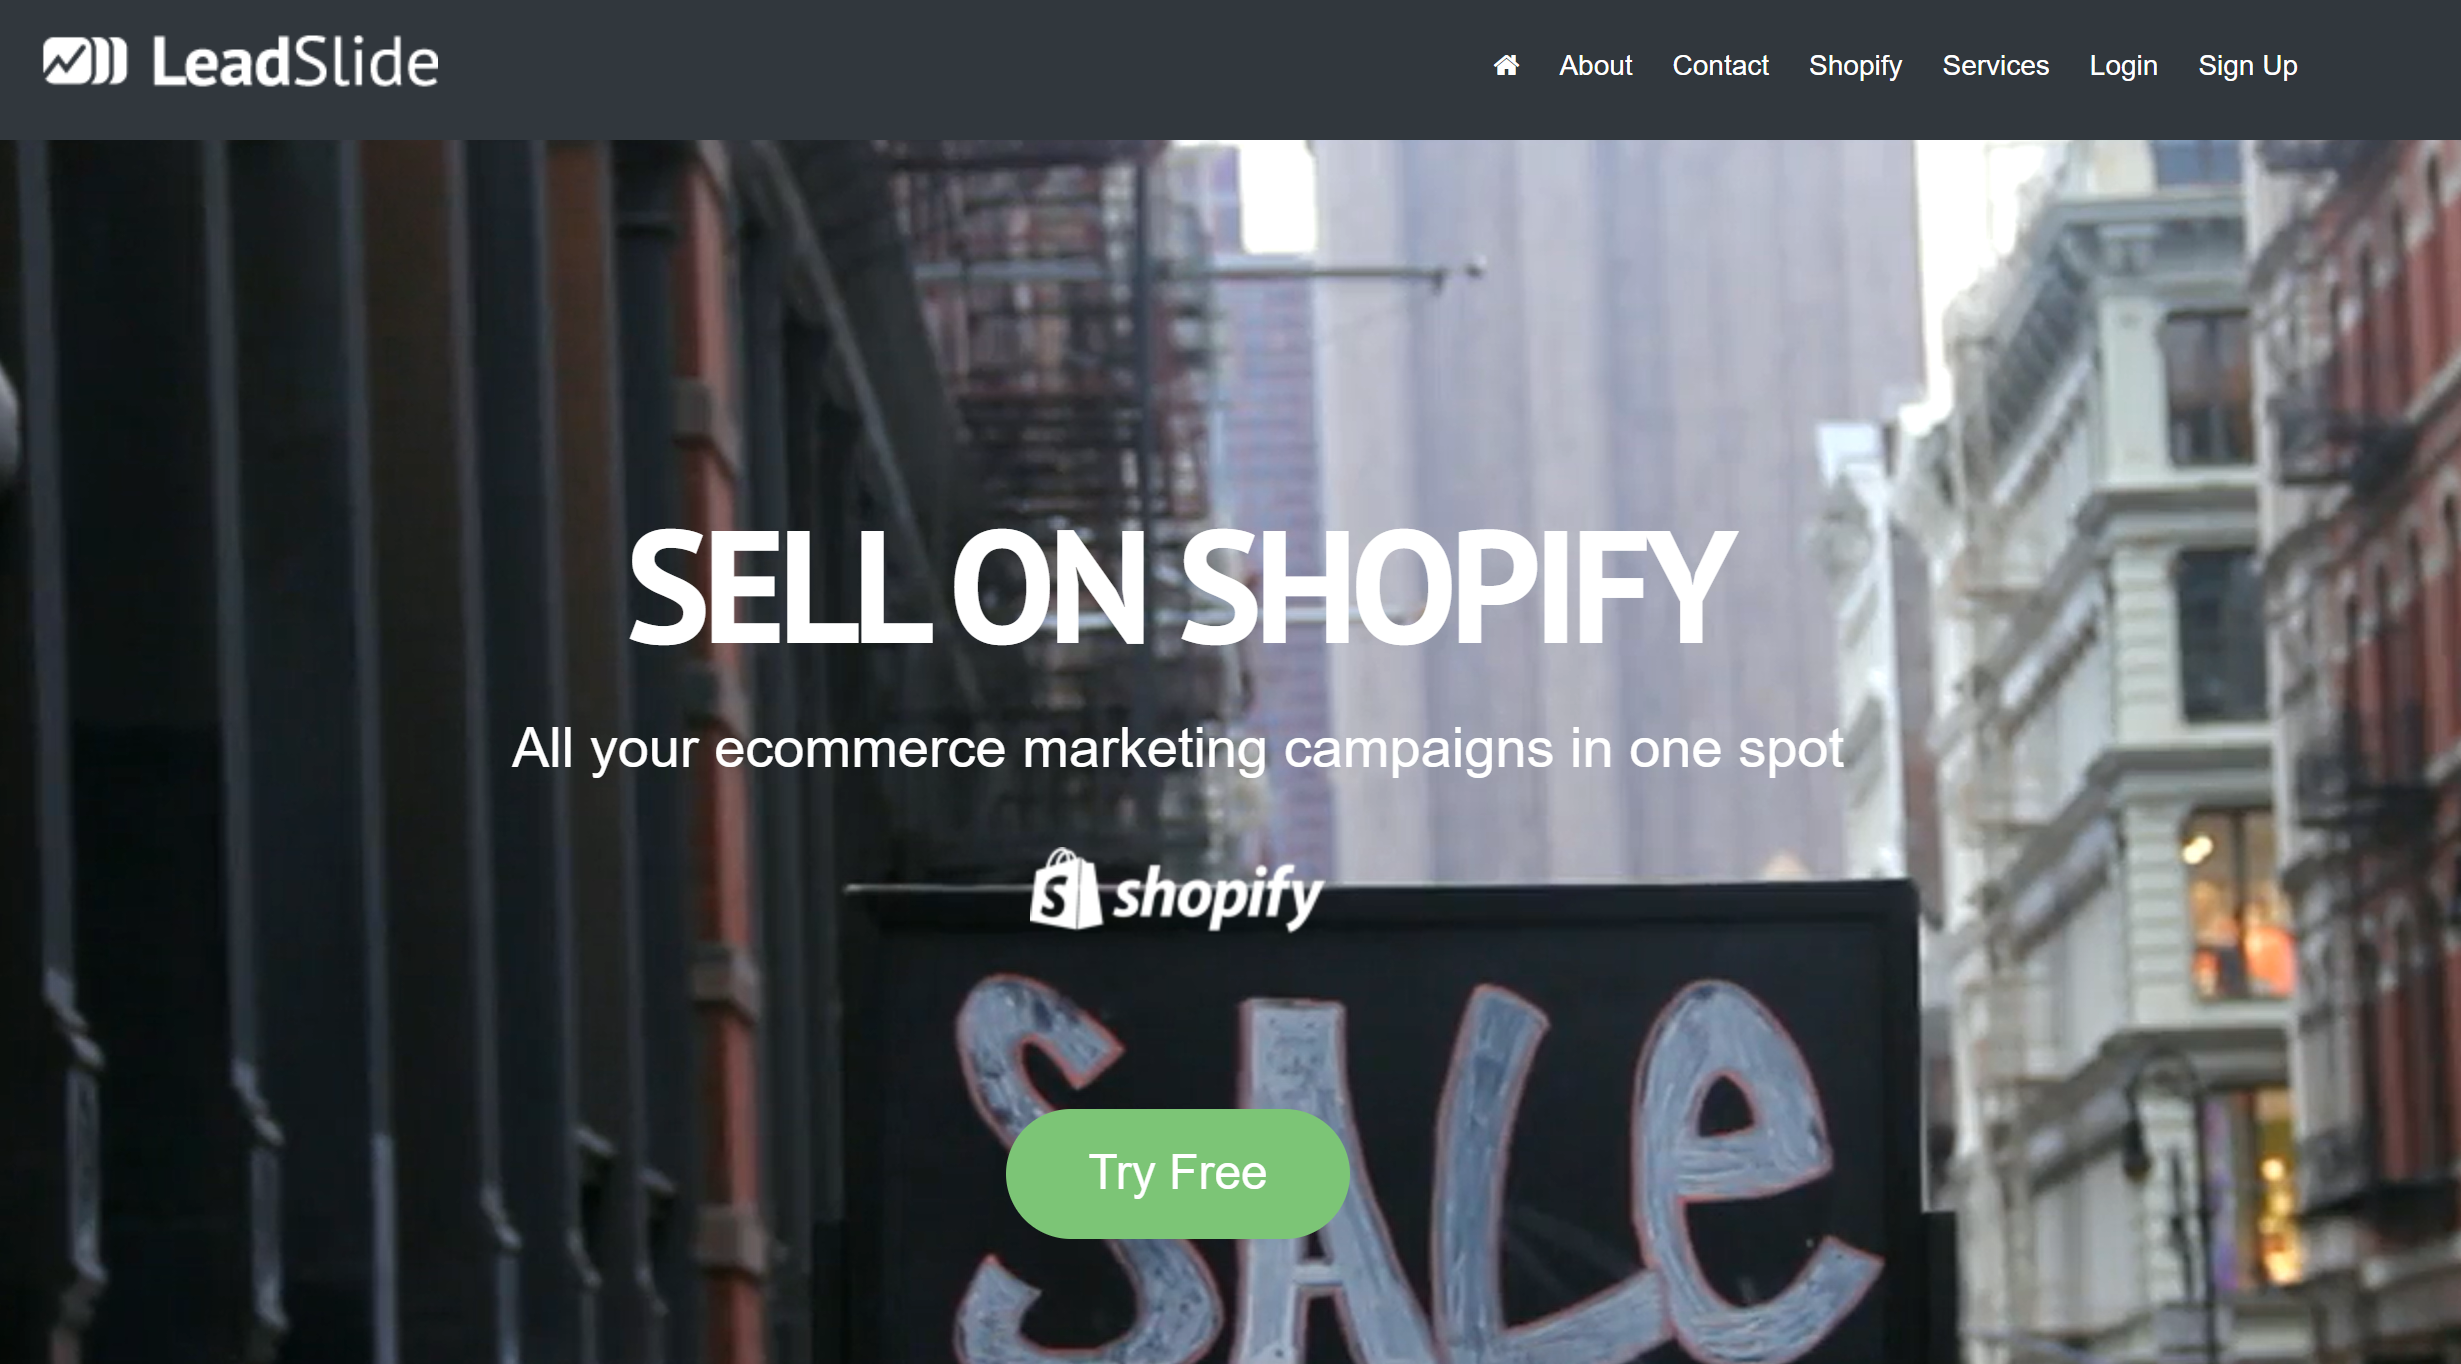
LeadSlide is built to help you with your marketing automation campaign with the lowest support package of up to 10,000 emails.
Similar to Zipify, you are offered some features like fully customizable product landing pages, integrations with Klaviyo and MailChimp, Giveaways and discounts functions, and a fully editable countdown timer to boost conversions.
In case you are in need of tracking important analytics such as abandoned cart rates, repeat customers and run special promotions landing pages, LeadSlide is always here to help you.
LeadSlide also has integrations with Facebook, Instagram, Twitter, Pinterest, Google Analytics WordPress, and LinkedIn. The app provides you with 30 days to try out their app before deciding whether to buy their full version or not. On top of email support, they also include phone support in case you need help.
2. Use Liquid to Create a Custom Landing Page
Right below that we will demonstrate how to customize existing themes and build a landing page template that your clients could be attracted to. More specifically, you are going through the guide to checking if your landing pages are flexible with Liquid tags and section settings and giving your clients as many options as possible when running campaigns.
Step 1: Generating a custom page template
To create a landing page, the first step is to create a unique Liquid template file for each specific campaign of yours. You can create a landing page Liquid file that clients can assign to a page simply with an alternative template, and customize from the editing board.
To achieve this, you have 2 options. If using Slate, you can manually generate a new file and copy & paste the existing page.liquid code into this file, then save it in the templates folder. If using the admin template editor, you can add a new template, and the editor will automatically pull in the default template code.
Here, new additional elements will be included below the Liquid object {{ page.content }} so that they will appear below the content we have inserted on this page.
Step 2: Adding content
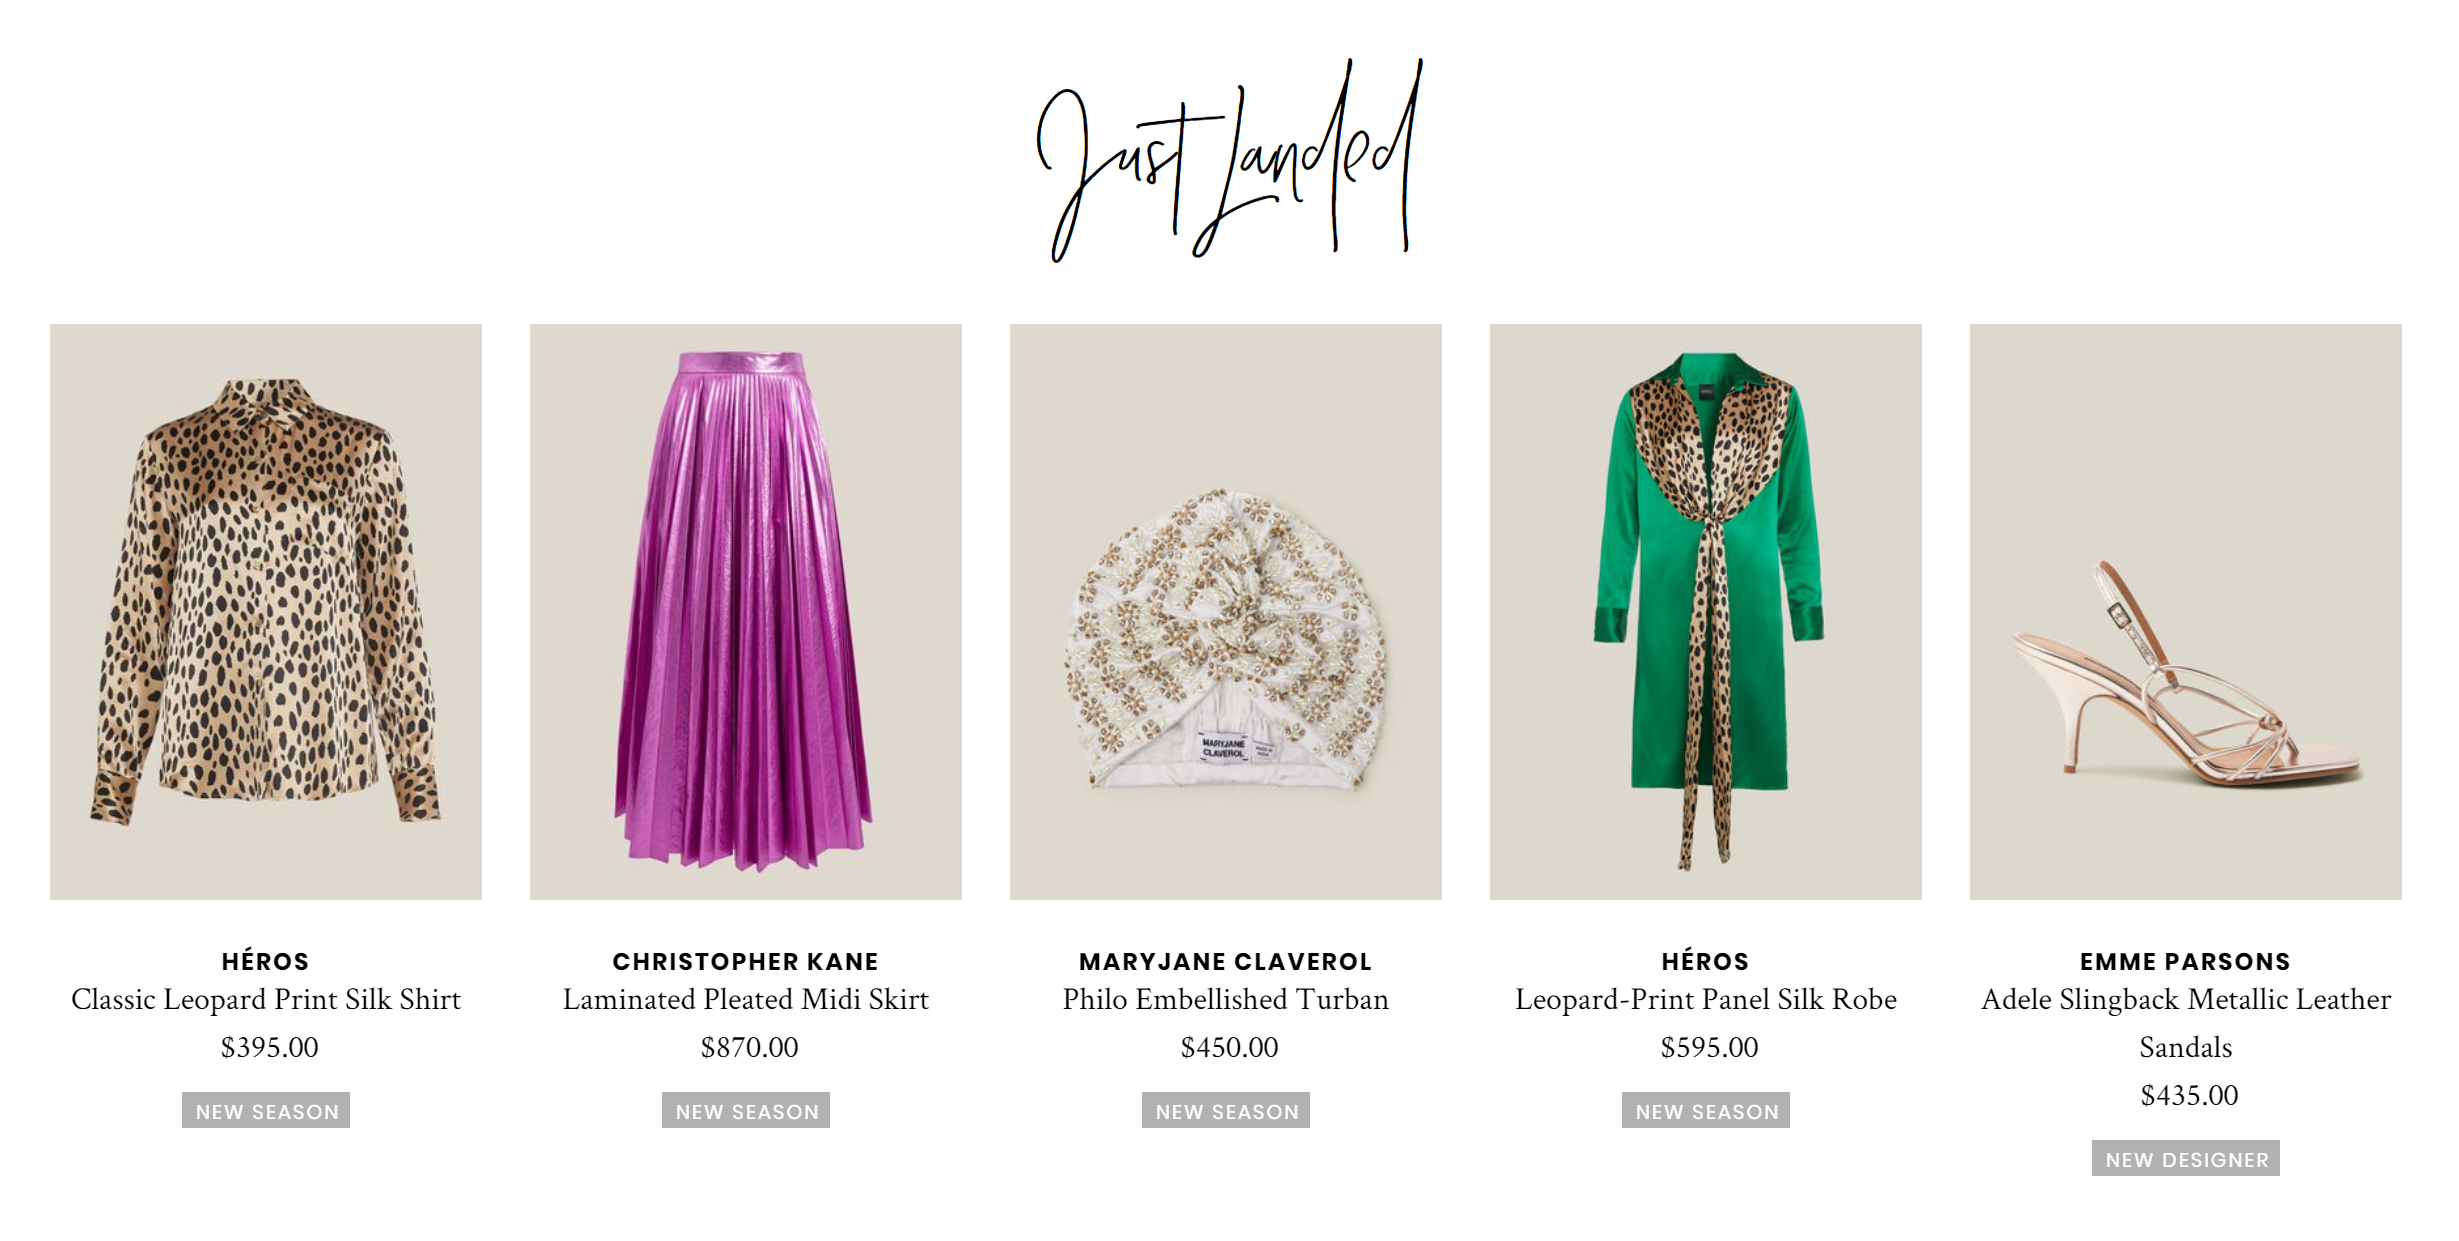
The next step is to find out the kind of content you want to display on your landing pages. It could be about a specific product or a new collection you have just launched, or a blog post you want to direct visitors towards.
In this example, we are focusing on a specific collection, so I will be adding a featured collection section to this page. Most themes will have an existing featured collection section, usually accessed through the theme editor.
These existing sections are dynamic sections and they can be added to the home page. However, you can also add them to other pages as static sections. The same with snippets, you can use the section Liquid tag to include a section in a template file.
Your theme may have an existing dynamic section for showcasing a featured collection. Once you have found this Liquid file in the sections folder, please copy/paste this code into a new section and give it a suitable name, such as summer-collection.liquid.
By removing the presets from the section settings, you can make this a static section.
"presets": [
      {
        "name": {
          "en": "Featured collection",
          "de": "Featured Kategorie",
          "fr": "Collection vedette"
        },
        "category": {
          "en": "Collection",
          "de": "Kategorie",
          "fr": "Collection"
        }
      }
    ]
Add this to the custom page template we created, using the Liquid tag {% section 'summer-collection' %}.
Step 3: Displaying newsletter/ sign up forms on the landing page
A newsletter sign-up form is considered one of the main components of a landing page because to collect leads, online business runners often drive the audience’s attention to the page.
Once finding out the theme’s existing newsletter section, you can follow the same process of turning a dynamic section into a static section above. Specifically, you have to create a new section that contains the code of the newsletter section. Then, delete the presets in order that a static section can be included manually in your custom page template.
Also, you give your client the choice of showing the newsletter form by adding hide or display buttons. Use Liquid’s control flow tags with section settings and then you will have your expected result. The rule you create may look like this:
{% if section.settings.show_newsletter == true %}
  code for newsletter
{% endif %}
Next, you can make a checkbox in the section settings that correspond with the show_newsletter attribute.
"type": "checkbox",
"id": "show_newsletter",
"label": "Show newsletter sign up",
"default": true
Step 4: Adding the call to action button
You might have heard about the Call To Action button. Yes, that’s it, it is one of the most common features of a landing page that gives you the permission to drive the engagement of visitors to one or some specific products, or to carry out a particular activity, like generating an account or accessing content.
Most themes may not have a designated section for a call to action, but you are able to create your own custom section. Even when there is no natively supported call to action section within your current theme, you still have to ensure they are styled consistently by using the default class names for buttons when you create them.
In here, we are using the class of btn–secondary when generating the section. Depending on the theme, the classes or IDs you would use could be different.
Within the section, right above the call to action button, we have added a header which any merchant could add text to. You can assign the copy for the button itself, and where the button links to in the section settings from the theme editor. The call to action section would look like this:
{% if section.settings.show_call_to_action == true %}
<div class="cta-section">
  <h3> {{ section.settings.text-box }} </h3>
  <button type="button">
    <a href="{{ section.settings.link }}" class="btn--secondary">{{ section.settings.linktext }}</a>
  </button>
</div>
{% endif %}

{% schema %}
{
  "name": "Call to action",
  "settings": [
    {
      "type": "checkbox",
      "id": "show_call_to_action",
      "label": "Show call to action button",
      "default": false
    },
    {
      "id": "text-box",
      "type": "text",
      "label": "Heading"
    },
    {
      "id": "link",
      "type": "url",
      "label": "Button link"
    },
    {
      "id": "linktext",
      "type": "text",
      "label": "Button text",
      "default": "Click here"
    }
  ]
}
{% endschema %}

{% stylesheet %}
{% endstylesheet %}

{% javascript %}
{% endjavascript %}
You can decide to hide or display this section to suit your needs. In this section, we have also added a text field above the button to make it more useful in case your call to action requires any additional instructions.
Step 5: Including them all on the custom page template
Some static sections have been done, but we have not finished yet! Now let’s move to Step 5: Bring it all on a custom page template.
As mentioned previously, tags are used to add these sections to our template, eg: {% section 'fall-featured-collection' %}.
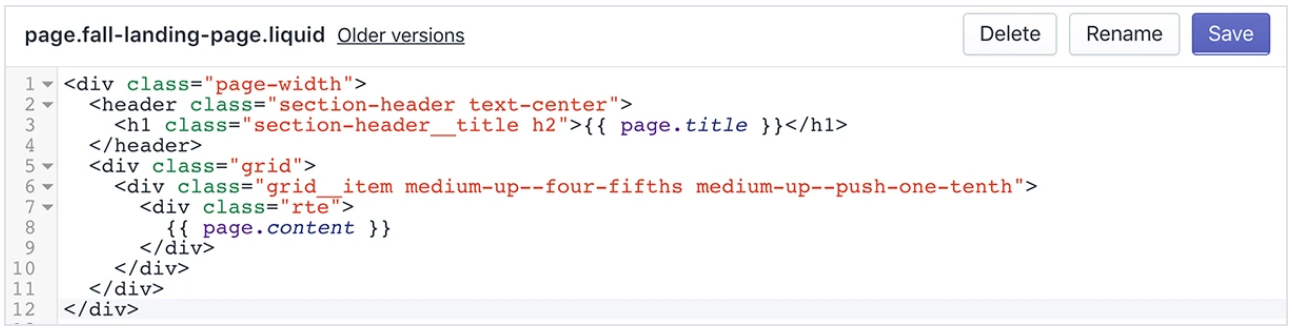
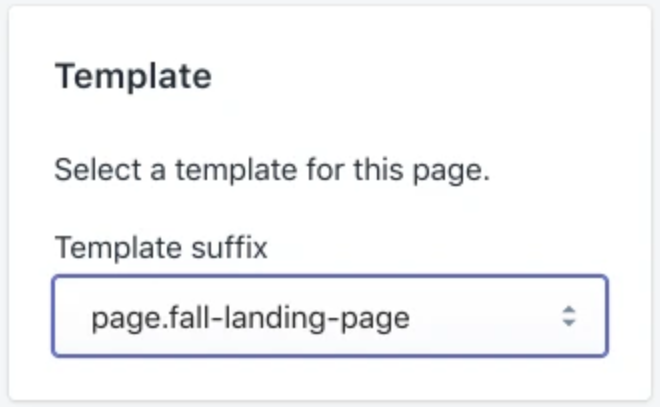
Once the section tags for the 3 sections we created are added, the page.fall-landing-page.liquid template will look like this:
<div class="page-width">
  <header class="section-header text-center">
    <h1 class="section-header__title h2">{{ page.title }}</h1>
  </header>
  <div class="grid">
    <div class="grid__item medium-up--four-fifths medium-up--push-one-tenth">
      <div class="rte">
        {{ page.content }}
        {% section 'fall-featured-collection' %}
        {% section 'landing-page-newsletter' %}
        {% section 'fall-call-to-action'%}
      </div>
    </div>
  </div>
</div>
Now try creating your landing page, you can select the template you need from the admin:
3. Create a landing page using Collections
This should be considered the easiest way to create a landing page. Why? Because it takes just a little time with a few steps. Now go visit your Collection page!
You may wonder what Shopify Collections are. Now imagine that you can group things like women’s jewelry and women’s clothes together. They can go well together and they should go well together! Hence they should make up collections so that your target customers (women, for instance) can find all these items on a single page. This is a conversion optimization practice. By doing so, you can help potential customers find what they want, related items so that they may purchase more and you will gain more sales.
In fact, Collections can support you upsell your customers on products related to what they initially purchase. This is a technique that Amazon successfully implements:
So how to generate a landing page using Collections?
There are 2 ways: you can do it manually or automate it.
If you have inconsistent flash sales, a specialist collection, or a few products, , a manual collection is ideal . You have to choose the items to add to a collection individually. For that reason, it would be so tiring if you have multiple products and a constantly changing inventory to update. What about the other method?
With Shopify’s automated collections, you have to set a condition or a set of conditions an item must require to be automatically added to a collection. Up to 60 items will be added once you select the conditions.
4 STEPS TO CREATE A SHOPIFY COLLECTION
- Step 1: On Menu, click on Products
- Step 2: Select Collections
- Step 3: Choose between adding products automatically or manually
- Step 4: Fill in your page’s title and URL. Then match it to your ad copy for SEO, boosting instant recognition, and boosting conversion
PRO TIPS
If you want to target popups, web notifications, widgets, and dynamic text to a specific campaign, make a note of tracking parameters that you use for paid ad campaigns. It is good for you that all products in the Shopify product collection you create will display together. However, using collections can restrict how much you can customize your Shopify landing page design and the elements you can use.
4. Create a landing page using third party websites and tools
Using the Buy Button feature of Shopify can help you embed a buy link, shopping cart or collections or a product right into a third-party website you are using. You are allowed to employ any tool and to generate any landing page while seamlessly managing your inventory and purchasing funnel through Shopify.
Knowing that an e-commerce store builder does offer instructions on how to set this up on WordPress, Squarespace, Tumblr, and Wix but you can still employ a third-party landing page builder which integrates with Shopify like Leadpages or Unbounce.
What makes a High Converting Landing page?
Understand your customers’ needs
The first step to creating a powerful landing page is to design it in a way that can arouse your potential customers’ motivations and desires.
That is to say, you have to build a user-centered design for your online store, which means you have to think like a customer, look for information on their age, language, income, motivation, goals, and know their problems. Be in their shoes so that all content and services will be tailored to be in line with what customers wish to see and do!
The best way is to talk to customers and know their pain points and the steps they take to solve a problem. For instance, you want to design a new product? Then you need to know keywords they will search, what features they are looking for in this product. Try comparing your product with the similar, and wonder what factors will lead your customers to purchase.
Focus on headlines and content
HEADLINES
Viewers always look at the headline first when they come to a landing page. The headline is often about the product or a product feature, like pink shoulder bag or durable leather goods. These kinds of feature-oriented headlines don’t tell your users what is important and different from the other products.
Let’s take an example, Storage For 1GB of MP3s in comparison with 1,000 Songs in Your Pocket, which one is more attractive? Which one has more potential to grab people’s attention? The 2nd one, yes! Because it can tell you how better your life will be after purchasing the product. Once they start imagining their happier future selves, wallets start opening.
According to Marketo, nearly 96% of visitors who arrive at an e-Commerce landing page aren’t ready to buy. That’s why it’s important to have an attention-capturing headline to pique the visitor’s interest. By focusing on the value to your target audience, prospects are much more likely to convert than when the talk is all about your company and products.
CONTENT
The common opinion is that a landing page could be more than a product listing or detail page, and content is one of the key elements in a landing page.
It should be created to solve the problems & questions about:
- Goal: Does this site have what I am looking for?
- Information: Is there enough information?
- Trust: Can I trust this site?
- Duration: How long will this take?
To use the exact words with regard to your target audience’s needs and goals which are being searched, looked for and talked about is one of the best ways to craft effective content. By doing so, your landing page is going to communicate with your customers in a very good way and serves the feeling like This is what I need to them.
REMOVE NAVIGATION
A landing page is made to redirect your audience’s attention to take action so to reduce distractions, remove any navigation that leads to them. How come? Because although the idea of a customer landing on your store from a landing page sounds awesome but if your goal for the landing page is to collect your customers’ data like email addresses then it’s an unwanted engagement. Hence you should remove links and navigation from your landing page to keep them focusing on your primary call to action.
Visually pleasing design
94% of the user’s first impression could be related to design elements. So the first impression of a landing page depends a lot on the visual design. Professional designs that wow users also give an impression of better quality. Hence you should hire a professional designer who can best communicate your brand values and products through designs.
On the other hand, you should remove annoying elements such as popups, surveys, music, and auto-playing video. Generally speaking, interruptive elements that are initiated without the users’ permission result in a negative reaction and worse user experience.
Focus on Call to action
FOCUS ON CALL TO ACTION (CTA)
As mentioned above, the purpose of a landing page is to get visitors to take action. By using a single call-to-action and getting rid of all elements that can cause distractions for the users, this laser-focused landing page will convert better.
LIMIT THE CALL TO ACTION
The fact is that adding even remove one more call to action may lead to a paradox of choice that causes analysis paralysis. For instance, you will hurt your conversations if you try to promote other items when your landing page is riving another product promotion.
Remarketing and A/B Testing
REMARKETING
Please keep in mind that you can always remarket to customers who came to your original landing page, and either send them back to the same landing page or try sending them to another one.
In some circumstances, it may sound not right to bring the user back to the same page they have previously visited, especially when the argument could be made that since it didn’t get them to buy then.
A/B TEST
If you think you’re done with your Shopify landing page after making it go public, you’re wrong! The next step should be to continue to A/B test your page to see if it works well. If you don’t, then you’re leaving your money on the table. A/B testing (or split testing) is aptly what it sounds like, an experiment that allows you to test out many versions of a landing page at the same time when you are not sure which images should be used. Also, with the A/B test, you will find out what CTA works for what audience.
Continuing to A/B test is the best way to measure results and see where & how conversion rates can be boosted. It’s also the best way to have the most successful landing page possible. Here are some of the elements you can A/B test on your landing page:
- Headline
- CTA
- Images
- Directional cues
- CTA button design and color
Read more: 11+ Incredible Tips to Optimize Landing Page & Boost sales
Final Words
Thanks to the use of static sections, it is now easy for any merchants to build customizable landing pages on Shopify. That is to say, you can focus more on the visuality of the page while being allowed to decide which products and the copy will show up on the landing page.


