Set Customer Account Preferences in 3 Easy Steps
There’s this problem that makes many store owners consider setting customer account preferences on Shopify. When a customer buys something from your store, you can choose either to ask the customer for his or her account or not. If the customers want to create an account, they will be taken to another page, this might lead to the customer dissatisfaction and they do not want to buy from your store anymore. This will lead to a decrease in sales.
Related Posts:
- How to View and Resend SMS Notifications for an Order on Shopify
- How to Change the Sort Order of File List on Shopify
- How to Select a New Checkout Language on Shopify
- How to Disable the Order Canceled Notification on Shopify?
- How to Edit Checkout Form Options on Shopify?
The writing below will provide you with the detailed tutorial on the topic how to set your customer account preferences on Shopify. I hope you will take the time to read my guideline carefully.
Step 1: Go to Settings > Checkout
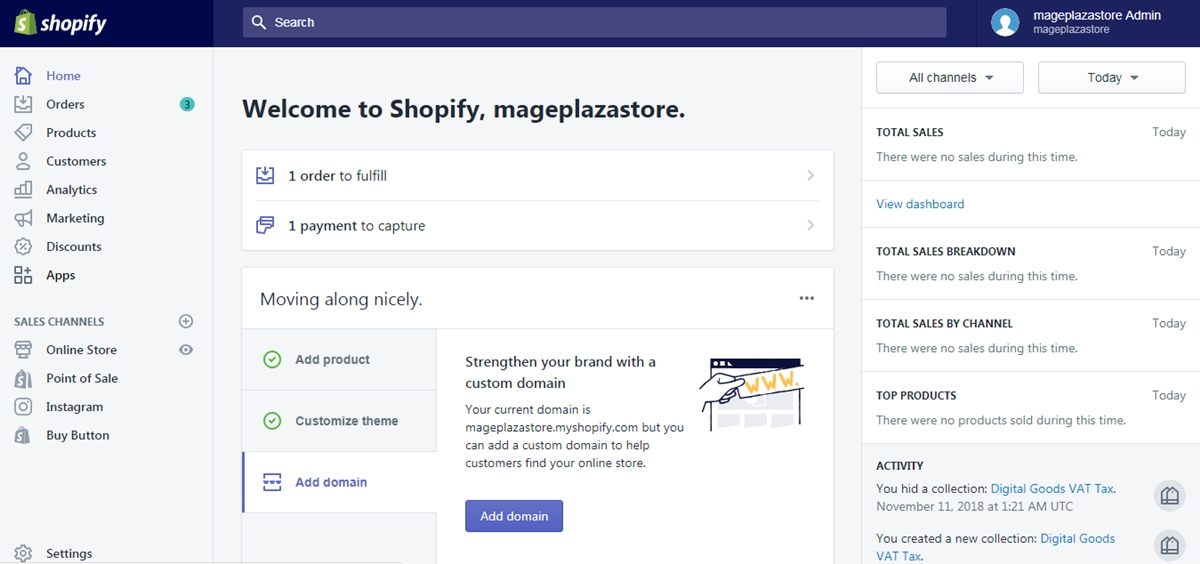
From the homepage of Shopify, look at the left side of the screen and find a button named Settings click on that button to continue.
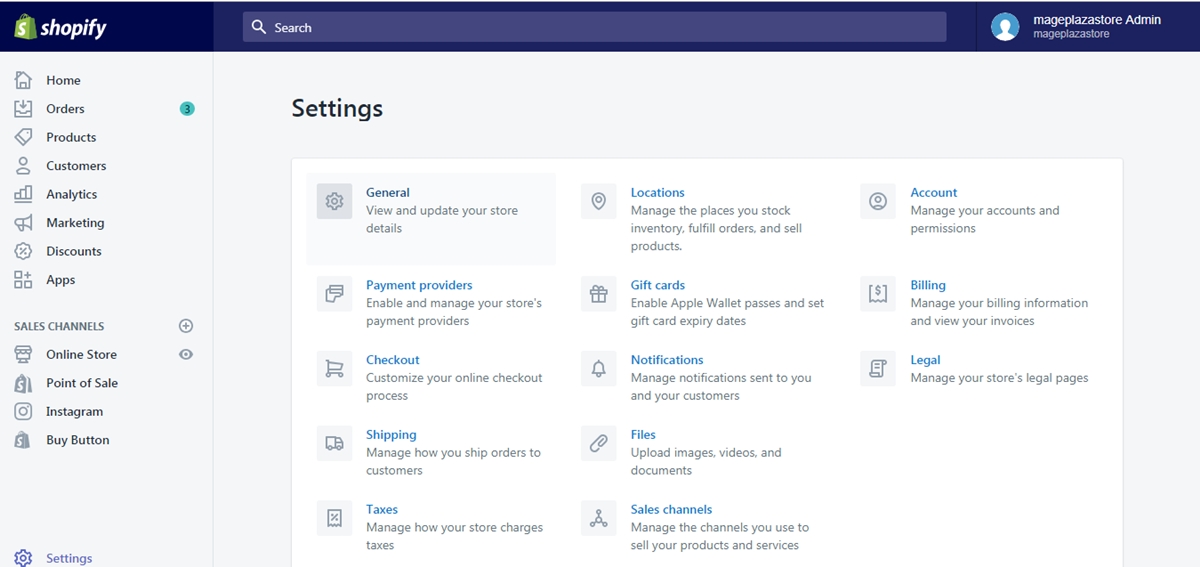
After you clicked on the Settings button, continue to go to the checkout page by clicking the Checkout button.
Step 2: Set customer account preferences
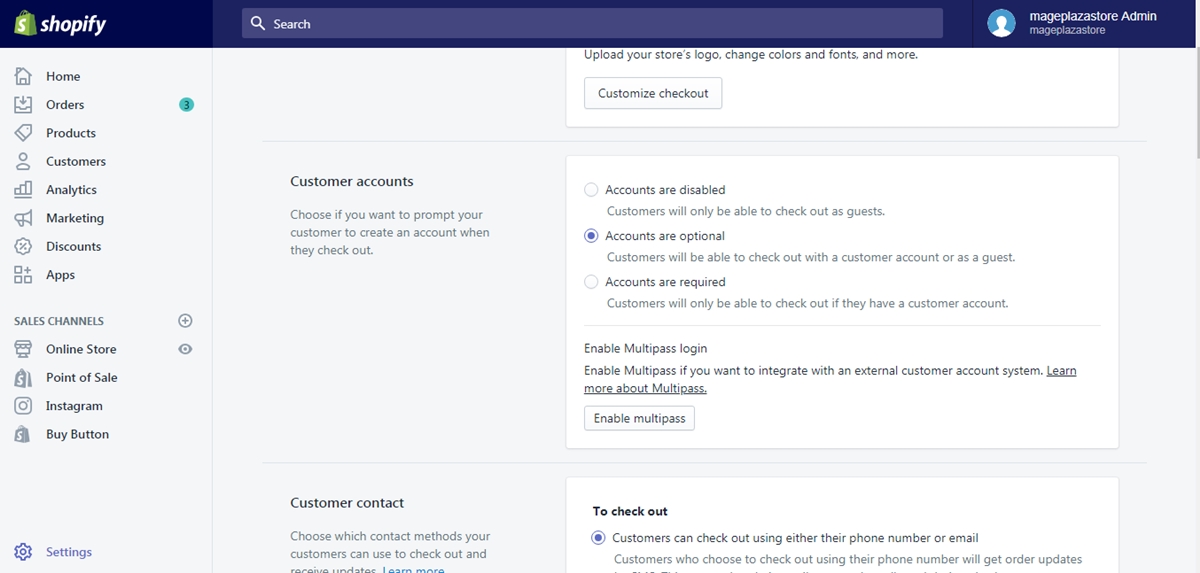
From the checkout page, you can see a section called Customer accounts. In that section choose one of the options below:
-
Accounts are disabled: the option to create an account or to log in an account will be hidden to the customers. Since the fields in the checkout page will not be pre-filled, the customers have to enter the information themselves.
-
Accounts are optional: the customers can choose whether to create an account or not. If they logged into their account, their address will be pre-filled.
-
Accounts are required: in order to check out, the customer has to create an account or logged into one. This option is suitable if your store focuses on dealing with the wholesalers.
Step 3: Saving
Finally, click Save to confirm the changes.
To set your customer account preferences on iPhone (Click here)
- Step 1: Go to Store -> Settings
When you get access to the home page of your shop from the app, go to Store button and continue by tapping the Settings section on that page.
- Step 2: Tap Checkout
From the store settings section, you can see an option named Checkout. Click on that option to go to the next step.
- Step 3: Choose an option
From the checkout page, you can see a section called Customer accounts. In that section choose one of the options below:
-
Accounts are disabled: the option to create an account or to log in an account will be hidden to the customers. Since the fields in the checkout page will not be pre-filled, the customers have to enter the information themselves.
-
Accounts are optional: the customers can choose whether to create an account or not. If they logged into their account, their address will be pre-filled.
-
Accounts are required: in order to check out, the customer has to create an account or logged into one. This option is suitable if your store focuses on dealing with the wholesalers.
-
Step 4: Saving
Finally, click Save to confirm the changes.
To set your customer account preferences on Android (Click here)
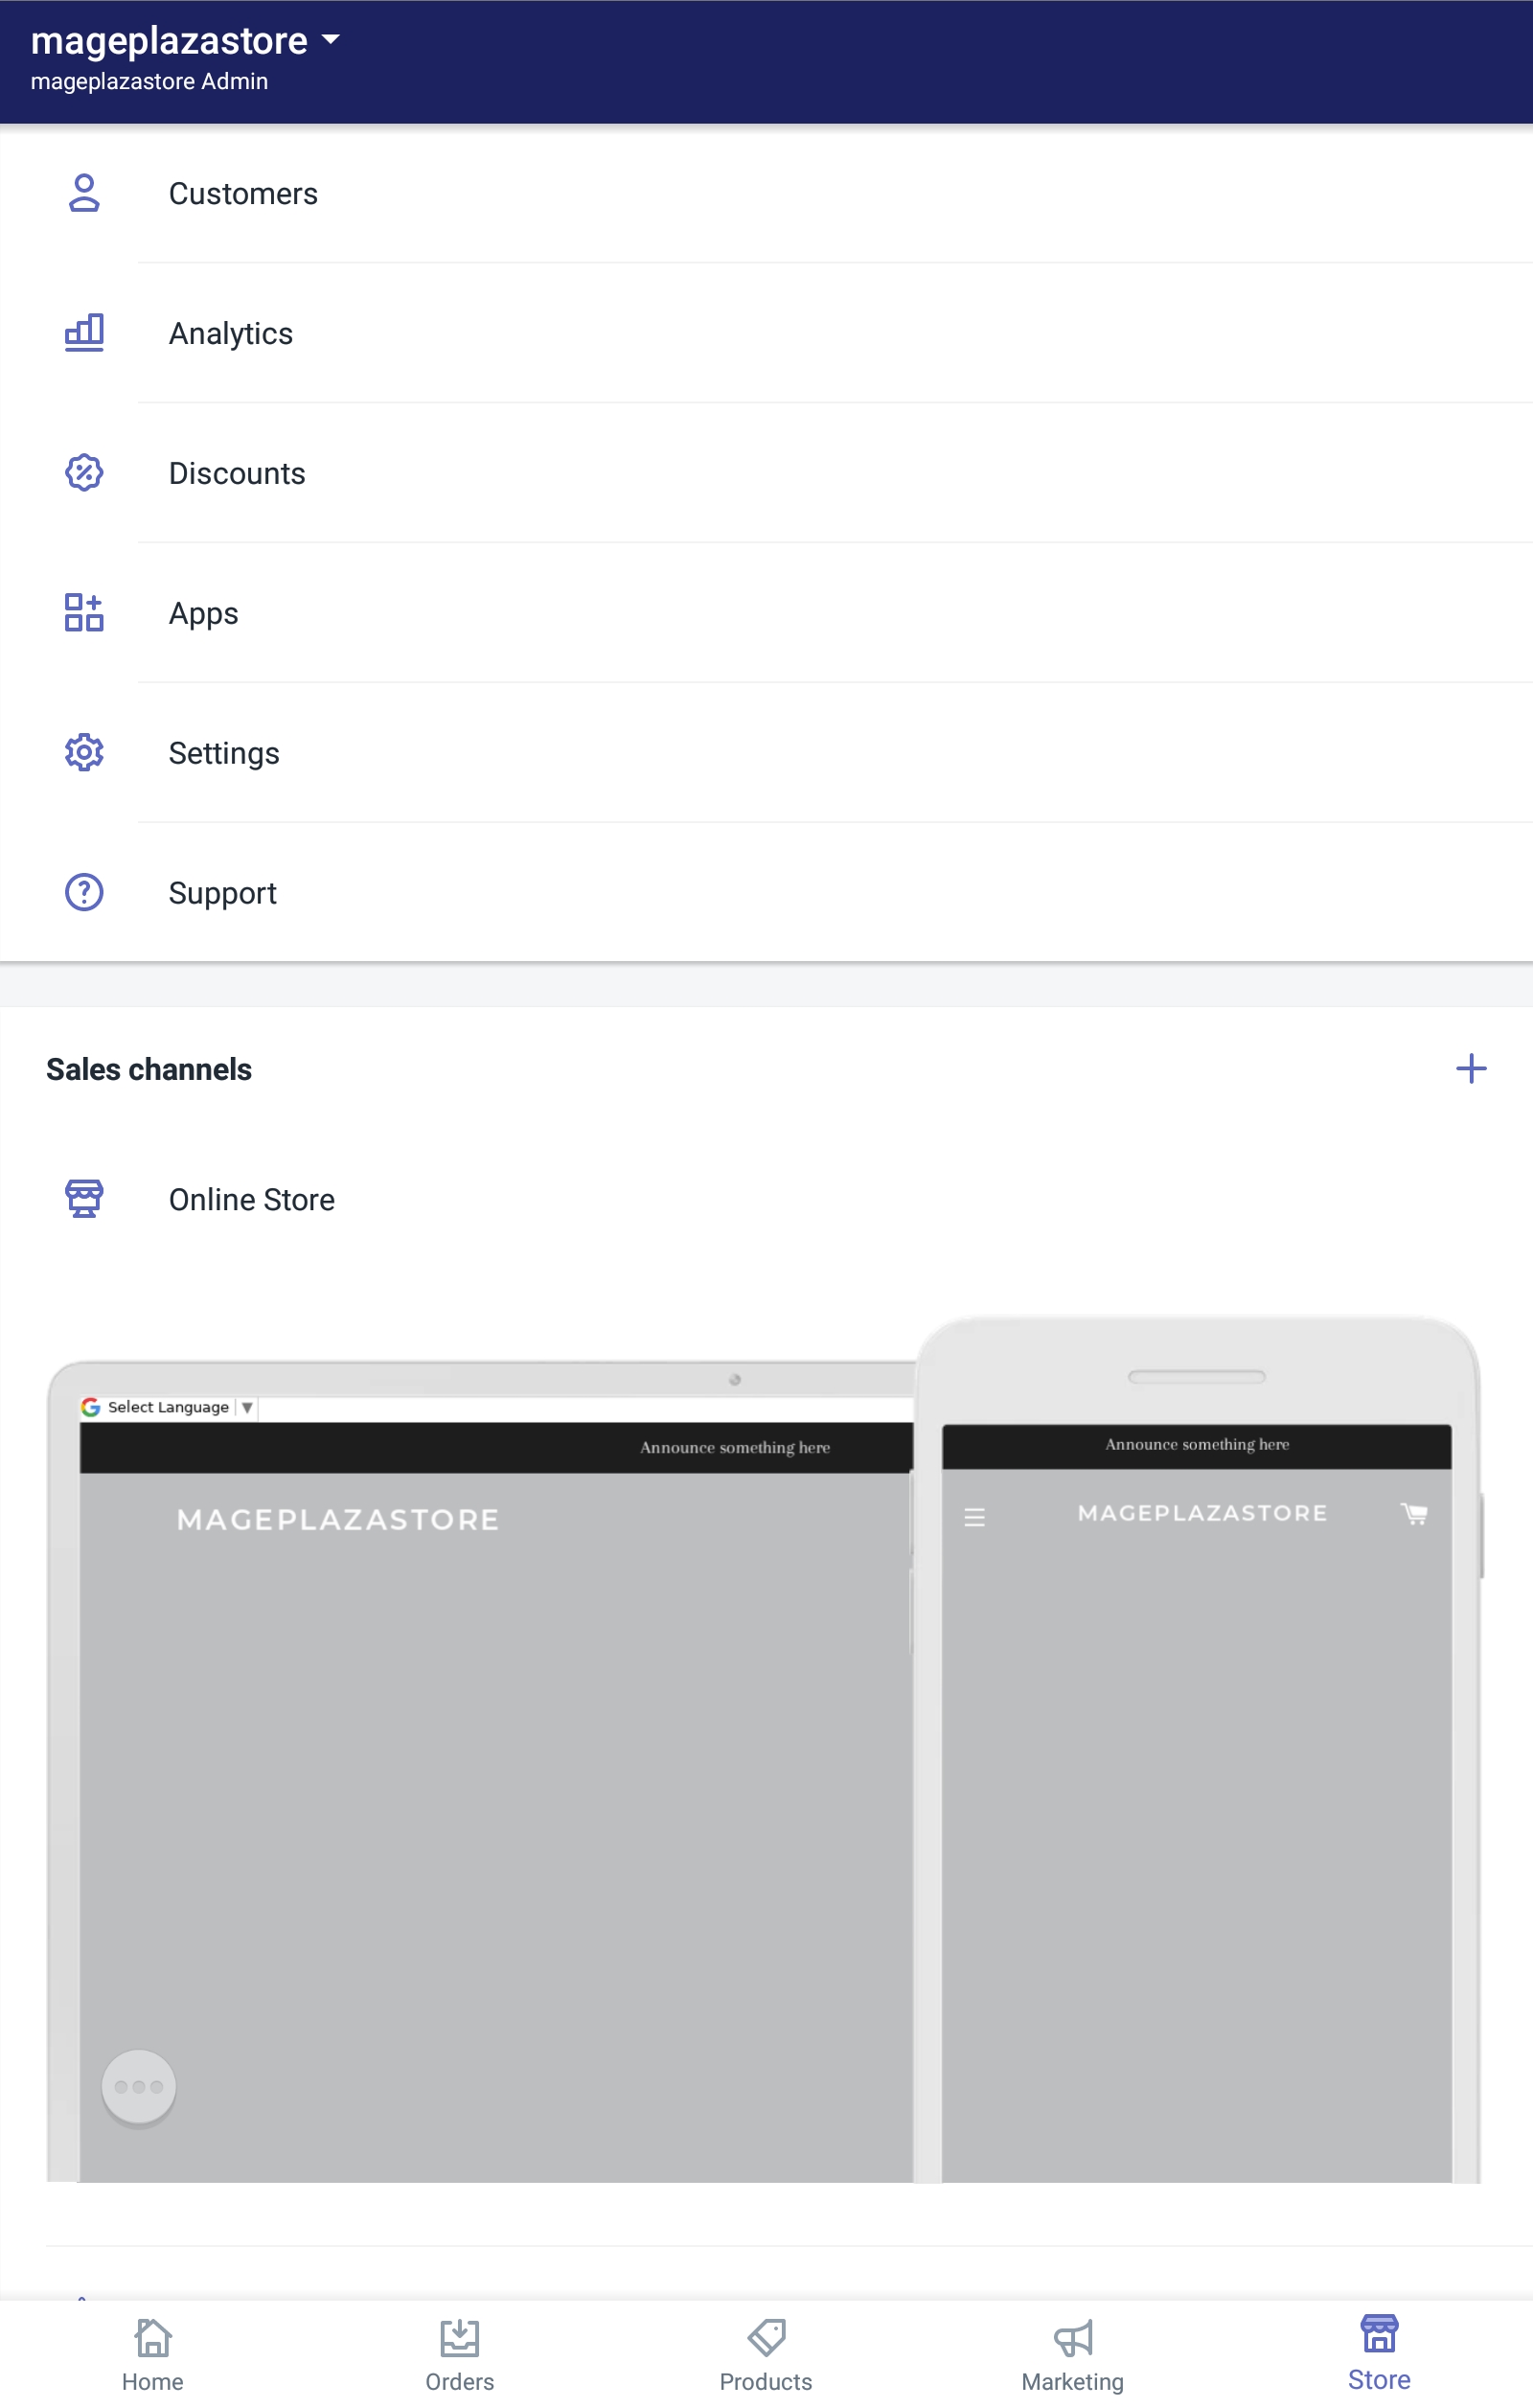
- Step 1: Go to Store -> Settings
When you get access to the home page of your shop from the app, go to Store button and continue by tapping the Settings section on that page.
- Step 2: Tap Checkout
From the store settings section, you can see an option named Checkout. Click on that option to go to the next step.
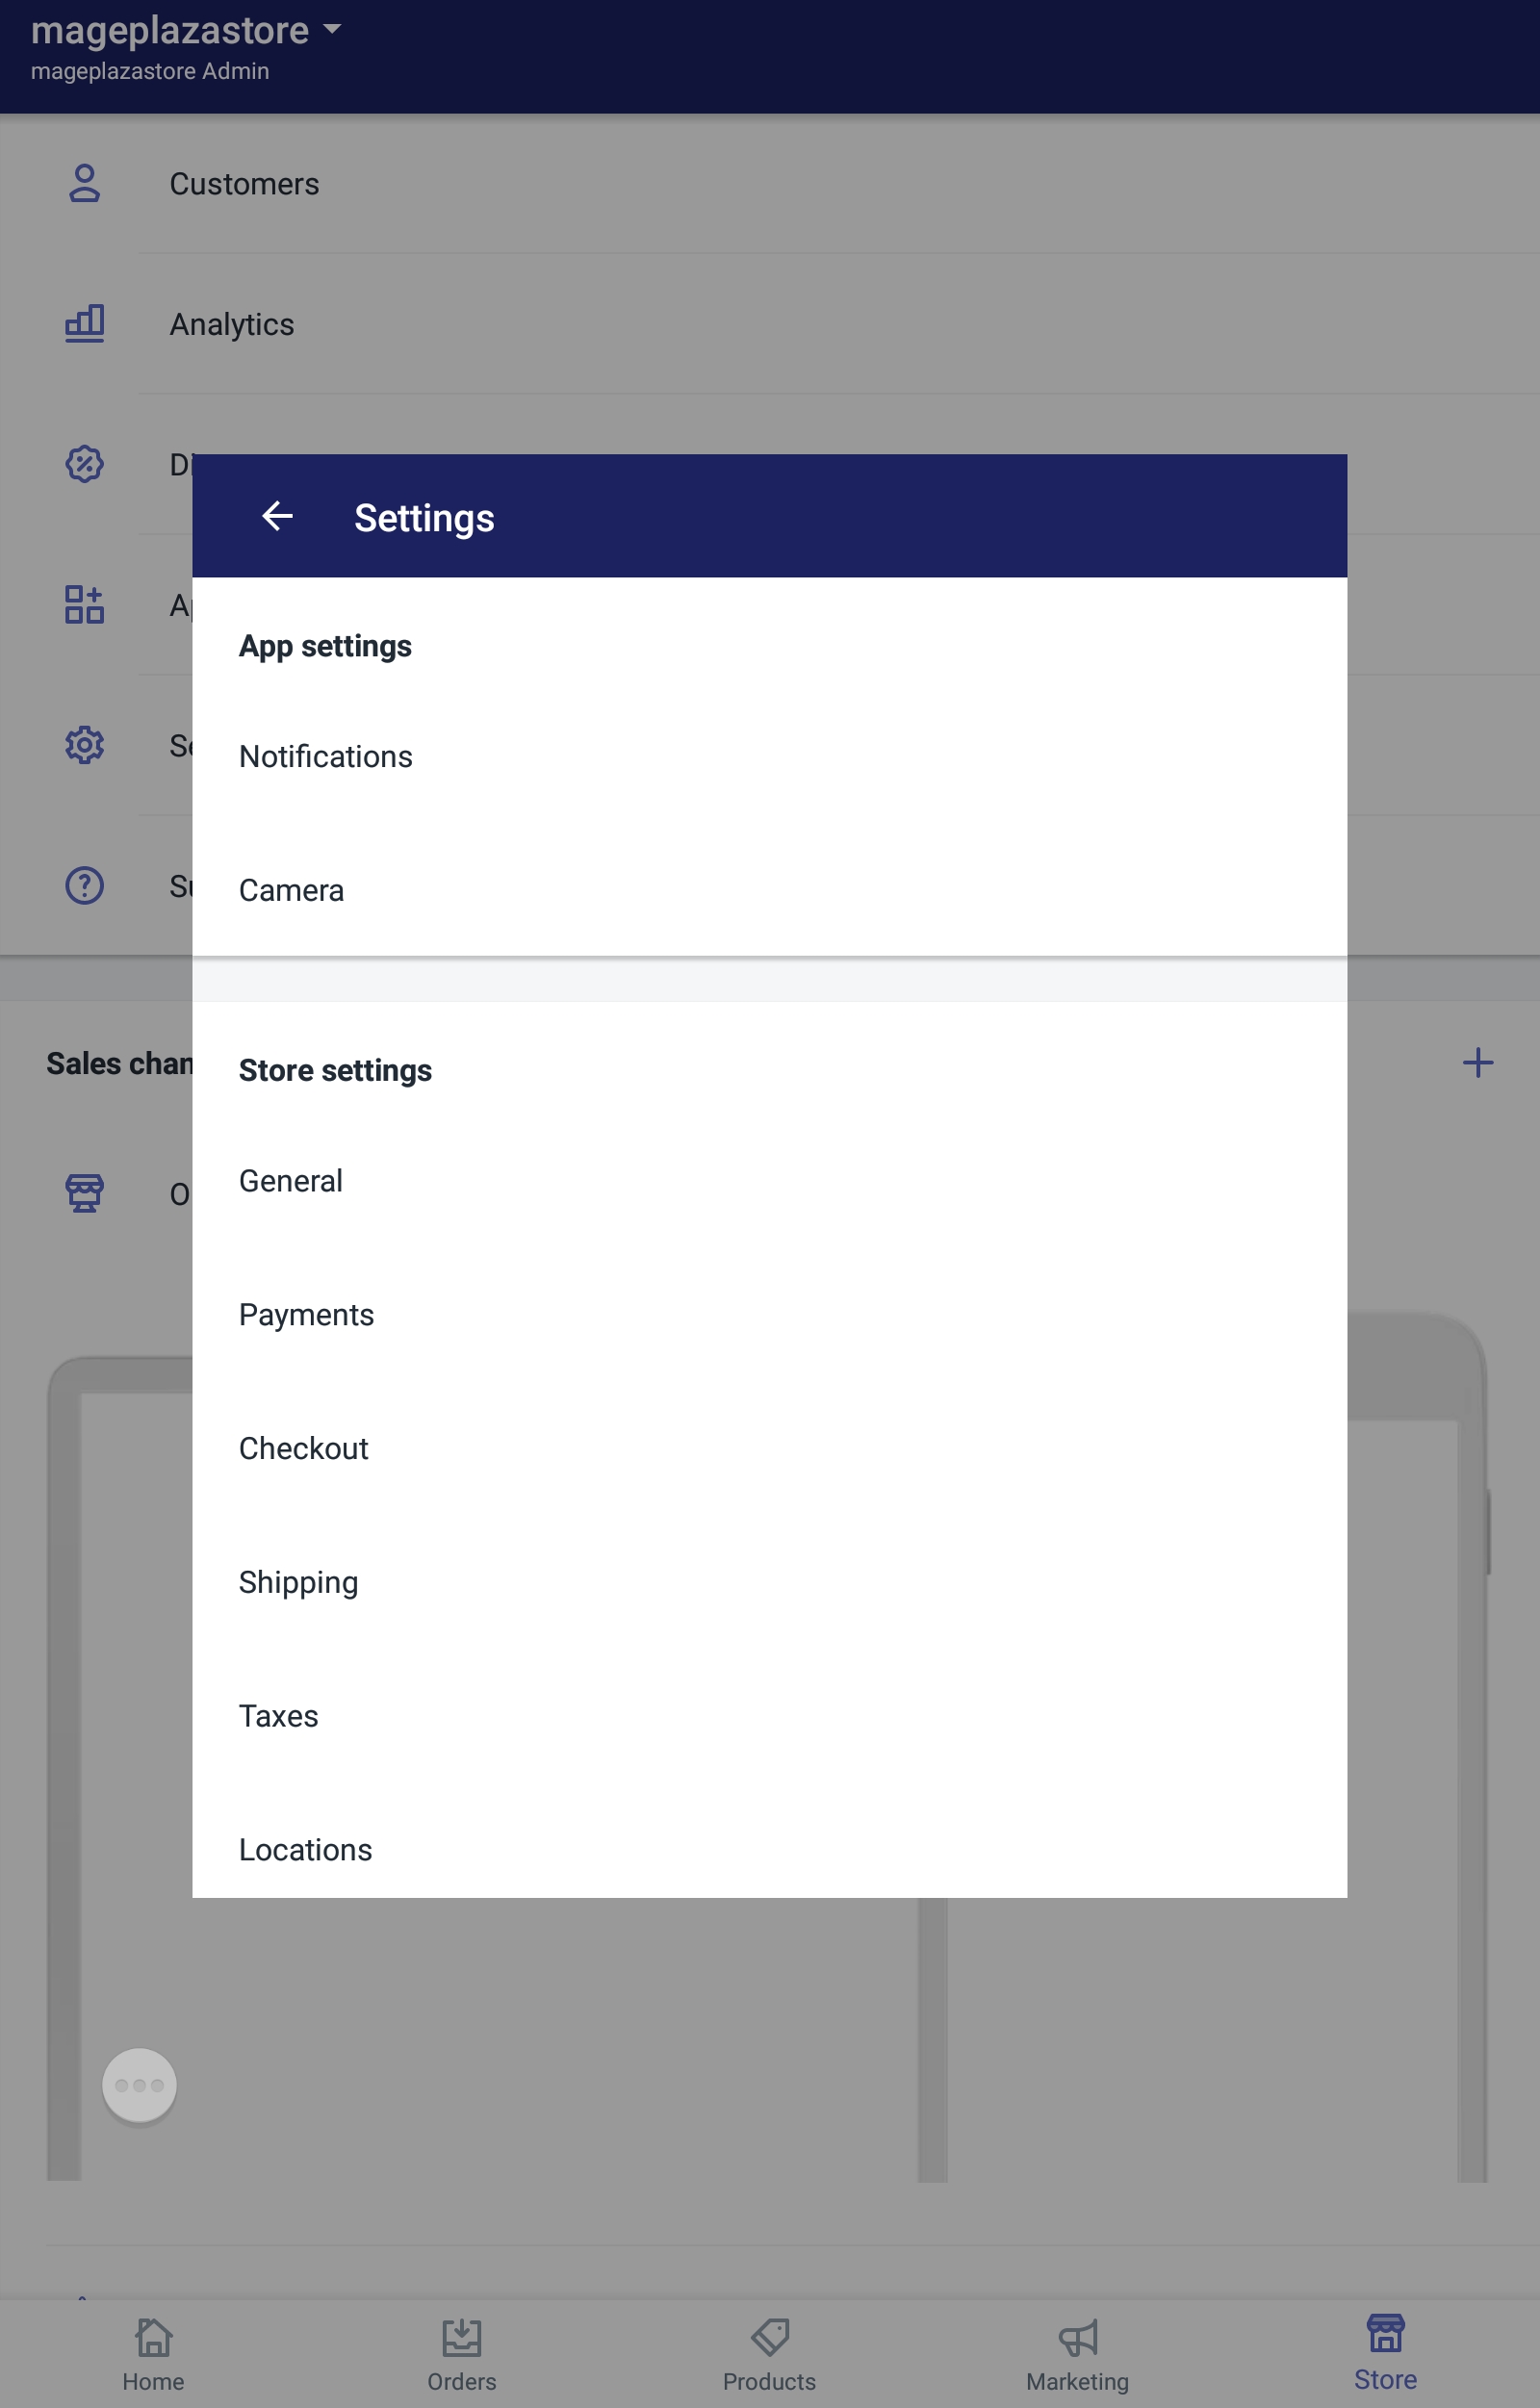
- Step 3: Choose an option
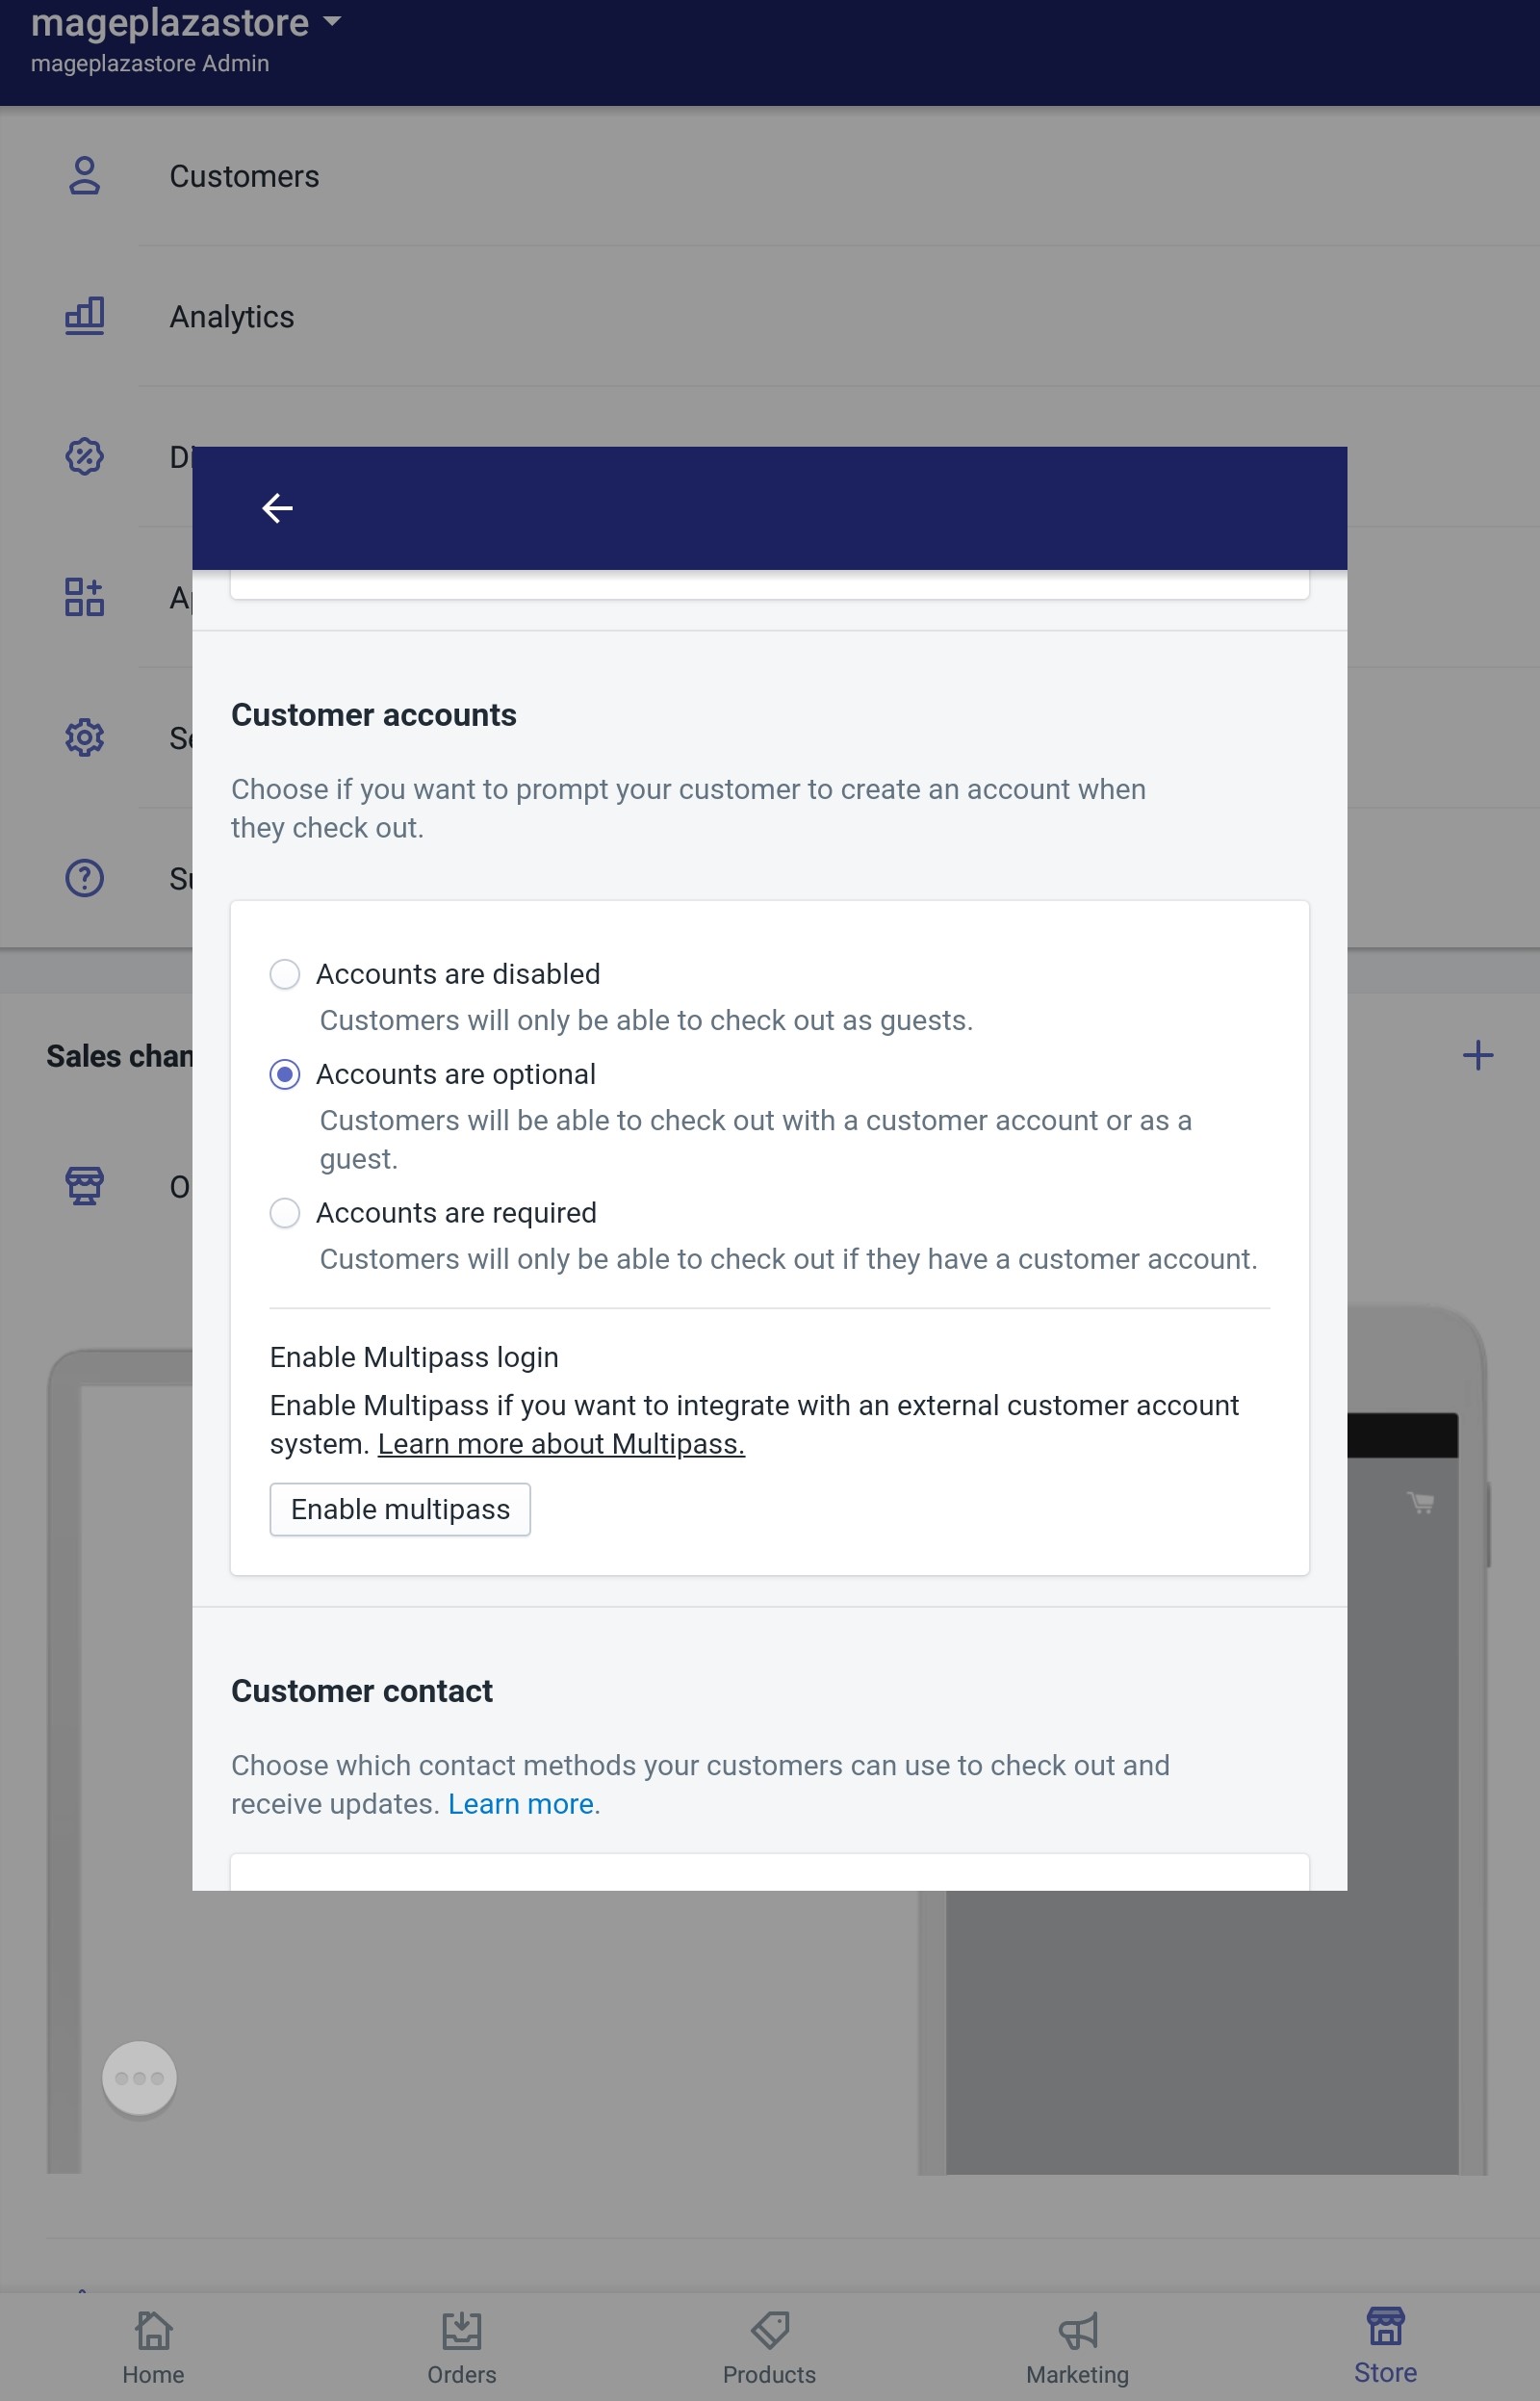
From the checkout page, you can see a section called Customer accounts. In that section choose one of the options below:
-
Accounts are disabled: the option to create an account or to log in an account will be hidden to the customers. Since the fields in the checkout page will not be pre-filled, the customers have to enter the information themselves.
-
Accounts are optional: the customers can choose whether to create an account or not. If they logged into their account, their address will be pre-filled.
-
Accounts are required: in order to check out, the customer has to create an account or logged into one. This option is suitable if your store focuses on dealing with the wholesalers.
-
Step 4: Saving
Finally, click Save to confirm the changes.
Conclusion
To sum up, the above is my instructional writing on the topic how to set your customer account preferences on Shopify. I hope my writing will be helpful for you while selling online.


