5 Steps to Enable Inventory Tracking on Shopify
Shopify has a helpful feature called the transfer which updates the number of items available in your online store automatically. You will find it convenient whenever you get inventory from your supplier. To activate the transfer feature, the first thing you must know is how to enable inventory tracking on Shopify. Or you can learn more about how to create transfer on Shopify on our tutorials.
To enable inventory tracking on Shopify
Step 1: Go to Products from Shopify Admin
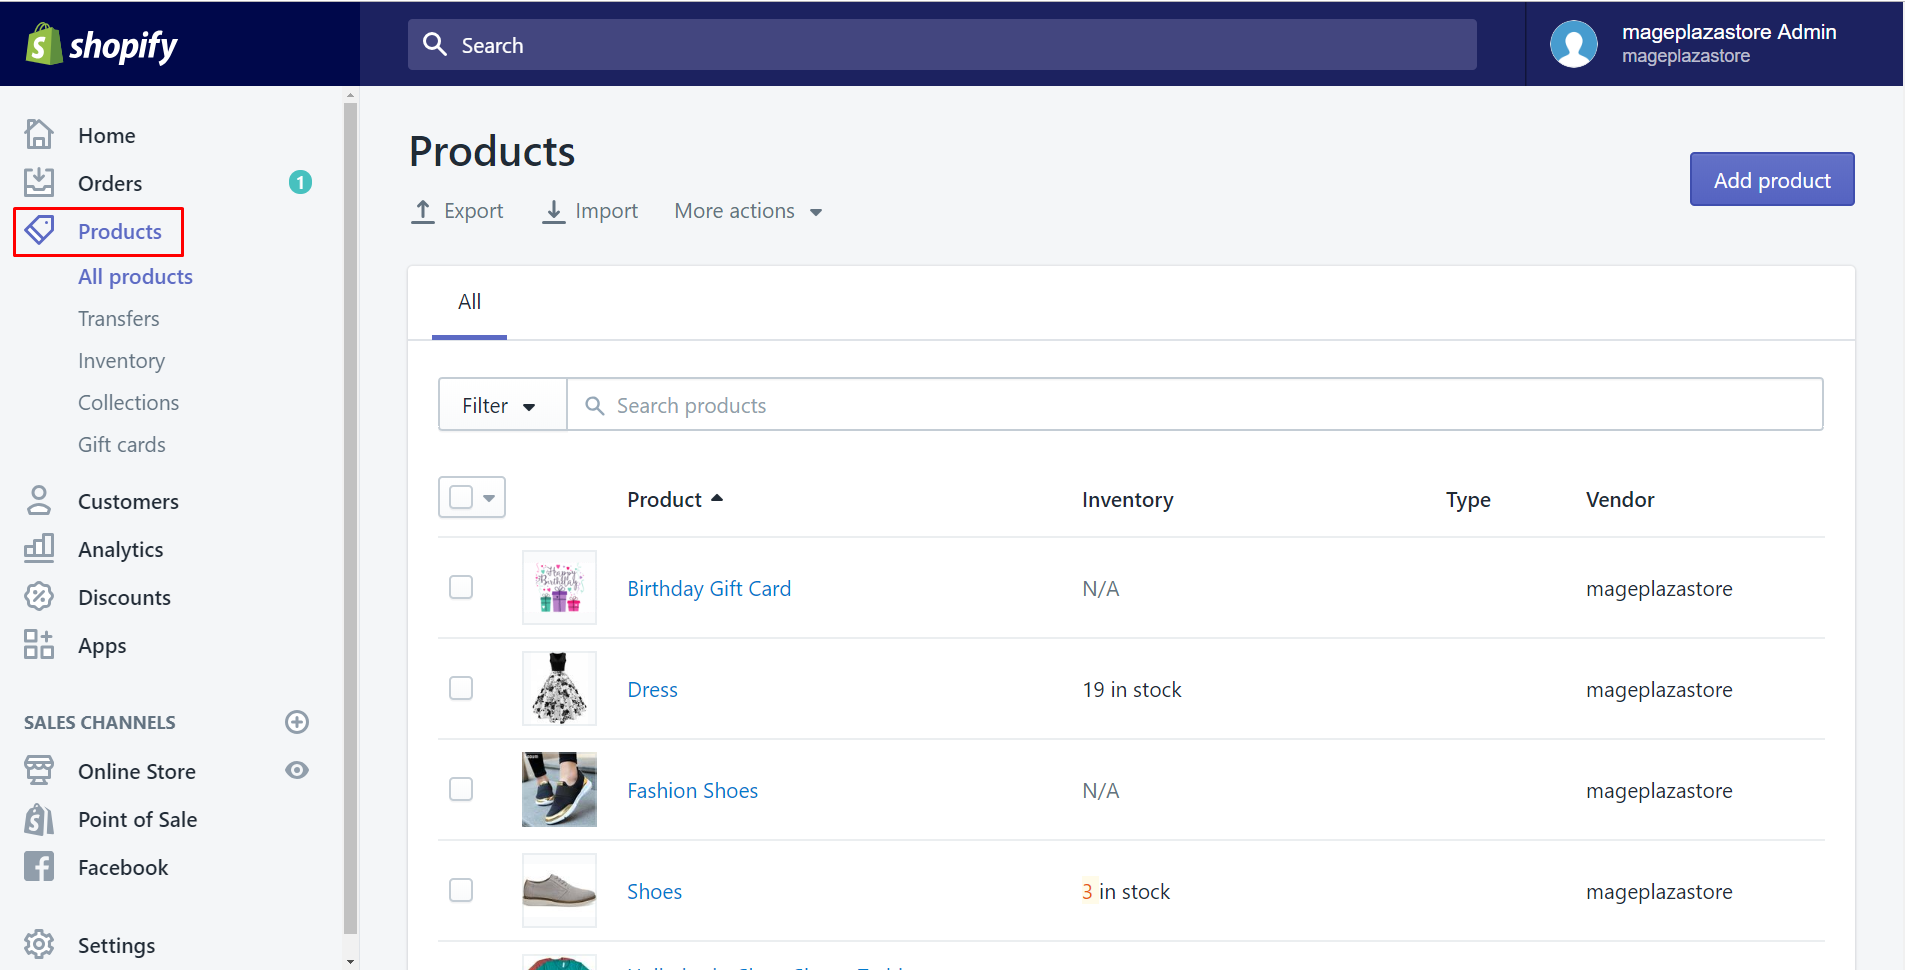
First of all, you should log in Shopify. Then, access to your Shopify admin page. Make sure that you click on Products.
Step 2: Choose a product to track
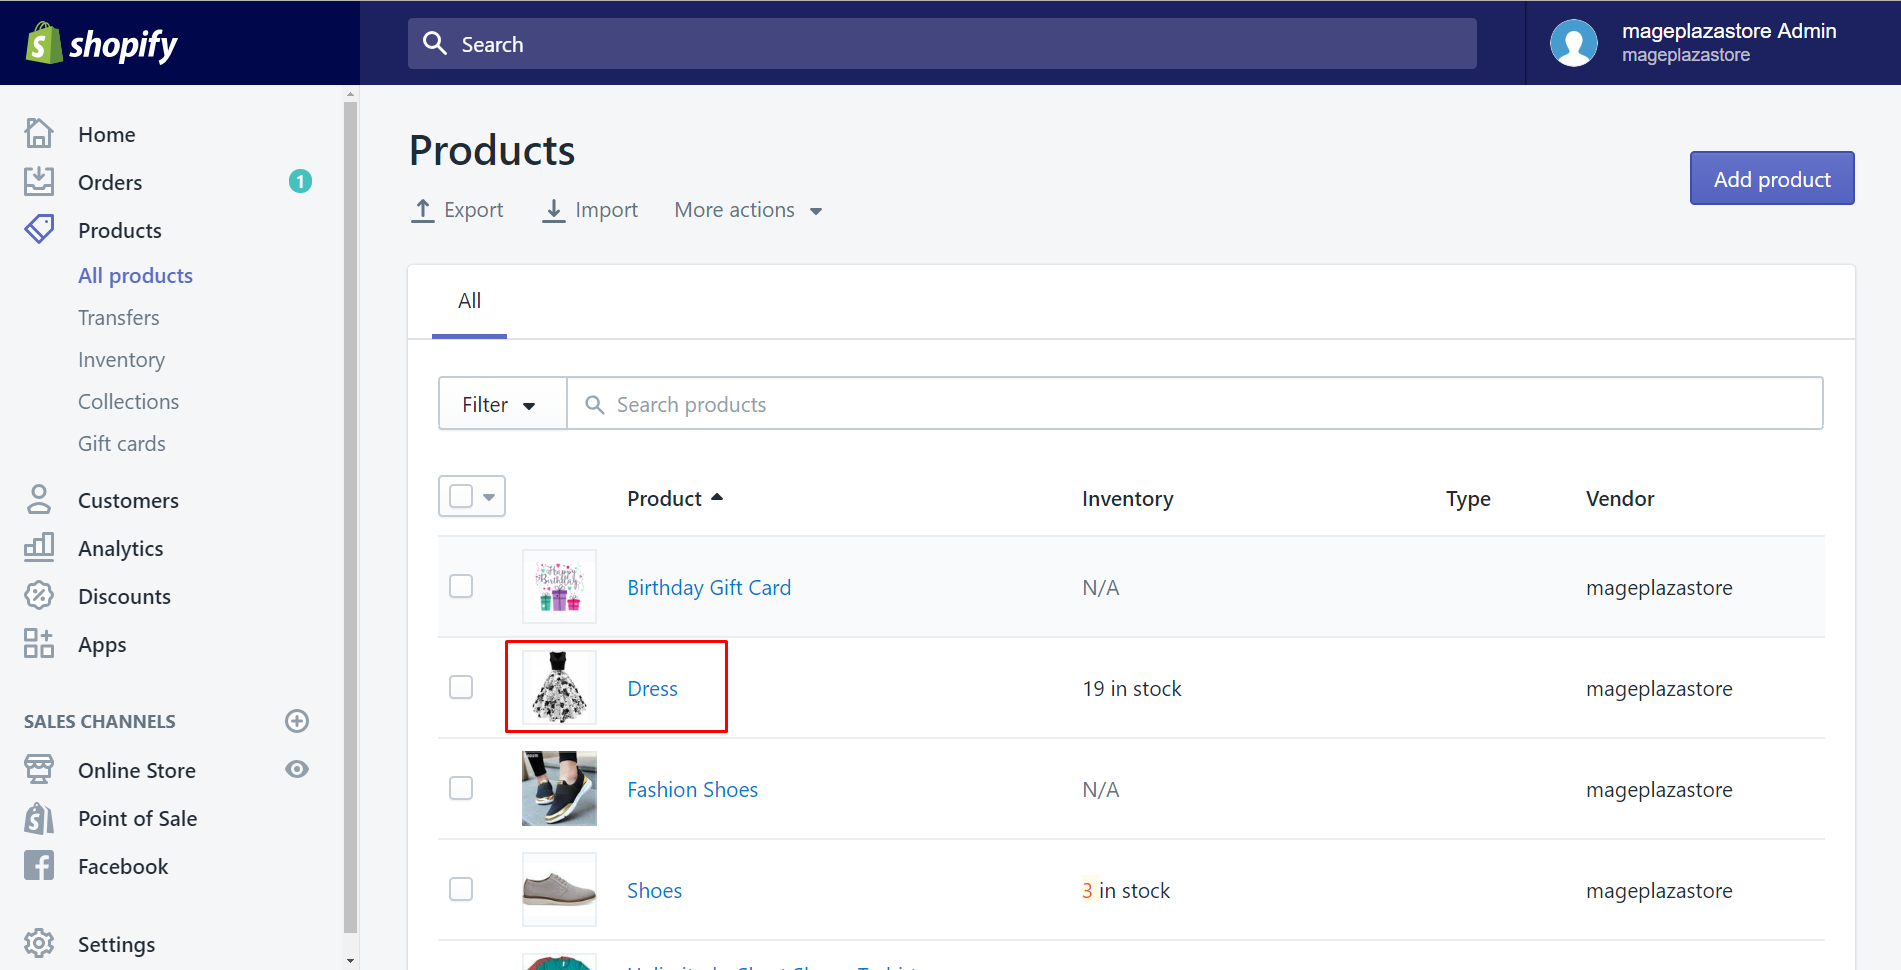
It will automatically go to All products after you click Products. In this step, you just have to take a look at all your products there and choose one of them that meet your purpose by clicking the name of it. As you can see, I tap Dress for example.
Step 3: Find the Inventory section
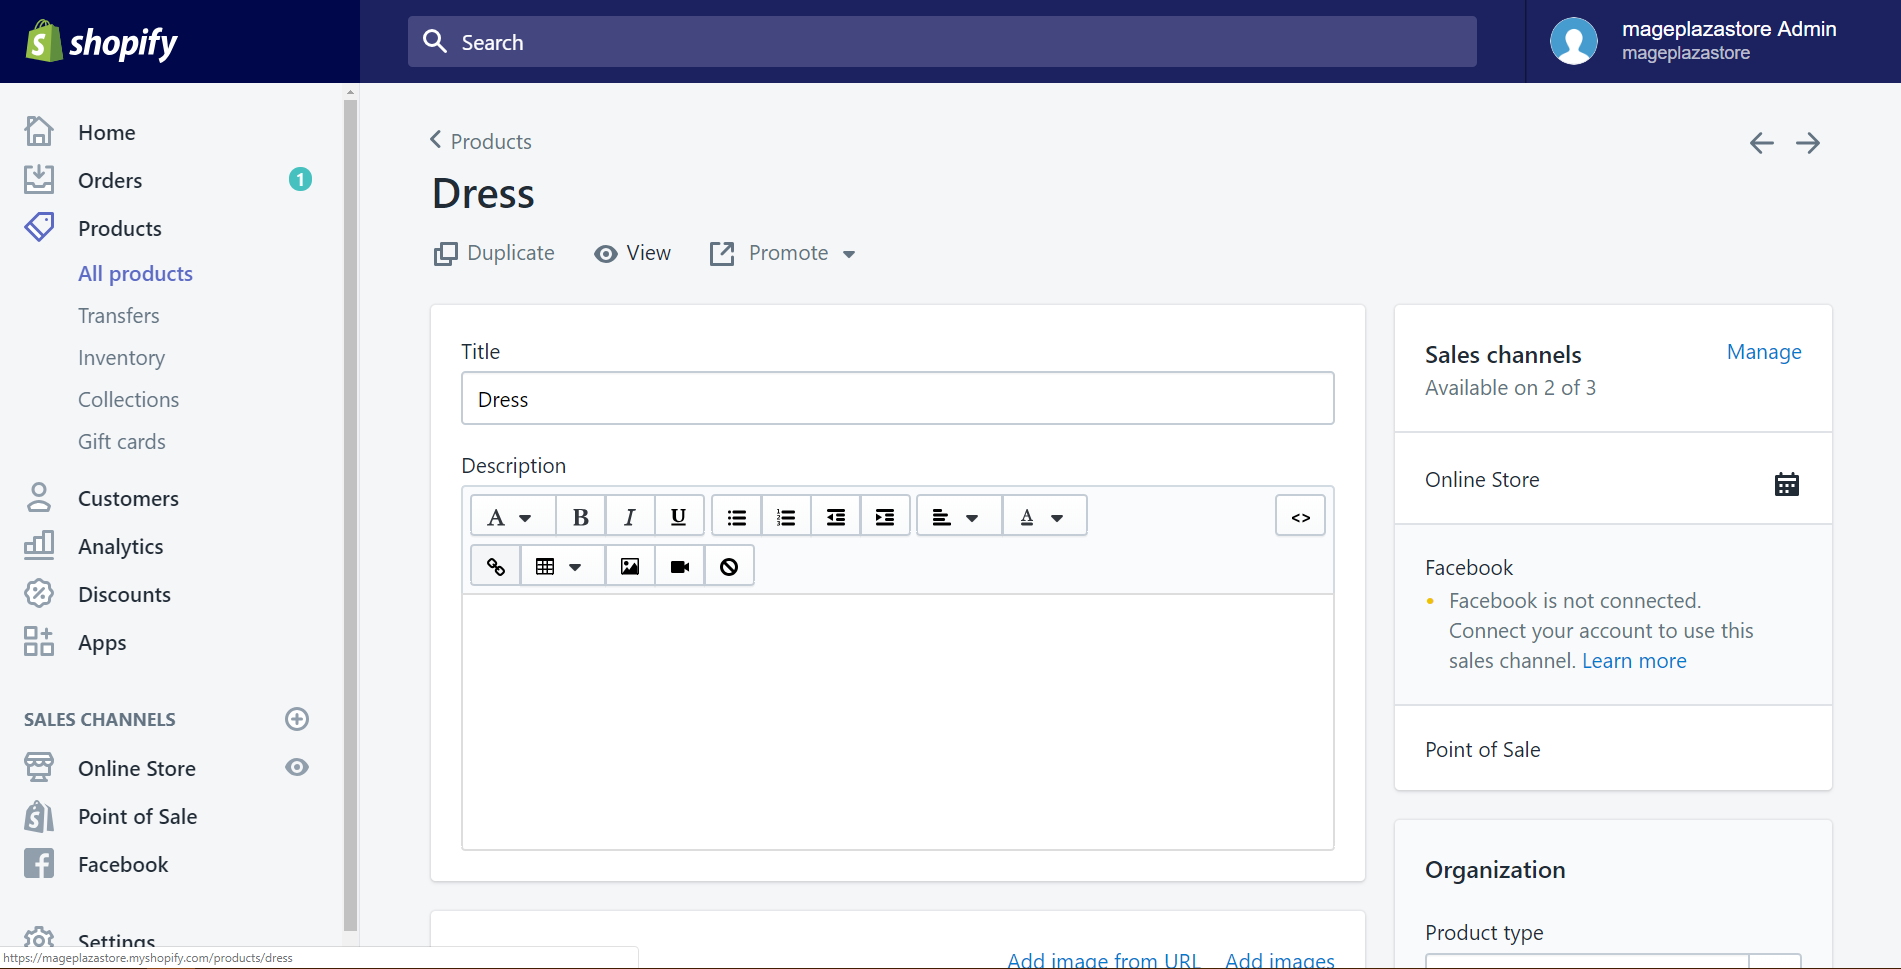
After selecting the name of that item, go straight to the product’s page. It has a lot of sections which have their own function there.
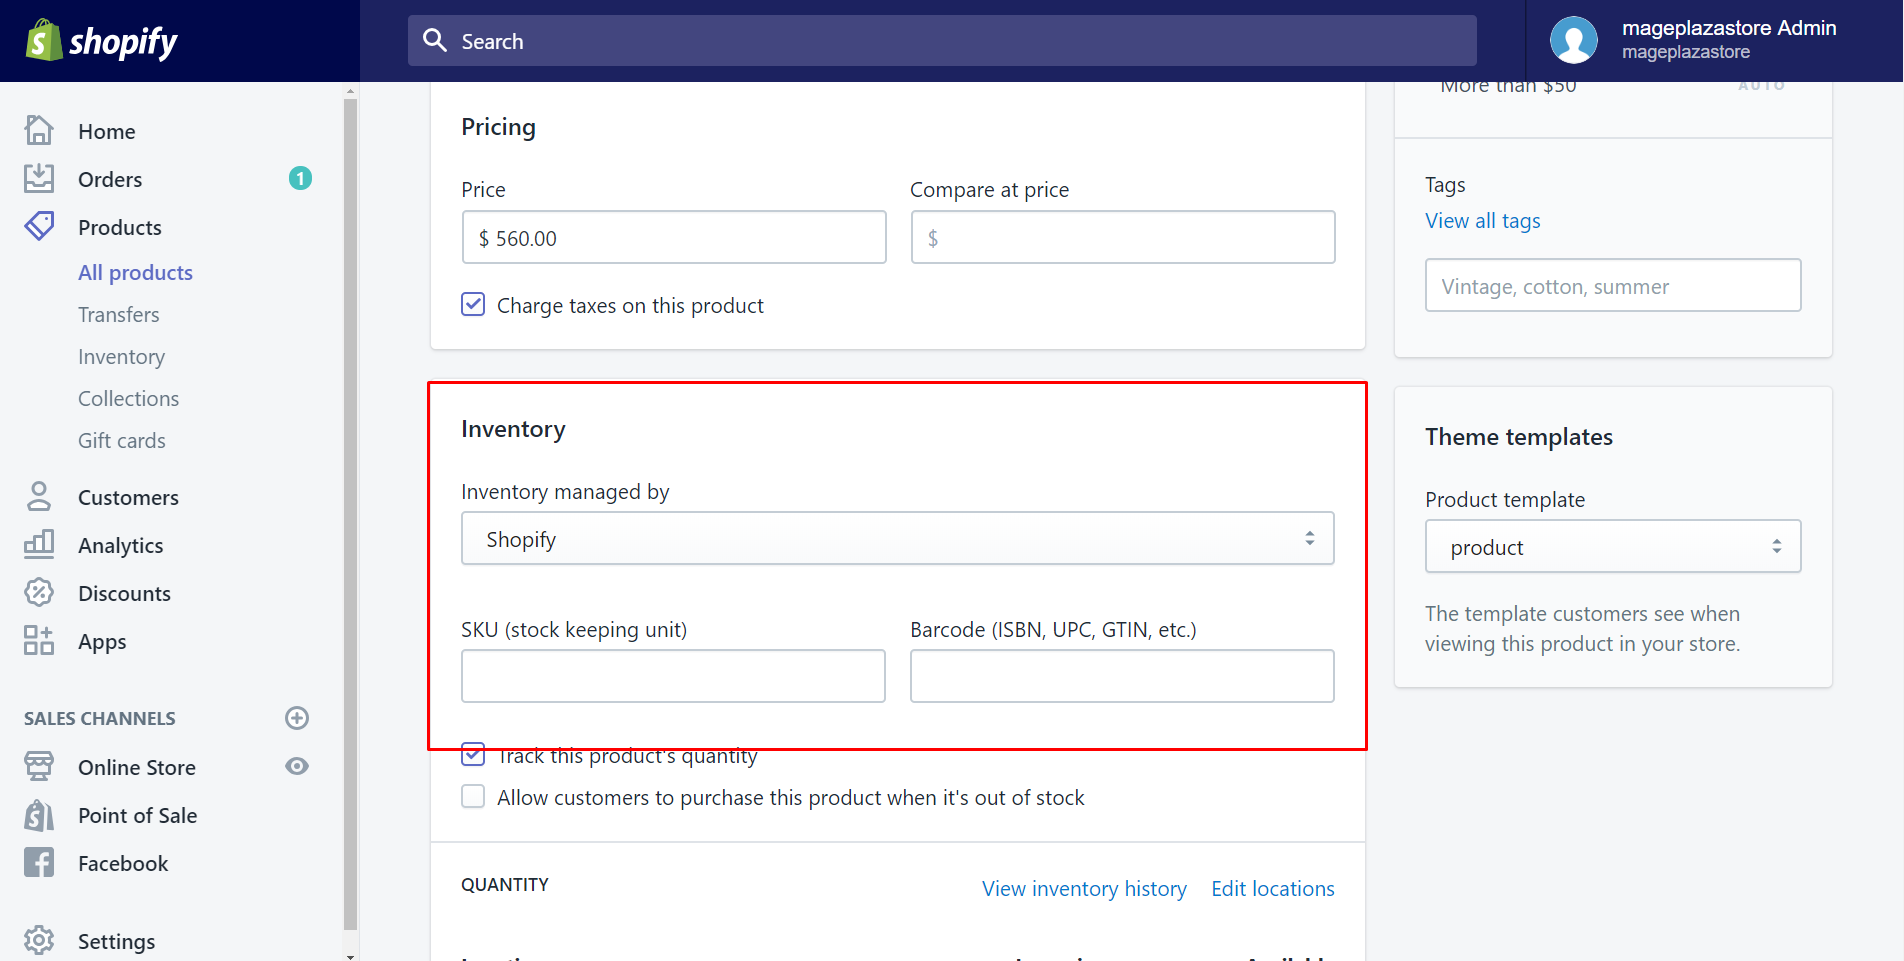
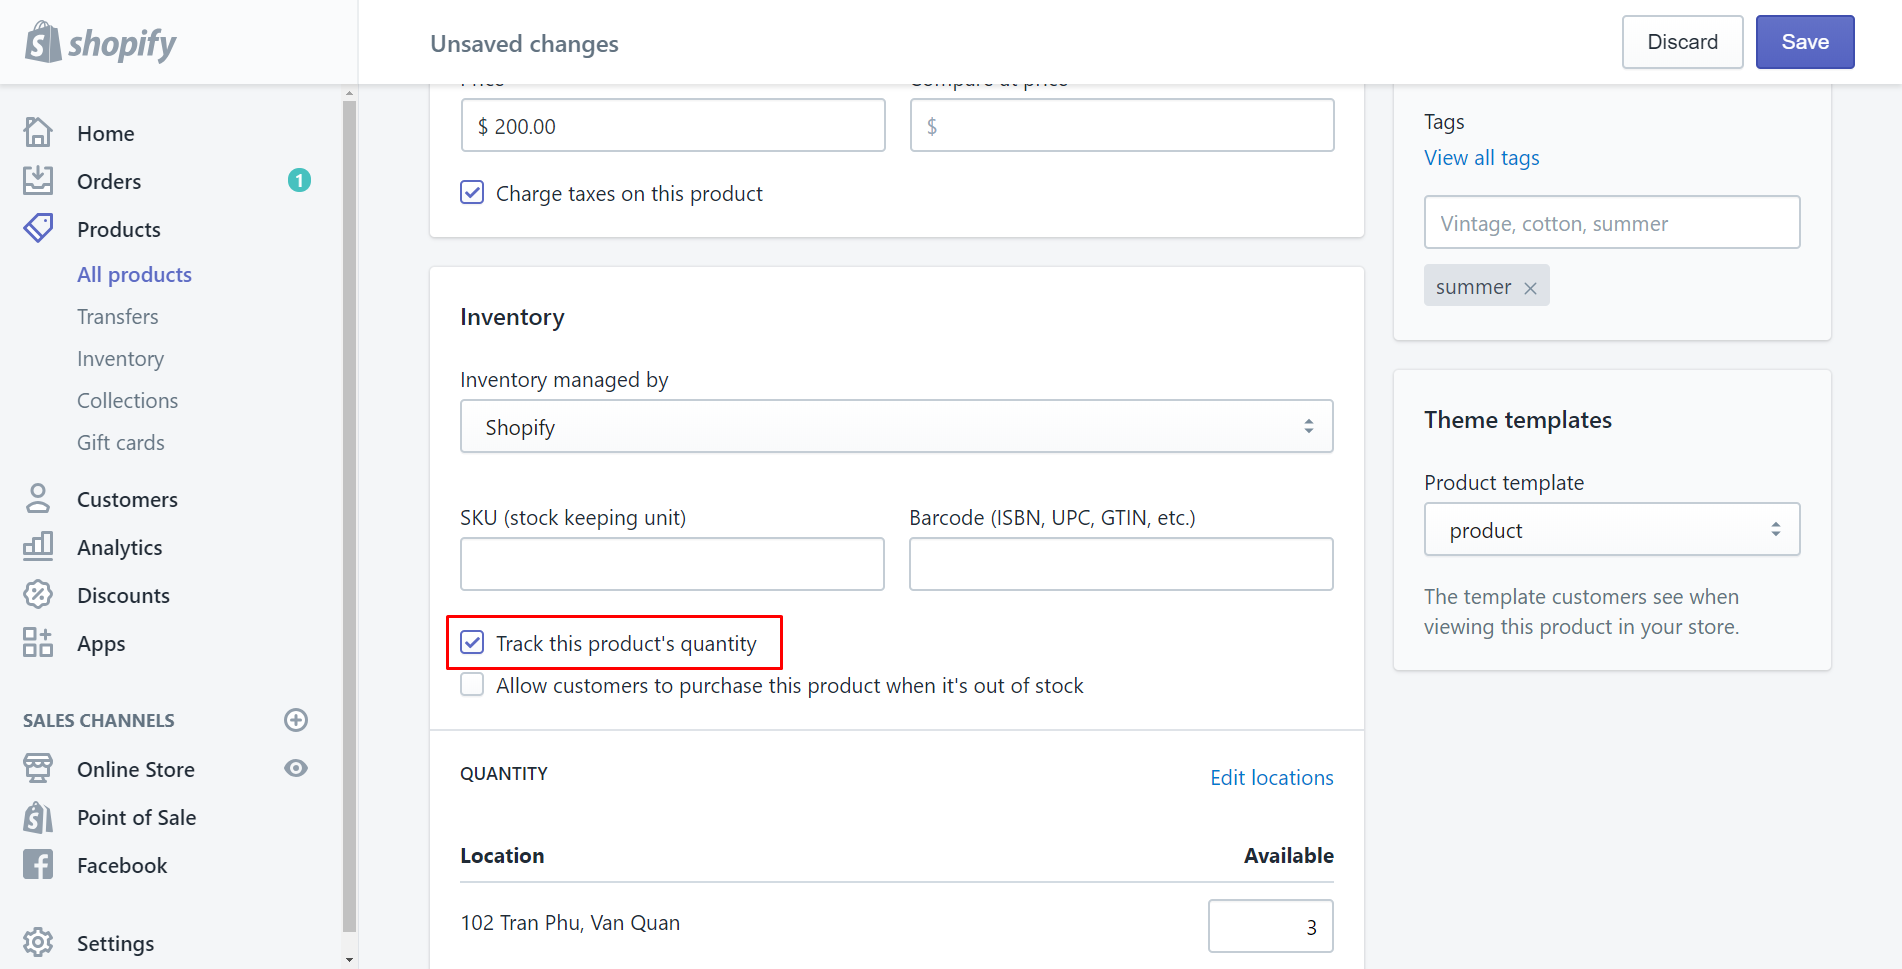
In order to enable inventory tracking on Shopify, you are looking forward to a section called Inventory. I suggest that you should scroll down and it is below the Pricing section for more details. You will find the Inventory box and view its content before going to the next step.
Step 4: Enable inventory tracking
Here is The Inventory policy. If we’d love to the number of items available in our online store is updated by the transfer feature whenever we receive inventory from our supplier, make sure that you check the checkbox Track this product's quantity to do the initial purpose.
Step 5: Click Save
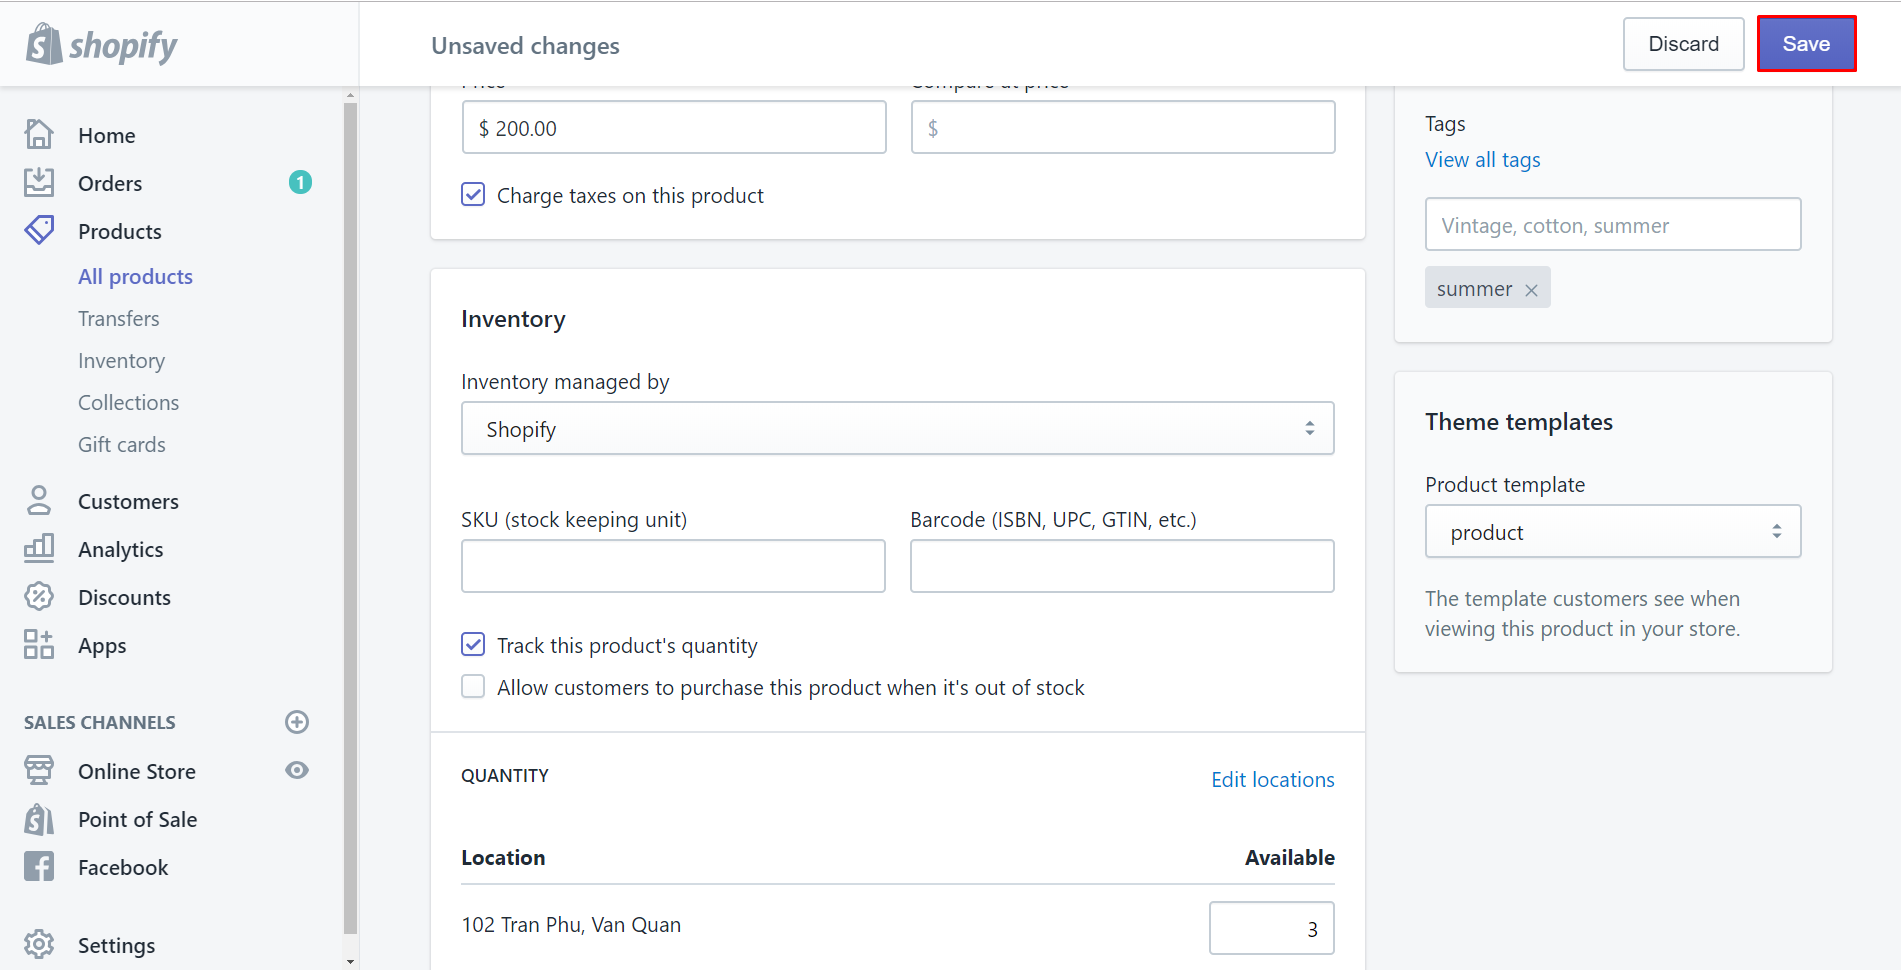
Shopify will remind you of unsaved changes which you’ve just carried out on the top of the working page. Tap Save to complete your work.
Conclusion
For more information, you’d better create a transfer after enabling inventory tracking on Shopify. If you find this guide useful, please follow me in the next writing How to set up inventory tracking on Shopify to set up inventory tracking. Hope you will enable inventory tracking effectively and save more time wasting for finding out what to do thanks to this.
Related Posts:


