
How to Create Custom Reports on Shopify

In the previous writing about how to view your sales reports, I’ve mentioned the report and its important role in your business. You may view it frequently and there comes a time you want to modify the report or create a custom report. You can filter a report on Shopify as well.
The custom reports are custom report metrics, which means you can build your own report templates. They can be powerful, optimized and more detailed than the report templates from Shopify. Creating a custom report can help you focus on the indicators you want to track and view advanced metrics based on your own formulas, or layout structure in a way which is easier for you to see.
Therefore, I recommend you to follow these easy steps below to customize reports.
How to Customize Reports
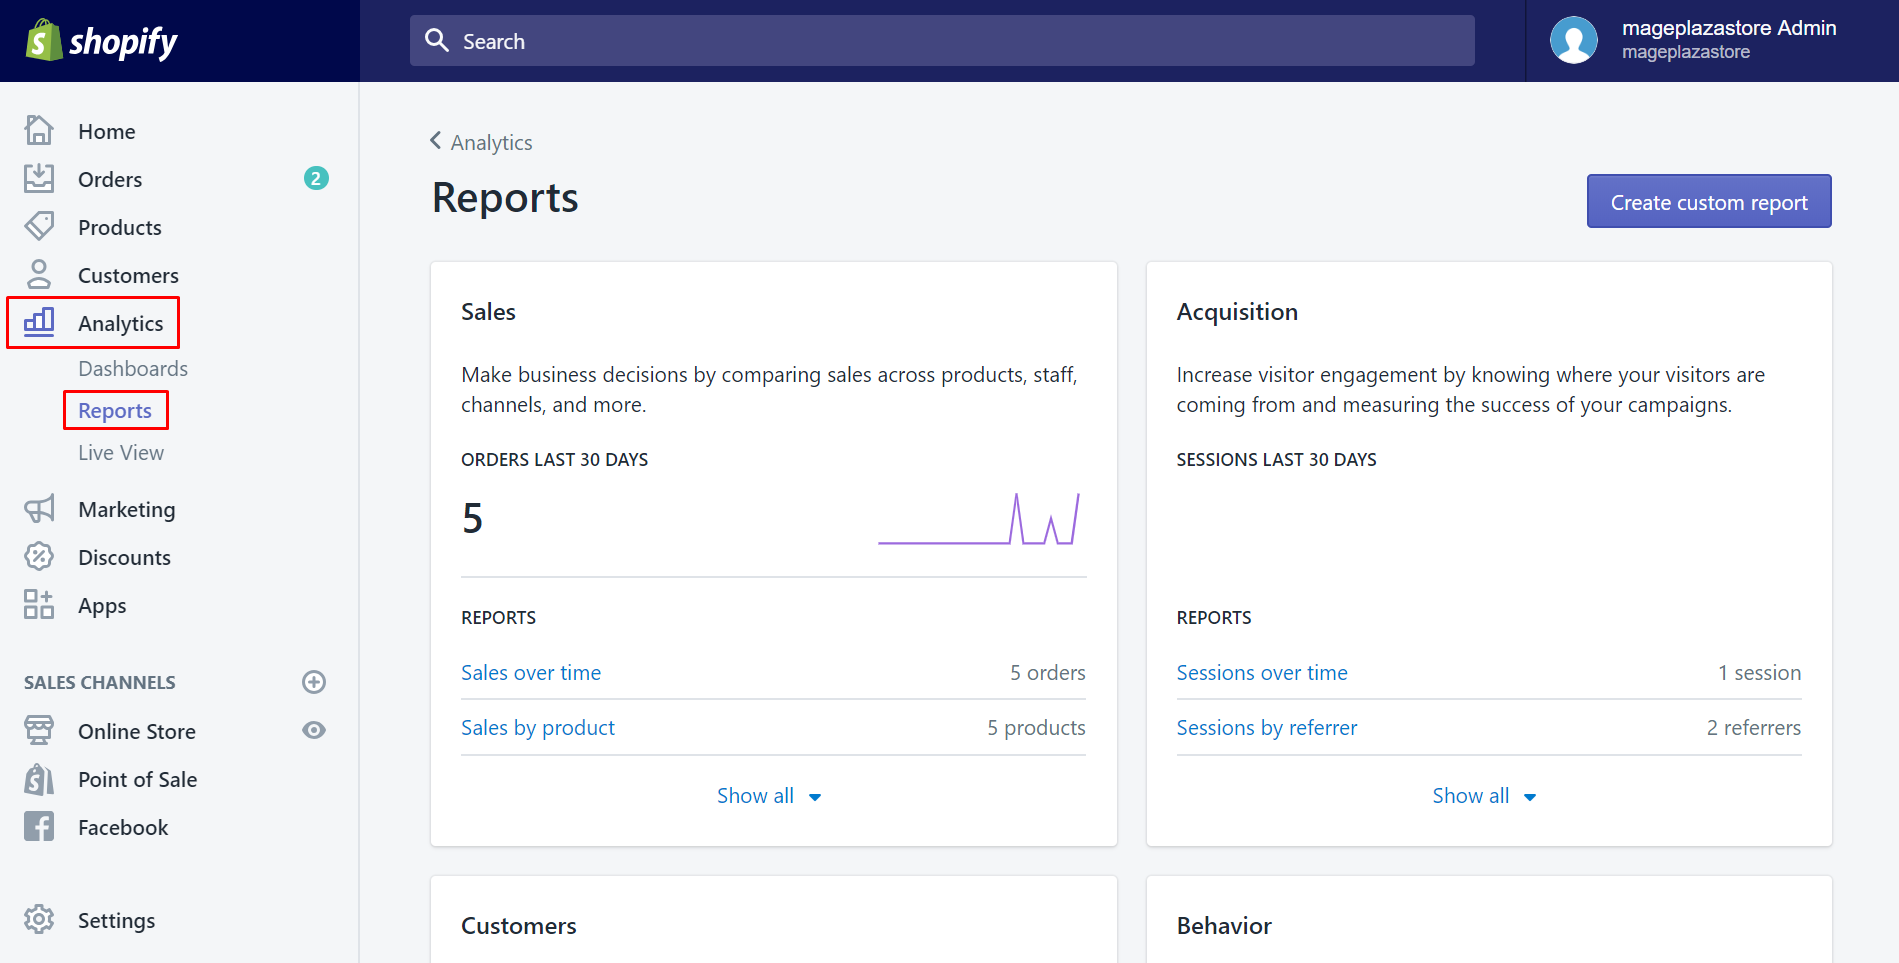
Step 1: Go to Reports
After logging in your Shopify account, click on Analytics which is on the left-hand side of the screen. It will automatically go to the first section called Dashboard. Make sure that you take a look at the second section Reports and tap on it.
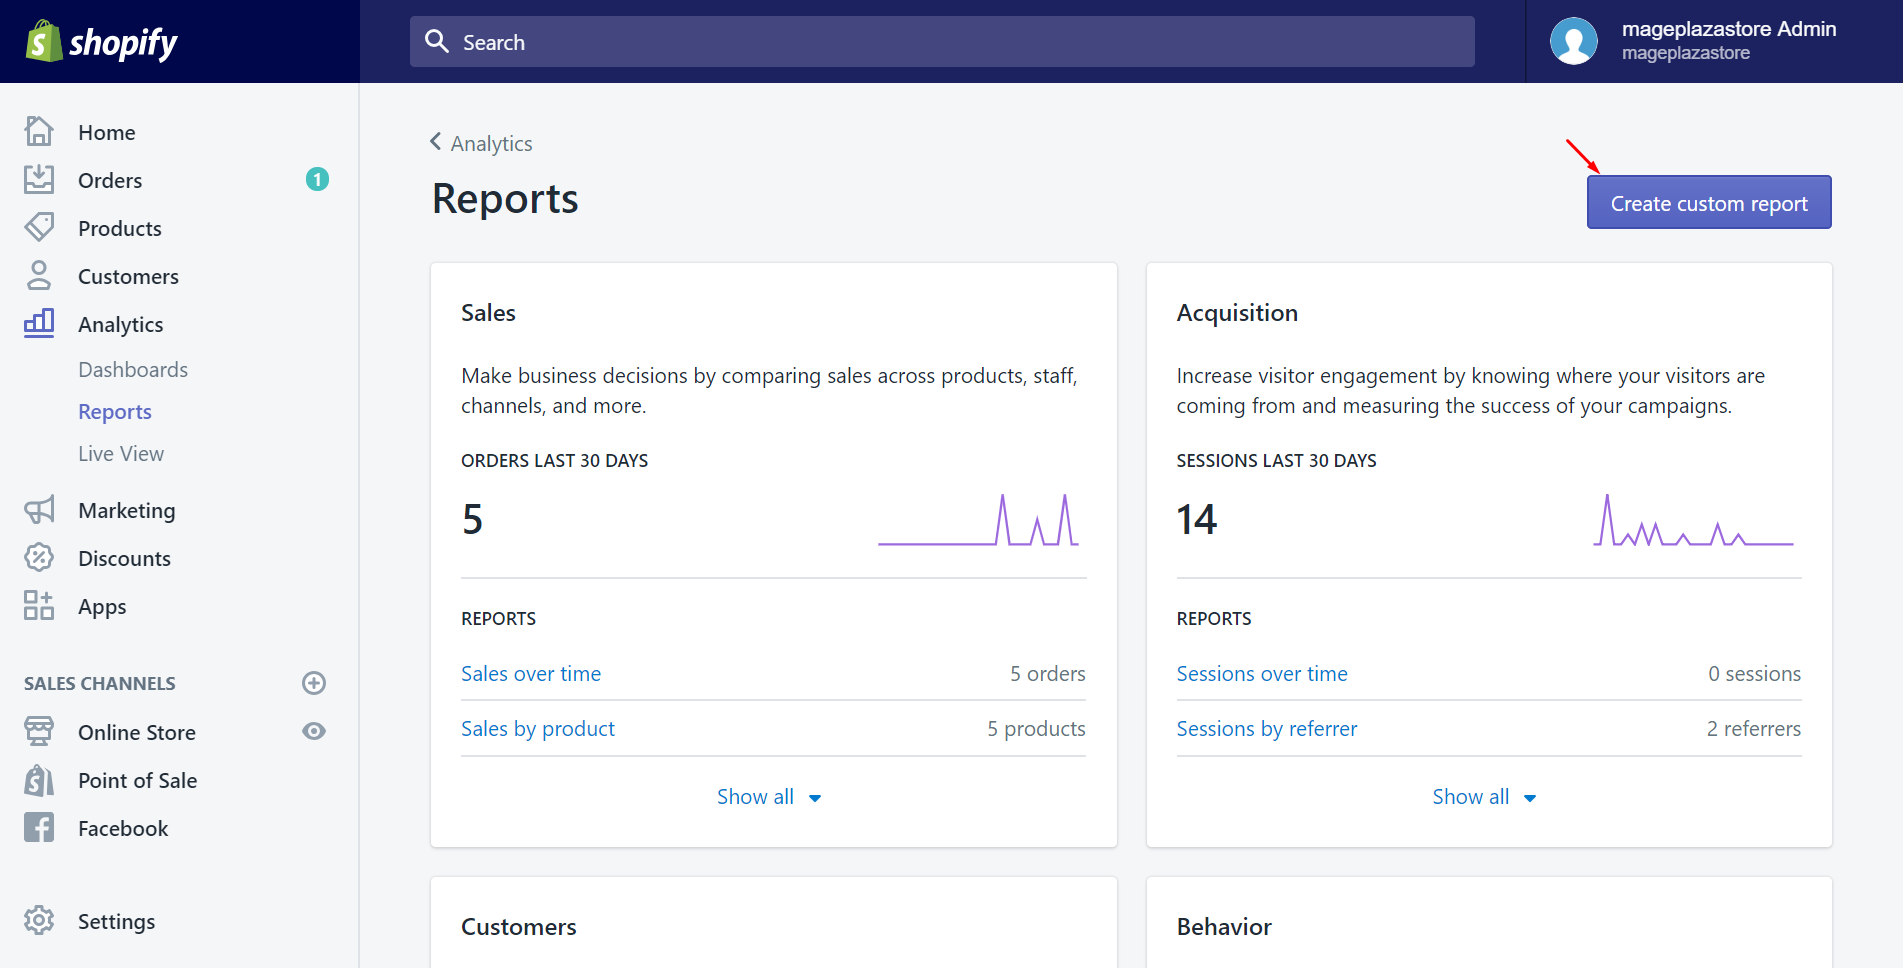
Step 2: Click Create custom report
Afterward, you access the Reports page. Look at the top of the page and make sure to click on the Create custom report button.
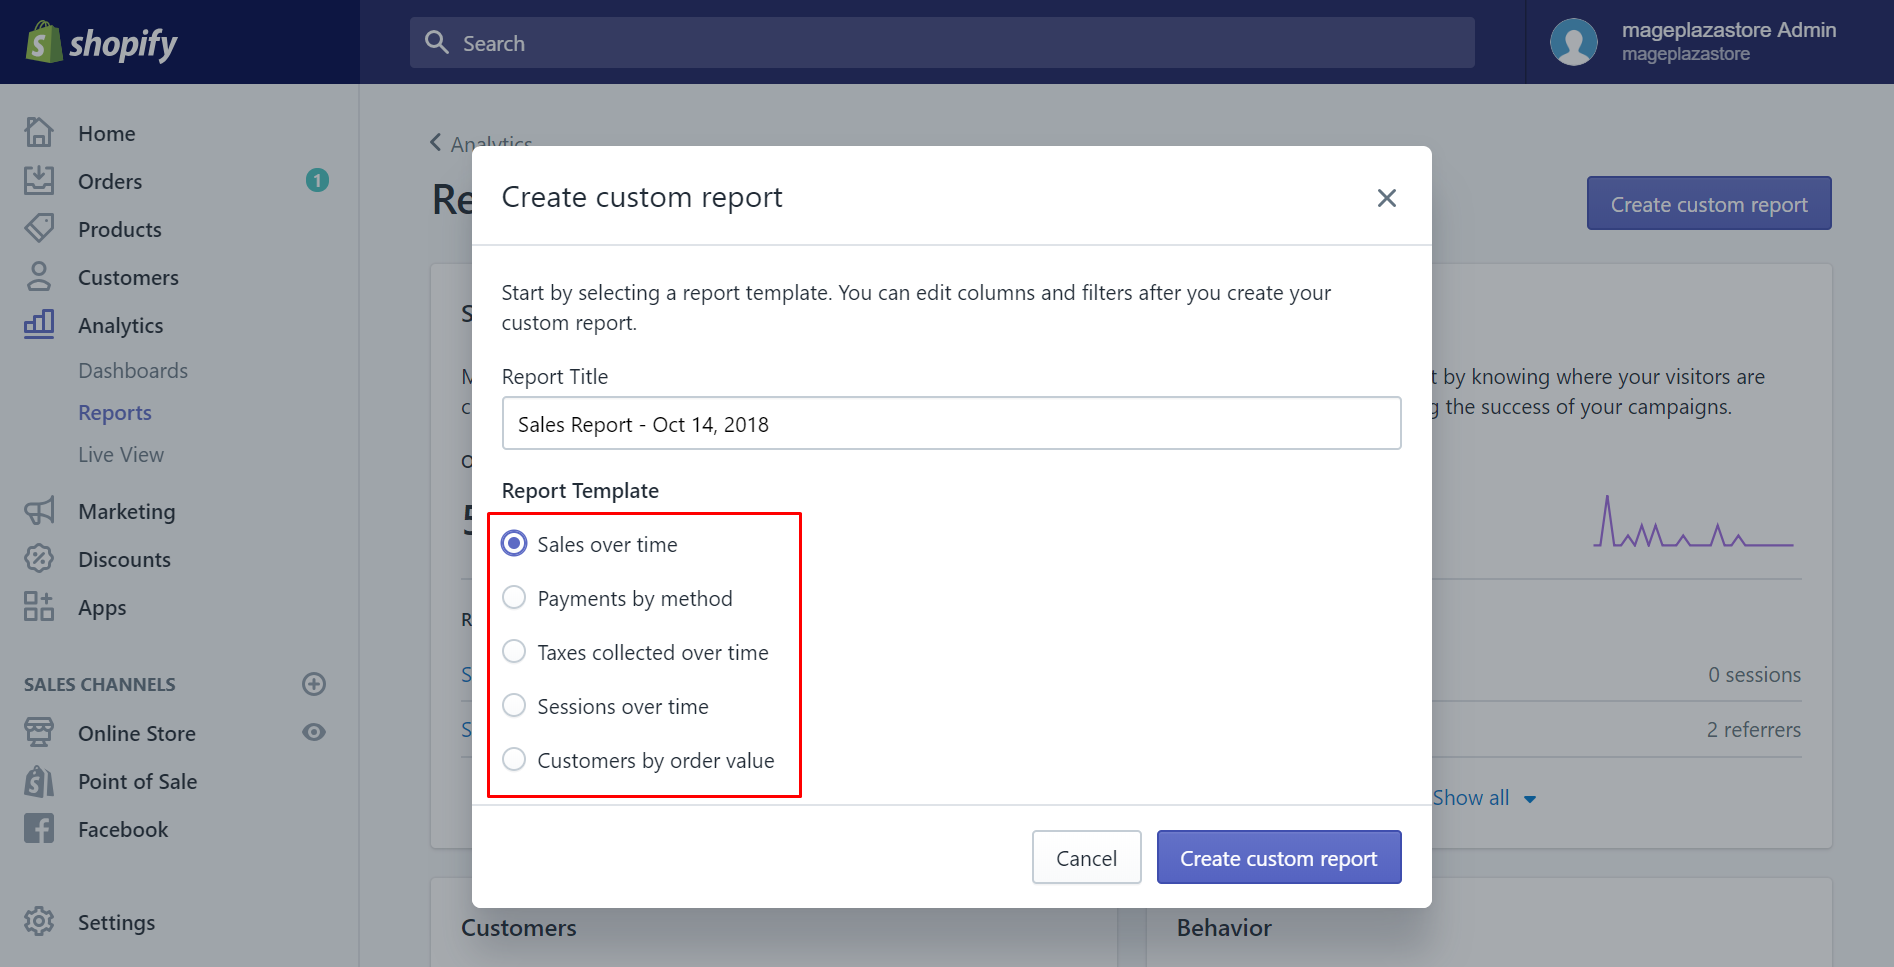
Step 3: Choose the report
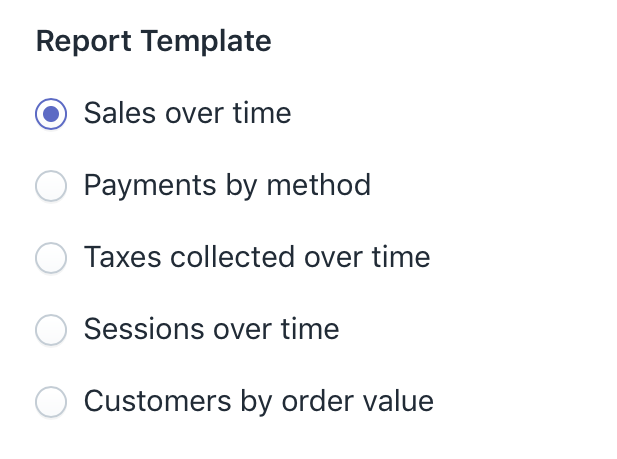
In this step, you will work with your own thoughts. A small dialog named Choose starting point will come out. As its name, it is to choose the kind of report you want to start with. Tap on the name of the report. For example, I choose Sales over time by clicking it.
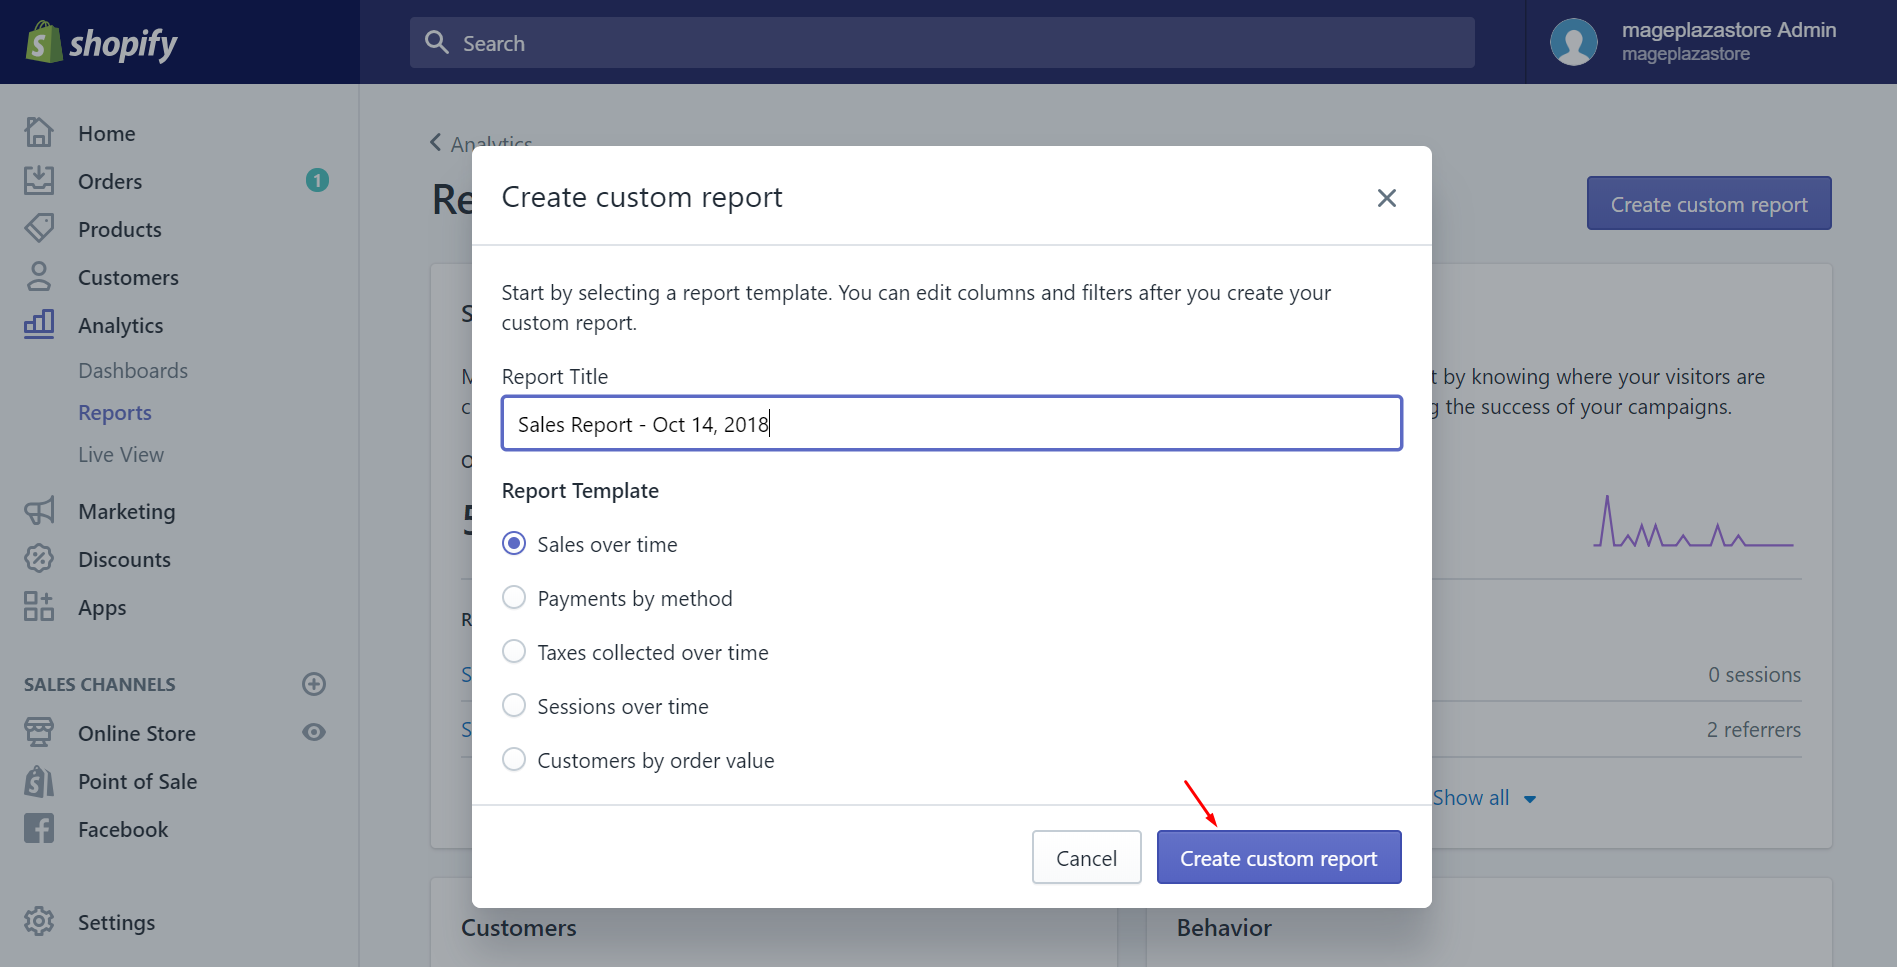
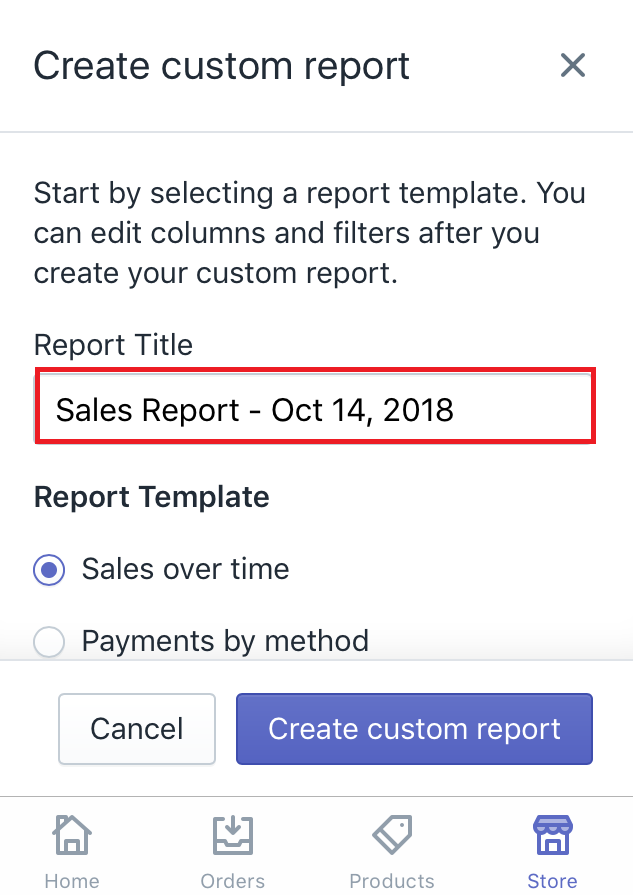
Step 4: Enter a descriptive name
You can change its name into a descriptive name you expected by entering it under the Title section.

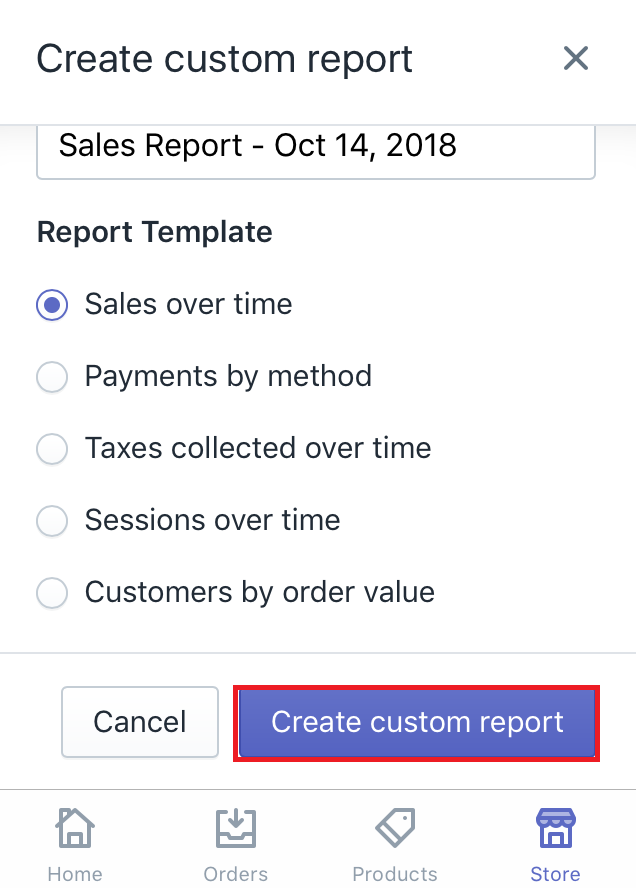
Step 5: Click Create custom report
To create the custom report, select the Create custom report button. Then, the report will be turned into a custom report immediately.
Step 6: Customize your new report
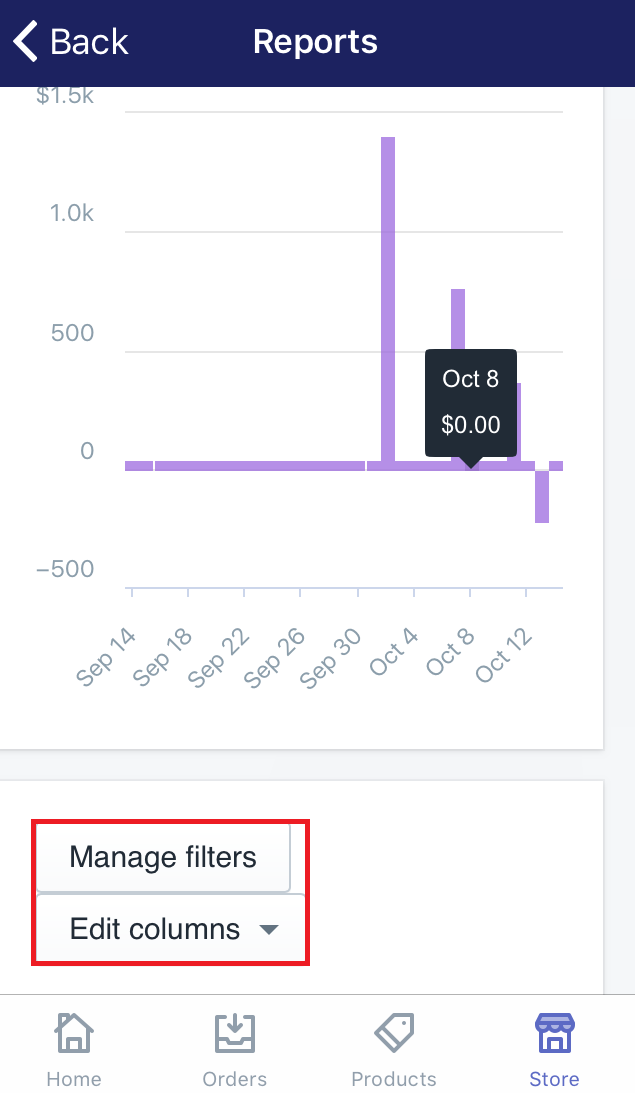
In this step, you are going to make a custom report on your own. This is to help you customize the best report which is the easiest to view and track. You can use many options to do this such as Manage filters or Edit columns.
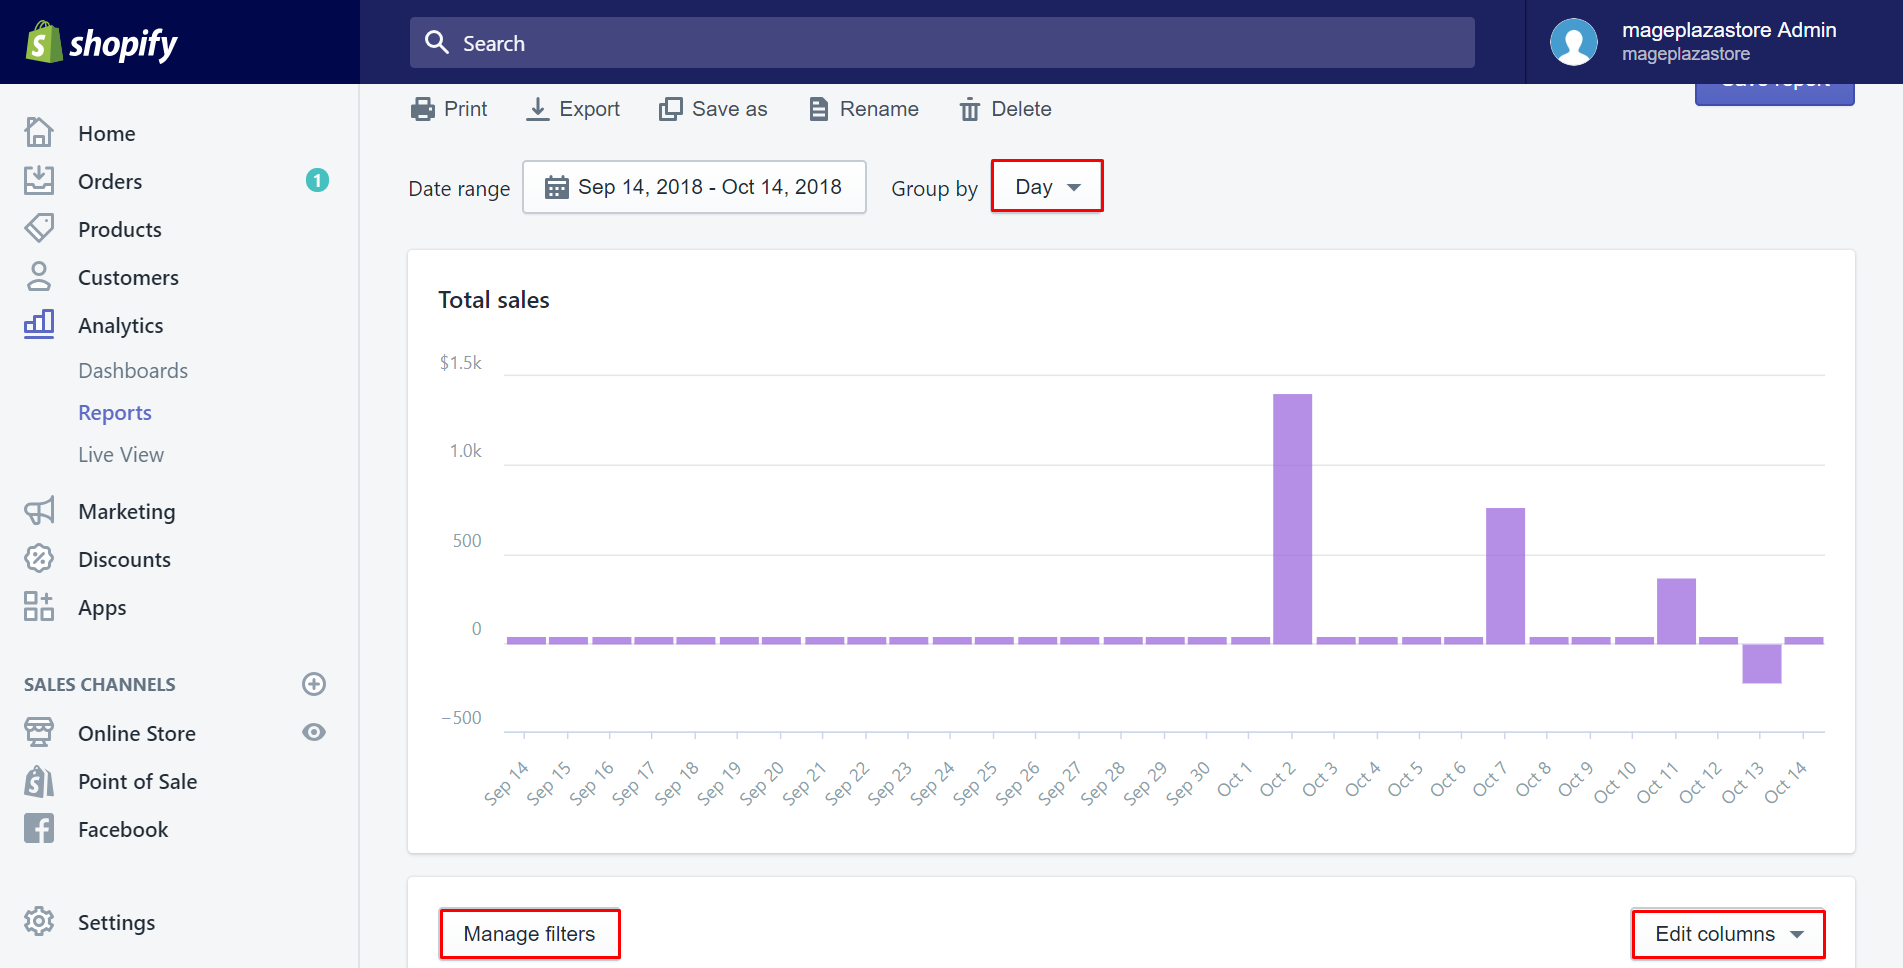
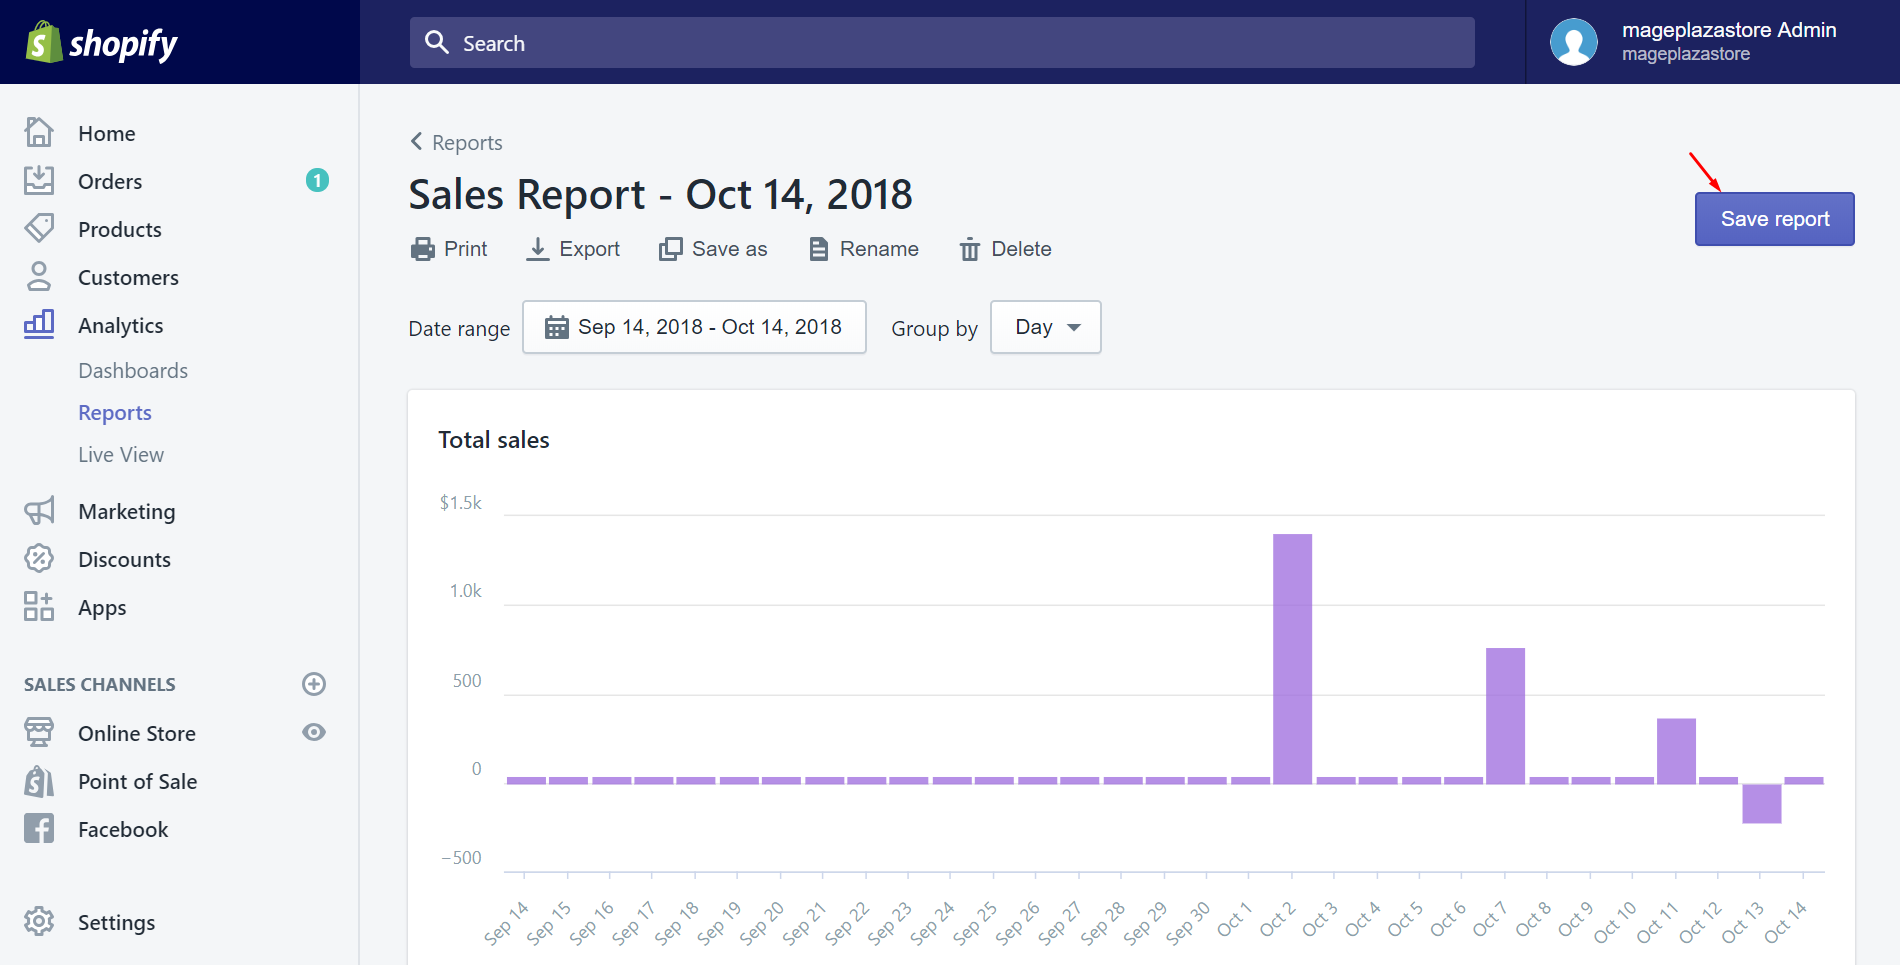
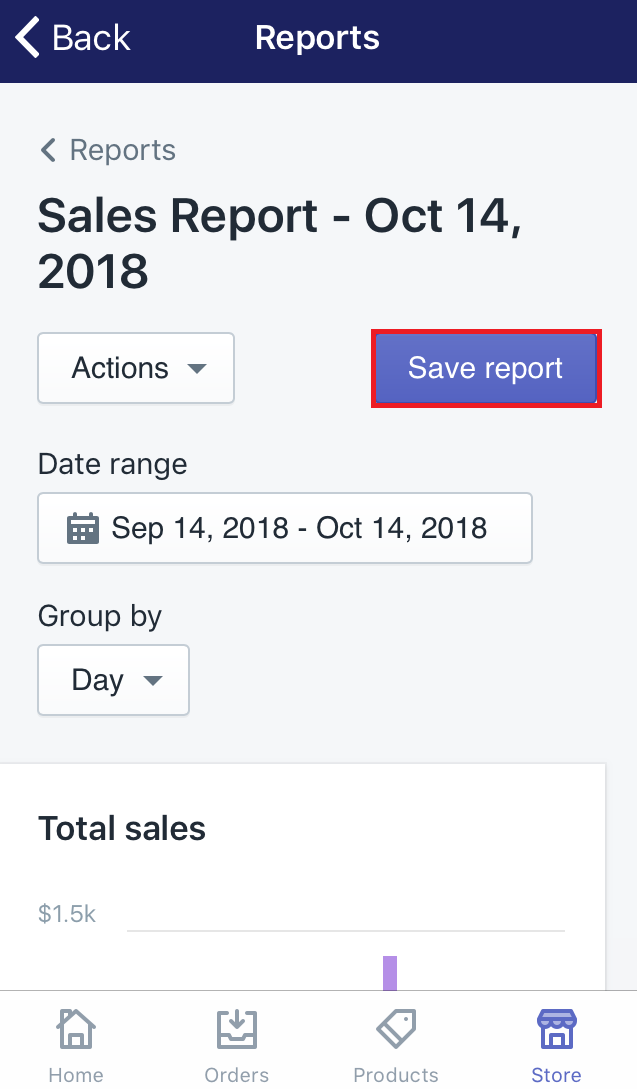
Step 7: Save report
Make sure that you have an ideal custom report after all. Then, choose Save report to complete.
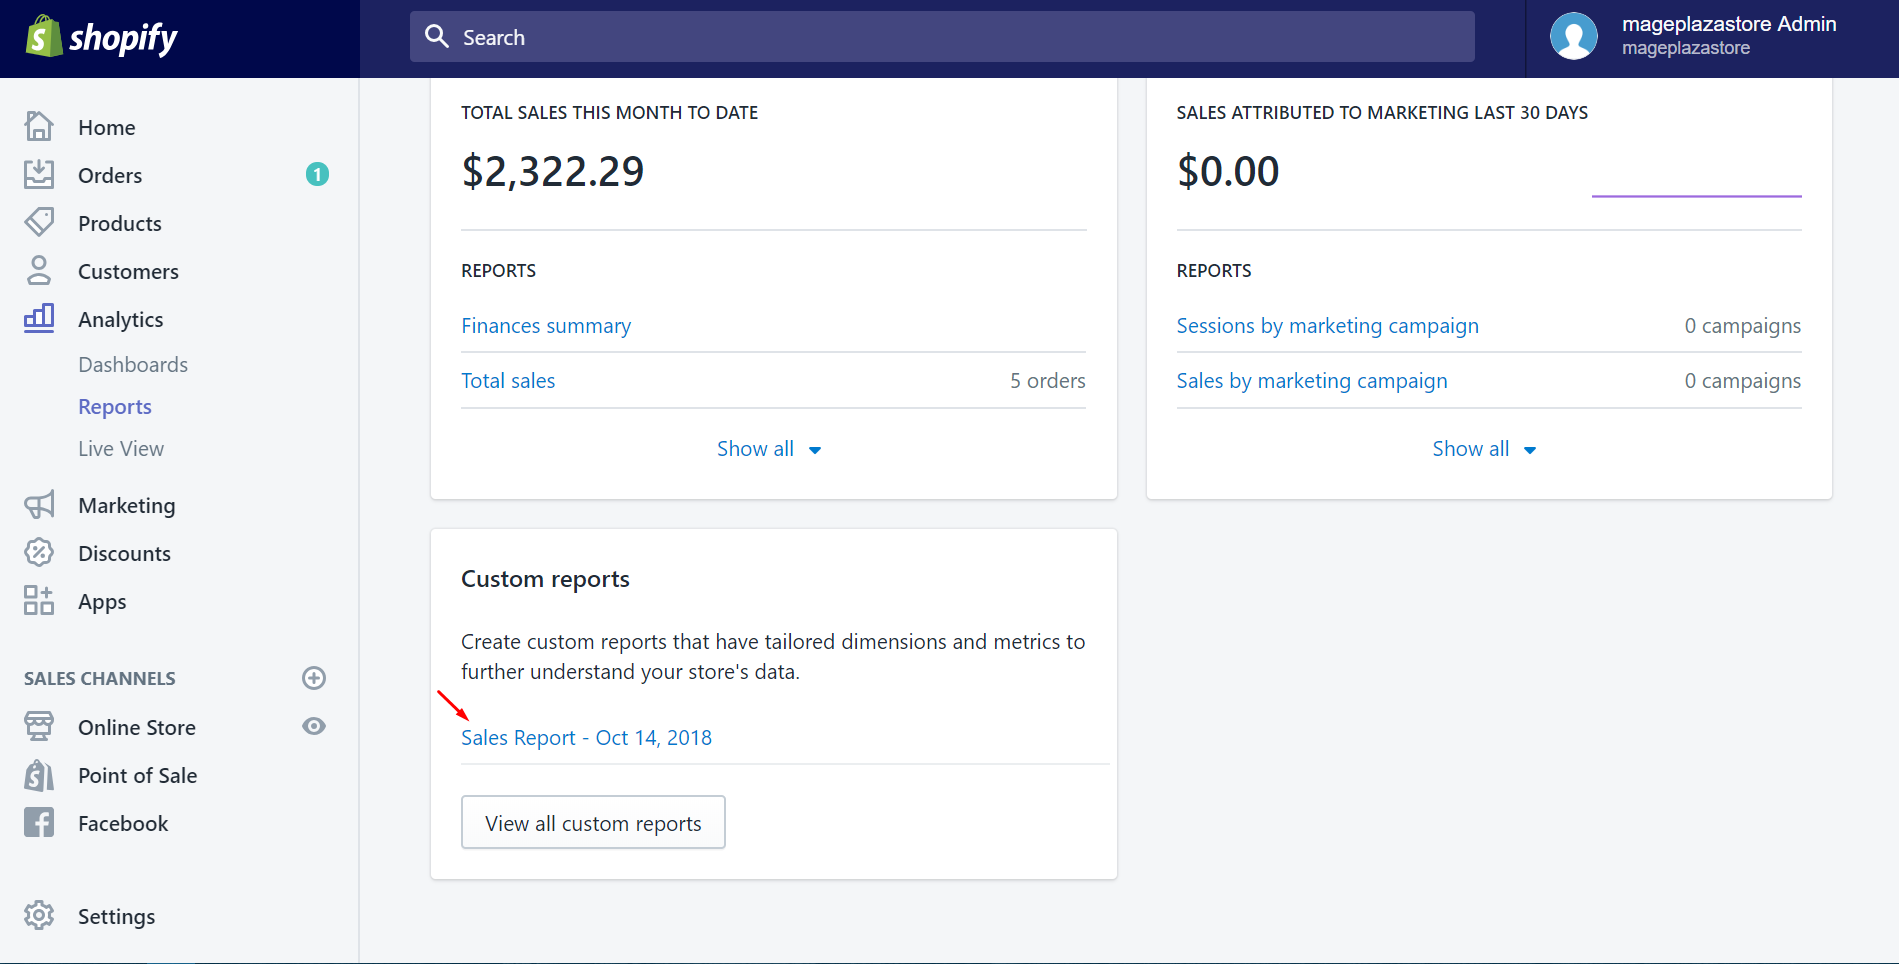
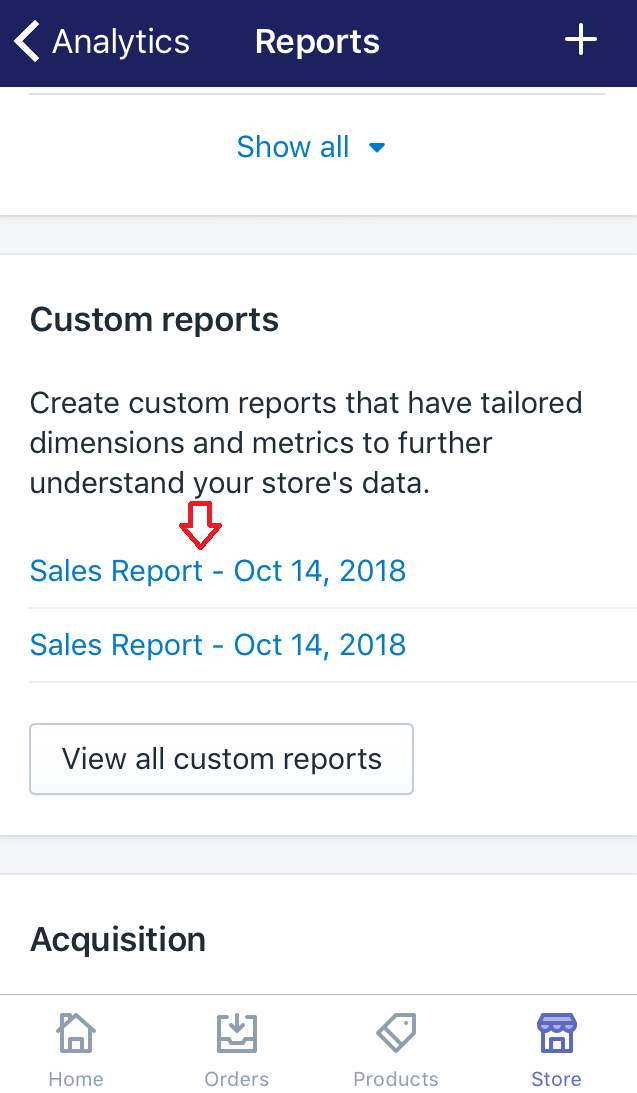
This report will be shown in the Custom reports section on the Reports page.
To custom reports on iPhone (Click here)
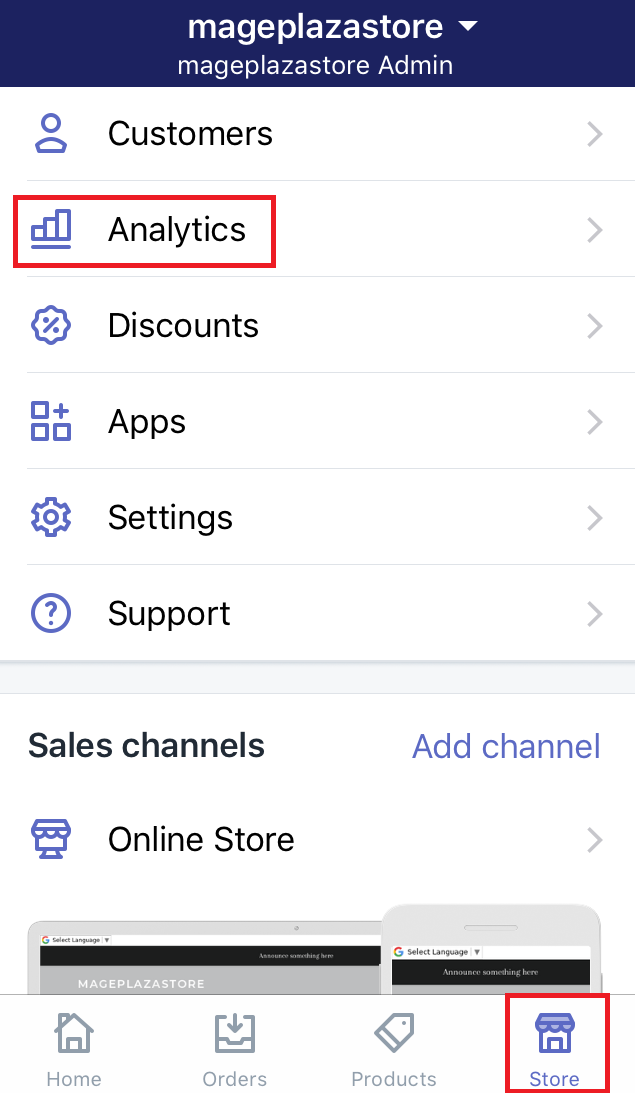
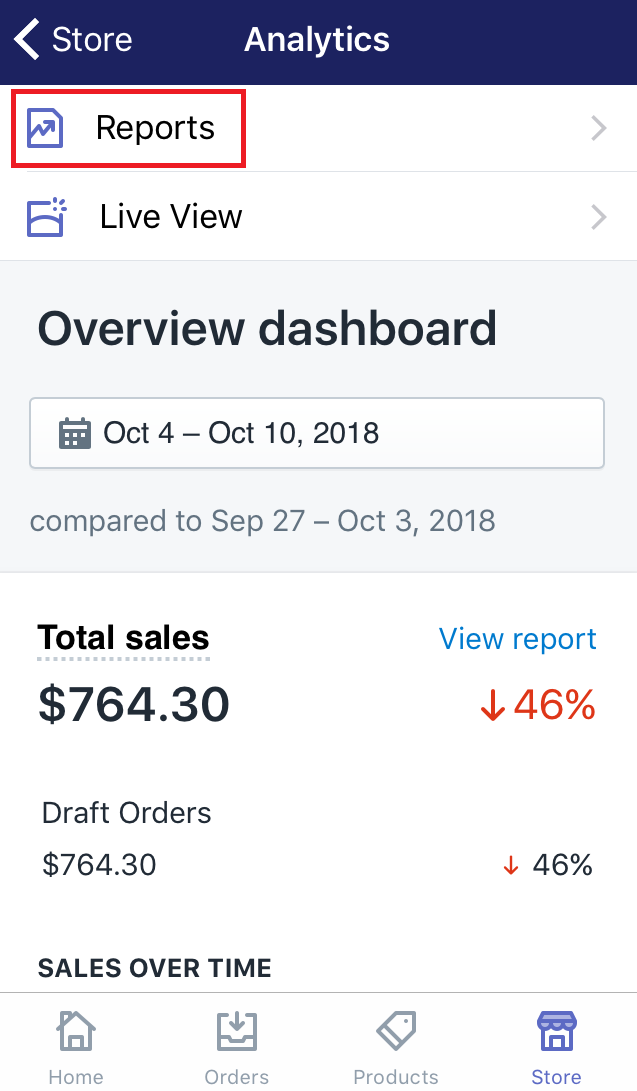
- Step 1: Go to Analytics
After logging in your Shopify account in the app, go to theStoresection at the bottom of the screen. Afterward, selectAnalytics. Then, the overview dashboard will come out automatically.
- Step 2: Click Reports
In order to view the sales report, clickReports.
- Step 3: Click the + button
Afterward, you will access the Reports page right away. To create a custom report, make sure to click the + button which is on the top of the screen.

- Step 4: Choose the report
In this step, you will work with your own thoughts. A small dialog namedChoose starting pointwill come out. As its name, it is to choose the kind of report you want to start with. Tap on the name of the report. For example, I choose Sales over time by clicking it.
- Step 5: Enter a descriptive name
You can change its name into a descriptive name you expected by entering it under theTitlesection.
- Step 6: Click Create custom report
To create the custom report, select theCreate custom reportbutton. Then, the report will be turned into a custom report immediately.
- Step 7: Customize your new report
In this step, you are going to make a custom report on your own. This is to help you customize the best report which is the easiest to view and track. You can use many options to do this such asManage filtersorEdit columns.
- Step 8: Save
Make sure that you have an ideal custom report after all. Then, chooseSave reportto complete.
This report will be shown in the Custom reports section on the Reports page.
To custom reports on Android (Click here)
-
Step 1: Go to Analytics
After logging in your Shopify account in the app, go to theStoresection. Afterward, selectAnalytics. Then, the overview dashboard will come out automatically. -
Step 2: Click Reports
In order to view the sales report, clickReports. -
Step 3: Click the + button
Afterward, you will access the Reports page right away. To create a custom report, make sure to click the + button which is on the top of the screen. -
Step 4: Choose the report
In this step, you will work with your own thoughts. A small dialog namedChoose starting pointwill come out. As its name, it is to choose the kind of report you want to start with. Tap on the name of the report. For example, I choose Sales over time by clicking it. -
Step 5: Enter a descriptive name
You can change its name into a descriptive name you expected by entering it under theTitlesection. -
Step 6: Click Create custom report
To create the custom report, select theCreate custom reportbutton. Then, the report will be turned into a custom report immediately. -
Step 7: Customize your new report
In this step, you are going to make a custom report on your own. This is to help you customize the best report which is the easiest to view and track. You can use many options to do this such asManage filtersorEdit columns. -
Step 8: Save
Make sure that you have an ideal custom report after all. Then, chooseSave reportto complete. This report will be shown in the Custom reports section on the Reports page.
Summary
Above is a detailed tutorial about how to customize reports. Thanks to this, you can design your own report that suitable for your store. For more information about how to work with reports in Shopify like how to set a date range for a report, check out our Analytic tutorials.


