How to Set A Date Range For A Report on Shopify in 3 Steps
Reports are a part of Analytics provided by Shopify which allow shop owners to get an accurate view of their businesses through times. Almost all of the reports can be shown in a selected date range, narrow or wide ups to your purposes. Particularly, you can choose a narrow date range to check the situation for a few days or choose a wide range to see the overview picture of the whole year. Be noted that the new date range will be kept as default until you change it. Now, without further ado, here’s how to set a date range for a report on Shopify.
How to set a date range for a report
Step 1: Select a report
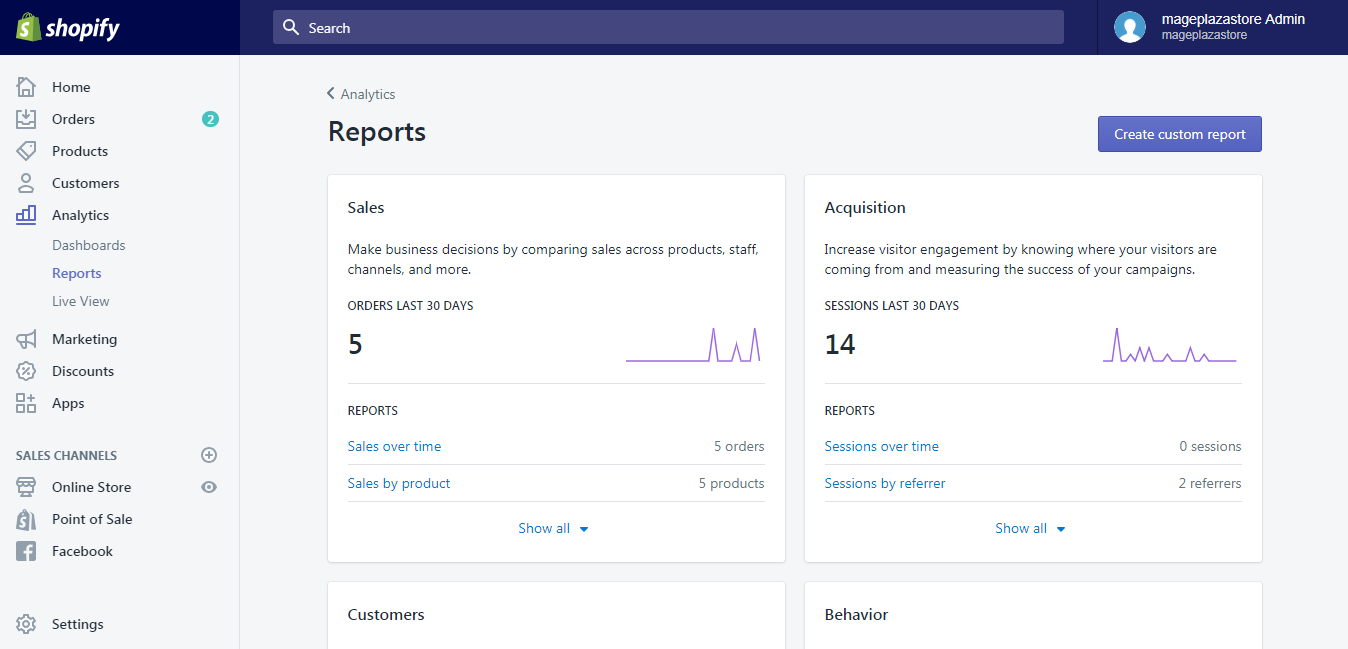
Sign in your account on Shopify website and go to Analytics which has a graph symbol beside its title. After that, you have to choose Reports to show all of your reports. You will see that they are categorized into groups, including Sales, Customers, Acquisition, etc.

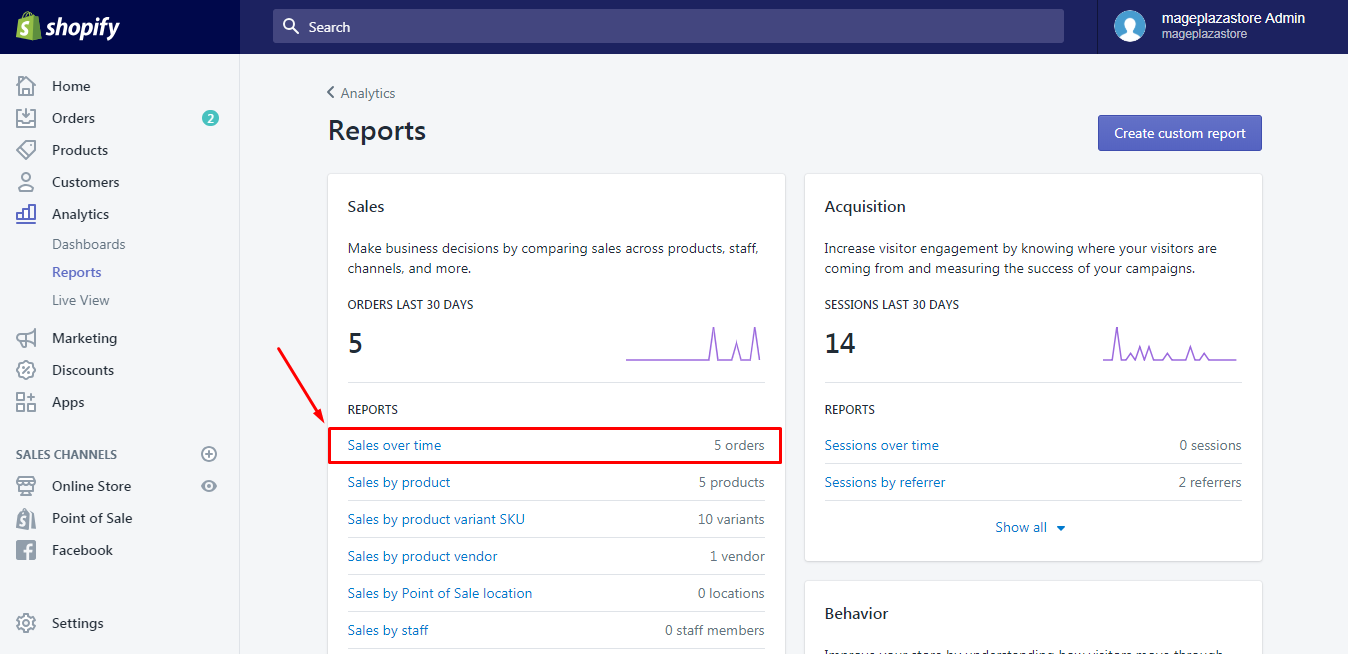
You can click on the Show all button under each group to see detailed reports list and open the one that you want to change the date range by clicking on its name. For example, let’s say you want to adjust the time period for the Sales over time.

Step 2: Press on Date range
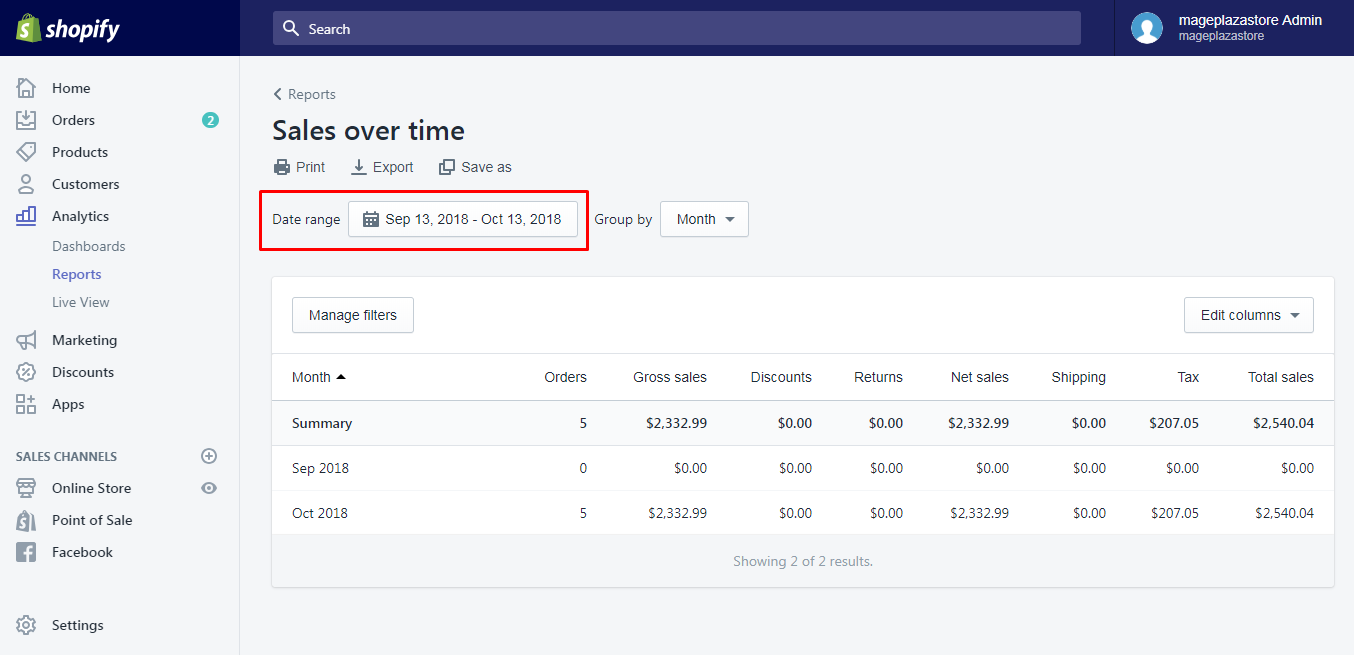
After opening the report, below its title, you will find that there are options to Print, Export or Save as and the Date range with a time setting. Click on the box next to Date range.

Step 3: Enter the range
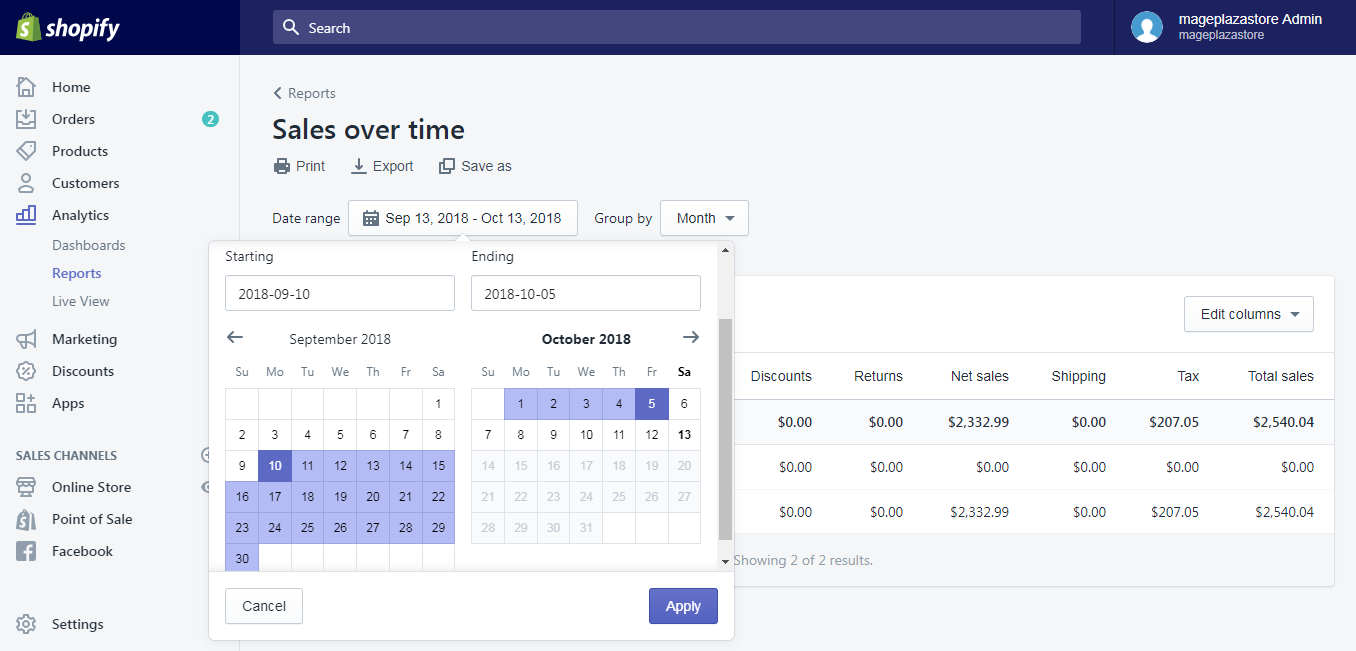
By default, the date range is set to be a month to date, like in this case, it is from September 13th, 2020 to October 13th, 2020. You can edit it by typing the day you want into the Starting and Ending boxes. If you don’t want to type it by hands, you can choose the dates in the calendar below. All you have to do is pick two days, the first pick is for the starting day and the last one is for the ending day.

After you pick your time frame, it will be marked as the blue zone in the calendars. Once you completed adding the range you want, the Apply button will light up that remember to press on it to save all the changes.
Conclusion
To sum up, this writing is all about how to set a date range for a report on Shopify. The process is fairly simple, it will probably take no more than two minutes of your time. We hope that you find this post helpful and make your life a little bit easier. If you want to know more about all the other cool things that you can do with reports on Shopify like add or remove columns, filter your reports, customize your reports or even export those reports, feel free to check out many other helpful posts in our website.


