
How To Integrate HubSpot with BigCommerce within 3 Minutes in 2024

Sales and marketing strategies play an important role in improving customer experience and boosting sales. This means store owners need to handle them with more personal attention to attract and retain customers.
HubSpot is one great tool that helps you implement marketing automation. However, if you want to get the best out of your HubSpot and Bigcommerce store, you need to know how to integrate the two platforms. In today’s article, we will give you comprehensive instructions on how to integrate HubSpot with BigCommerce.
Let’s get started!
What is HubSpot?
HubSpot is an American software provider with the mission to greatly assist you with inbound marketing, sales and customer service.
Founded in 2006 by Brian Halligan and Dharmesh Shah, HubSpot is a comprehensive CRM platform that provides all the resources you require to expand your business.
Moreover, being considered an all-in-one system, HubSpot offers a multiple of options for you to choose from ranging from HubSpot Marketing Hub, HubSpot Service Hub, HubSpot Sales Hub, CRM.
Why Should We Integrate HubSpot with BigCommerce?
Now you might still doubt why you would want a HubSpot BigCommerce integration. Therefore, here are the top three reasons you need to know to clear all your doubts about this complete solution.
- Boost the conversion rate
HubSpot can track what your visitors have viewed with detailed reporting, and more importantly, what have turned them into your actual customers.
- Track your customers' orders.
HubSpot can provide you with valuable data about your customers' orders, including information about products they have purchased and how much they have spent on the latest order.
- Maximize your marketing automation
It’s high time that you took advantage of all the precious pieces of information that HubSpot provides so that you can build your ideal marketing campaigns and make the best out of marketing automation.
Integrating HubSpot with BigCommerce via MakeWebBetter
Here is a step-by-step tutorial about integrating Hubspot with BigCommerce through MakeWebBetter. Let’s explore now!
Step 1: Install HubSpot BigCommerce integration
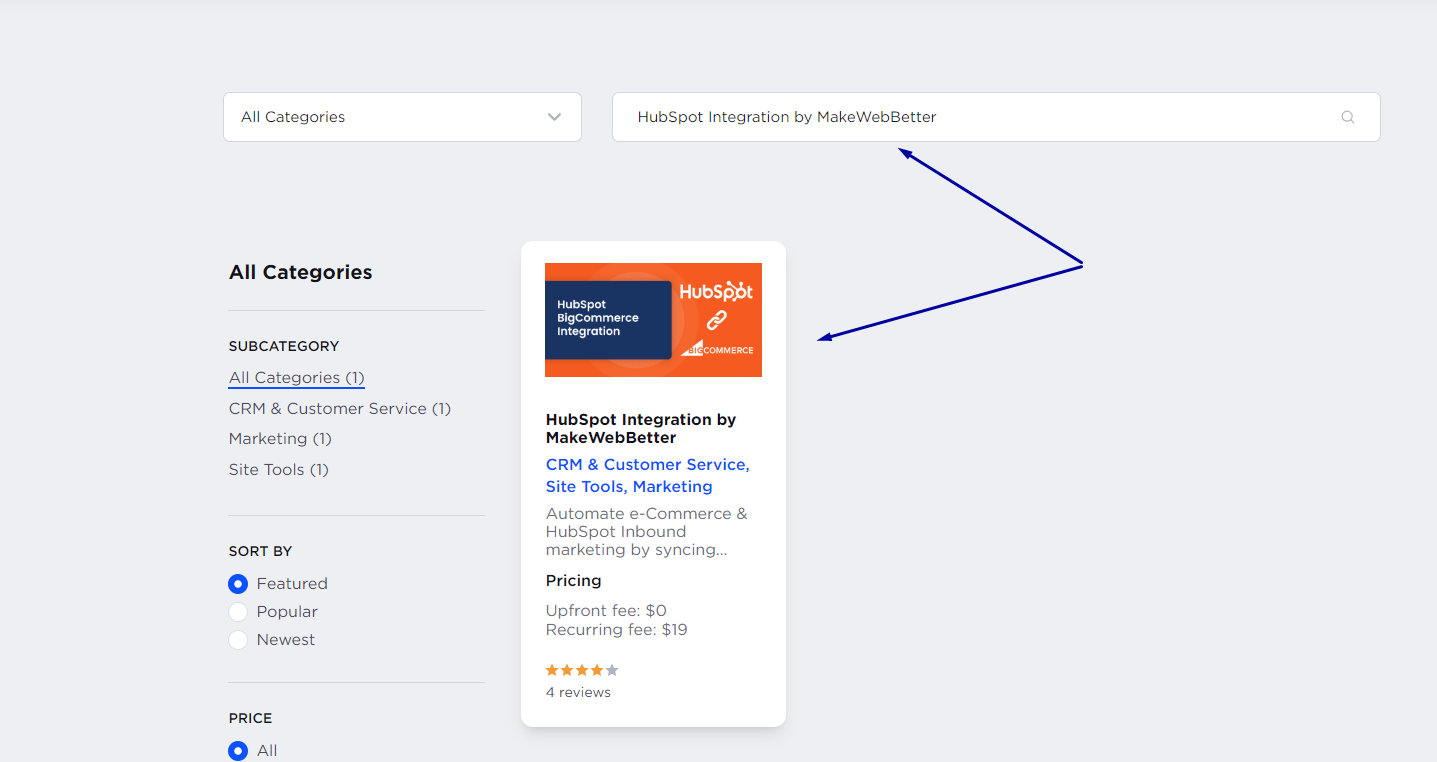
- Go to BigCommerce Marketplace and seek “HubSpot.” Click on “HubSpot Integration by MakeWebBetter.”
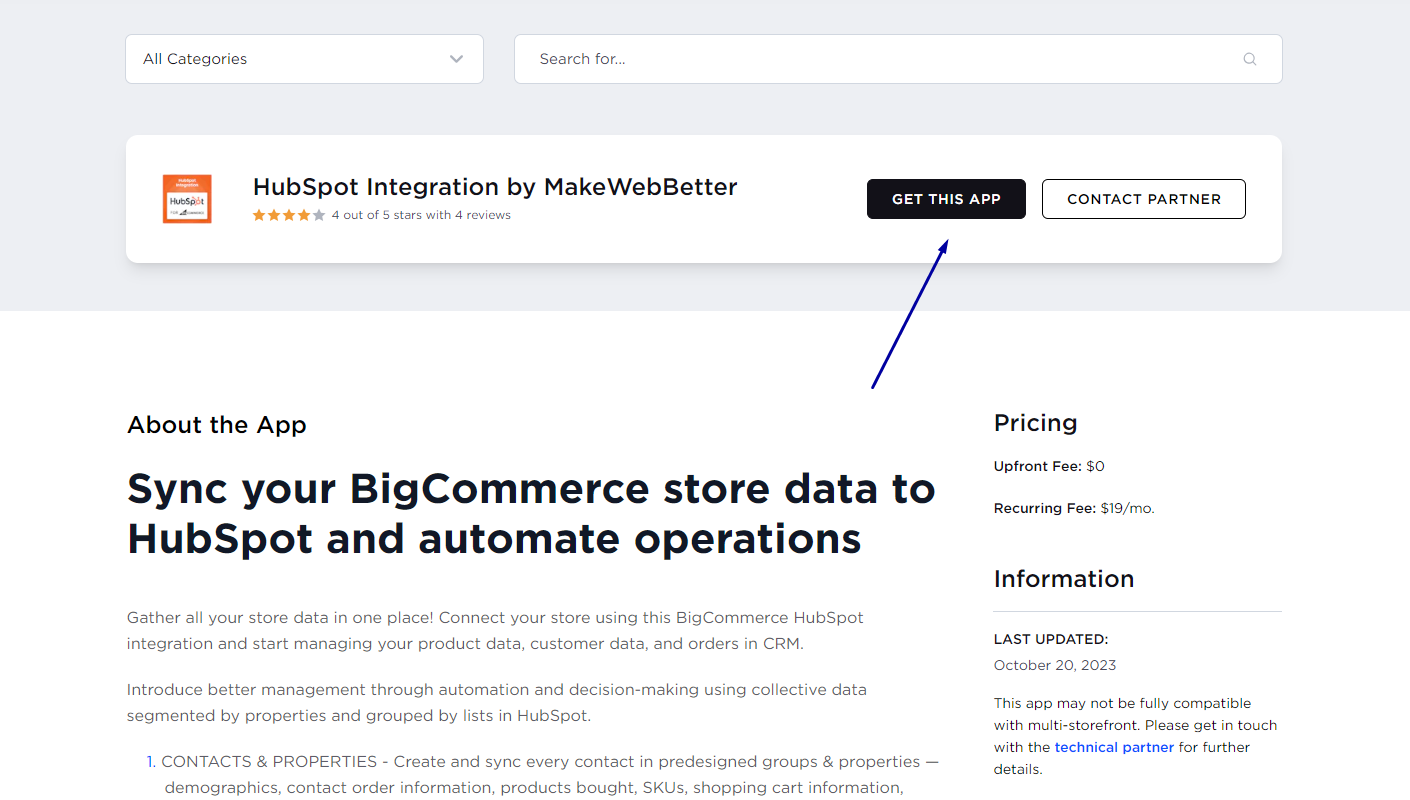
- Click on the “Get this App” button.
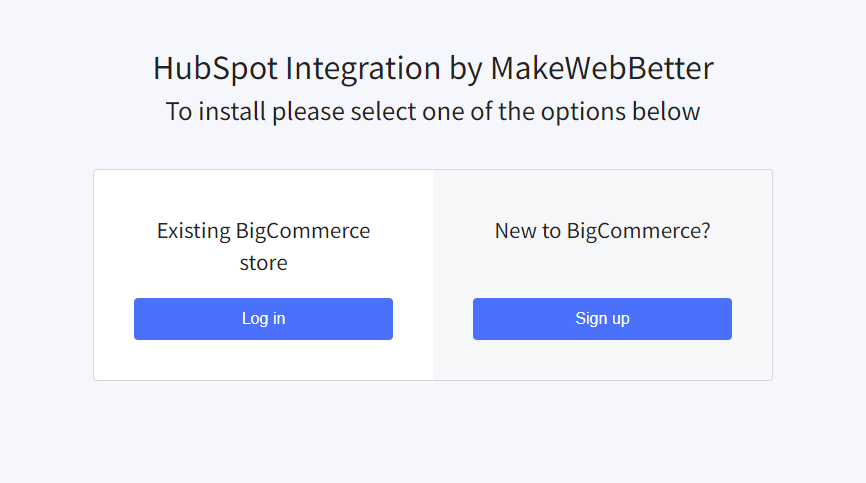
- Click “Log in” if you have an existing BigCommerce store or “Sign Up” if you are new to BigCommerce.
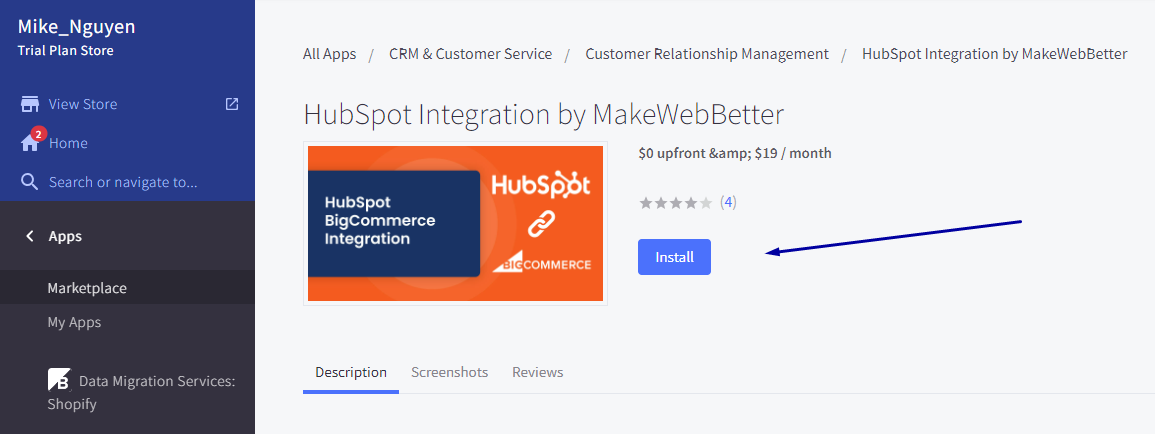
- After logging into the account, click on the “Install” button in your BigCommerce dashboard.
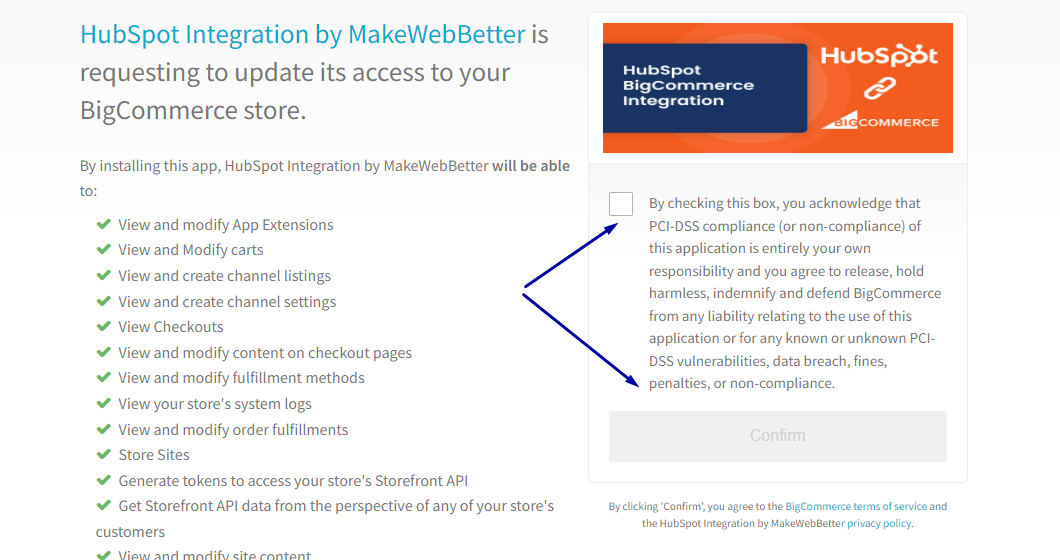
- The installation needs to finish within a few seconds. You read the compliance notice and click the “Confirm” button to continue processing.
Step 2: Set up HubSpot integration by MakeWebBetter
- So now, let’s start HubSpot integration. You will land on a screen like this.
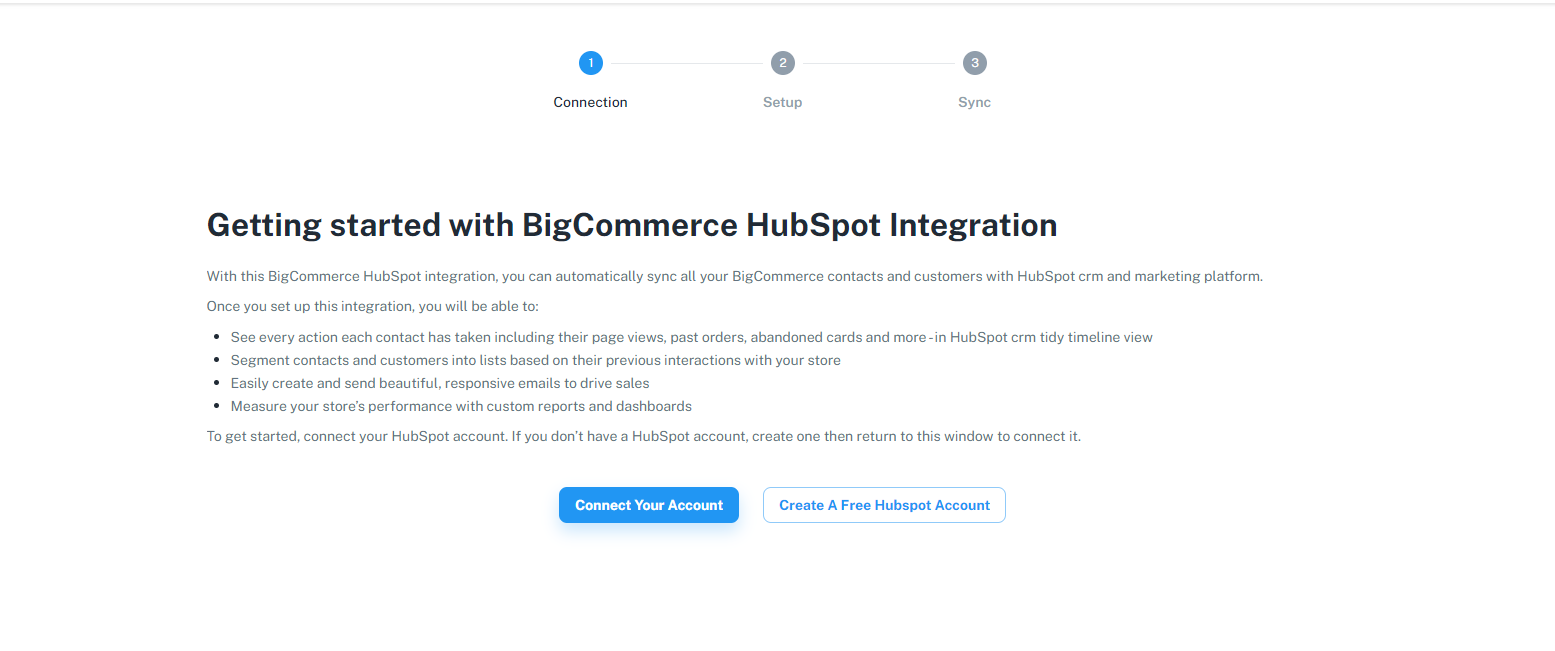
- Click on “Connect your account” to sync data or “Create a HubSpot account” if you don’t have one.
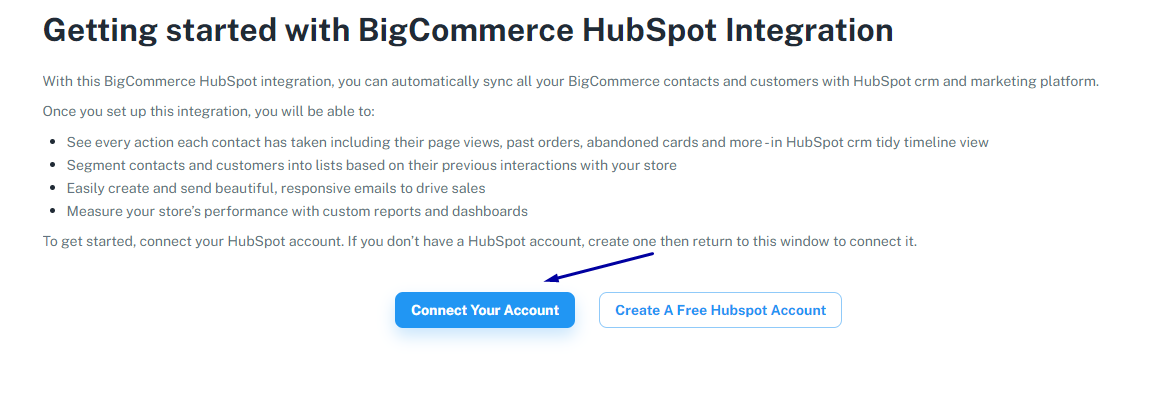
After clicking Connect your account button, you’ll see a window with all the HubSpot accounts connected to your email.
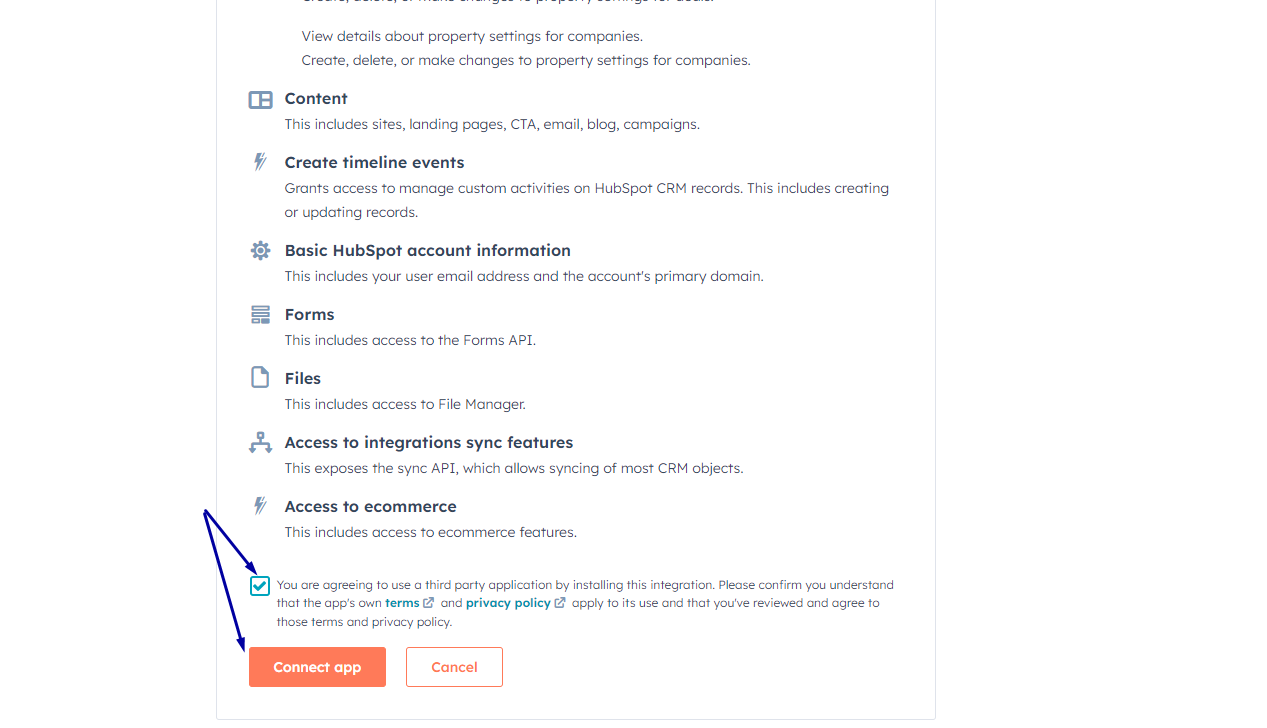
- After clicking “Connect Your Account,” you read all the information and press “Connect App.”
Once your account is connected, you want to experience these quick steps:
- Setup Groups and Properties
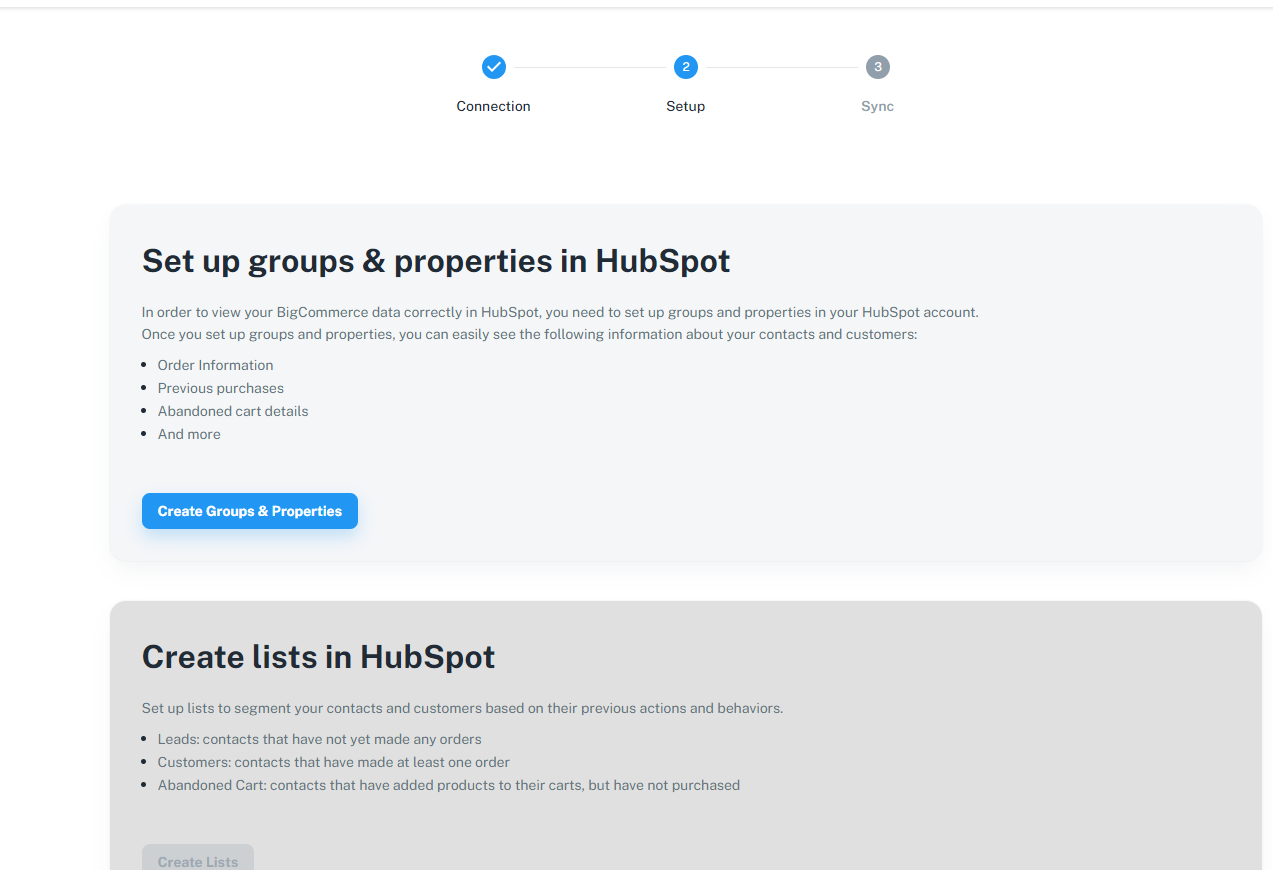
- Create Lists for Segmentation
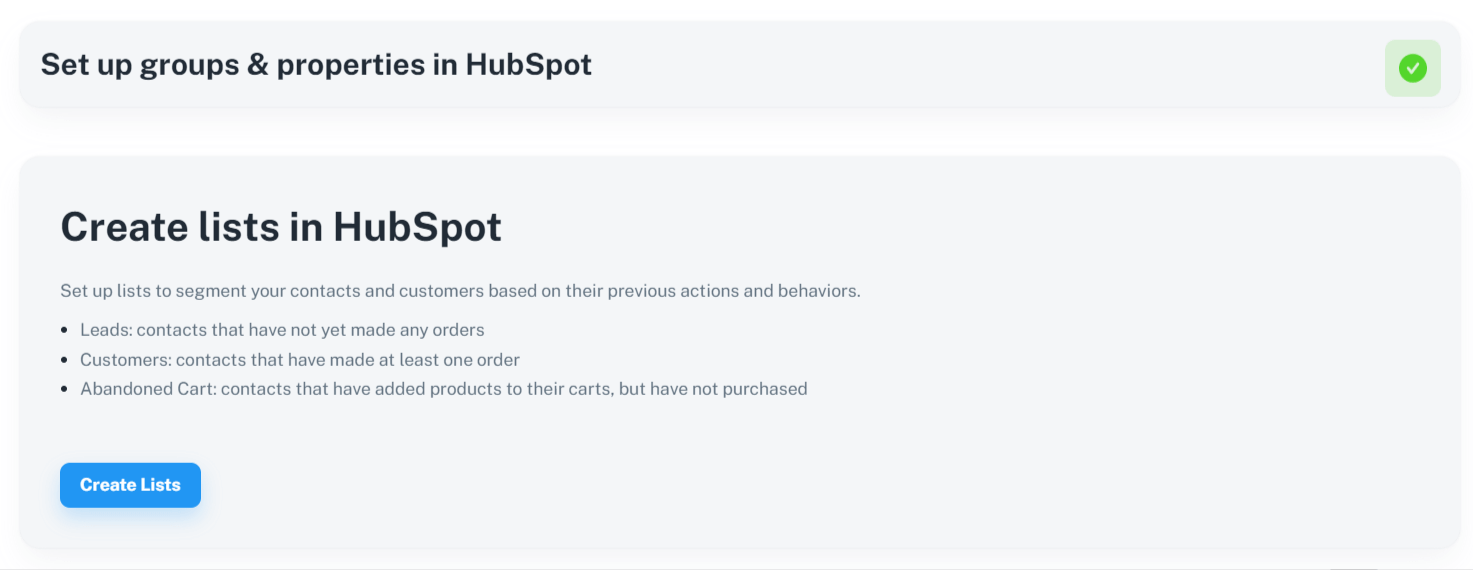
Creating lists helps you segment your contacts on different criteria so you can generate personalized content.
- Create Workflows for Automation
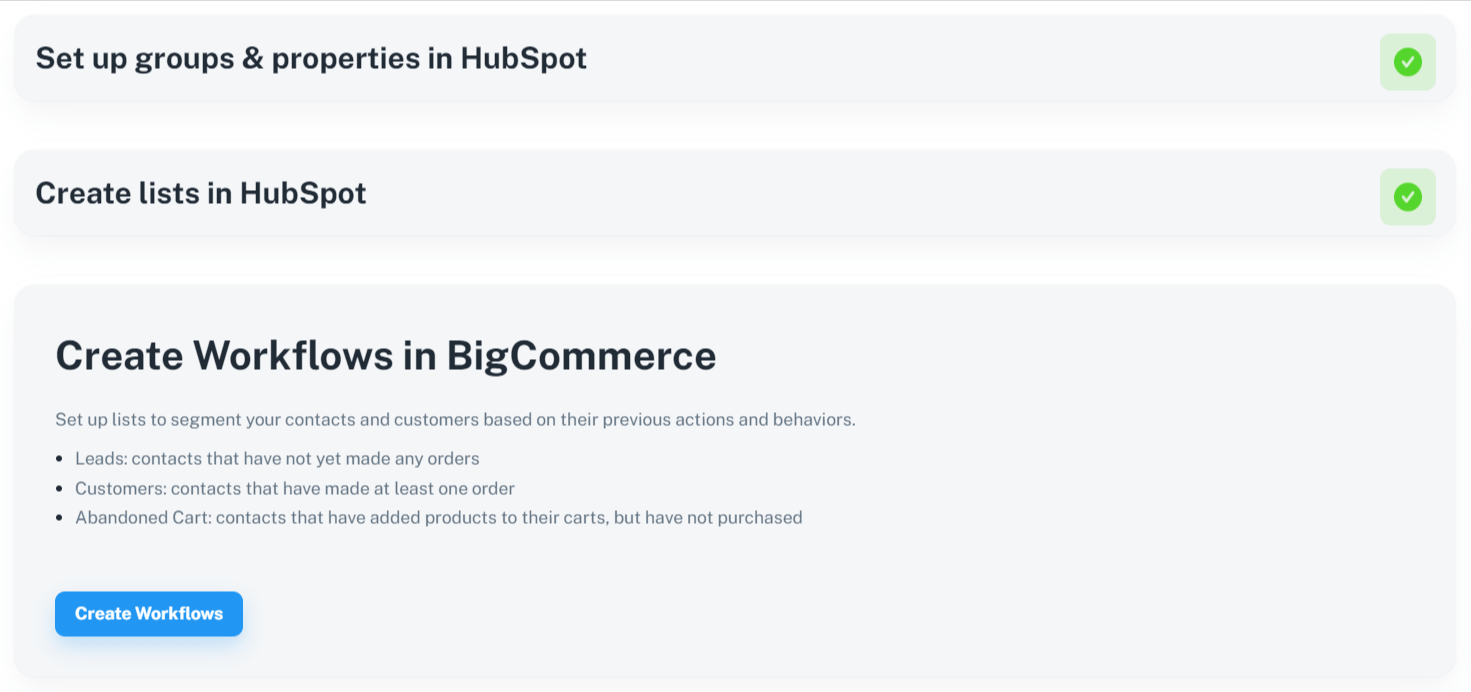
Click “Create Workflows” to automate your redundant tasks.
- Map Pipeline Stages for Both Platforms
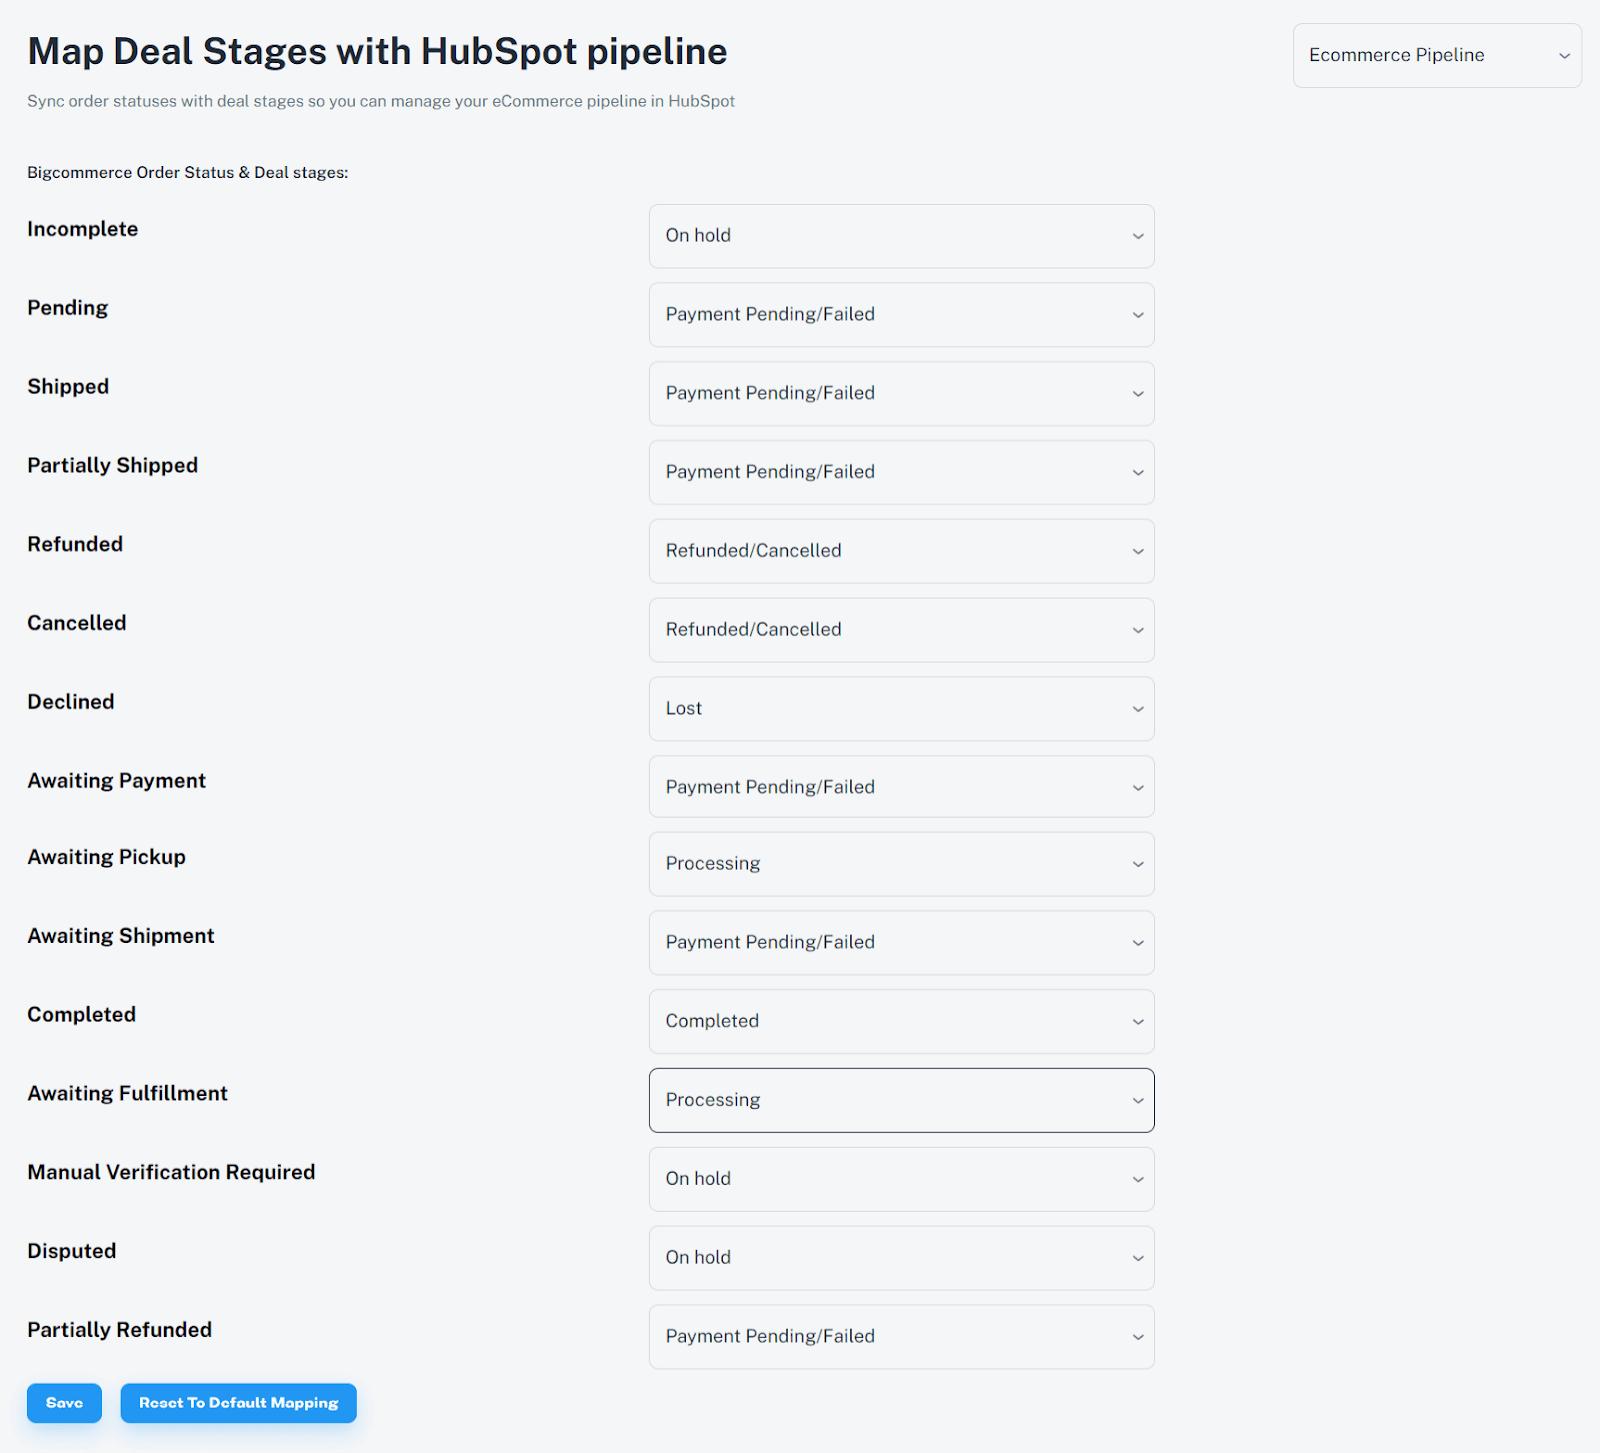
Select your pipeline and stages, map them, and click “Save.”
- Sync Existing Data to HubSpot
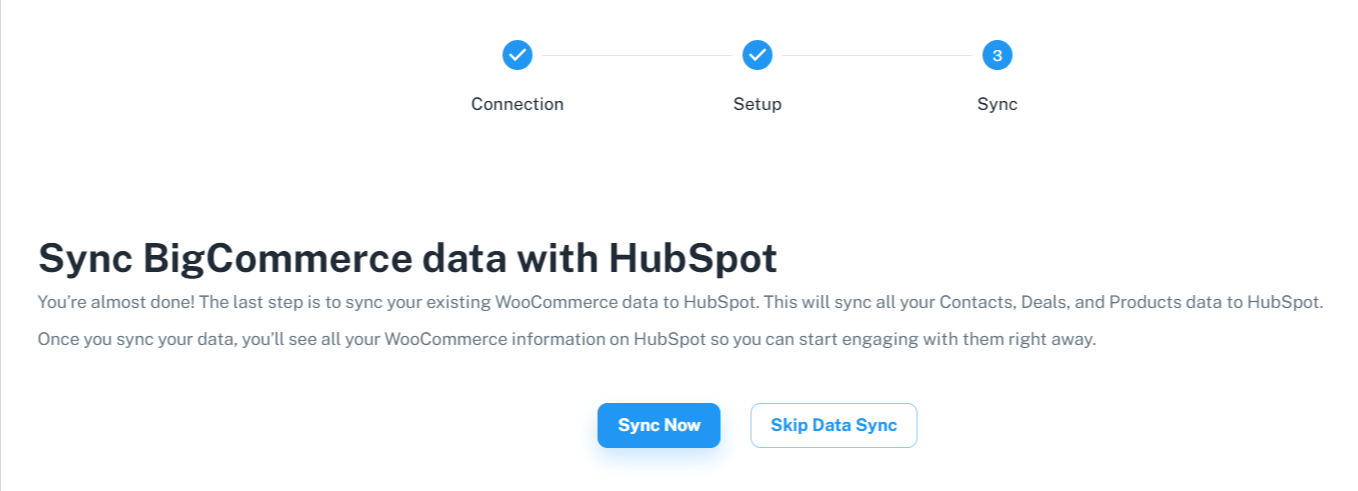
If you have data on your BigCommerce store, click “Sync Now.” to send it to HubSpot.
Integrating HubSpot with BigCommerce via Unific
Integrating HubSpot with BigCommerce through Unific involves connecting two platforms to enhance your ecommerce strategy by leveraging HubSpot’s marketing automation capabilities within your BigCommerce store.
Step 1: Install HubSpot BigCommerce integration
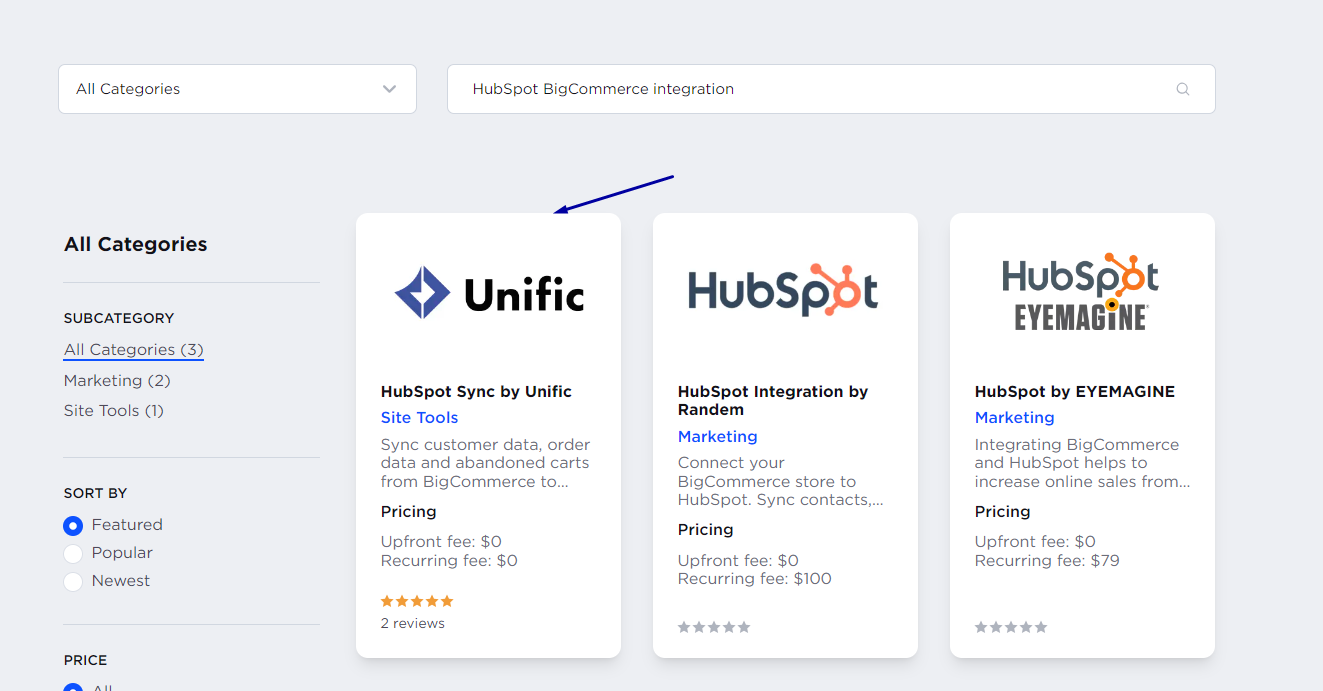
Go to “BigCommerce Marketplace” and search for “HubSpot BigCommerce Integration.” Click on “HubSpot Integration by Unific.”
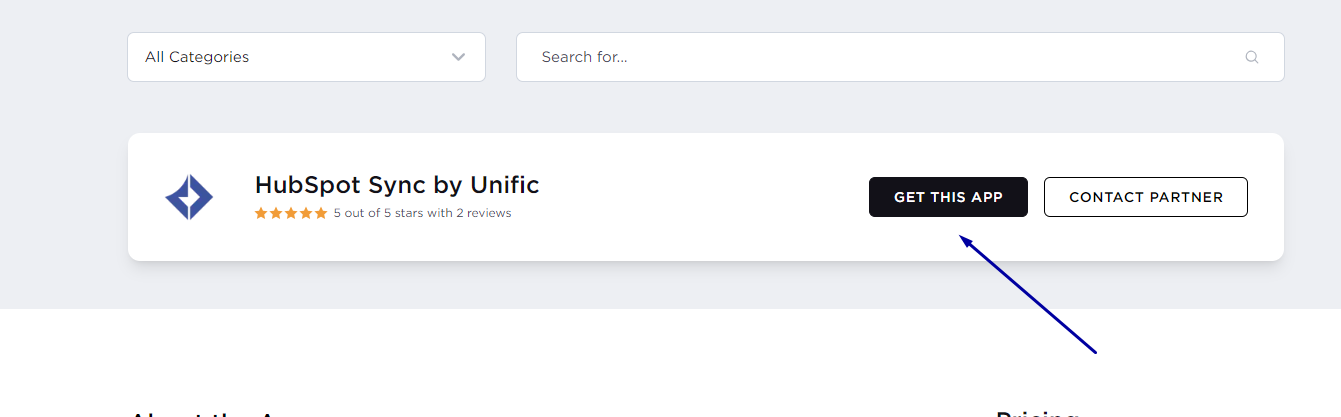
- Click the “G et this app” button.
- Choose one of the following choices in the image below.

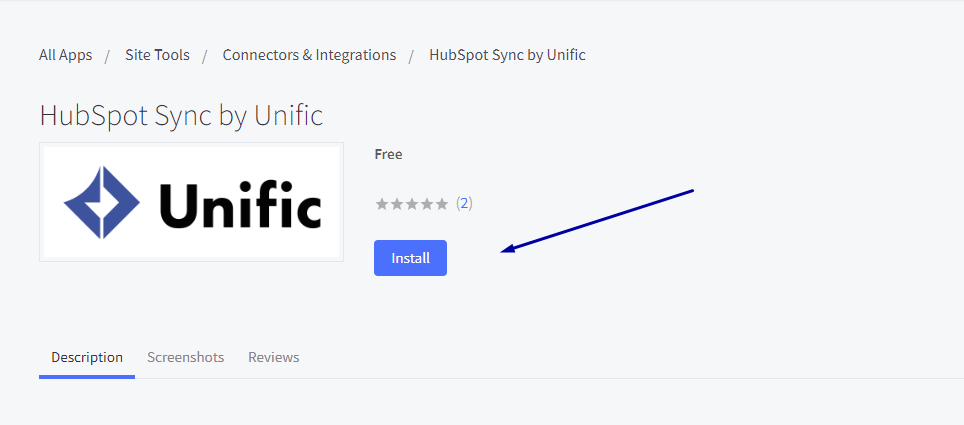
- Press “Install” after moving to the BigCommerce dashboard.
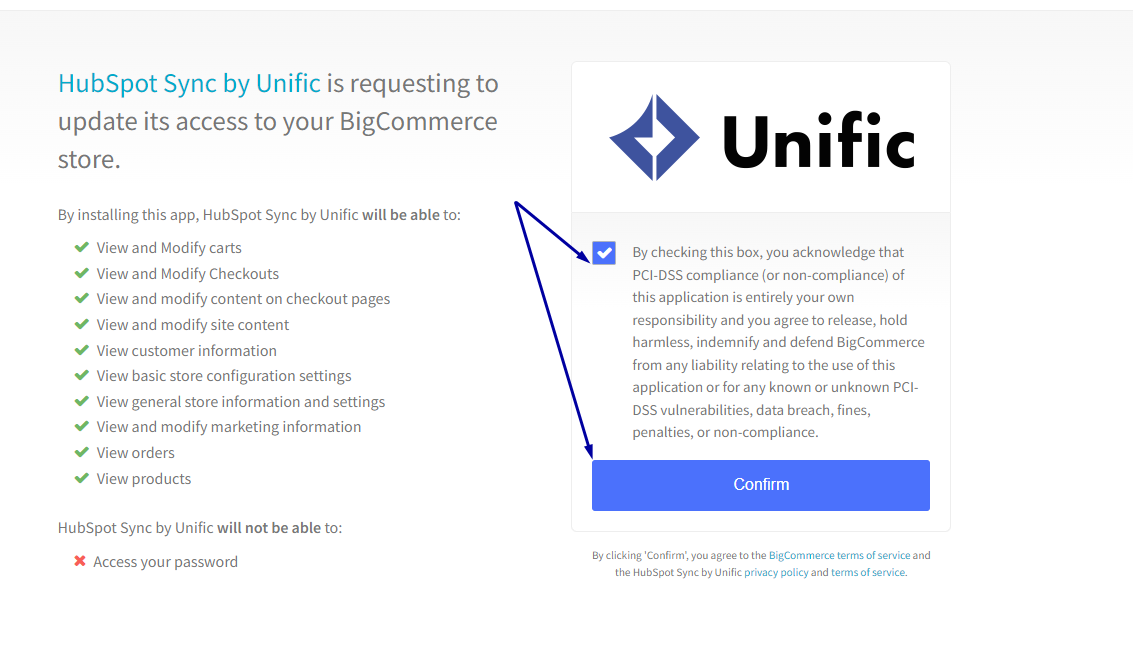
- The installation will finish in a few seconds. Click on the “Confirm” button to move forward.
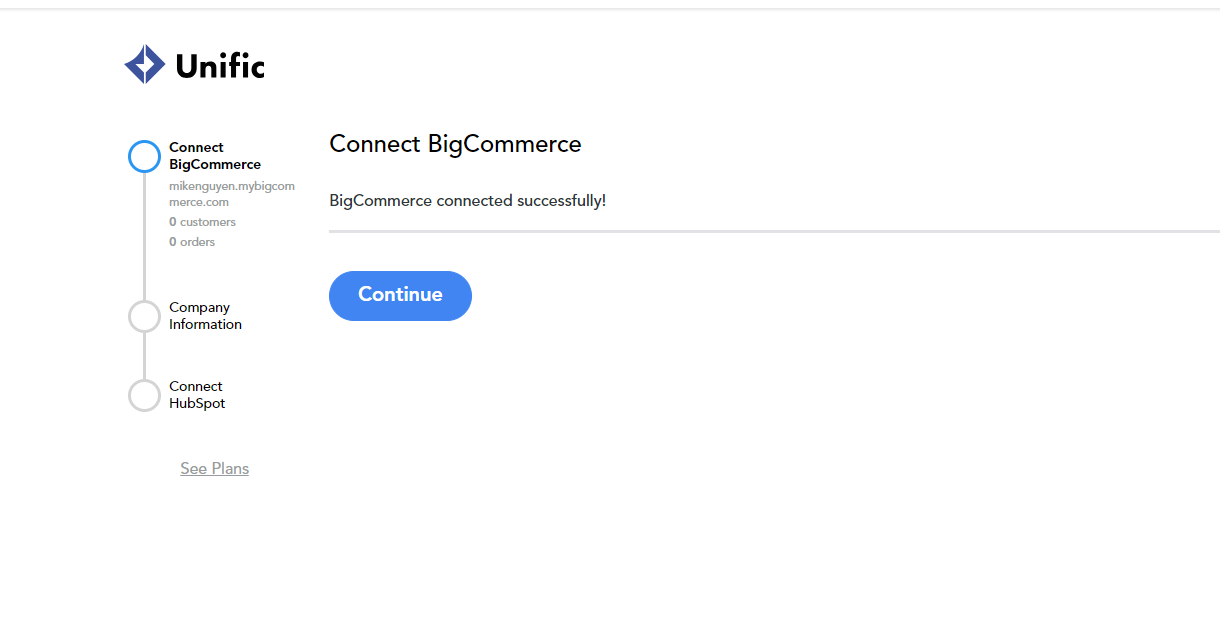
- Click the “Continue” button to move forward.
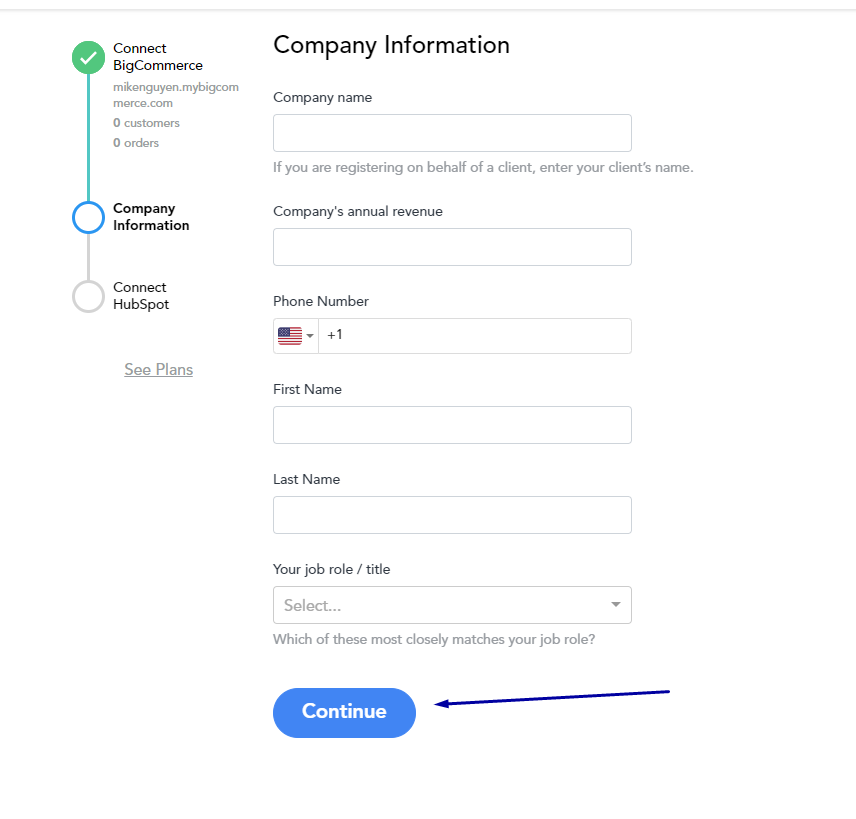
- Fill in Company information and then press “Continue.”
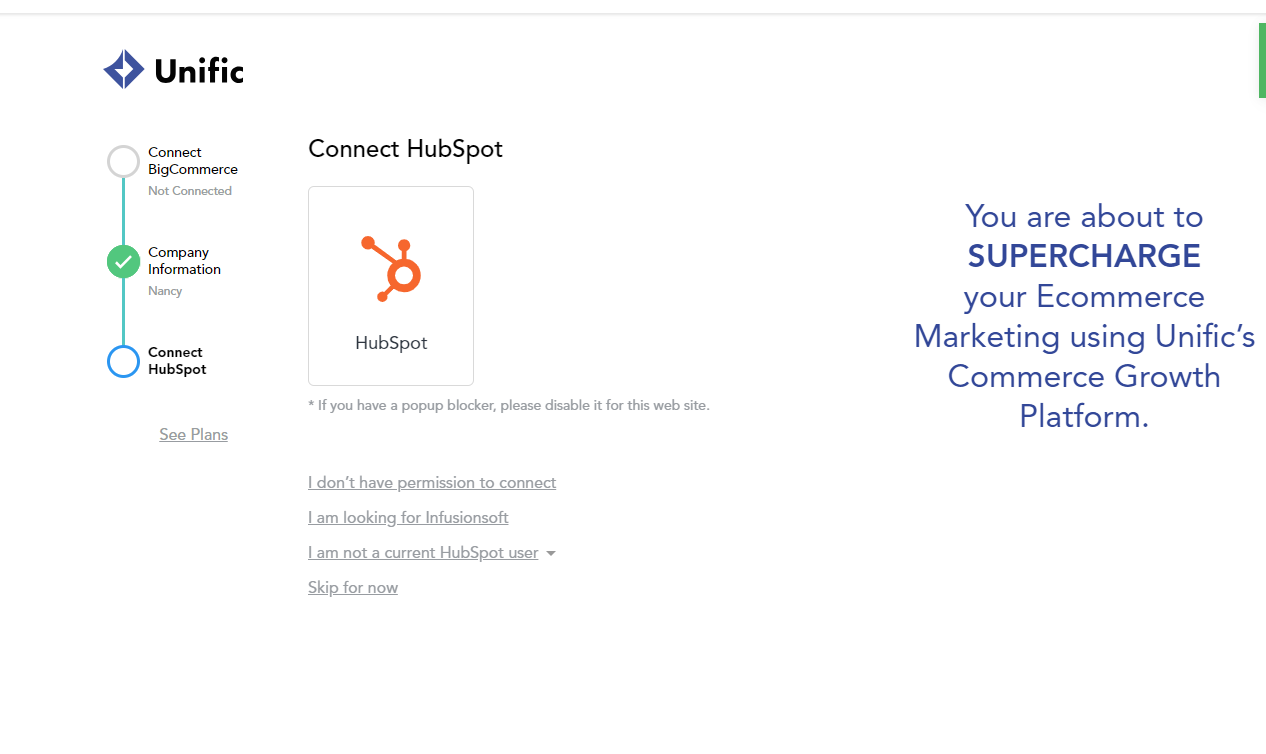
- Click one of three options if you want, and in this case, if you don’t answer, click “Skip for now.”
Step 2: Start Syncing data process
- In the Integrate section, click “Create a sync” or “Historical Data Sync.”
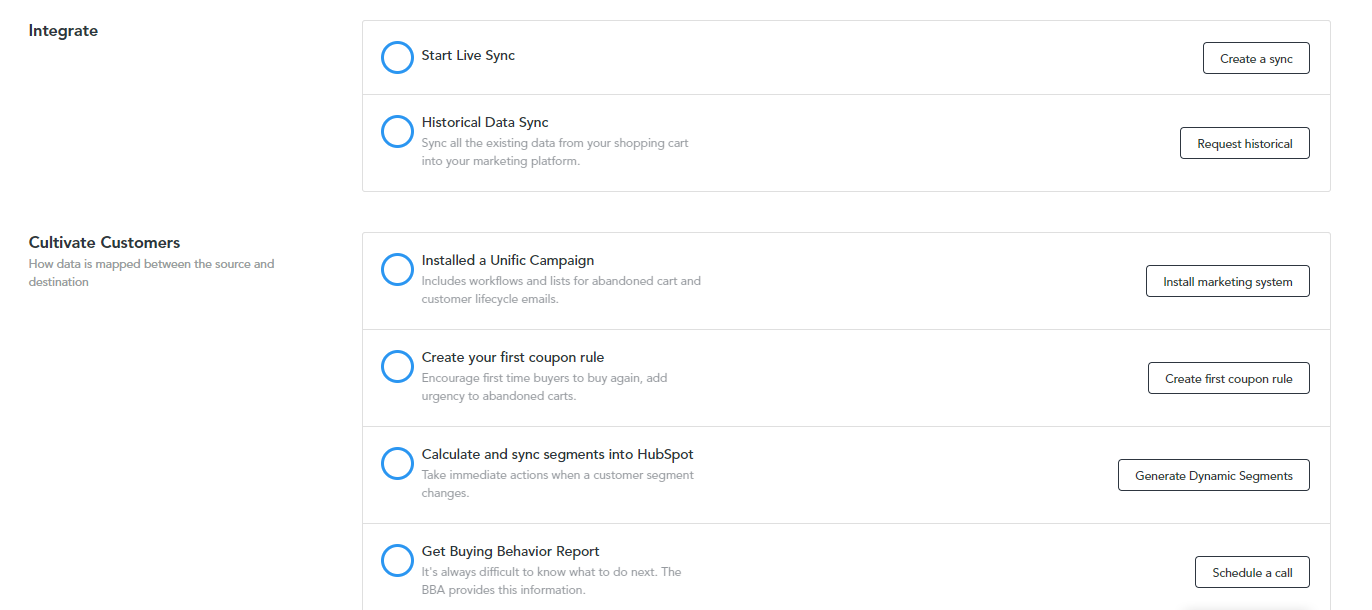
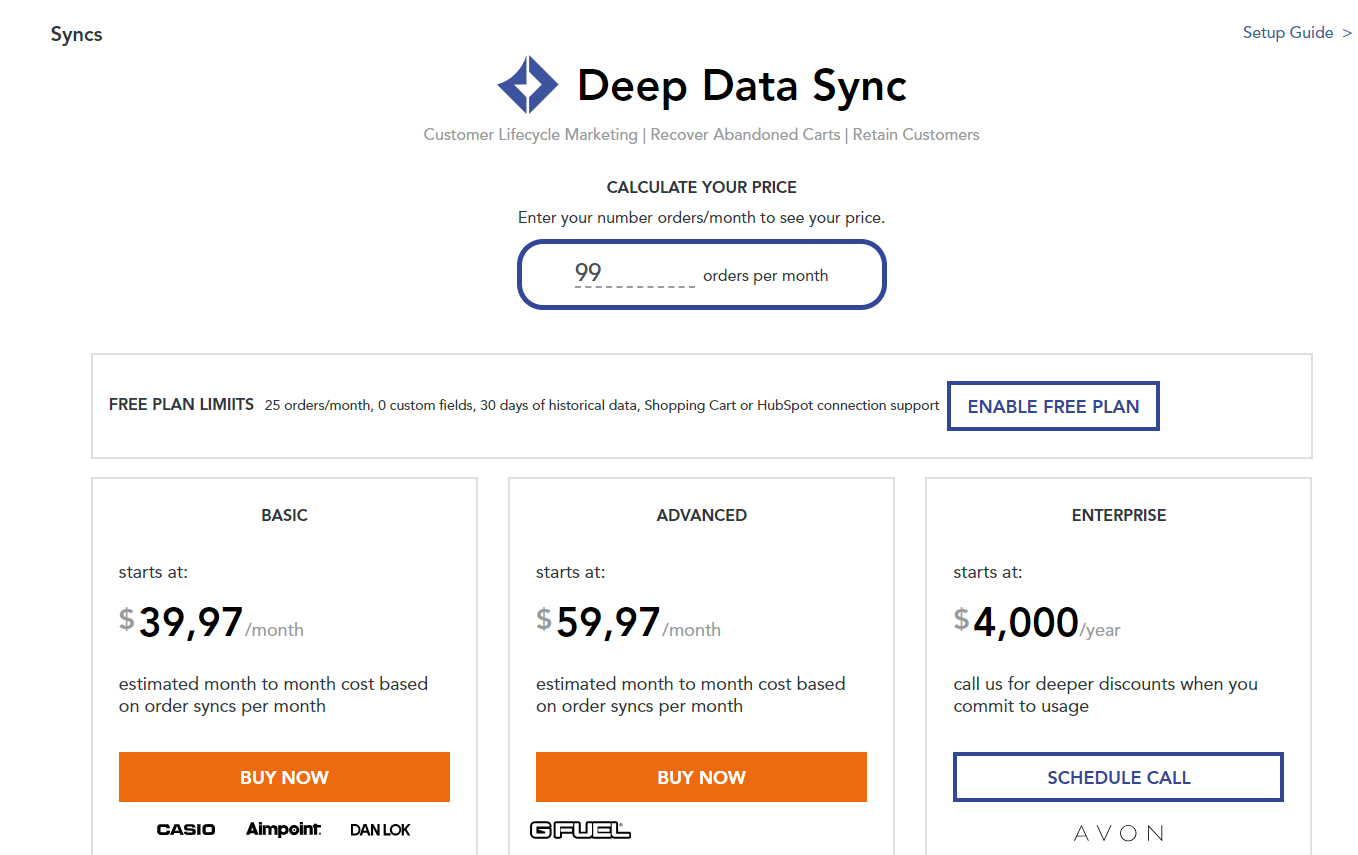
- If you choose “Create a sync,” you can try a free or paid plan.
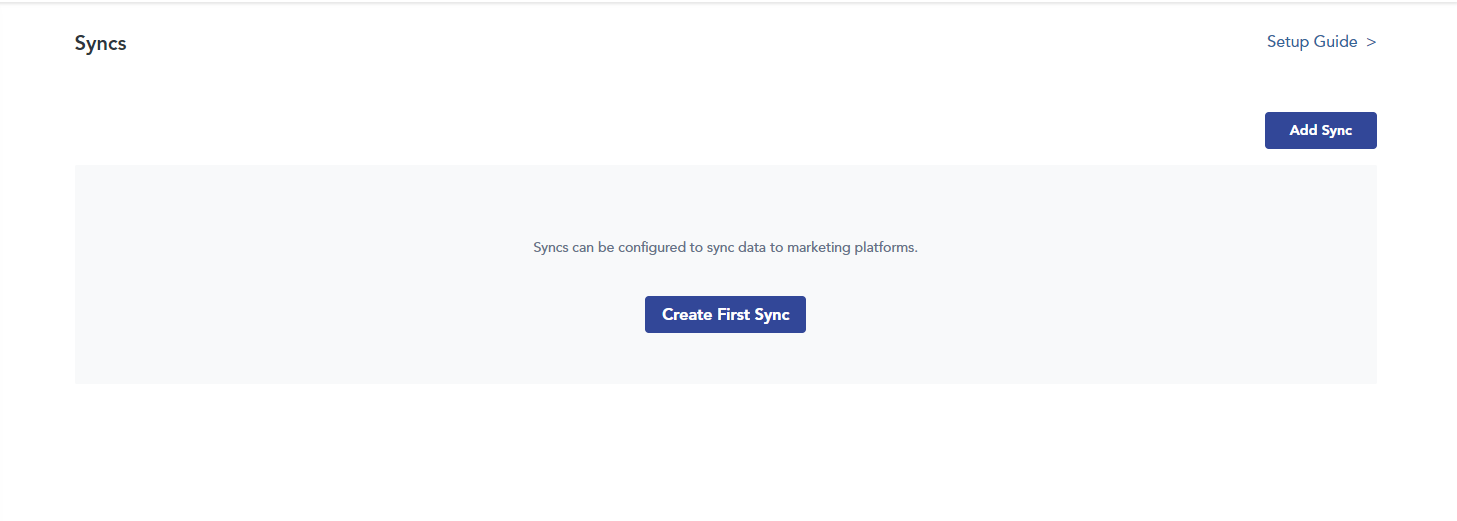
- Next to, click “Add Sync” or “Creae First Sync.”
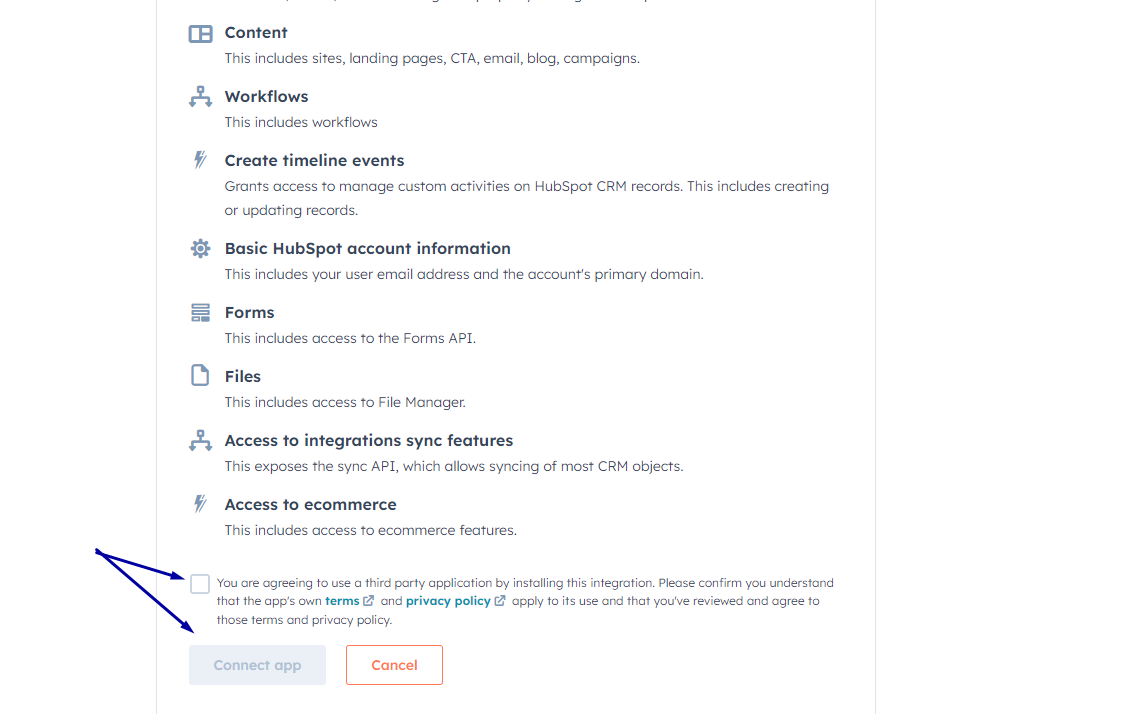
- You are moving to HubSpot oauth and clicking “Connect App.”
How To Use HubSpot BigCommerce App for Maximum Results
Import/Export Data
Using the HubSpot BigCommerce integration, you can easily import your BigCommerce data and export it to your HubSpot CRM.
Begin with navigating to HubSpot >Import/Export and you can choose “importing or exporting data.”
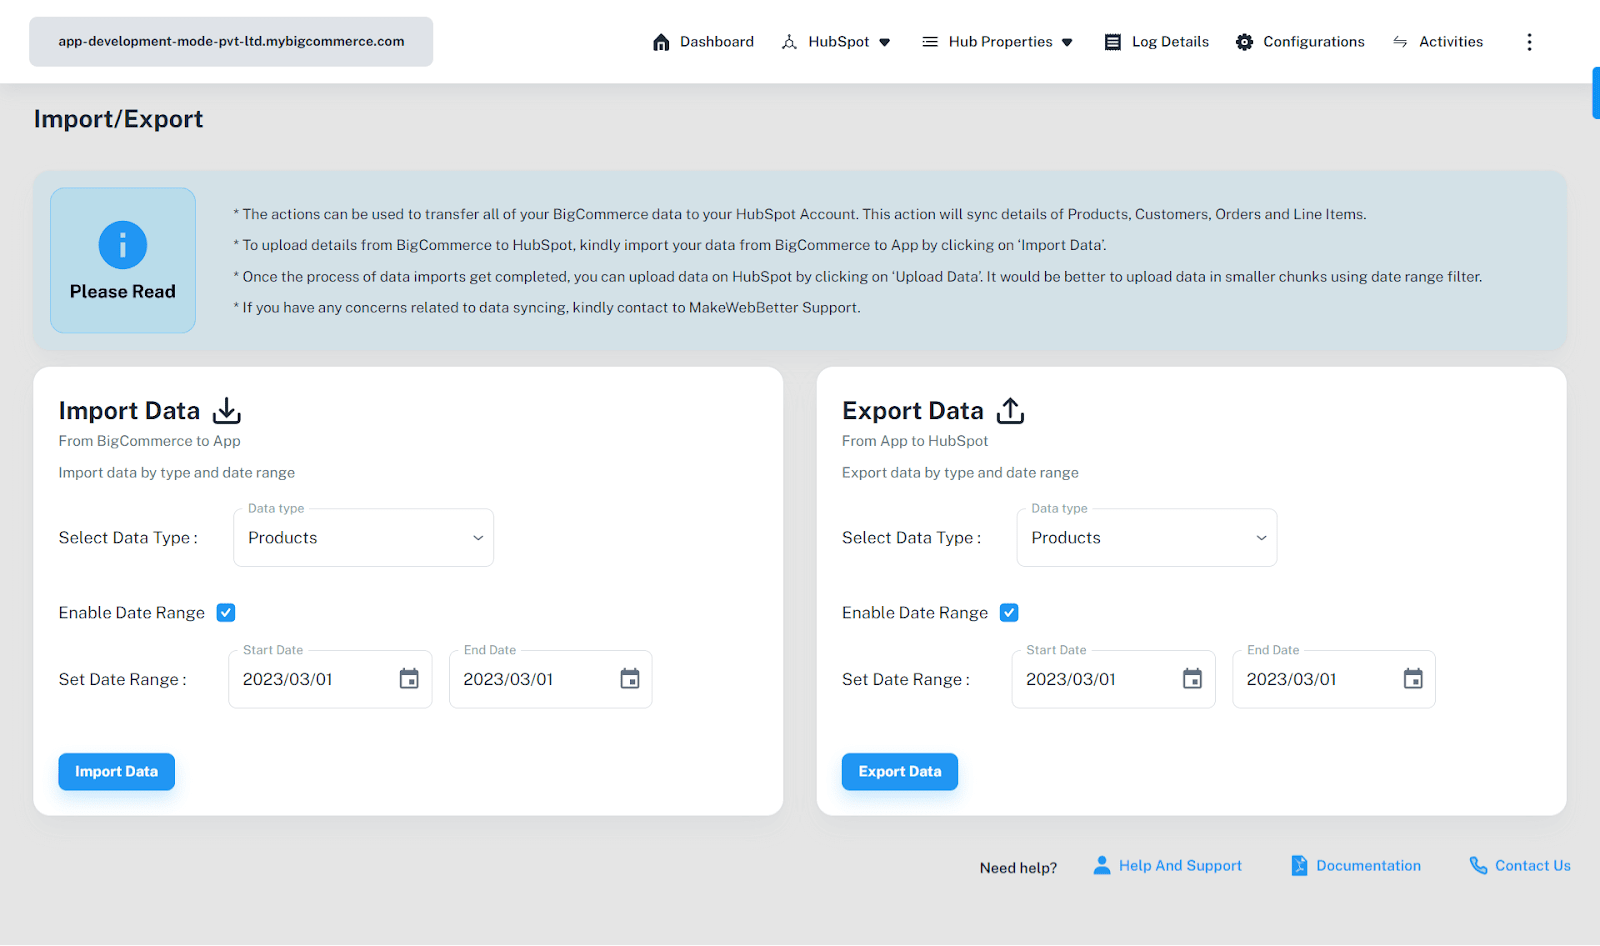
Select the data type and date range, and click “Import data” to send your BigCommerce data to our database.
Click “Export data” to send it to HubSpot CRM from our database.
Configure HubSpot BigCommerce Integration
a. Abandoned Cart Settings
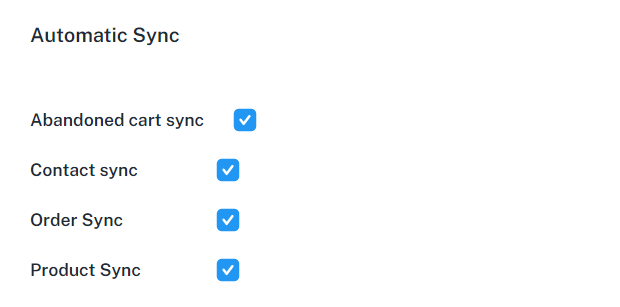
To sync your abandoned card data with HubSpot CRM, click “Configuration” within the app. Then, look for the "Automate Sync" option and expand it. Here, you'll find the "Abandoned Cart" setting. Make sure to check this box to enable it.
b. RFM Settings
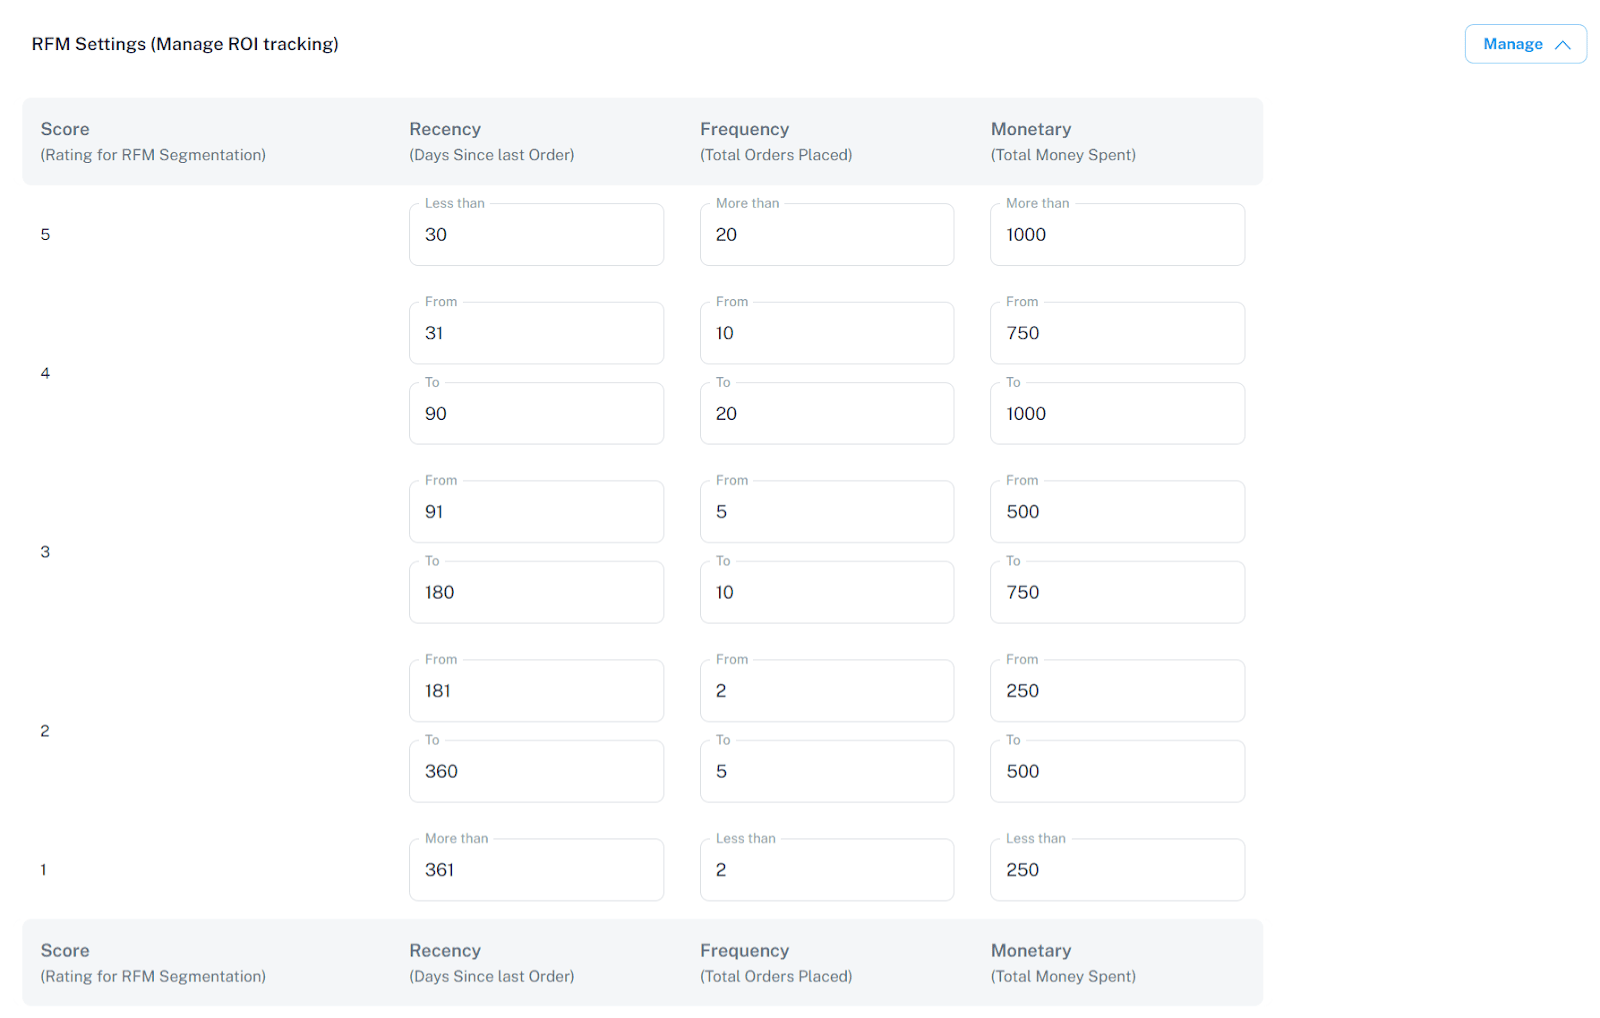
In the “Configuration” tab, you can find the RFM settings. With RFM segmentation, you can rate your customers from 1 to 5, reflecting their purchasing behavior.
Moreover, using these RFM rating, you categorize your customers into groups such as High Spenders, Loyal Customers, and Repeat Buyers.
For instance, targeting high-priced items at customers who typically spend less is unlikely to be effective. Instead, you should offer them products that align with their spending habits and are more affordable. Segmenting customers based on purchasing patterns simplifies this process, making your marketing efforts more targeted and efficient.
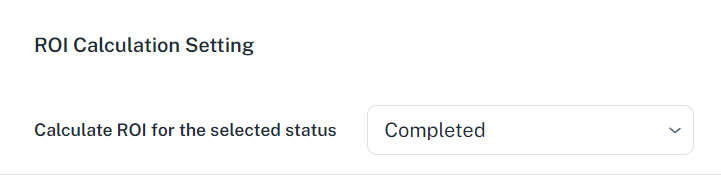
c. ROI Calculation Setting
3/ View Sync Log Details
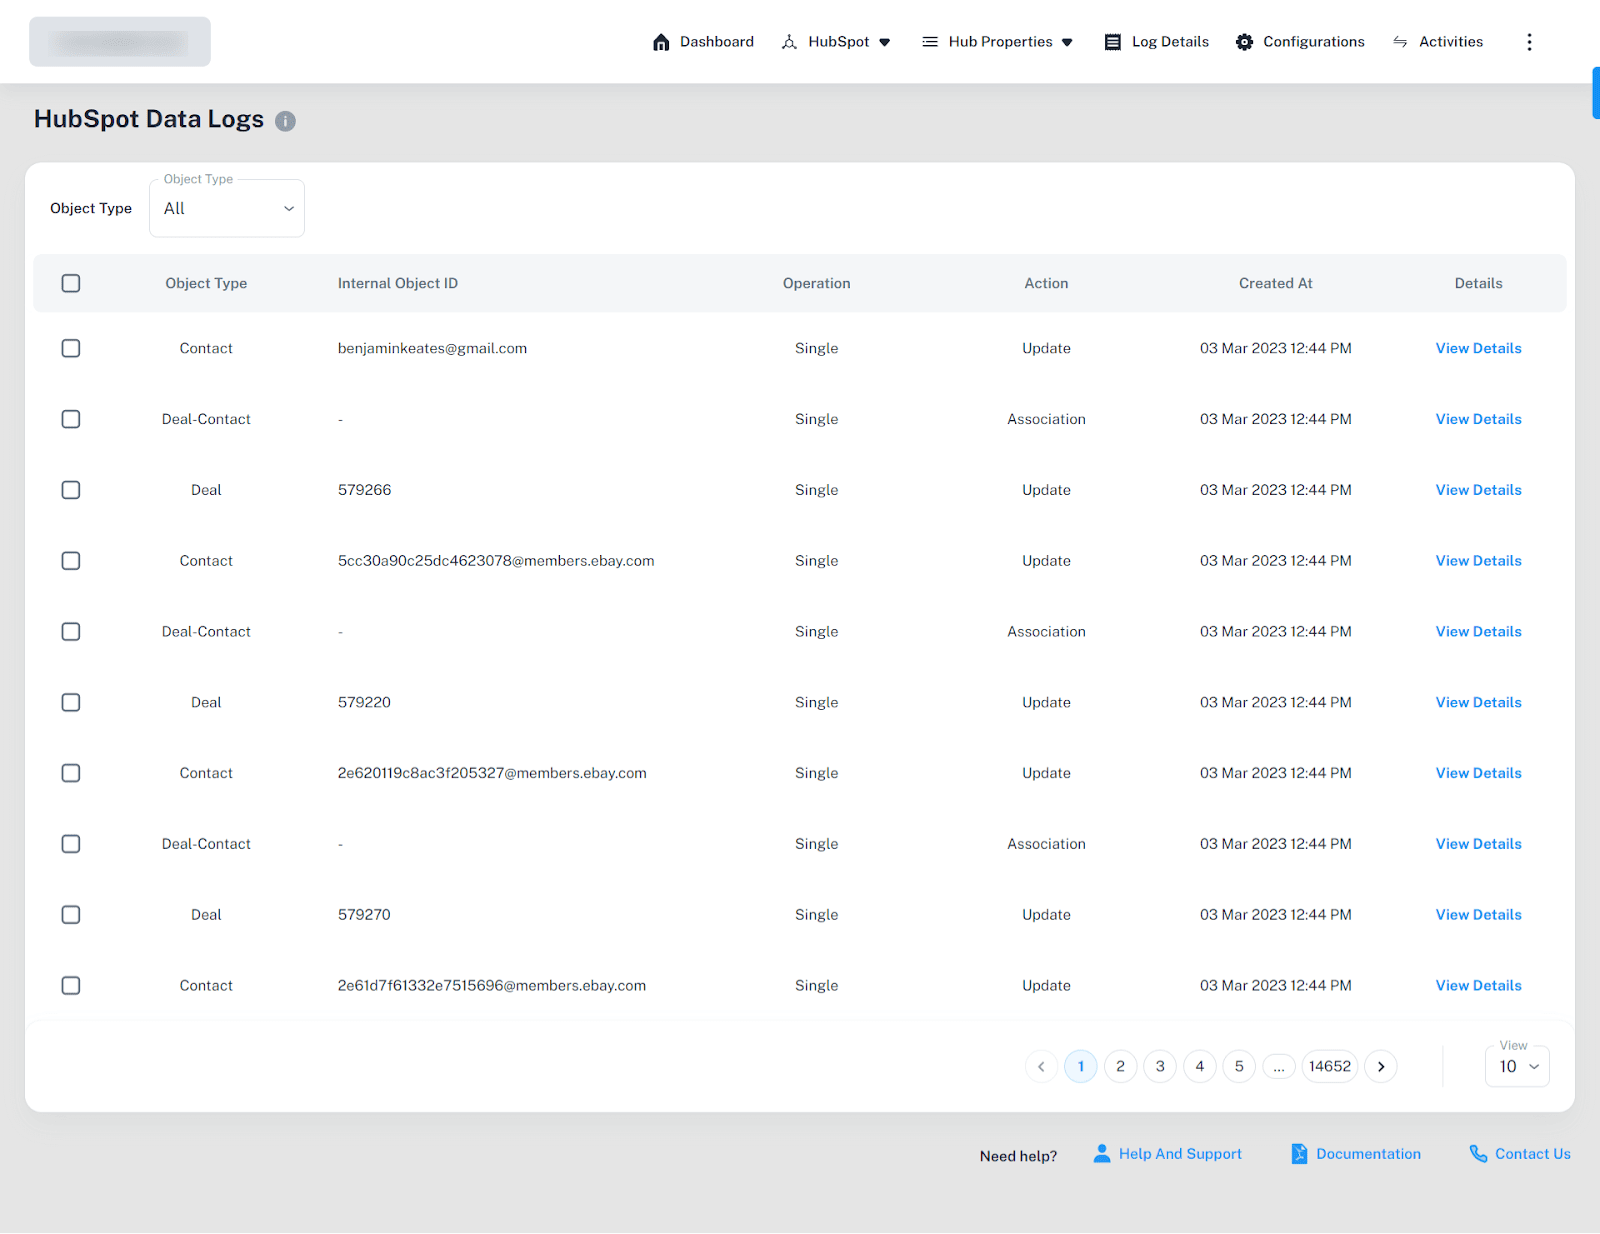
All data, whether it synced successfully or not, will be logged here in this section. This allows you to track activity taken through the app. You see comprehensive details on each activity, including whether a record was successfully synced or if an error occurred. Information such as Object Type, Internal Object ID, Operation, and Action will be available for review, providing a clear overview of all sync activities.
Five Common Errors To Watch Out When Integrating BigCommerce HubSpot Integration
When integrating BigCommerce with HubSpot, there are several pitfalls that business owners often encounter. Avoiding these mistakes can lead to a smoother integration process and better utilization of both platforms.
Ignoring Data Syncing Issues
Not paying attention to how data syncs between BigCommerce and HubSpot can lead to inconsistencies in customer information, order details, and product data. Ensure that the integration settings are correctly configured to keep data consistent across both platforms.
Overlooking Custom Field Mapping
Failing to map custom fields between BigCommerce and HubSpot can result in missing critical customer insights or order information. Custom field mapping ensures that all relevant data is transferred accurately, allowing for more personalized marketing efforts.
Neglecting Segmentation Opportunities
One of the key benefits of integrating BigCommerce with HubSpot is the ability to create detailed customer segments for targeted marketing campaigns. Not using this feature means missing out on the chance to engage your audience more effectively.
Underestimating the Importance of Training
Assuming that your team can seamlessly manage the integrated platform without proper training is a mistake. It's essential to invest time in training your team on how to use both systems efficiently to maximize integration benefits.
Failing to Monitor and Optimize the Integration
Simply setting up the integration and forgetting about it is not enough. Continuous monitoring and optimization are necessary to address any issues that arise and to adapt to changing business needs. Regularly review the integration's performance and make adjustments as needed.
Conclusion
With all of the advantages that you can have by integrating HubSpot with BigCommerce, it is undoubted that you should integrate your HubSpot account with your BigCommerce store as soon as possible. When finishing the integration, you can definitely enjoy more and more visitors to your stores, seeing your business grow day by day, and having smooth and great marketing automation.
Today’s article has covered only two platforms (CedCommerce and Groove Commerce) among many other platforms that can help you integrate your HubSpot account with your BigCommerce store. The step-by-step instructions have also been given for each platform to help you with the HubSpot BigCommerce integration process.
Hopefully, you enjoy reading this article, and now you can integrate HubSpot with BigCommerce easily.
We wish you the best of luck with your HubSpot BigCommerce integration, and thank you so much for reading! Feel free to comment below or contact us if you have any questions.
BigCommerce HubSpot Integration: FAQs
Does BigCommerce integrate with HubSpot?
Yes, BigCommerce can integrate with HubSpot through third party integrations such as MakeWebBetter, Unific, or Randem. These integration apps enable store owners to sync, export, and import data efficiently between the two platforms.
Does HubSpot have integrations?
Yes, HubSpot offers a wide range of integrations with various platforms and services. These integrations include CRM systems, social media platforms, email marketing services, and e-commerce solutions like BigCommerce, allowing businesses to extend the functionality of their HubSpot environment.
What is BigCommerce integration?
BigCommerce integration refers to connecting the BigCommerce e-commerce platform with other software applications or services. This can include integrating with marketing automation tools like HubSpot, payment gateways, shipping services, and more. The goal is to streamline operations, enhance the customer experience, and improve sales and marketing efforts.
How long has BigCommerce been around?
BigCommerce was founded in 2009. Since then, it has grown to become one of the leading e-commerce platforms, providing businesses with a comprehensive set of tools to build, run, and scale their online stores.
Related Posts:
- How to Integrate BigCommerce with Instagram?
- How to integrate NetSuite with BigCommerce?
- How to Integrate ShippingEasy with BigCommerce
- How to connect BigCommerce with Quickbooks Online Integration?


