
How to Take Payments with WooCommerce

You don’t want to lose customers on payments just because your WooCommerce store doesn’t accept the payment methods they need or usually use? You’re struggling to find a sensible way to take payments from your WooCommerce stores that aligns with your products? Or you’re simply looking for alternative payment methods to adapt to the pandemic period?
If your answer to at least one of the above questions is “Yes”, then this blog post is for you.
For WooCommerce users, you have multiple options to take payments either with or without a third-party plugin. However, you should be aware of which type of payment is compatible with which types of products or services as well as what is the most frequently used methods of your customers. Knowing your products and knowing your customers should be kept in mind.
After that, you should take a deeper look into the WooCommerce payment methods available and How to Take Payments with WooCommerce, which are literally navigated in the below sections. In the very last part of the post, you’ll find a list of Top 4 WooCommerce Payment Plugins.
Now, you can simply jump to the desired part of the post with the below Table of Contents and find your own answer.
Why should you be flexible in WooCommerce payment methods?
Before going to start reading about How to Take Payments with WooCommerce, we recommend you look through some of the reasons why you should be flexible in WooCommerce payment methods to see how this can help you with your WooCommerce business.
With the 3 most important reasons, it’ll be easier for you to decide to equip your WooCommerce store with an additional payment method. Also, they help you choose how to take advantage of the payment methods to serve your customers better.
The 3 reasons are:
- It depends on the kind of products or services you provide that you should choose the most suitable way to take payment with WooCommerce.
- This can be an indication of your caring for your customers as each payment method may meet the demand of certain customers.
- People love choices! So the more choices of WooCommerce payments you offer, the happier you will make your customers.
How to Take Payments with WooCommerce
Now you seem to be ready to dive in How to Take Payments with WooCommerce.
In this part, you can easily find a way to use the available payment options on WooCommerce and know more about them to decide whether they’re right for you.
Solution 1: Default WooCommerce payment methods
WooCommerce is developed in a way that provides fundamental functions for users to start with. For that reason, it’s understandable that this eCommerce platform is also bundled with the most popular payment methods: using PayPal or Stripe, bank transfer, Check payment, and cash on delivery.
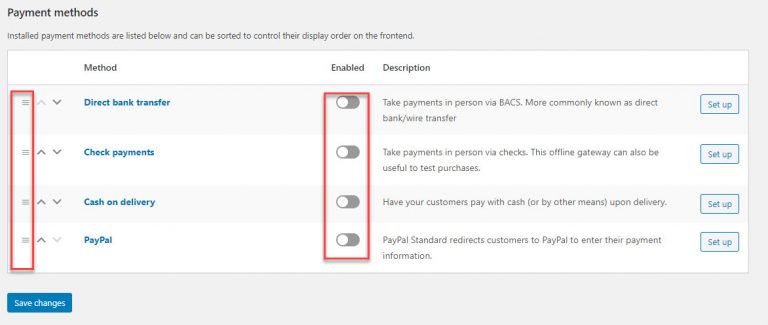
To access these payment options, you’ll need to choose WooCommerceto your WordPress dashboard. Then you look for the Settings section and choose Payments.
Now you can see all 4 in-built options displayed on the page, next to which you can find the On and Off button for you to enable or disable the option.
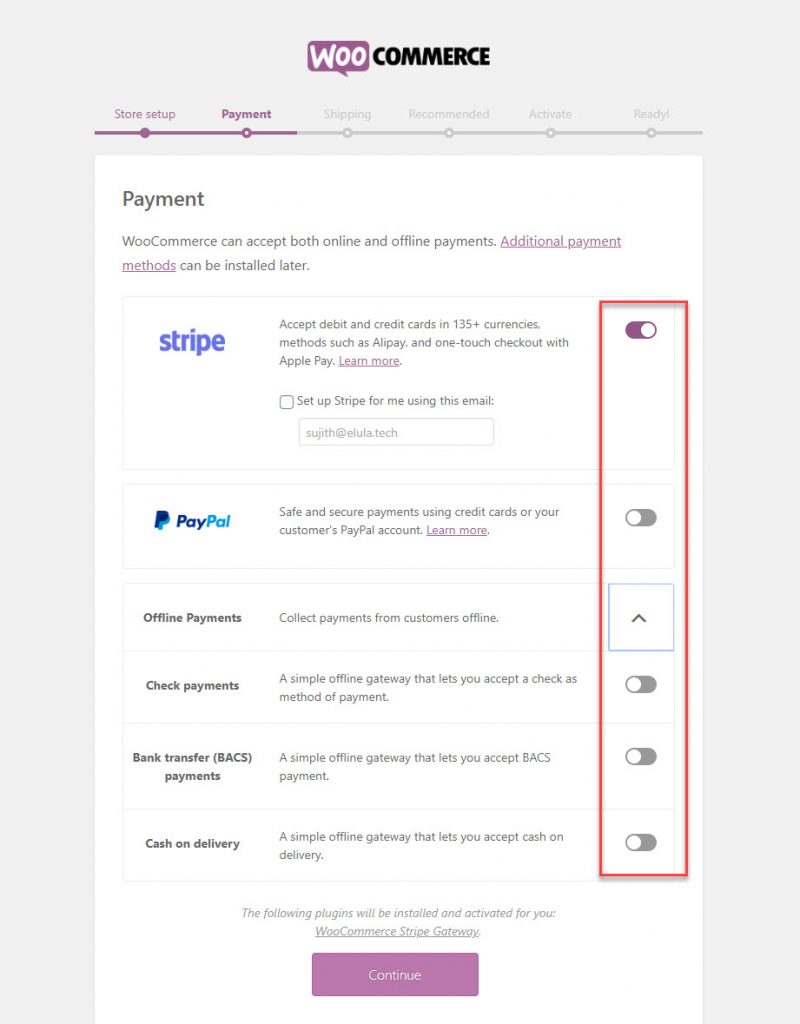
After that, you may also sort the display order by dragging and dropping it to your liking. Every time you adjust these options, remember to click the Save changes button.
Now let’s discover how to set up the given payment methods.
1. Using PayPal or Stripe
The most preferred payment gateways of the list because of their wide acceptability are PayPal Standard and Stripe.
PayPal Standard
The setup of PayPal contains both fundamental and advanced options.
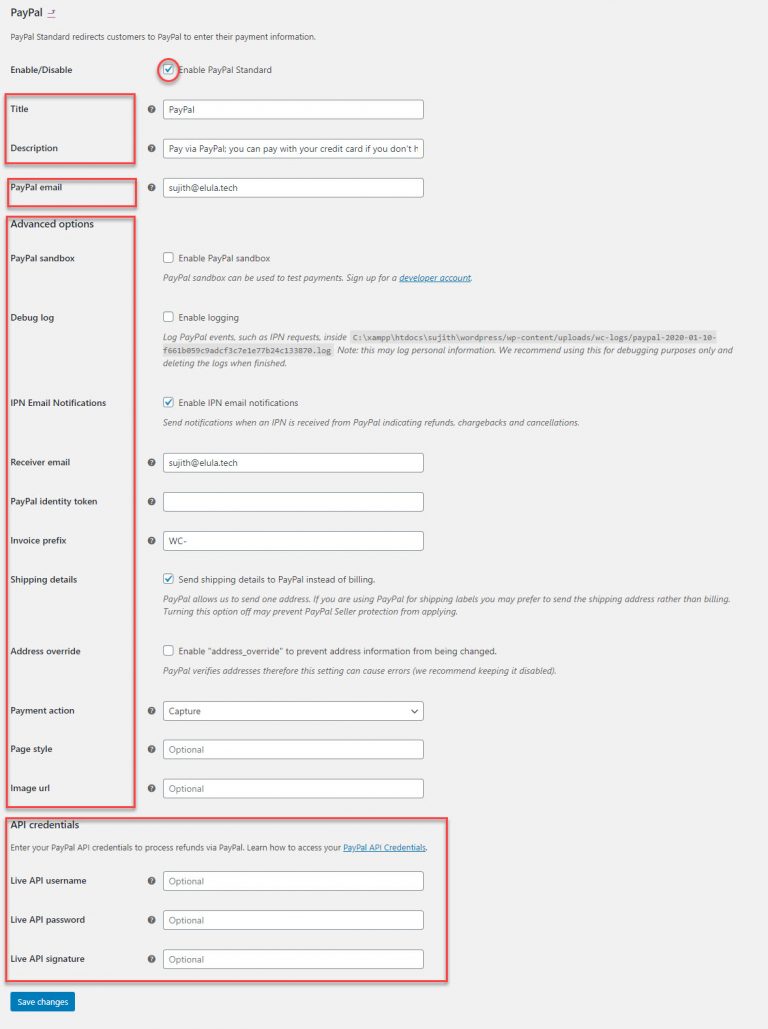
The first 4 fields required basic details, which are:
- Enable/Disable i/o button with which you can tick the checkbox and activate the payment gateway.
- The Title is where you decide how this payment method appears on the Checkout page.
- Description is where you put in some more detailed information.
- PayPal email requires your business email address or an existing Personal account converted to a Business one.
The next section contains all the Advanced options:
- PayPal Sandbox: This helps you test the functionality of this payment gateway before you officially start to sell products on your WooCommerce store. Therefore, you should ensure that you disable this function before actively selling or your payment will not be properly credited. However, the PayPal Sandbox is only allowed if you have a Developer Account.
- Debug log: Debug logs help in debugging by ensuring that all events are recorded in a designated file on a server. This is critical for troubleshooting any issues with your store’s setup.
- IPN Email Notifications: This function allows PayPal to notify you about the status of the payment (Successful or not) via Email. To use this feature, you have to enter your Email ID, which can be either you PayPal Email or another, in Receiver Email field. PayPal Identity Token is filled when any IPN issues come up. You can get this token by allowing Payment Data Transfer in PayPal.
- Invoice prefix: This helps PayPal identify your different websites in case you have multiple payment sources.
- Shipping details: This area allows WooCommerce to transmit your customers’ shipping address information to PayPal. This is essential if you use PayPal to print shipping labels. PayPal only permits WooCommerce to transmit to one address, therefore supplying a billing address makes little sense in this circumstance.
- Address Override: This function is concerned with PayPal’s address verification. If you are just getting started with WooCommerce, it is recommended to leave it unticked.
- Payment action: This parameter allows you to choose whether you want to record payments immediately or after they have been authorized. There is a drop-down menu where you may select ‘Capture’ or ‘Authorize’ based on your preferences.
- Page style: You may use Page Style to define a preferred page style that has already been generated in PayPal. This will assist you with the branding components of your website.
- Image URL: You can specify an image in the Image URL area that will be shown as your logo on the PayPal Checkout pages.
- API Credentials: This allows you to process refunds via PayPal
Now when you finish all the setup for your PayPal payment gateway, remember to click the Save changes button.
Stripe
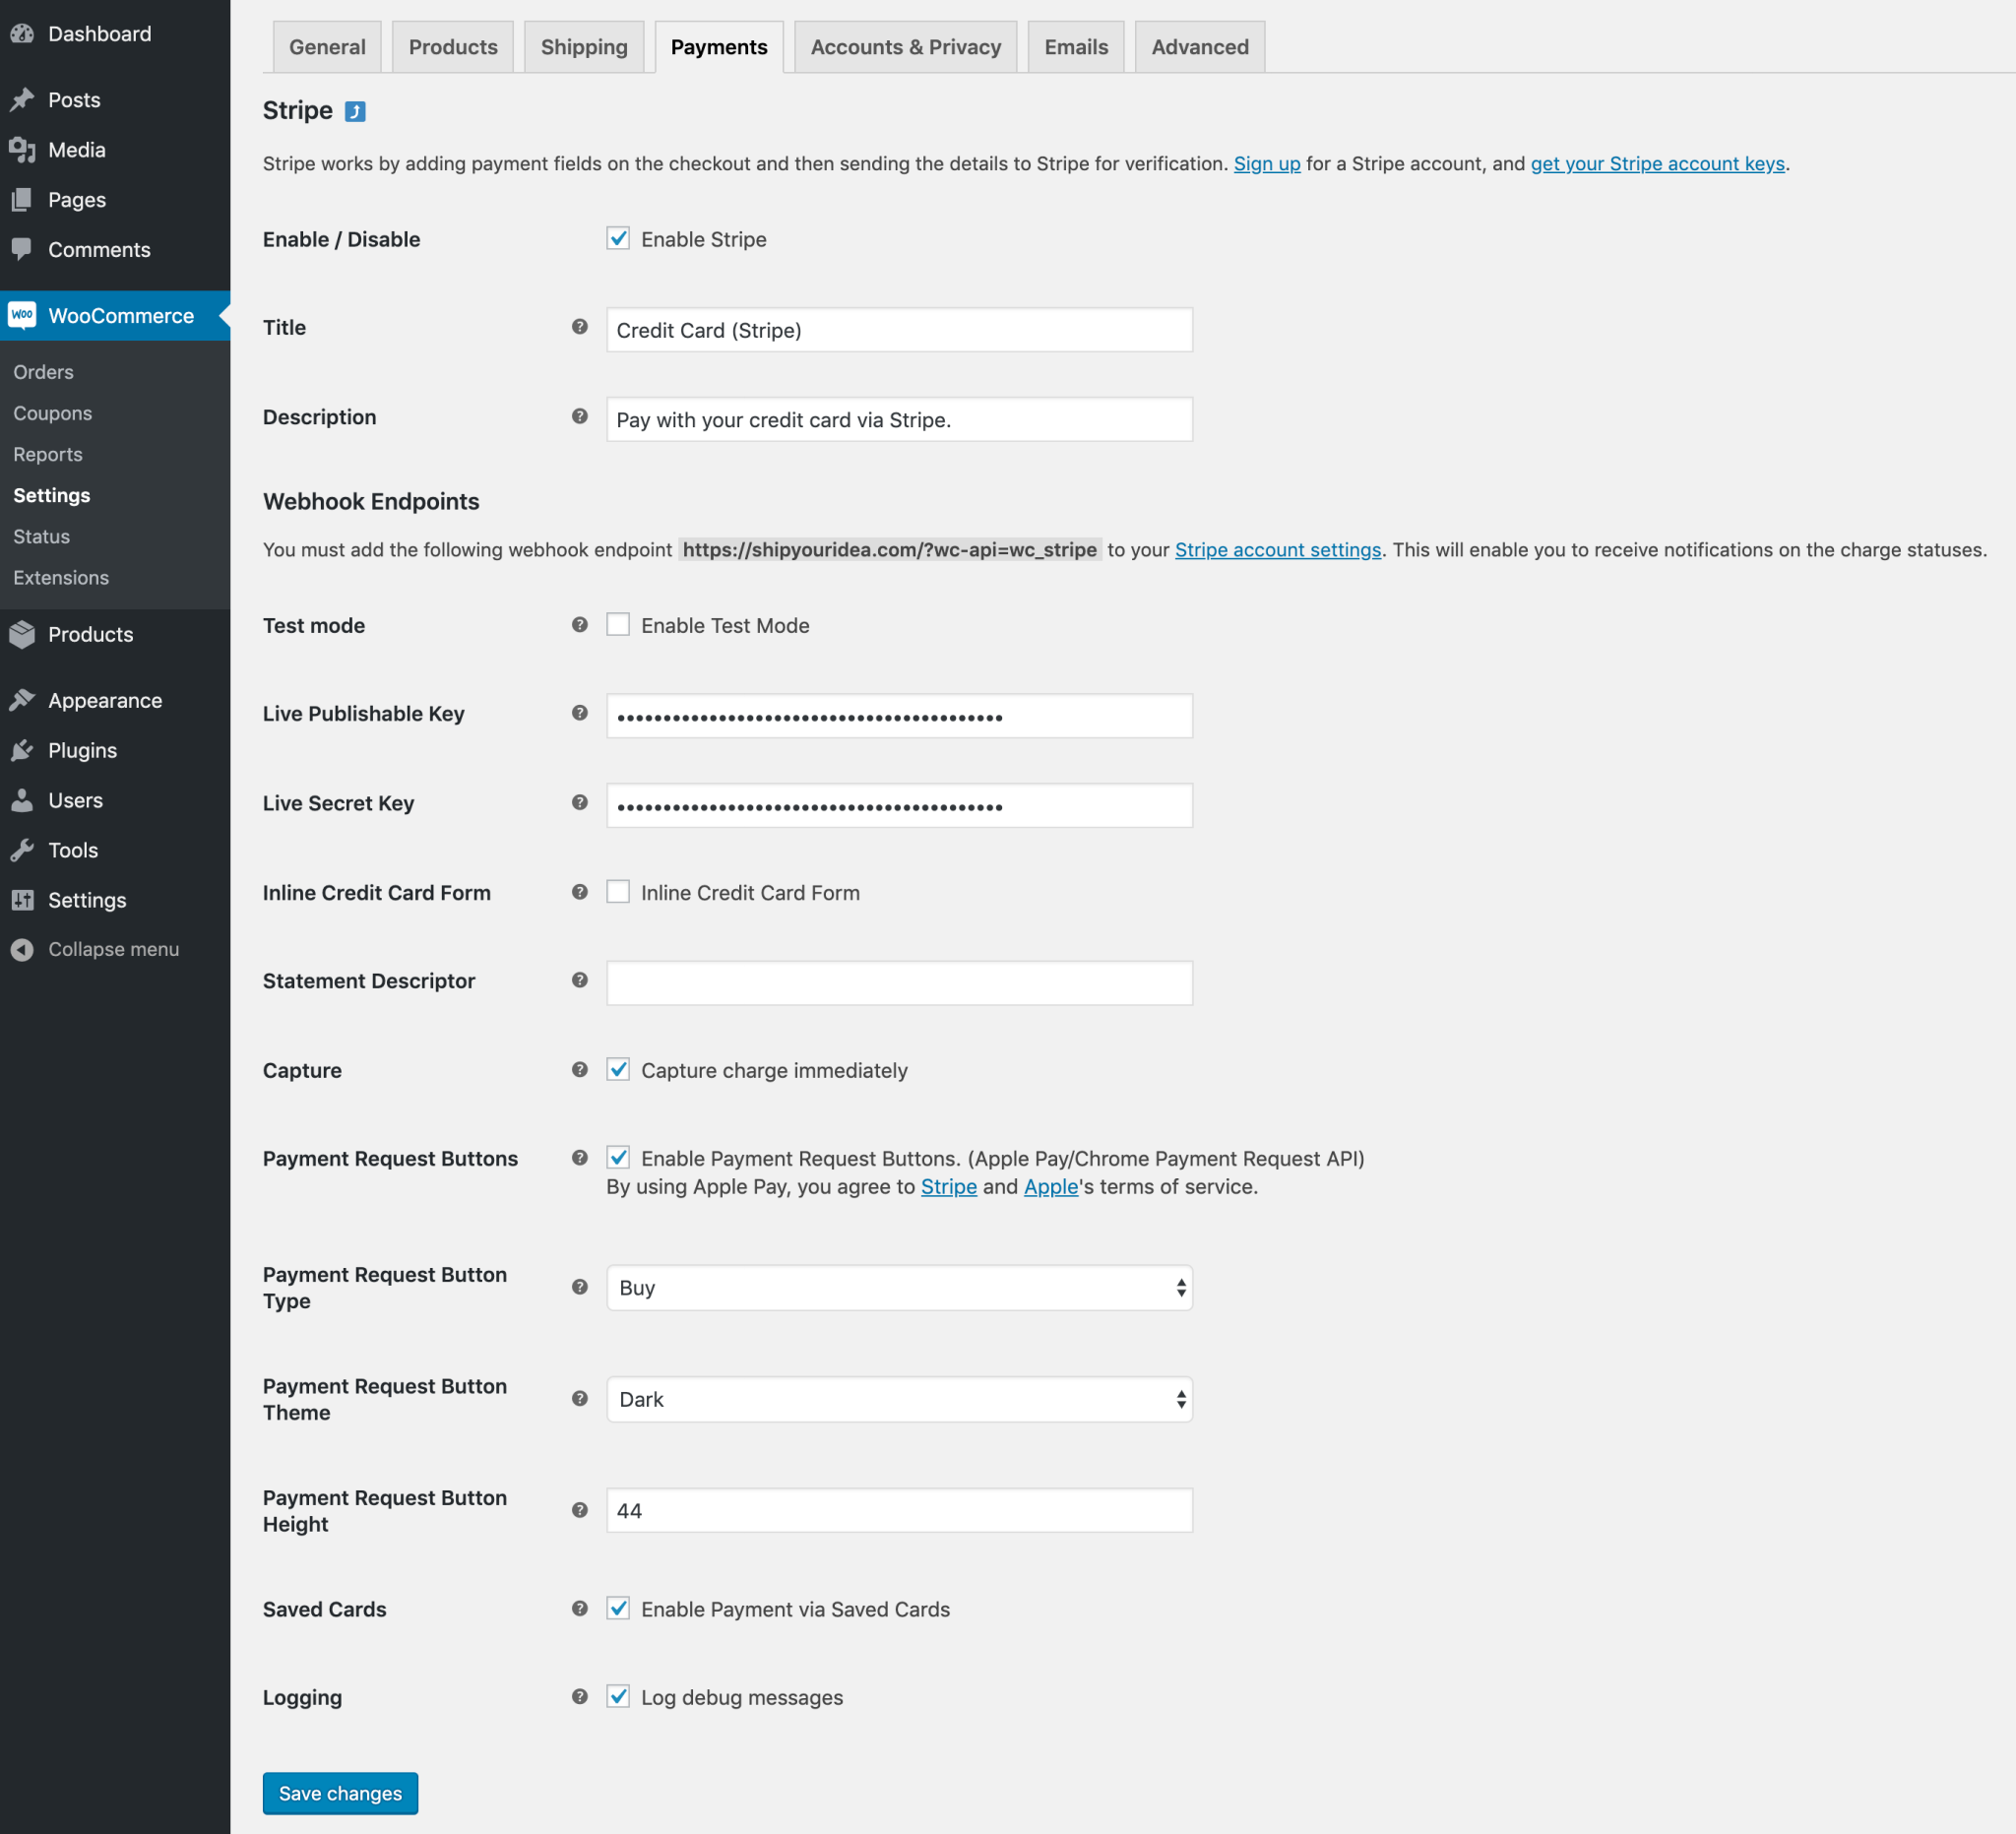
While the PayPal setup process seems to be quite complicated, Stripe setup is simple, and with automated installation, you won’t have to bother with a file transfer or exit your online browser.
To begin, log in to your WordPress dashboard, go to the Plugins menu, and then click Add New. Search for WooCommerce Stripe Payment Gateway and click Install Now. Navigate to your WooCommerce Settings and pick the Payments tab after installing and activating the plugin. You may enable payment methods and change the settings for the capture and payment request buttons here. You will also be required to configure webhooks so that Stripe can connect with your application.
2. Getting paid by bank transfer
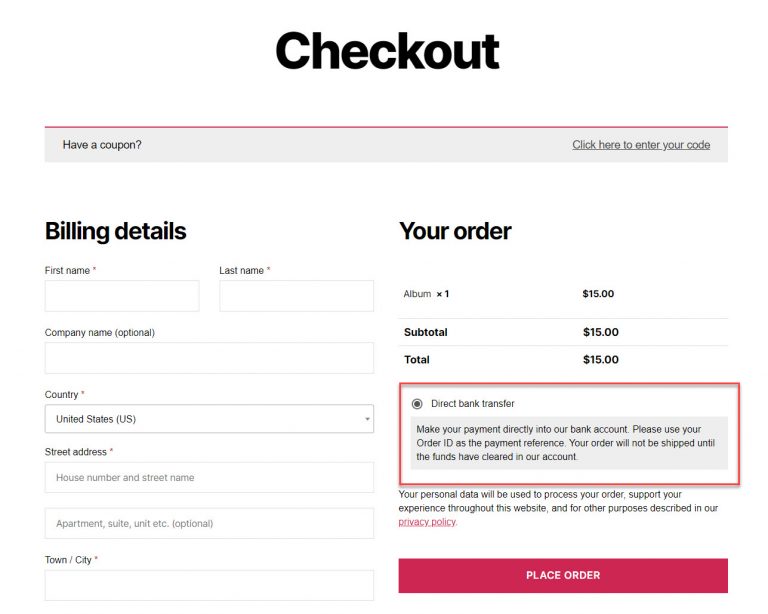
On the setup page of Direct bank transfer, you can see the following fields.

The red circled field is a checkbox where you can choose to enable the payment option. This Enable/Disable field is followed by other 4 fields, the first 2 of which are filled by default.
These 4 fields are:
- Title: You can decide how this payment option will be displayed on the checkout page. Although WooCommerce already recommends the Title, you can customize it to your liking.
- Description: The description of a payment option will appear when being chosen by the customers. Again, this part can be customized to your liking.
- Instructions: This part can be filled in your way and displayed on the Thank you page and the Emails sent to customers.
- Account details: This part is the most important because it contains the information of your bank account that customers will need to pay the bills. In this field, you can see 6 pieces of information you need to provide.
- Account Name
- Account Number
- Bank Name
- Routing number
- IBAN
- BIC/Swift
Now the bank transfer payment method is ready to use. However, keep in mind that using direct bank transfer to get payments means you have to manually manage the transactions and update the order details to take your customers to the next step - shipping process.
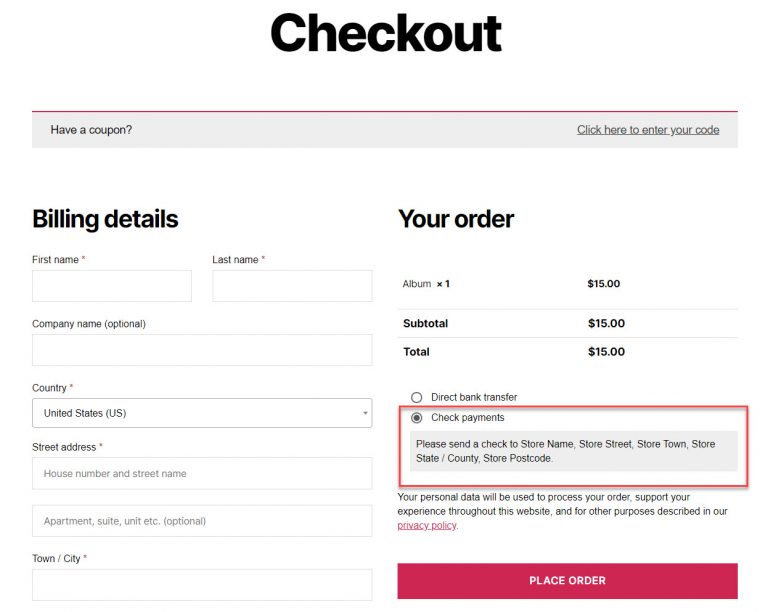
After completing the setup, remember to click the Save changes button. You can check the outcome on the Checkout page.
3. Accepting Check payment
Check payment is another payment gateway that you can easily find in WooCommerce right after the installation of the eCommerce platform.
For the setup of this payment method, it has a lot of features in common with the previous one - the direct bank transfer but without the Account details field.
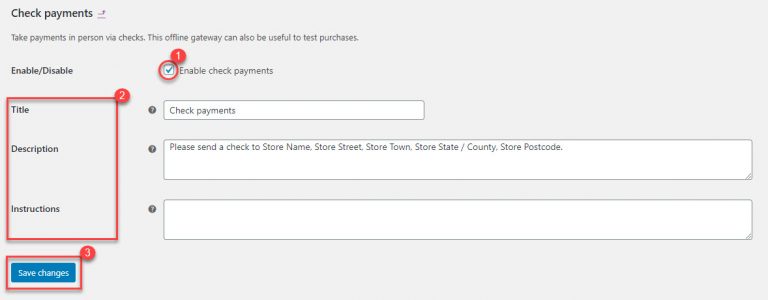
- You can tick the checkbox to Enable/Disable the payment option.
- Then you need to fill in the 3 following fields (Title, Description and Instructions). This step is quite similar to what you’ve done with the Direct bank transfer method right in the above section.
- The last step is absolutely to click the Save changes button.
Again, you can check the outcome on the Checkout page.
4. COD (Cash on Delivery)
The final payment method that WooCommerce provides you by default is the most conventional of paying, as well as the only method in this article to accept Cash. It’s Cash on Delivery (COD).
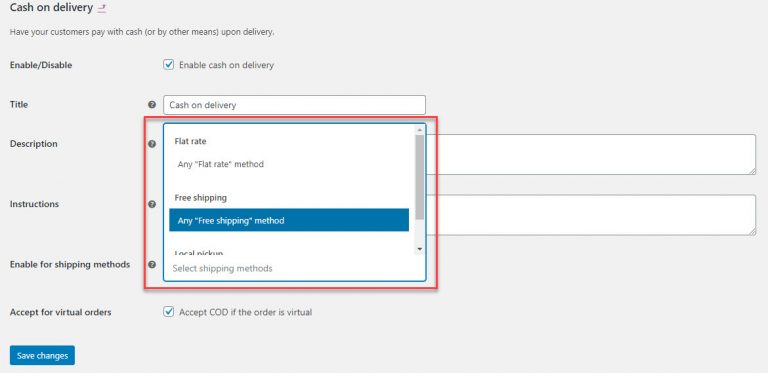
Here is its setup page.
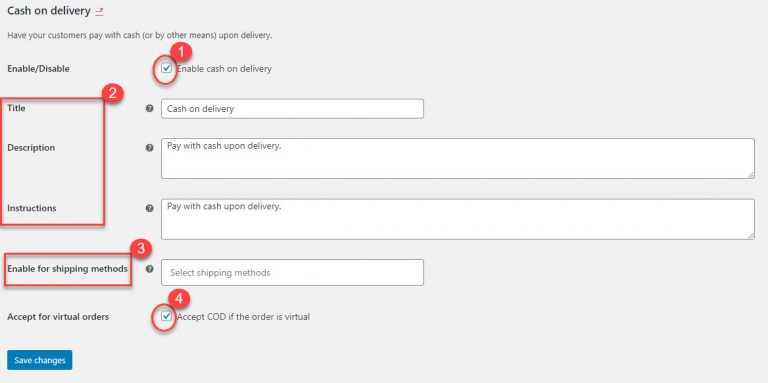
As you can see, the setup page of this payment option is similar to the 2 previously mentioned methods - Direct bank transfer and Check payment, which contains:
- Enable/Disable checkbox where you can allow your customers to apply this payment method.
- Title, Description and Instructions can be customized to provide your customers with more detailed information about COD.
- A Save changes button when you finish the setup.
Furthermore, there are 2 additional fields which are:
- Enable for shipping methods: This field allows you to choose the shipping methods you want to apply COD. When you choose this field, a dropdown menu of available shipping methods, including those provided by third-party plugins, will appear for you to choose from. In case you leave this field blank, COD will be applied for all shipping options.
- Accept for virtual orders: You can also activate Cash on Delivery for virtual orders that need a service to be performed in person.
Solution 2: Other WooCommerce payment methods (Plugins required)
Although the WooCommerce in-built payment gateways meet the fundamental requirements of the majority of WooCommerce users, there are cases that you need to expand the list of payment options for your customers. Therefore, you may need to equip your WooCommerce store with payment plugins that facilitate Taking Payments with WooCommerce.
This section will go deeper into some of the new but more frequently used payment methods that may require certain WooCommerce Payment Plugins to process.
1. Pre-ordering
The majority of the products you sell on your WooCommerce store are available items you already have on hand. However, now even products that are on their way from a seller, or soon to become available before you have stock can be shown on WooCommerce stores to inform customers about the upcoming items.
In this case, WooCommerce Pre-Orders allows you to display future products, allowing consumers to reserve things and have their credit cards debited immediately when supply comes.
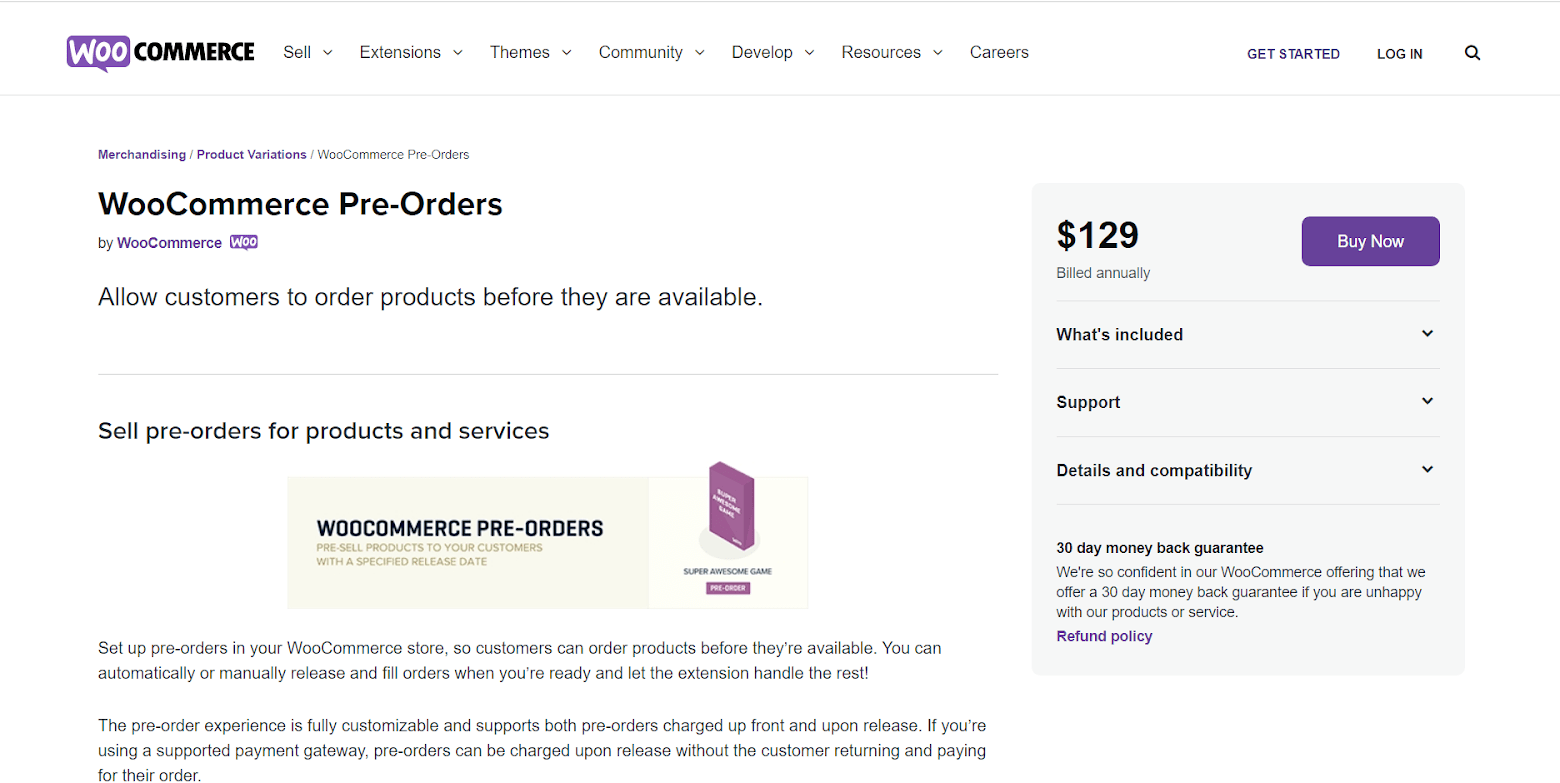
Your clients’ credit cards will be charged once the pre-ordered items are available, preventing them from paying anything until the item they’re waiting for has actually been delivered.
You can even charge a fee for pre-orders if you choose. This isn’t appropriate for every store or product type, but it might be useful for some business owners that provide services or wish to utilize pre-orders to reserve slots or virtual things before they’re created.
2. Periodically repeating payment
Some of the products and services are so preferable by the customers that they want to buy them over and over again. In that case, ordering and paying for the products in every purchase for the same products may not be a comfortable experience, hindering the customers’ motivation to continue buying it.
For that reason, it is far more convenient for the customers to automatically get orders of their favorite goods rather than having to return to order over and over again. Therefore, the payment should be made automatically.
WooCommerce Subscriptions enables you to build and manage products with recurring payments, providing you the ability to automate the process of taking payments from consumers for items they desire each month, every few weeks, or on any other schedule.
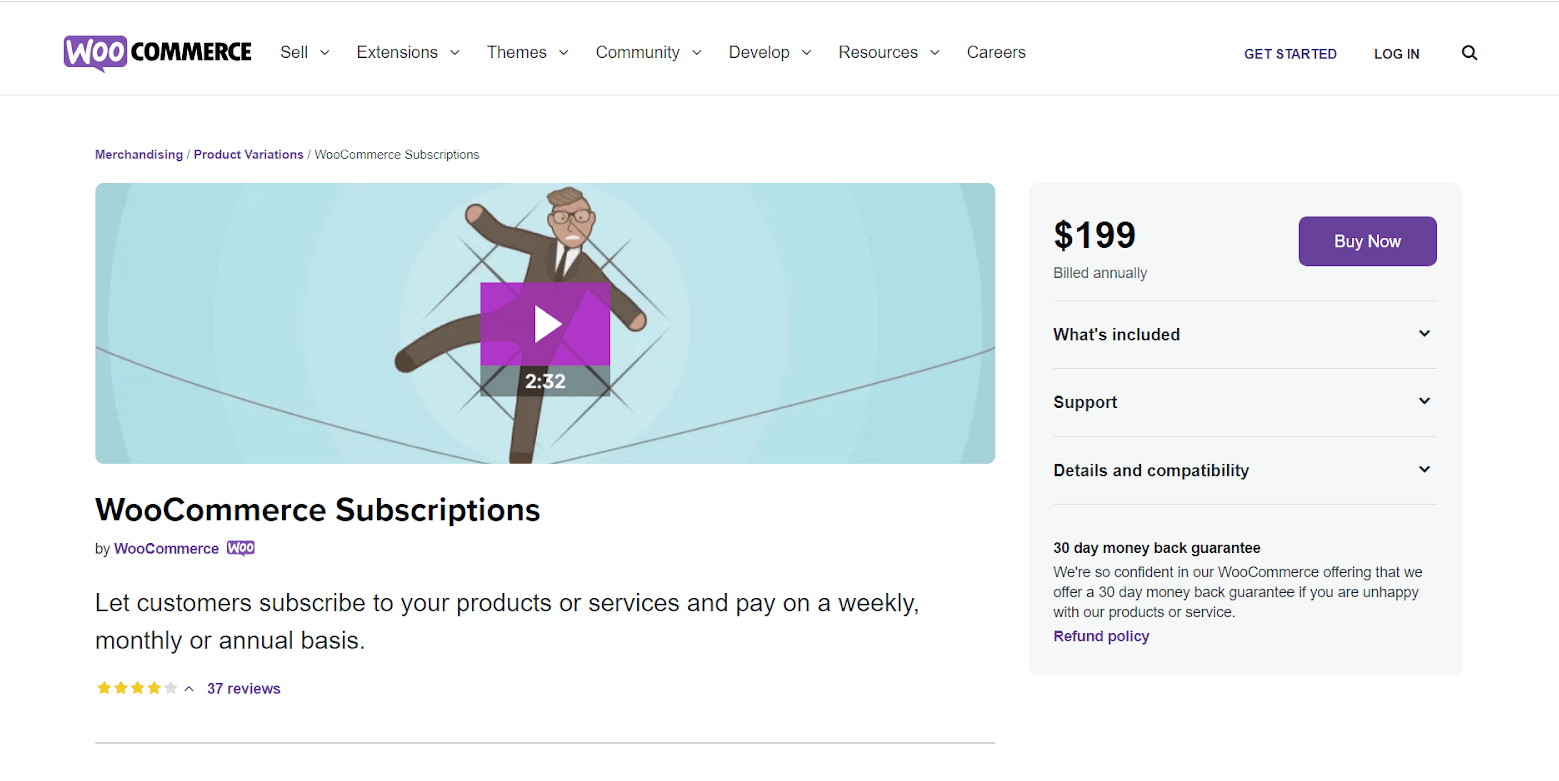
Customers may pay you on a regular basis with this extension, eliminating the need for them to return to your business. It enables customers to get frequent orders of the things they enjoy, while also providing you with a steady source of recurring money.
3. Optional deposit
Some kinds of products on WooCommerce stores may be unusual such as pricey computers, server components or even reservations for event venues or catering services that will be available at a later date.
Asking your consumers to pay in full up ahead isn’t always reasonable because the cost may depend on the completion of your service. Your consumers may even be able to cancel, postpone, or change their purchase with you.
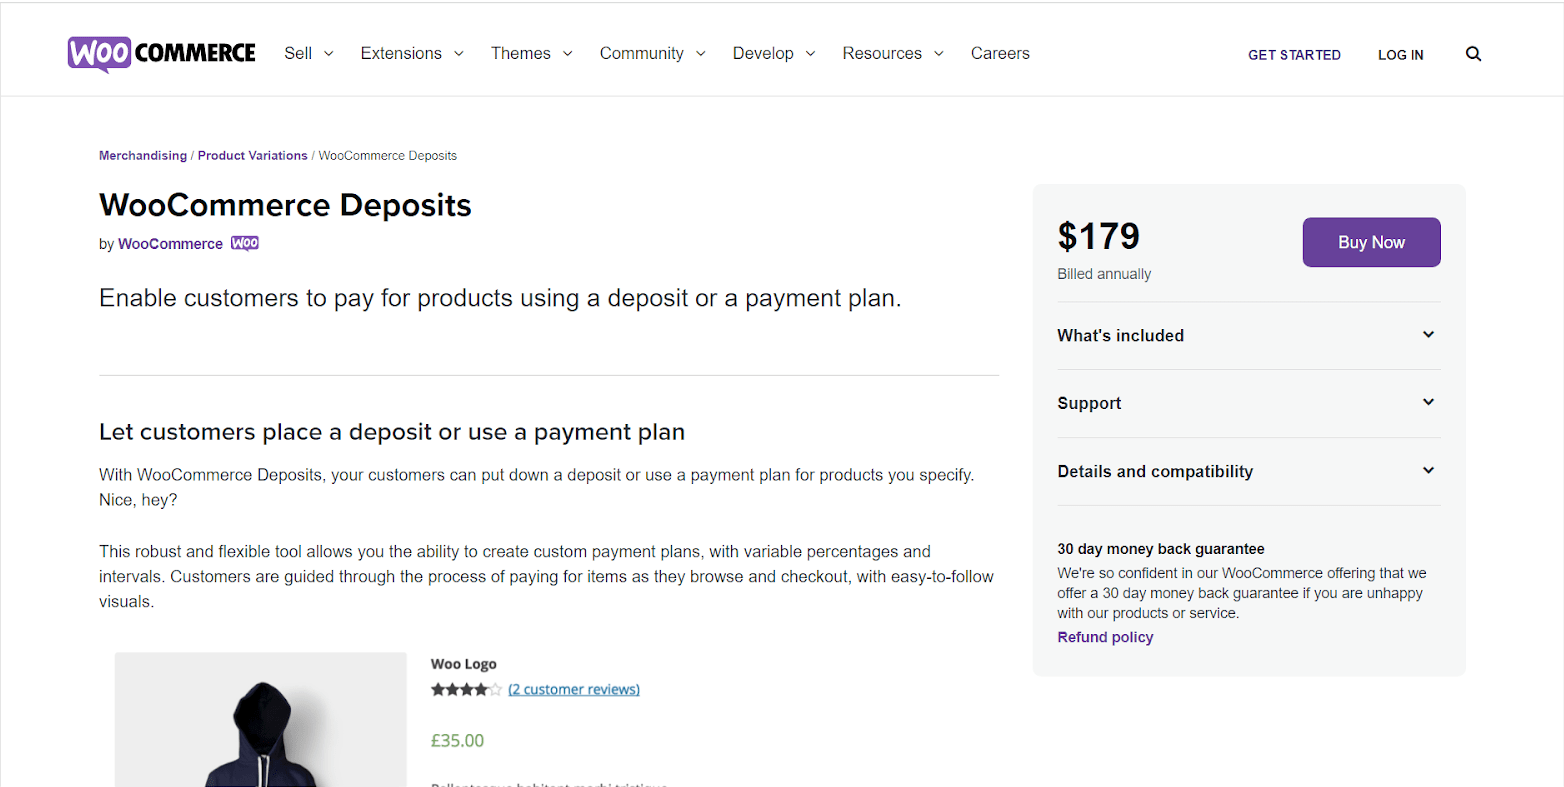
You may use WooCommerce Deposits to establish customized payment plans or deposit alternatives for (just) the goods you specify. For example, you want to charge a 10% deposit on that event space you rent out, or provide a payment plan on that costly Linux server.
4. No Payment needed
This payment method seems to be off the track, but let us give you a situation when WooCommerce store owners really don’t require any payments. For instance, you are utilizing your WooCommerce store as an online catalog and prefer a direct arrangement with customers to complete the deal or collect payments, or, in another case, you’re actually a regional store owner who sells items that are too fragile to be delivered. This is also the case of free guides, eBooks or video stores, which are the free part of the bigger main service of the company. These might be primarily for the visitors’ emails for downloading.
For those situations, you can use Catalog Visibility Options to get rid of all the WooCommerce payment gateways.
Top 4 WooCommerce Payment Plugins
Now you may know that there are a number of different payment options that you can equip your WooCommerce store to optimize the customer experience. For the addition of a third-party plugin, we have some recommendations for you to make a decision on which plugin you should choose.
Below are Top 4 WooCommerce Payment Plugins that we picked from a long list of payment plugins on the market.
If you cannot find a suitable plugin for you out of the 4 below listed ones, we have a separate post where you can choose from a list of 12 Best Payment Gateways for WooCommerce Stores.
Now, let’s begin with the 4 most used plugins first.
1. Authorize.net
Authorize.Net is a Visa solution that gives you the capabilities you need to receive payments, particularly for online charting in WooCommerce. It provides authorization when adequate funds for the transaction are confirmed at the time of the sale. This can be done using a credit or debit card such as Visa, American Express, or MasterCard, or with a digital wallet such as Visa Checkout or Apple Pay.
Key features
- Provide a range of payment methods to online business owners and customers.
- Connection to card readers is quick and easy, allowing you to begin receiving payments right away.
- Products may be purchased easily and automatically using cellphones and tablets.
- SSL and PCL aren’t necessary for a simple and quick installation.
- For a secure payment transaction, use Authorize’s secure servers and SIM.
Price
For the all-in-one option, Authorize.net charges a monthly fee of $25, no setup fee, and a cost of 2.9 percent plus 30 cents each transaction. If you select the “Payment Gateway Only” option, you will pay a lesser transaction cost of 10 cents and will not be charged any additional fees.
2. Square
Square provides a wide range of commerce solutions that make it simple for merchants to operate their enterprises in WooCommerce. With the many APIs and connections available, as well as support for in-person, online, and even in-app purchases, the possibilities for designing a unique system with everything from invoicing to email marketing and more are nearly unlimited. Stripe is primarily focused on mobile and eCommerce, with robust solutions for marketplaces and subscription-based businesses.

Key features
- Allow retailers to take a variety of extra payments in over 135 different currencies.
- Be able to add Apple Pay and other mobile wallets to the web.
- Weebly was purchased in order to provide a simple and cost-effective eCommerce solution.
- Able to sell anywhere without the need for a complex system of integrations or coding needs.
- Quick access to all of Square’s available tools and applications.
Price
Square charges a fee of 3.5 percent + 15 cents every transaction for online card payments. If your consumers utilize online checkout, the fee is 2.9 percent plus 30 cents for credit and debit cards.
3. Amazon Pay
Amazon Pay is a one-of-a-kind alternative for business owners that currently sell things on Amazon and wish to link their stores to WooCommerce. It enables users and customers to enter their Amazon credentials instead of entering their credit card information. Online shoppers will benefit from a faster and better user experience as a result of this. Amazon Pay does, however, charge a fee for overseas transactions. As a result, you should think about using this option for your internet business.
Key features
- Accept payments online and on mobile devices using Amazon’s eCommerce platform technology.
- Purchase with a single click without requiring customer information such as shipping address, credit card information, or name.
- Enhance the client experience by providing a high-quality support crew that is available 24 hours a day, seven days a week.
- Increase total earnings and conversion rates by implementing a quick and dependable payment procedure.
- Use a high-security protection strategy to safeguard client information and business owners’ data.
Price
Amazon Pay is completely free to use. However, it charges a transaction fee of 2.9 percent plus 30 cents for each purchase, much as other payment gateways. If your consumers are located outside of the United States, the additional fee will be 3.9 percent + $20 in tax.
4. Apple Pay
Apple Pay is a secure and private method of paying for goods and services using iOS applications. Customers may use the Touch ID feature to provide all payment and shipping information with a single touch. Customers will be able to make safe transactions by holding their iPhones over near field communication (NFC) terminals, eliminating the need for cash or credit cards at the checkout. Many well-known e-commerce platforms and payment service providers, including WooCommerce, support Apple Pay in apps and on the web.
Key features
- Allow Apple devices to purchase online products with a single tap.
- To improve the purchasing experience, provide a quick, straightforward, and secure payment method.
- Provide comprehensive data reports that aid in increasing conversion rates on eCommerce platforms.
- Significantly increase checkout time by eliminating the need for lengthy paperwork.
- Face ID and Touch ID requirements per transaction provide high security and privacy.
Price
You may acquire the Apple Pay payment gateway for free for your WooCommerce online store. Furthermore, the transaction and exchange currency fees are determined by each country’s regulations.
Final thoughts
There are a huge number of methods to Take Payments with WooCommerce as well as a long list of WooCommerce payment plugins that you can choose from. The most important thing you should keep in mind is that you need to offer your customers suitable payment options that are diverse enough to satisfy them yet not too numerous, making them confused.


