
How to Install WooCommerce on a WordPress Site?

Covid-19 has changed the way we shop. Small businesses that are considered non-essential have had to close their brick and mortar locations for the time being and open up shop online. If you have a WordPress website for your blog, hobby, brick, and mortar, adding WooCommerce is an excellent option for getting an eCommerce platform up and running.
In this article, we will inform you How to install Woocommerce on a WordPress site. Once the plugin is installed, you can add your products and configure them to look however you want. Now, keep reading to see how this is done!
How to install WooCommerce step-by-step to a WordPress site
Step 1: Choose a WooCommerce hosting
First and foremost, before installing WooCommerce on the WordPress site, you need to choose a hosting provider for your WooCommerce online store. Follow these criteria below to select your most appropriate hosting:
- Speed: as fast as possible. Customers never wait more than two seconds for a website to load.
- Uptime: needs to be up and running whenever there is a visitor.
- User experience: simple, friendly, and beautiful. You do not want your visitors to be confused by the layout or unable to view all products or proceed with a purchase.
- Security: needs to be secure and reliable.
- Pricing: needs to be at an affordable price. You need your WooCommerce site’s maintenance and management not to cost you a fortune.
- 24/7 support: no matter how perfect a system is, there are still some issues that need a real person to fix.

We already have an article about the 7 Best WooCommerce Hostings. You can check it here best WooCommerce hostings!
Step 2: Install WordPress
After purchasing a hosting plan, you now have a space to start building your website. You can easily install WordPress through the default stores of your web hosting provider. At this step, you can get a domain name and ensure that all essential features like IP and SSL certificates are dedicated to your online store.

Most popular hosting providers offer a one-click WordPress installation, so be sure to look for this option or ask if it is available. Otherwise, you can download it directly from WordPress.org.
Step 3: Activate WooCommerce
After finishing the two previous steps, it is time to install eCommerce functionality with WooCommerce. We will inform you of three different ways to do this.
Create a WooCommerce account
The first and most recommended way is to create a free account on the main website of WooCommerce. Go to WooCommerce.com and sign-up for a budget for your WordPress site.
In this way, you can easily install WooCommerce from:
- The zip file can be downloaded.
- The automatic installation from the WordPress site.
- The pre-installed option from your chosen hosting provider.
Install WooCommerce
- Download the WooCommerce plugin
- Download WooCommerce from the homepage
- Go to your eCommerce website
- On the main Dashboard, navigate to the Plugins and select the Add New option.
- Choose Upload and click on the downloaded plugin
- Install and activate the WooCommerce plugin
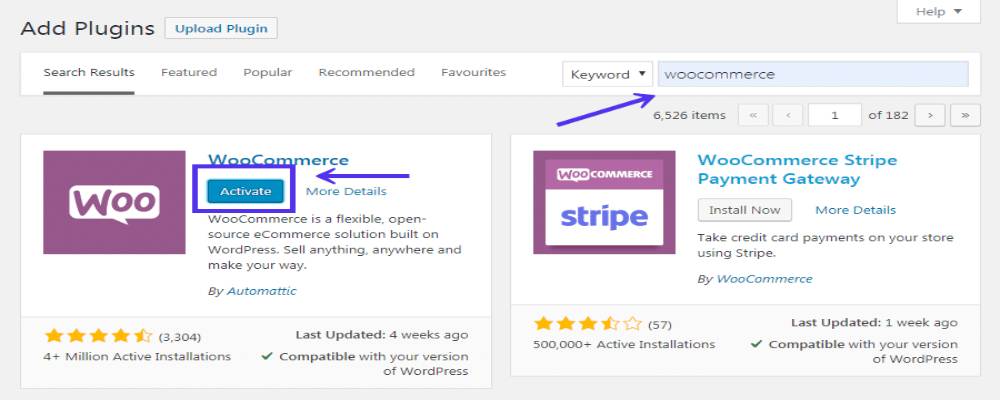
- Install the plugin via the WordPress site
- Navigate to the Dashboard
- Choose the Plugins tab
- Press on Add New and navigate to the Search Plugins blank box
- Type “WooCommerce”
- Install and activate the plugin
Step 4: Setup Wizard and expand your WooCommerce features.
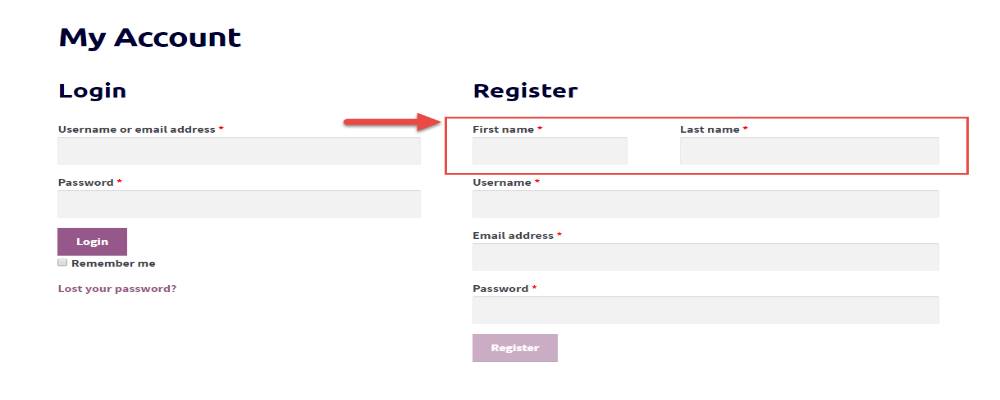
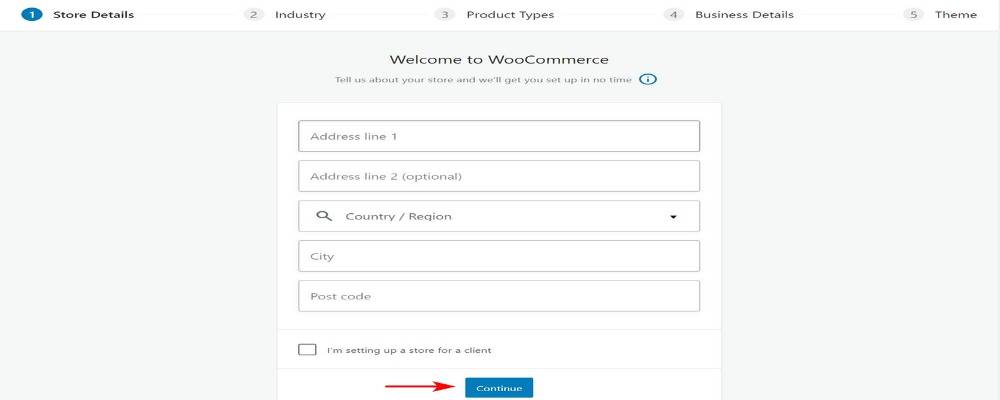
The last step you need to complete to install WooCommerce is to set up the wizard and add some built-in functionality to your web store. With a customizable eCommerce platform, there are a plethora of settings to experiment with. The Setup Wizard walks you through all of the steps required to set up your store and get it ready to sell! You are taken to the Store Profiler immediately after activating the plugin. The store profiler will allow you to provide essential information about your store, such as where it is located, what industry it is in, what products it sells, and so on.
In addition, extend the functionality of your store by using extensions. We sell extensions for almost everything, including subscriptions, bookings, memberships, payment gateways, shipping, and many other things. You can start a store/website for free and grow it as your customer base and revenue expansion. Each extension is purchased as part of a subscription, which includes access to support and product updates. A subscription is charged on an annual basis.
Step 5: Update your WooCommerce to the latest version
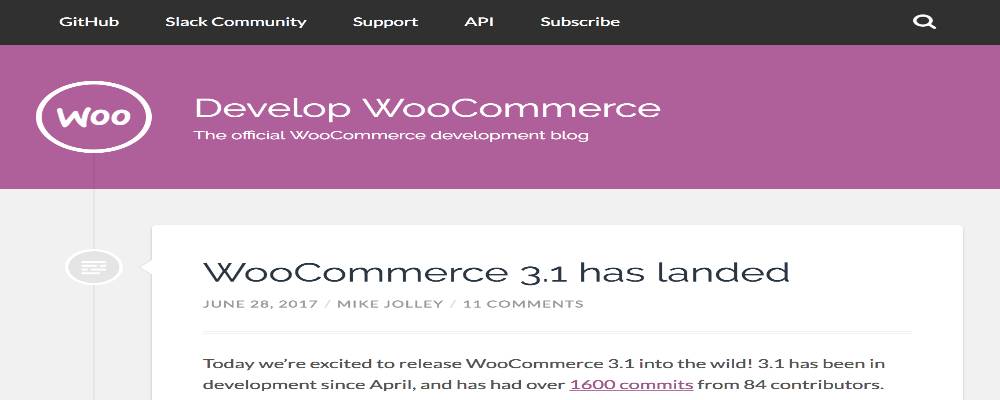
For security reasons, WooCommerce always recommends that you use the most recent version of all plugins and extensions on your site. Furthermore, the most current version of our plugins and extensions will always have the advantage of any new features and functionality. You must check to see if the report of the WooCommerce database has been updated. It is frequently updated with each version of WooCommerce, so you will need to restore your database from the previous version of WooCommerce to ensure everything works properly. This is why we strongly advise having backups in place, as well as a staging environment when testing new releases of mission-critical software such as WooCommerce. For more information, see Updating WooCommerce. As a result, this section is strictly for informational purposes.
Here is your guideline:
- Step 1: Disable or delete the current plugin on your website.
- Step 2: Restore your customer and products database by using the backup feature.
- Step 3: Under the Advanced View, get the latest version of WooCommerce and install it.
- Step 4: Navigate to the Plugins tab. Click on Add New to upload the previous version that you installed on your computer.
- Step 5: Activate the latest version of WooCommerce like the four steps above. And now, you are good to go!
Conclusion
Installing and configuring WooCommerce correctly will save you a lot of troubleshooting time in the future. To promote your products and generate income, you must get your store’s settings right the first time. If you want to see more details, check it here !
We hope that the article will clear your doubts on How to install Woocommerce on a WordPress site. And from this essential phrase, you will easily enhance your sales because WooCommerce includes everything you need to run a successful online store!


