4 Steps to Mark a Manual Payment as Paid on Shopify
In one of my the previous articles, I talked about creating a custom manual payment method, which is the method that allows the customers to place the orders online without using credit cards. When the customers use this kind of payment, shop owners can manage to receive the payment outside the online checkout and approve it later. However, they need to mark the payment as paid manually after receiving the money from the customers. Normally, the order will be marked as Pending in the Payment status on the Orders page if the customer makes the order using a manual payment. If you have enabled the manual payment and you are confusing, do not miss this writing because I will show you how to mark a manual payment as paid on Shopify.
Related Posts:
How to mark a manual payment as paid
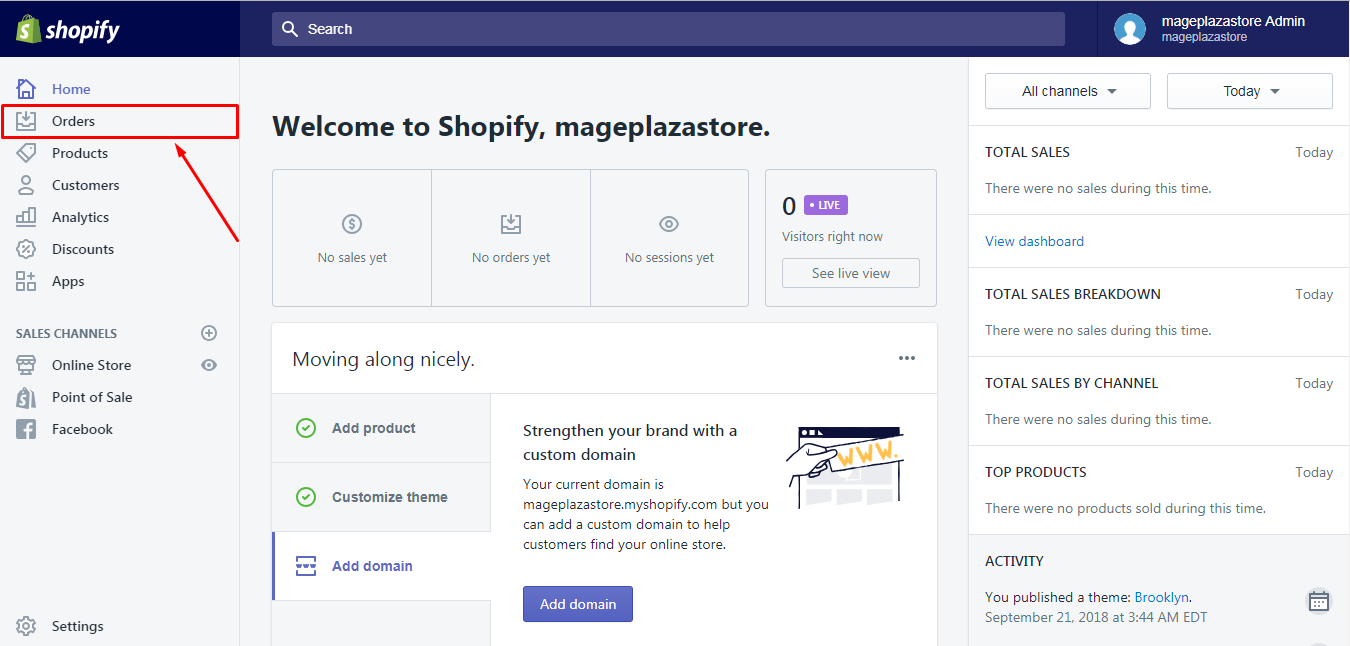
Step 1: Open Orders section
Log-in to your Shopify account and press on the Orders at the second place in the menu on the left side of the page.

Step 2: Pick an order
After opening Orders, the list of All orders will appear that you have to find the one which you want to mark as paid and click on it.
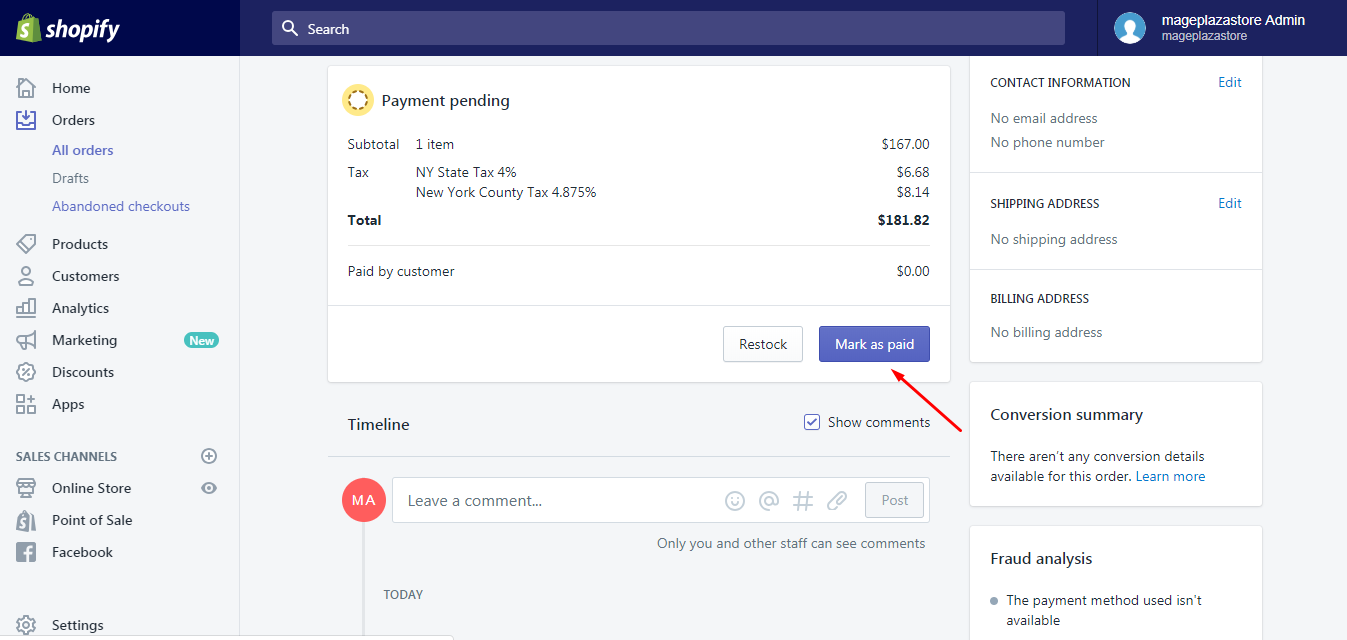
Step 3: Click Mark as paid
The detailed information about the order will present on your screen then scroll down until you see the Payment pending section. This section includes the value of the items, the tax added to it, the total amount of the orders and the amount paid by customers. Below it, you will find a blue Mark as paid button then click on it. You can link to this picture to know what it looks like in actual.

Step 4: Mark payment as received
Like the action for deactivating the manual payment, the system will ask you again to ensure your selection then you need to confirm it by choosing Mark payment as received. If you choose Cancel or close the dialog, nothing will happen and you need to repeat the step 3 again. Therefore, do not skip this step because you find this is the final one.
If you have completed all the above steps, you will see that on the order details page, the payment is marked as accepted. Meanwhile, on the Orders page, particularly in the All orders section, the Payment status for the order will be changed as Paid. In case you don’t observe any change like this, it means you may do something wrong previously then try to practice the process again.
Conclusion
In short, I have given you the guideline to mark a manual payment as paid on Shopify. The steps are quite simple and I also attach some photos there to help you practice it easier. I hope that it can benefit you in your management of orders or at least it provides you with some helpful information. If you want more posts like this, check out our Shopify Tutorials.


