
How to Export Orders To A CSV File on Shopify
By Sam Nguyen

There are two ways for you to export your orders to a CSV file. You can either export them with their transaction history or export only the transaction history. The payment data will also be included in the CSV file.
The following is my instructional writing on the topic how to export orders to a CSV file on Shopify. In my opinion, I find this writing very informative so I hope you will take your time to read it and follow the instruction carefully.
Step 1: Sort and filter the order
1.1 Sort your orders
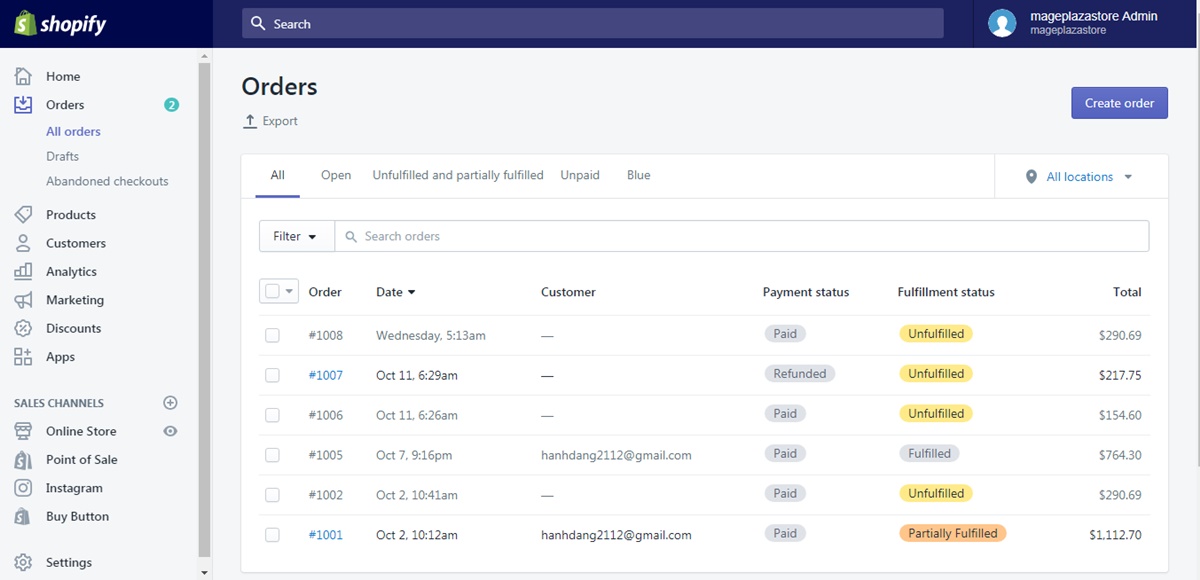
From the admin screen, choose Orders to continue. The system will take you to the All orders page. From the page, to sort the orders list, click on the column header that you want to see the orders in.
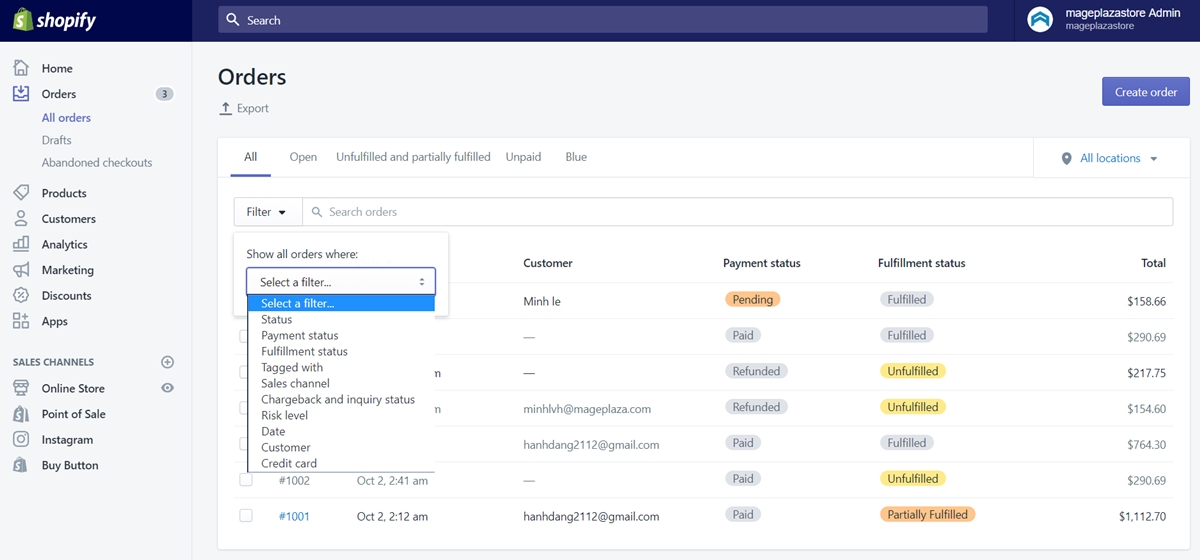
1.2 Filter your orders
From the All orders page, choose Filter, a small dialog will show up on the screen. Choose a filter in the first drop bar menu and choose a value in the second one. After you finished choosing, click Add filter.
Step 2: Click Export
From the All orders page, you can find the Export button with an upward arrow on top of the page. Click on that button to go to the next step.
Step 3: Select the option
After you clicked on the button, a box named export orders will appear on the computer screen. Inside the box, there are several options for you to choose from.
Export as:
- Current page: choose this option if you want to export the orders you sorted and filtered that are shown in the background.
- Orders by date: choose this option if you want your orders to be chronological and you have to set the start and end date for your order in the box below this option.
- All orders: choose this option if you want to export all the existing orders of your store
- Selected orders: choose this option if you want to export the orders you selected from before
- 2 orders matching search: choose this order if you want to export only 2 orders which match your search.
Choose the format:
-
CSV file for Excel, Numbers or other spreadsheet programs: choose this format if you plan to use a spreadsheet program to adjust the CSV file.
-
Plain CSV file: choose this format if you only use a plain text editor for the CSV file
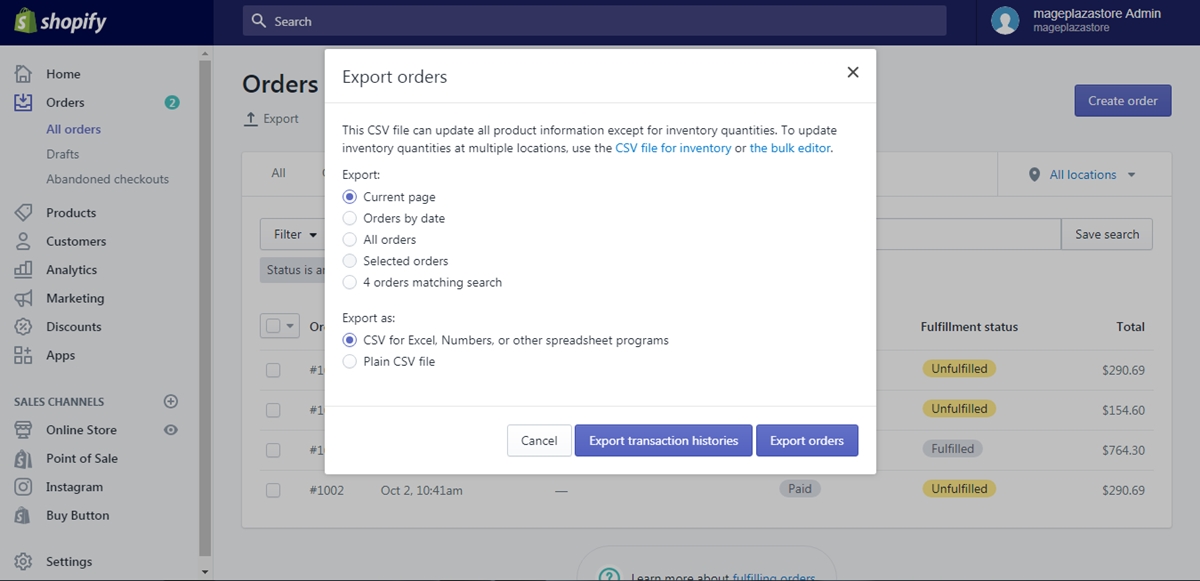
Step 4:Export the order
After you finished all the steps above, choose Export orders to export all the information about those orders to a CSV file. Choose Export transaction histories if you only want the transaction histories.
Conclusion
To sum up, the above is my very detailed instruction on the subject how to export orders to a CSV file on Shopify. I hope you enjoyed my writing and if you want more articles like this one, check out our Shopify tutorials.
Related Posts:
- Import CSV Files into Google Sheets: A Step-By-Step Guide
- Import Multiple Product Images in a CSV File on Shopify
- Import Products With a CSV File on Shopify


