How to Enable Apple Wallet Passes on Shopify
Apple Wallet is an app for devices using the iOS operating system that let users save coupons, event or public transportation tickets, etc. Shopify also allows online shop’s owners to add Apple Wallet for their stores. By using this feature, consumers can confirm their gift cards’ balance as well as redeem a gift card in store. This app can be added into your online store that you can use it to increase the number of loyal customers, but do you know how to enable Apple Wallet Passes on Shopify. Let’s check this writing for detailed steps.
How to enable Apple Wallet Passes
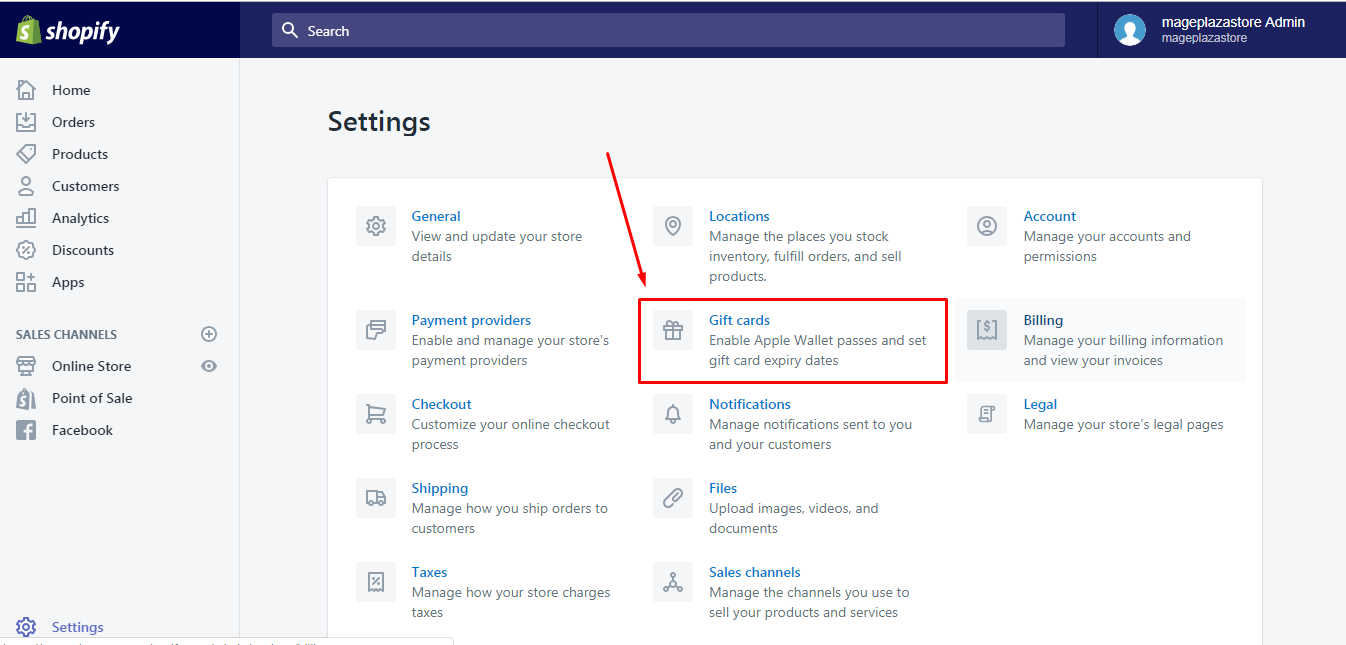
Step 1: Click Gift cards
From the admin page of your Shopify account, select Settings. A list will appear, but only look for Gift cards and click on it.

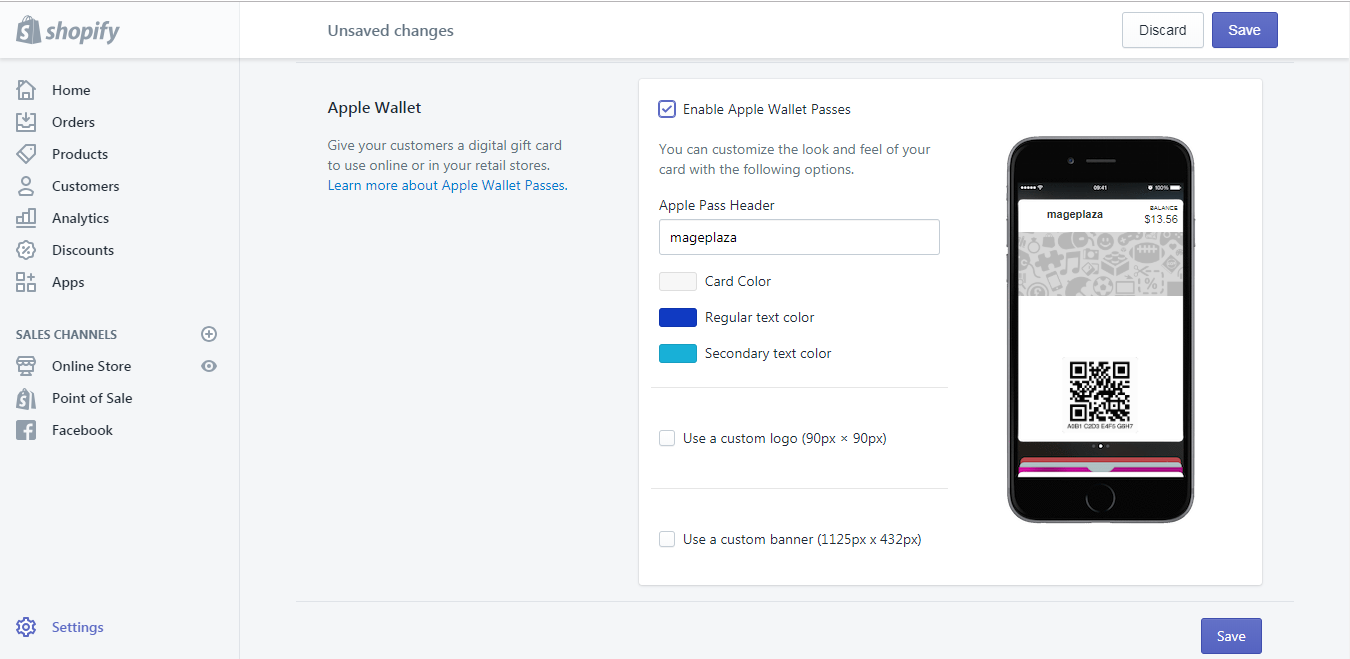
Step 2: Enable Apple Wallet Passes
Tick on the Enable Apple Wallet Passes in the Apple Wallet section below the Auto-expiration.

Step 3: Edit gift card setting
Detailed settings of your gift card will appear that you can edit it anytime you want. You can change the color of your card and text into your favorite color. Moreover, the logo and banner can be customized in your style as well.
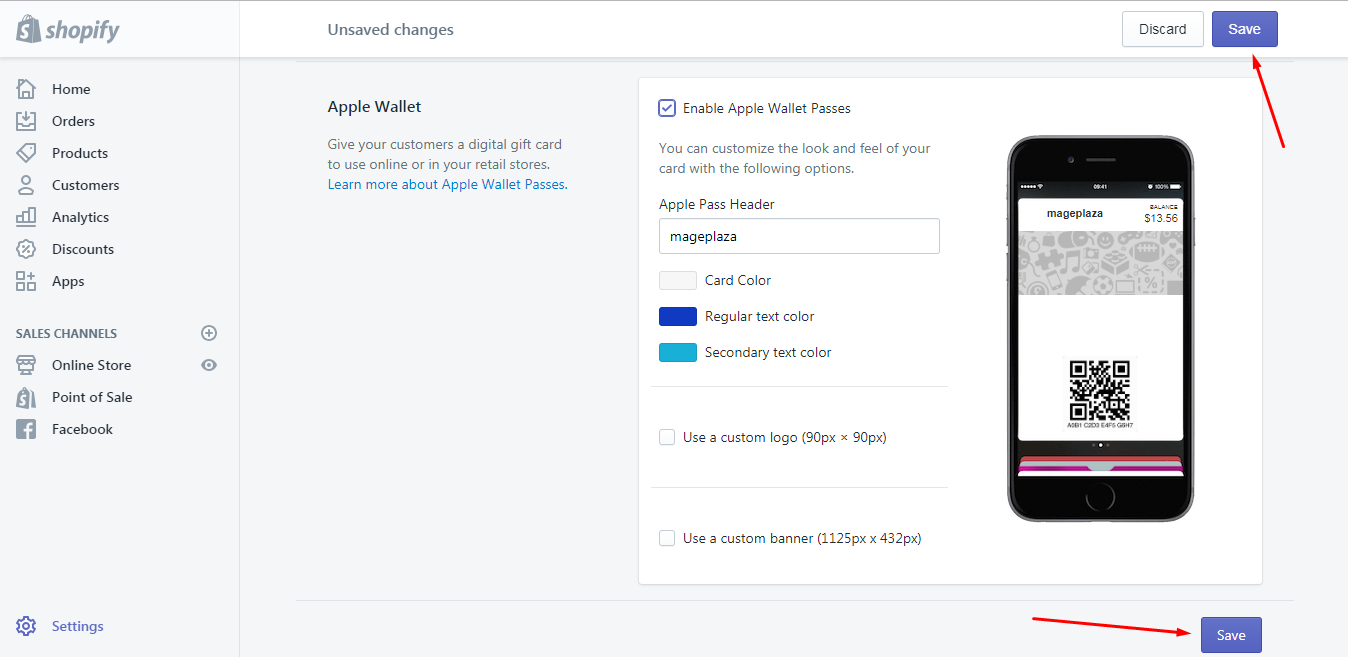
Step 4: Click Save
Like other options, if you change something in Shopify remember to press Save to end the action or no changes will be counted. In this setting, there are two Save buttons appeared on both heading and ending of your screen, you can choose one to click on and close the process.

After you complete all these above steps, a button named Add to Apple Wallet will be added to your emailed gift cards. You can refer to the picture below for clearer understanding.

To enable Apple Wallet Passes on Iphone (Click here)
-
Step 1: Get access to your Shopify app, choose
Storeand go toSettingsafter that. -
Step 2: Find
Store settingsin theSettingssection and selectGift cardsnext. -
Step 3: Under
Apple Walletpart, you can seeEnable Apple Wallet Passessetting, check it to activate -
Step 4: Right after the permission for using Apple Wallet, the options to adjust the appearance for your gift card will be shown. You can edit it based on your taste or purpose to attract your customers.
-
Step 5: To finish, tap
Save
To enable Apple Wallet Passes on Android (Click here)
-
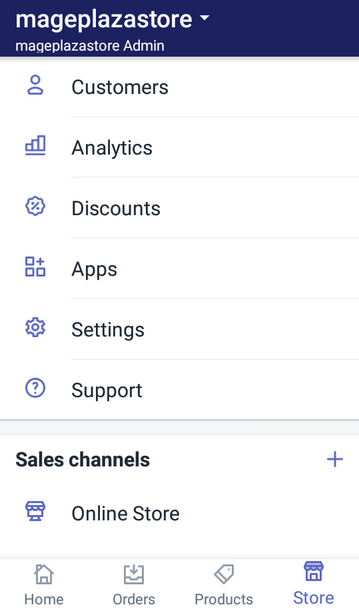
Step 1: After opening your app, tap on
Storewhich stays on the right ending of your display then chooseSettings
-
Step 2:
Settingsis divided into smaller categories to make it easier for users to use, which includeApp settings,Store settingsandAbout. SelectStore settingsand go toGift cards
-
Step 3: Check
Enable Apple Wallet Passesunder theApple Walletsection
-
Step 4: Because gift card is a special kind of products, you can design it to “sell” to your customers, by changing text, card color or its display picture.
-
Step 5: Record all changes by pressing
Save
Conclusion
In short, with the aim to support users, this article had clearly described the process of how to enable Apple Wallet Passes on Shopify. Hope that you can take advantages from Apple Wallet to raise your sale revenue as well as your number of buyers.
Related Posts:


