
How to Change or Remove an Image from Checkout Page
By Sam Nguyen

As you may have known that we can add logo to the checkout page. However, there comes the time when you that the image you are now having is not suitable for your shop anymore and you want to remove or change that image from checkout page. If this is the problem you are facing with, this writing must be for you.
Related Posts:
- Add a Logo to the Checkout Page on Shopify in 6 Easy Steps
- How to Change Button and Accent Colors on the Checkout Page on Shopify
- How to Change the Font on Checkout Page on Shopify
- How to Create a new Checkout Language on Shopify
- How to Edit Checkout Form Options on Shopify
The writing below provides you with the detailed instruction on the topic how to change or remove an image from the checkout page on Shopify. Please read this and follow the instruction carefully to solve your problem.
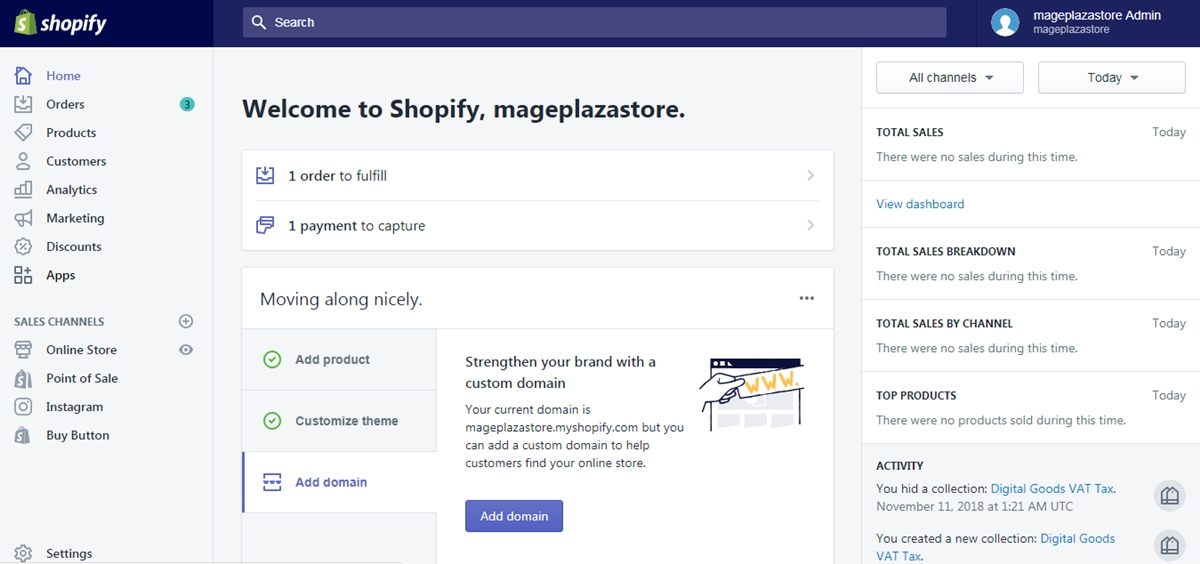
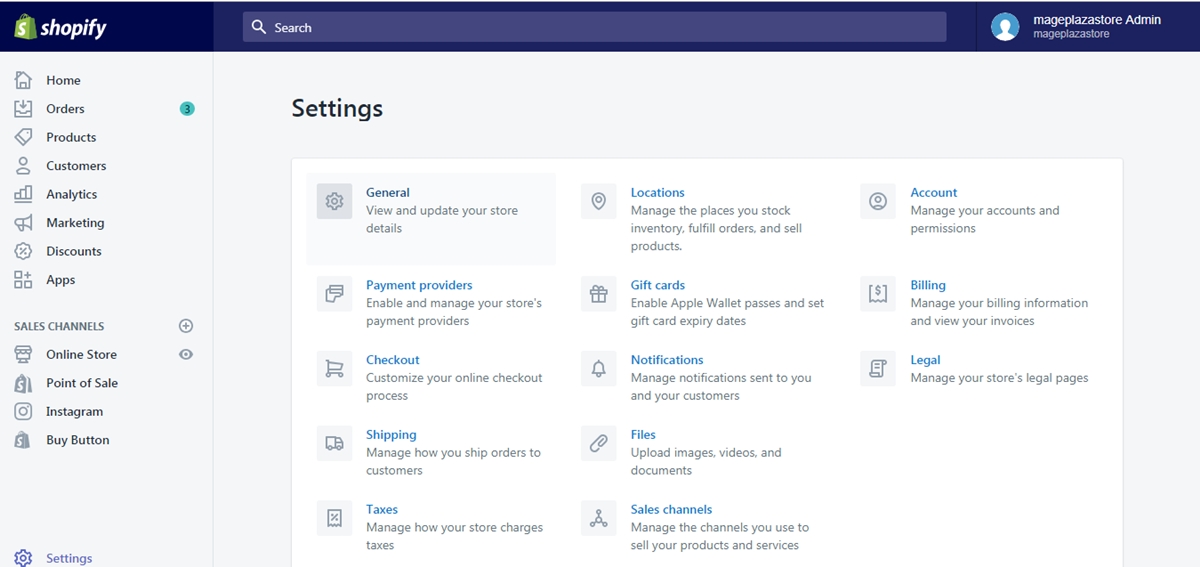
Step 1: Go to Settings -> Checkout
After you logged into your account, look at the left bottom of the screen and find the button named Settings and click on it to continue.
At the Settings page, find the Checkout button and click on it.
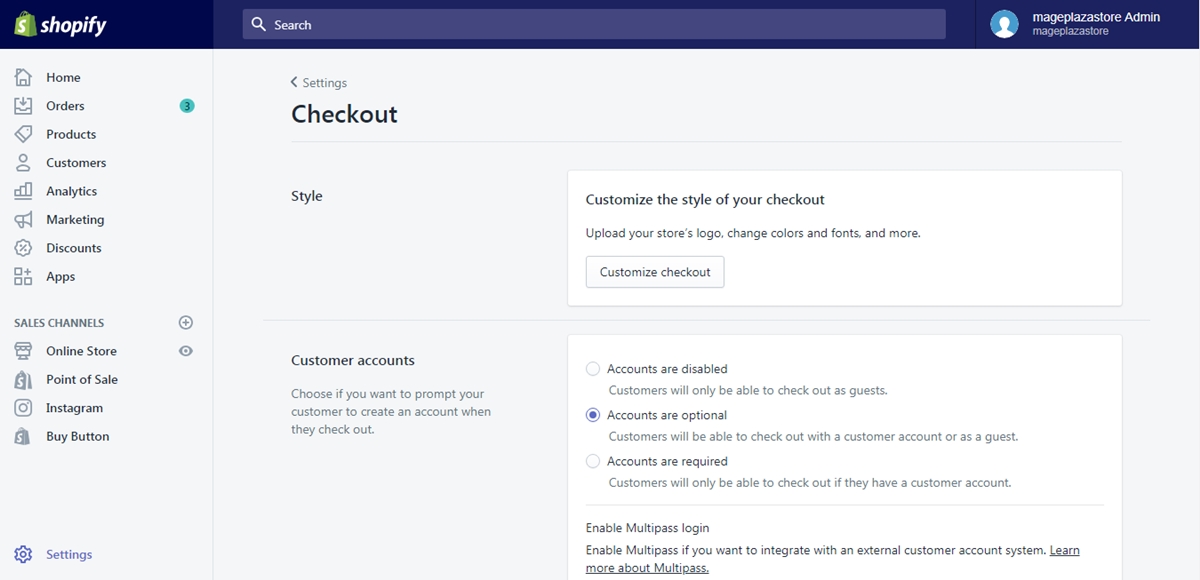
Step 2: Click Customize checkout
Inside the checkout page, you can see the Style area, in that area, click on the button named Customize checkout to see the theme editor.
Step 3: Change the image
Under the image that you want to make changes to, click Change and upload another image or choose an existing one.
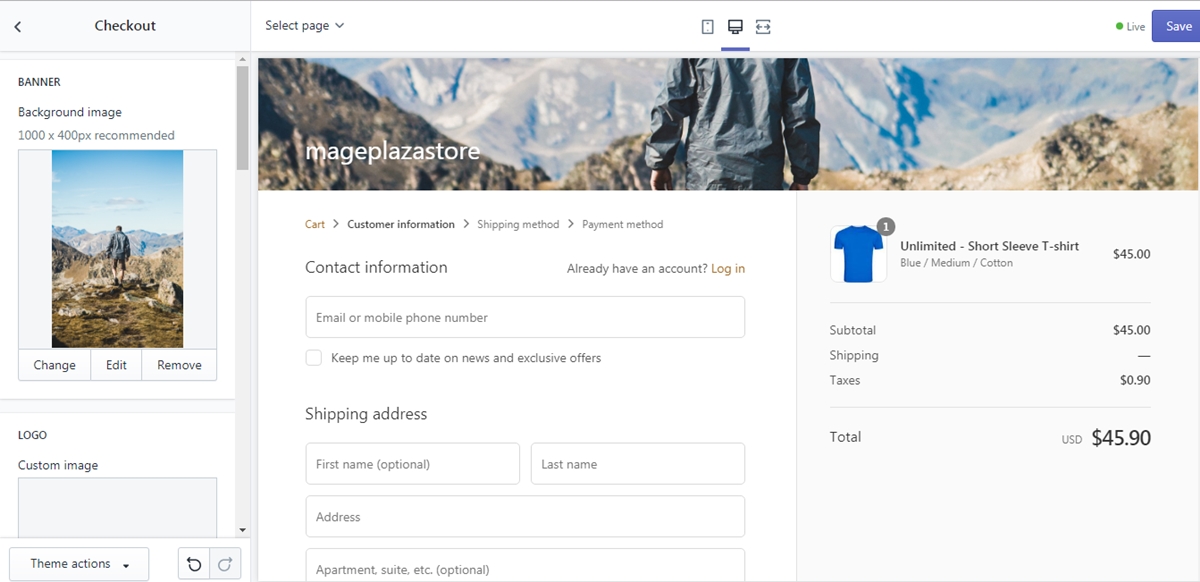
Step 4: Remove the image
Beneath the image that you want to delete, there is a Remove button, click on it to remove the unwanted image. This action will not delete the picture from Shopify library.
Step 5: Saving
After all the steps above, click Save to keep all the changes you made.
To change or remove an image from the checkout page on iPhone (Click here)
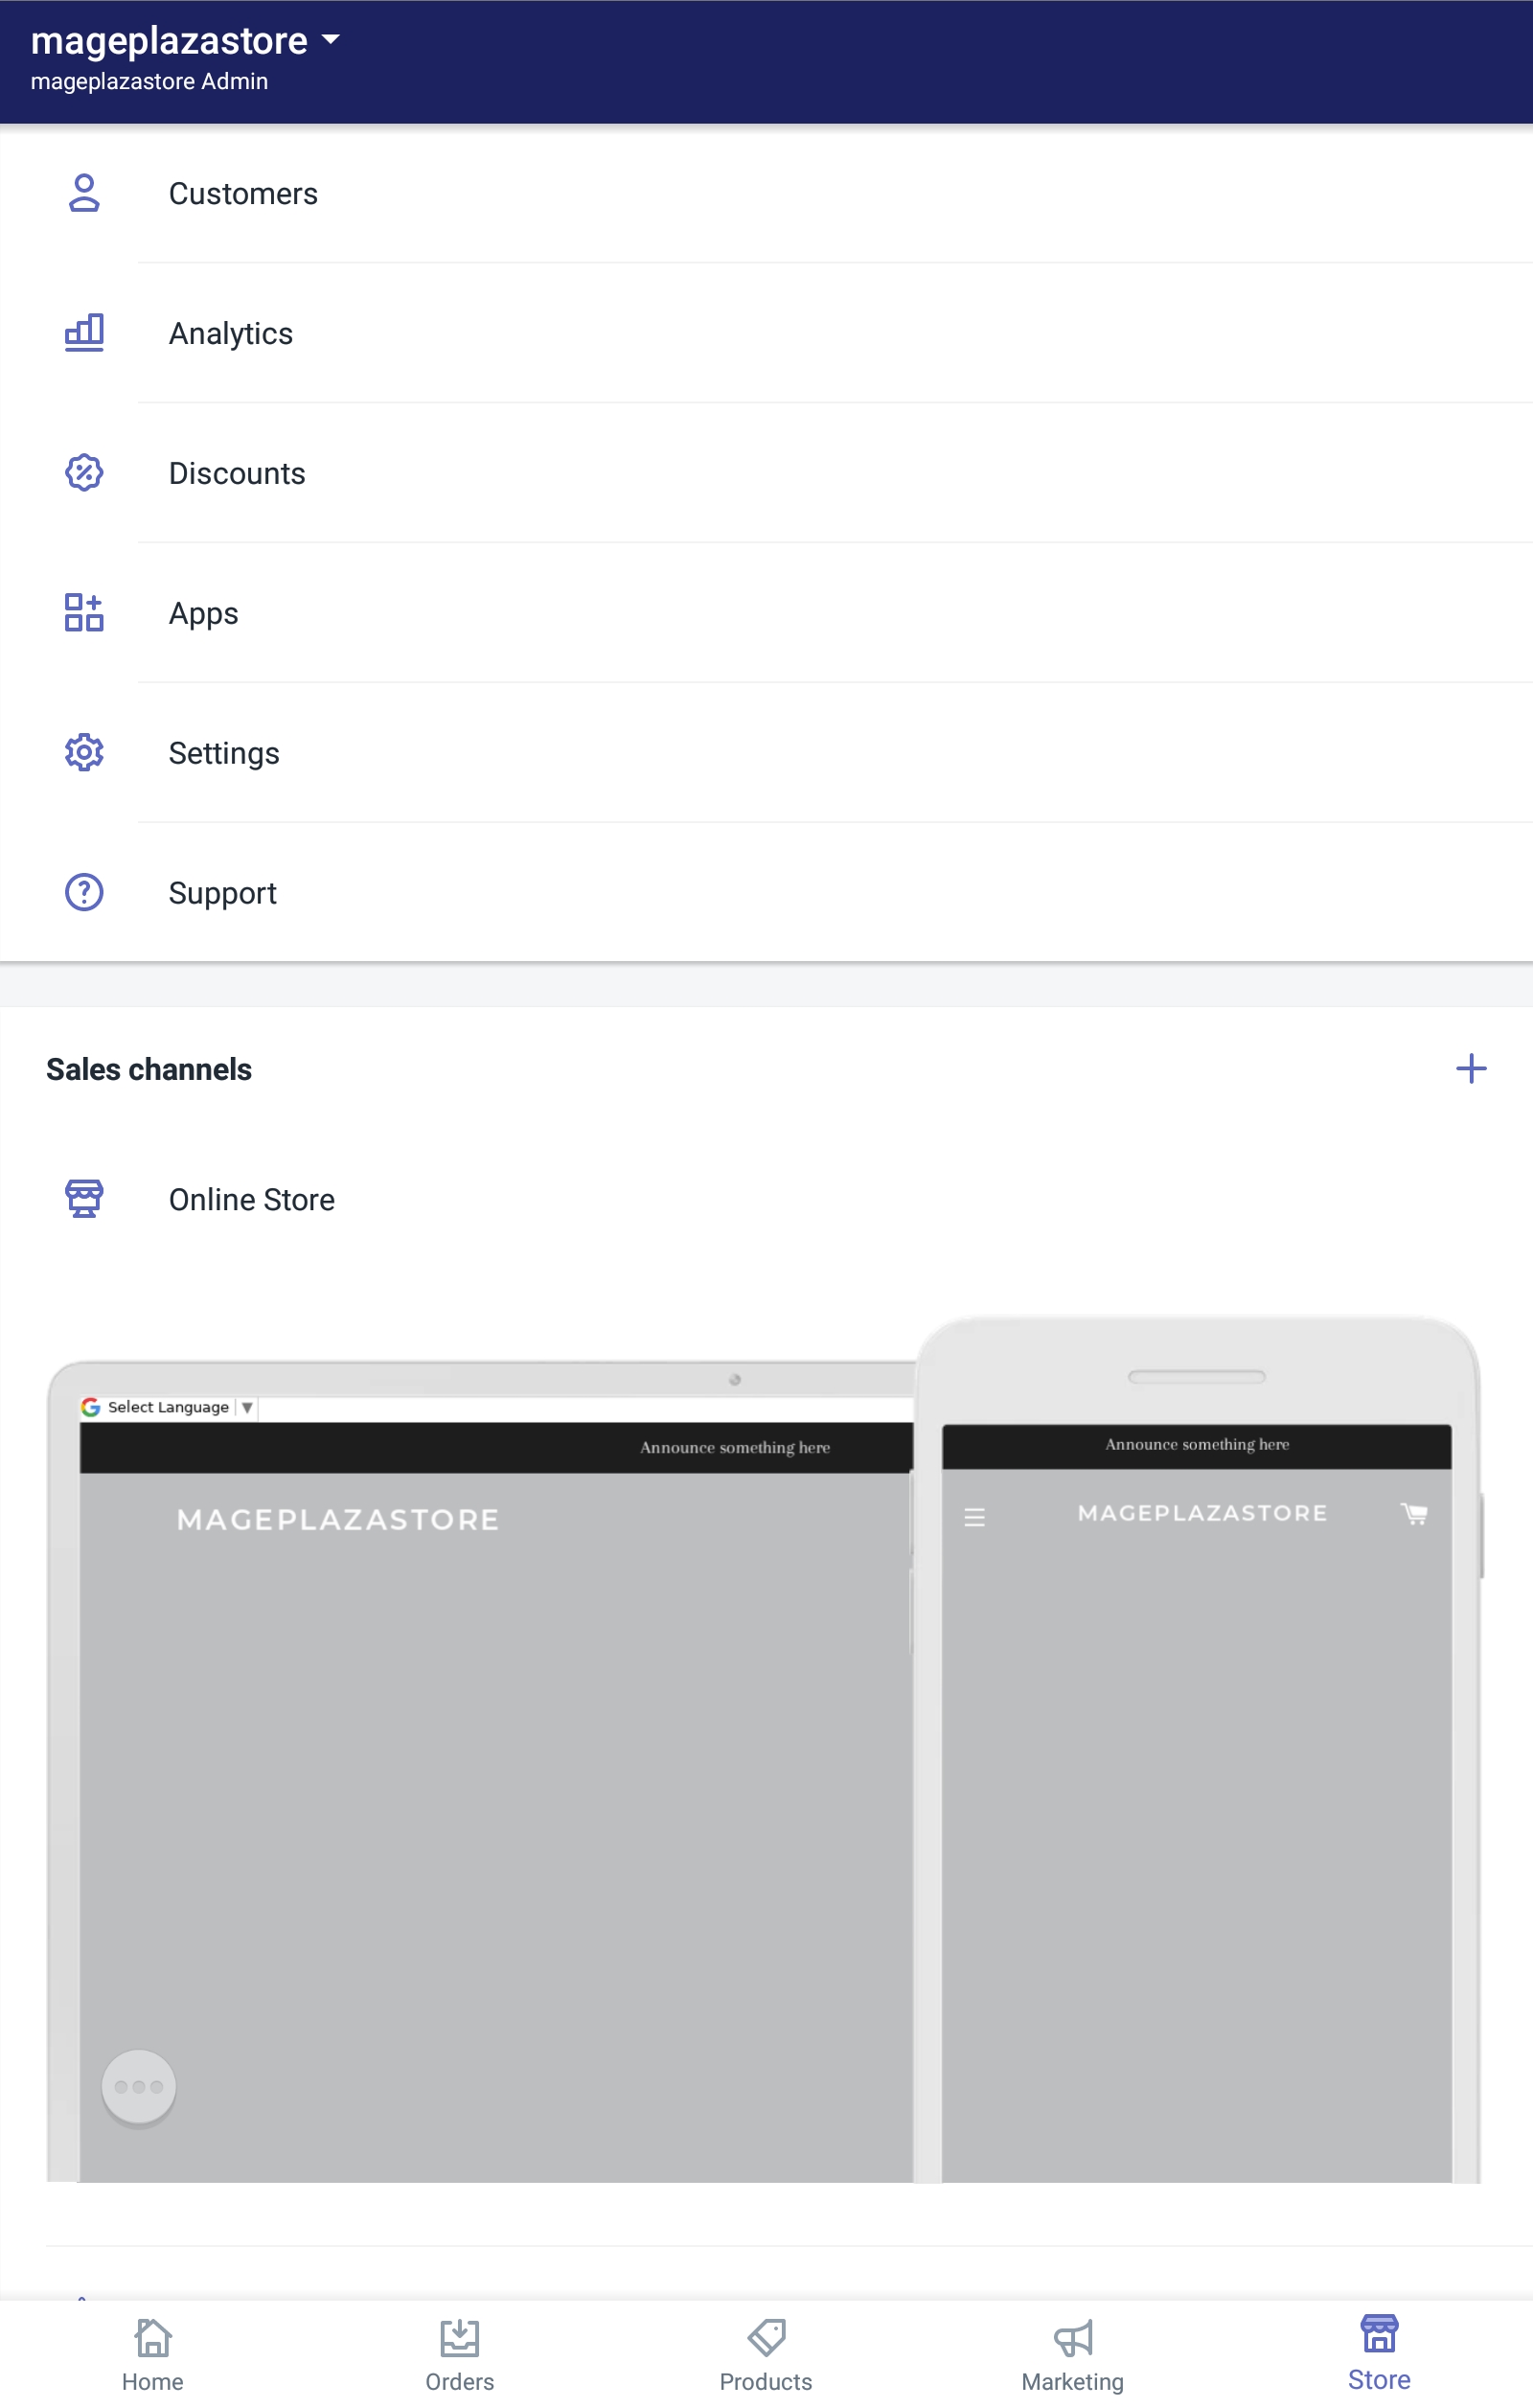
- Step 1: Go to Store -> Settings
When you get access to the home page of your shop from the app, go to Store button and continue by tapping the Settings section on that page.
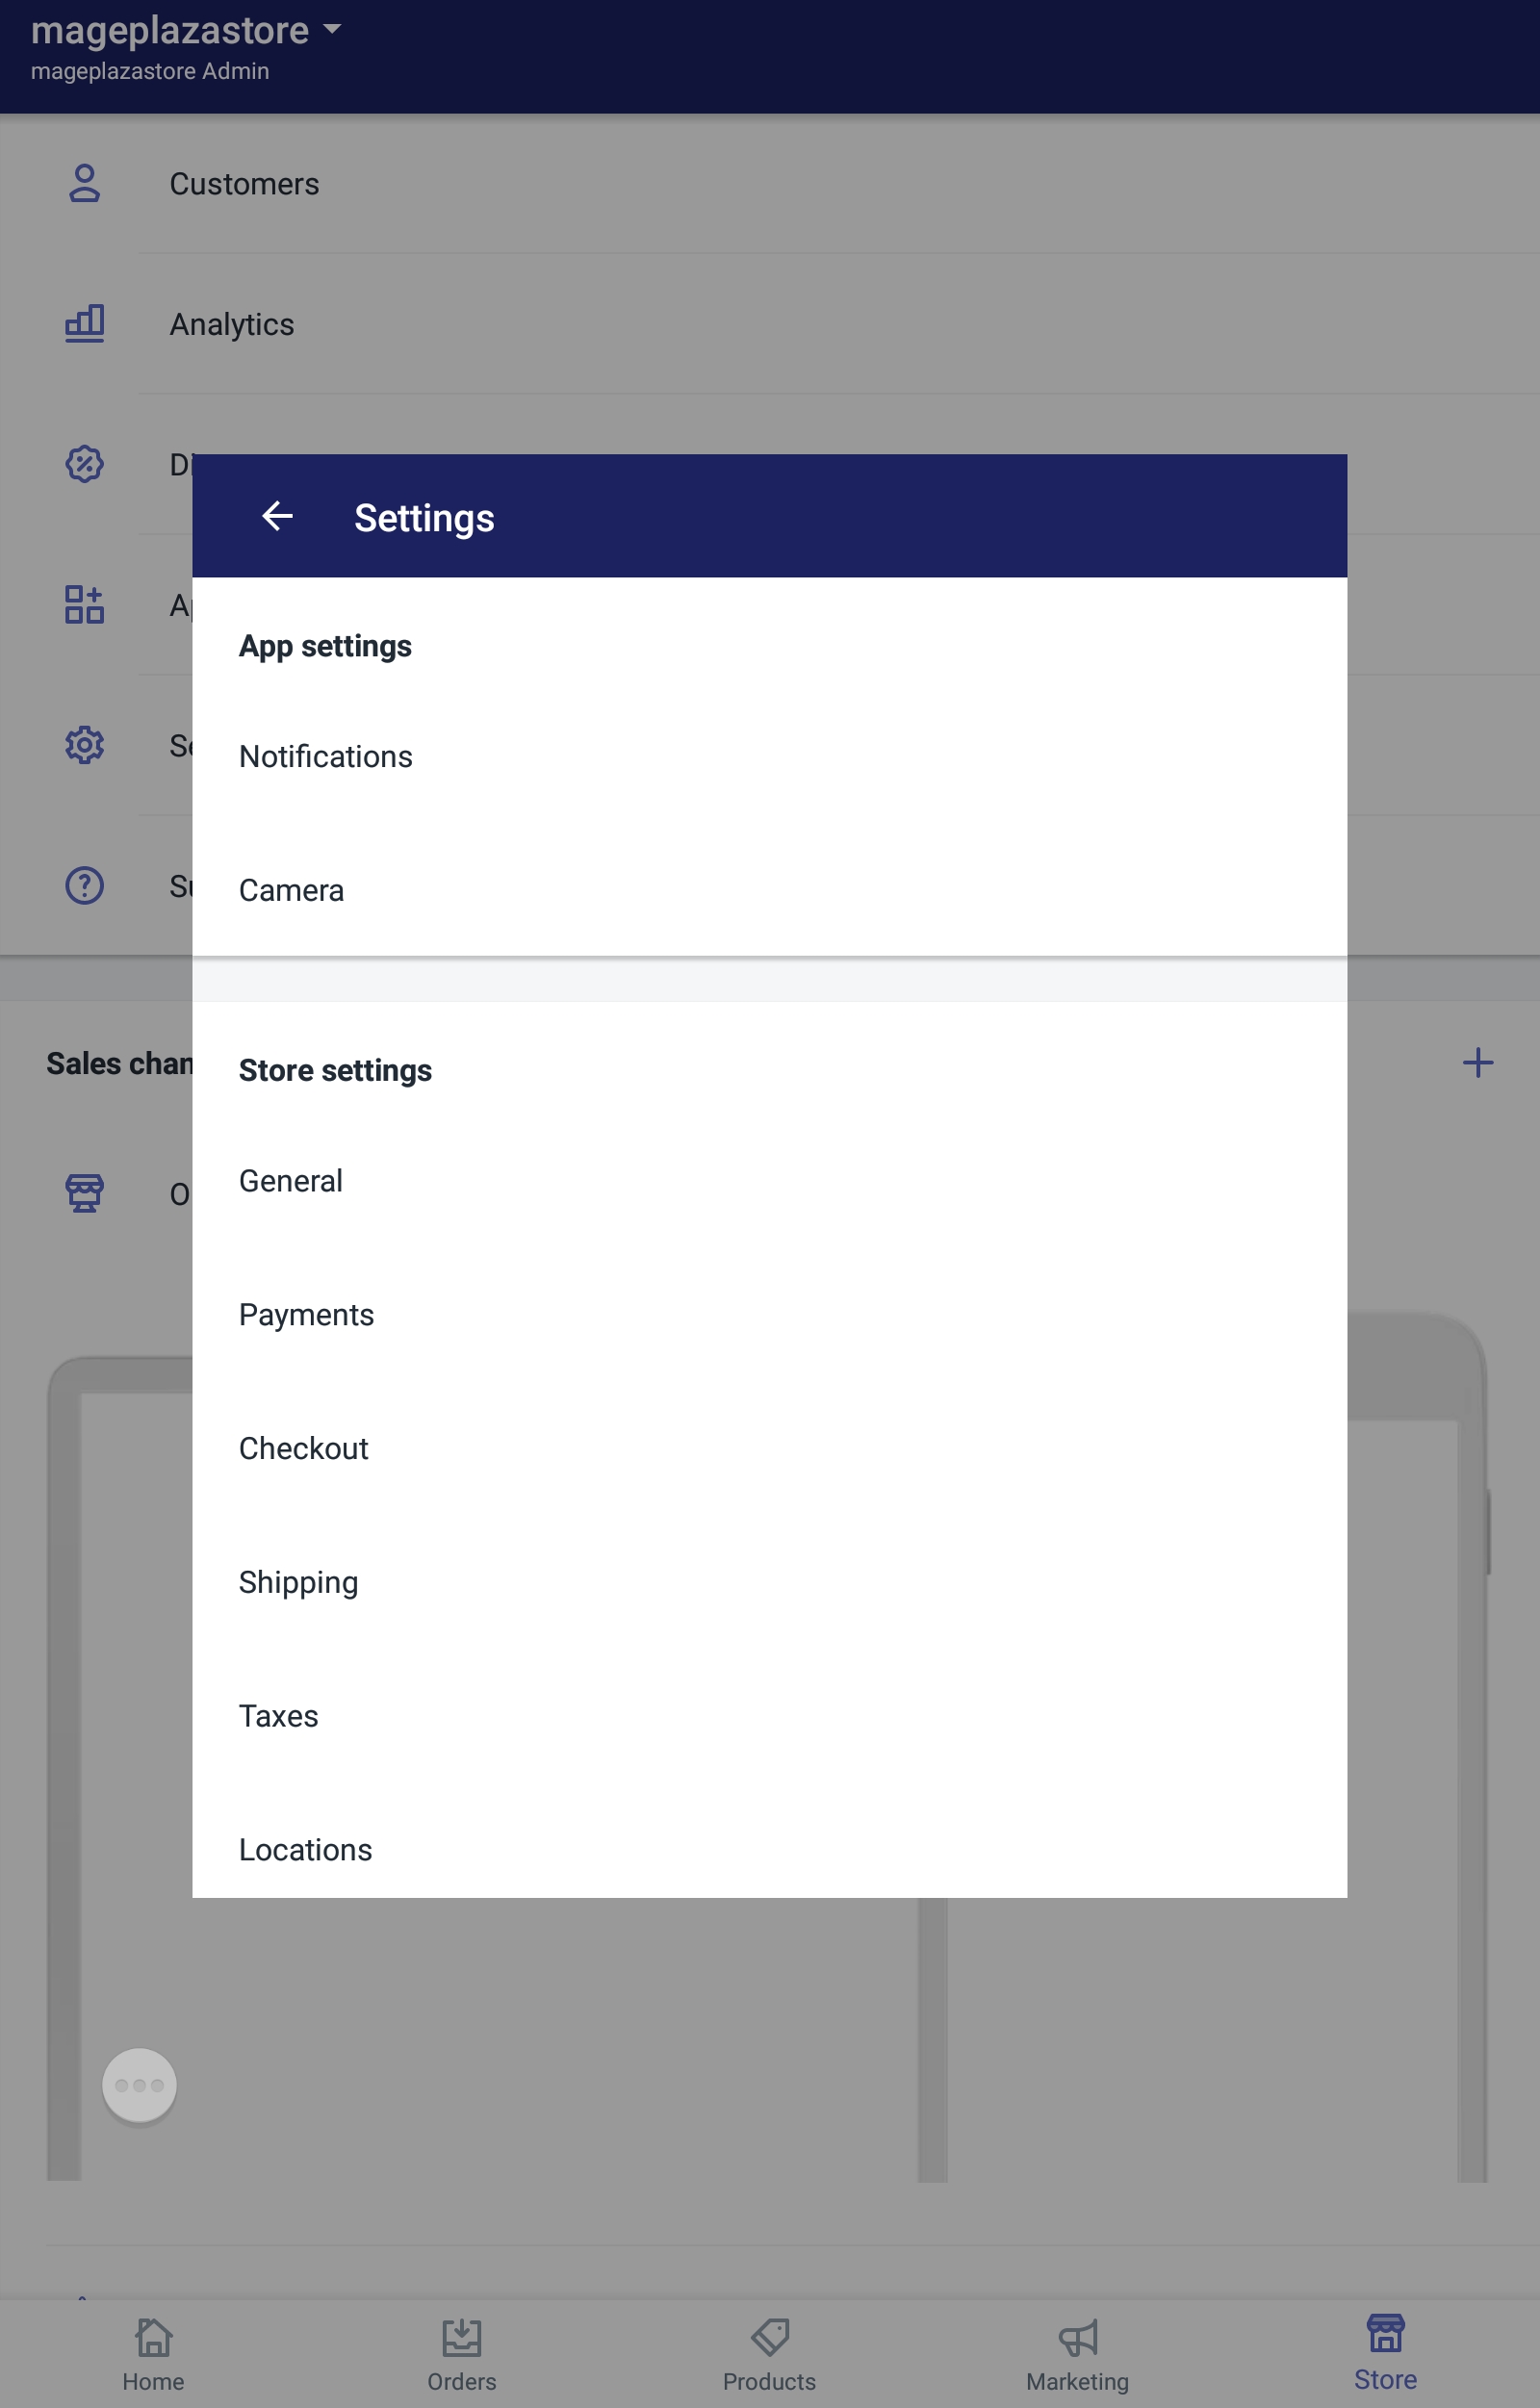
- Step 2: Tap Checkout
From the store settings section, you can see an option named Checkout. Click on that option to go to the next step.
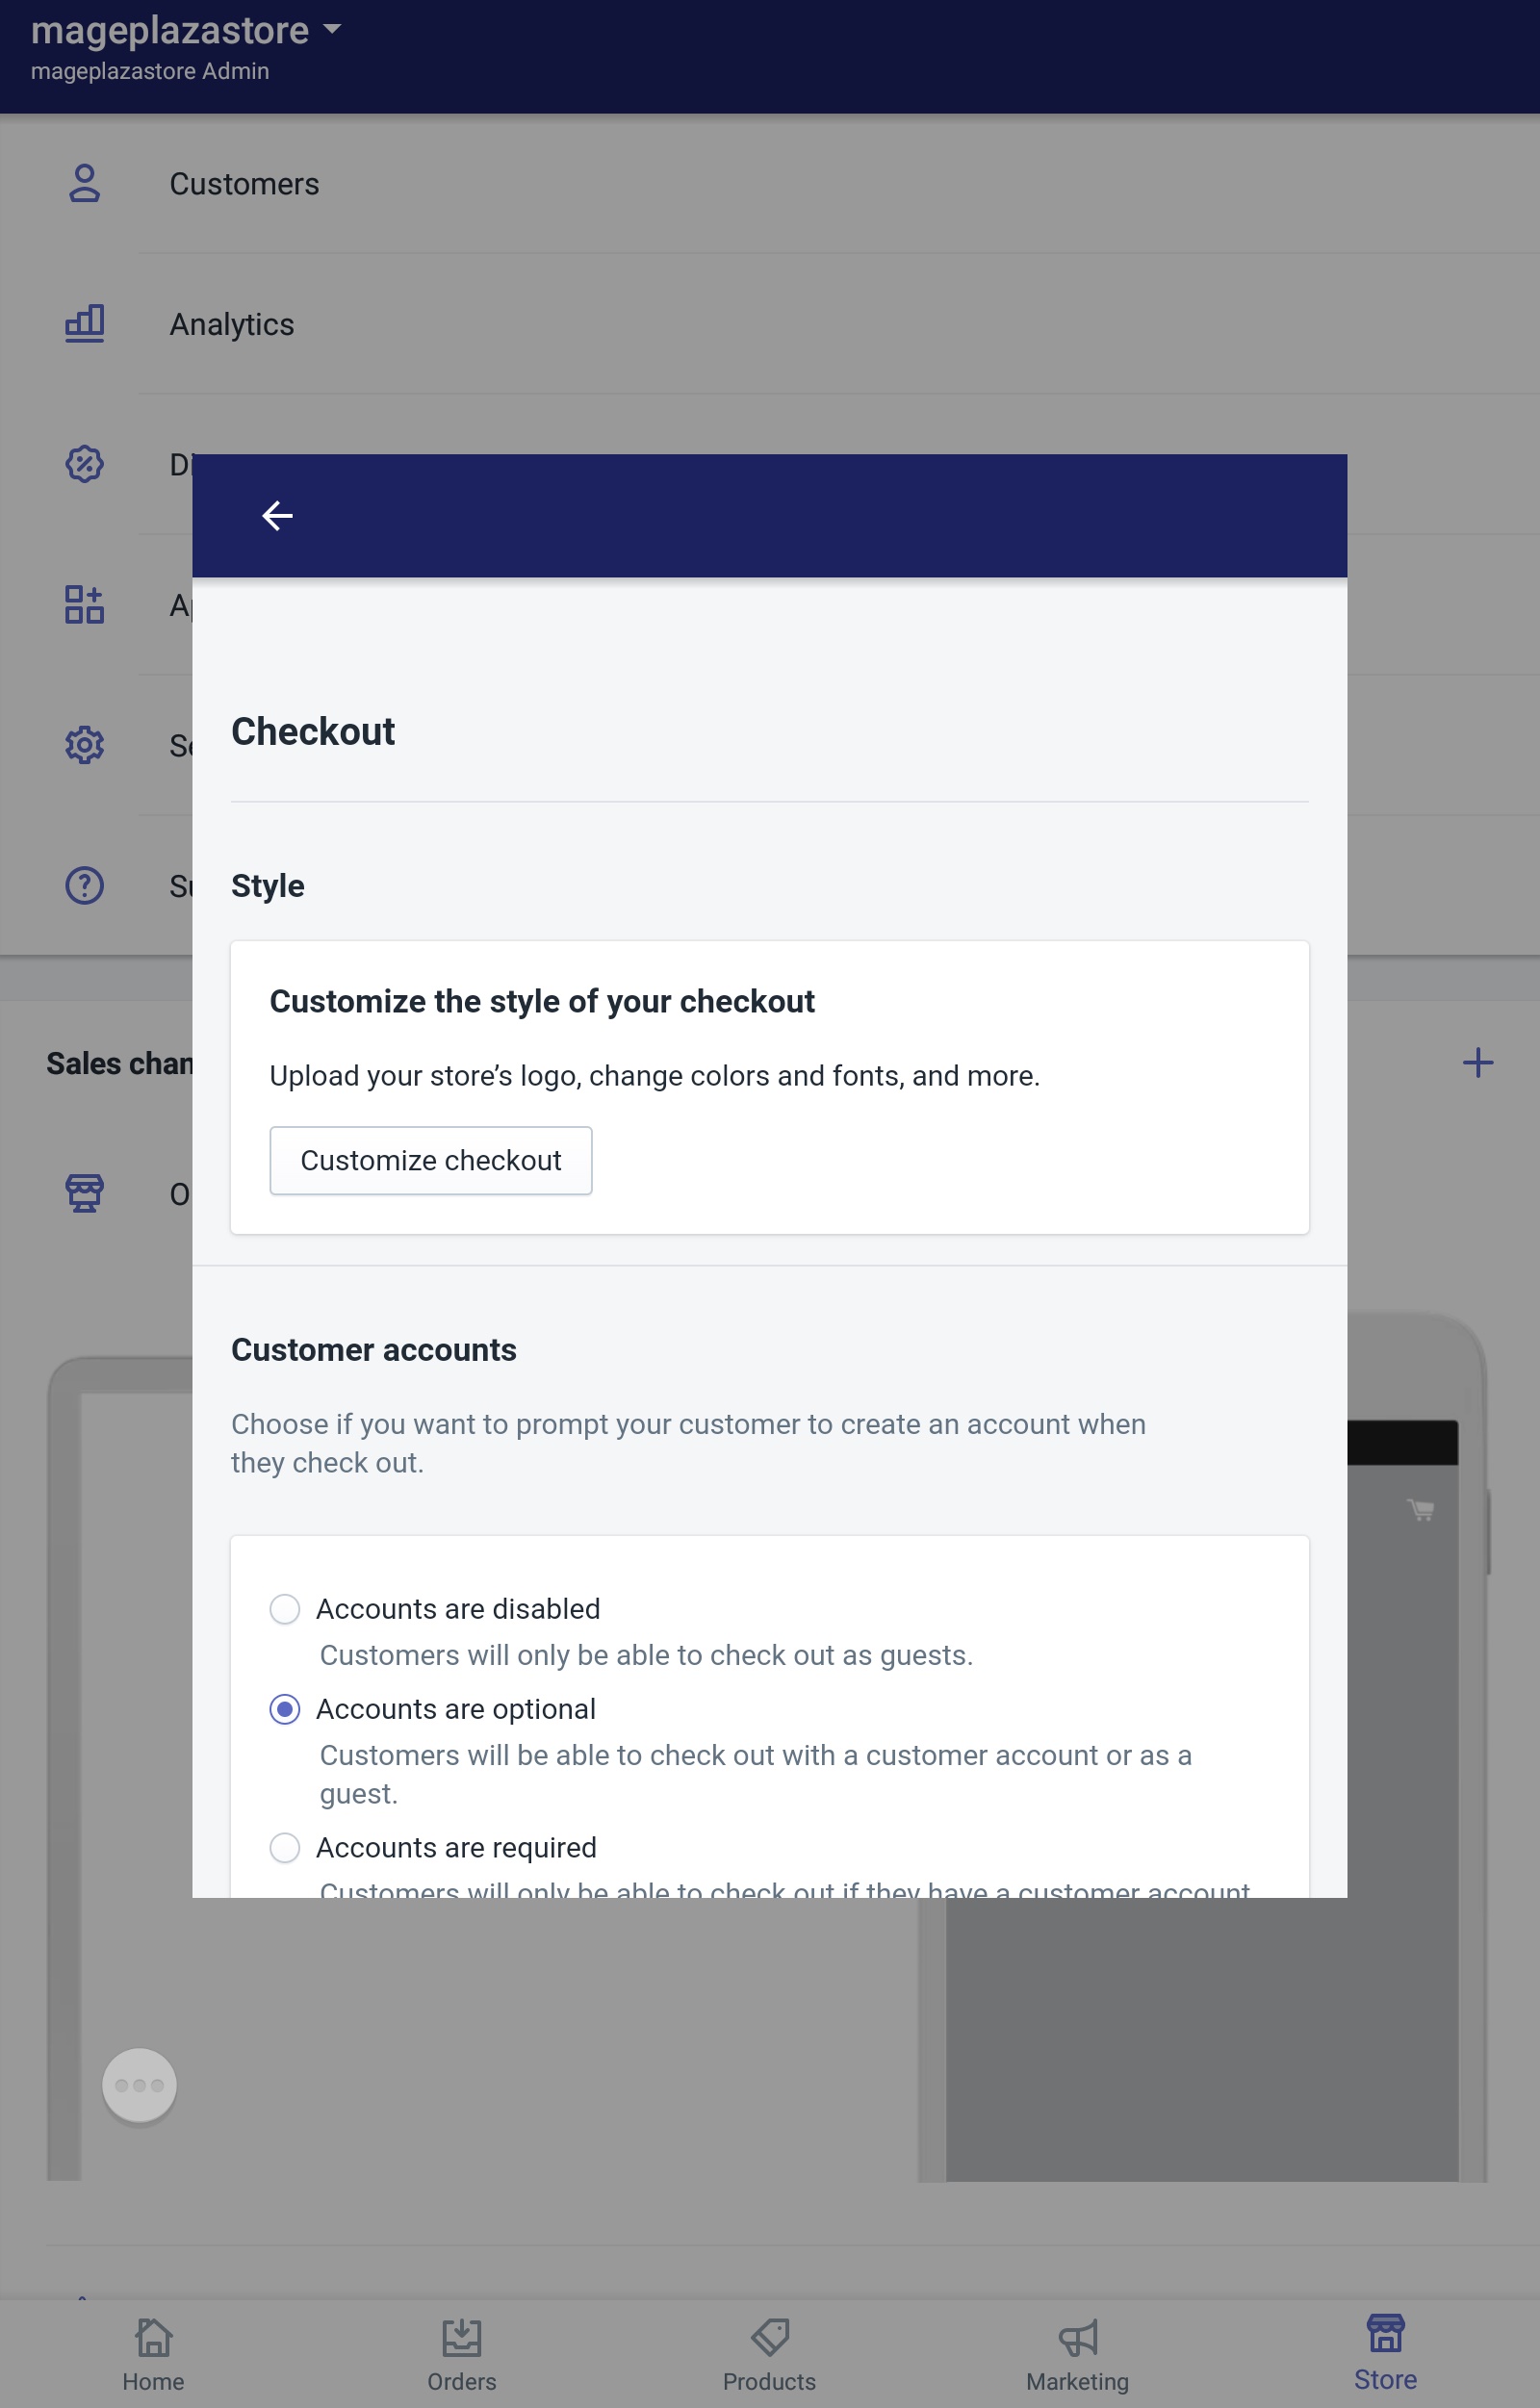
- Step 3: Tap Customize checkout
Inside the page, there is a field named style. From that field, tap Customize checkout to see the theme editor.
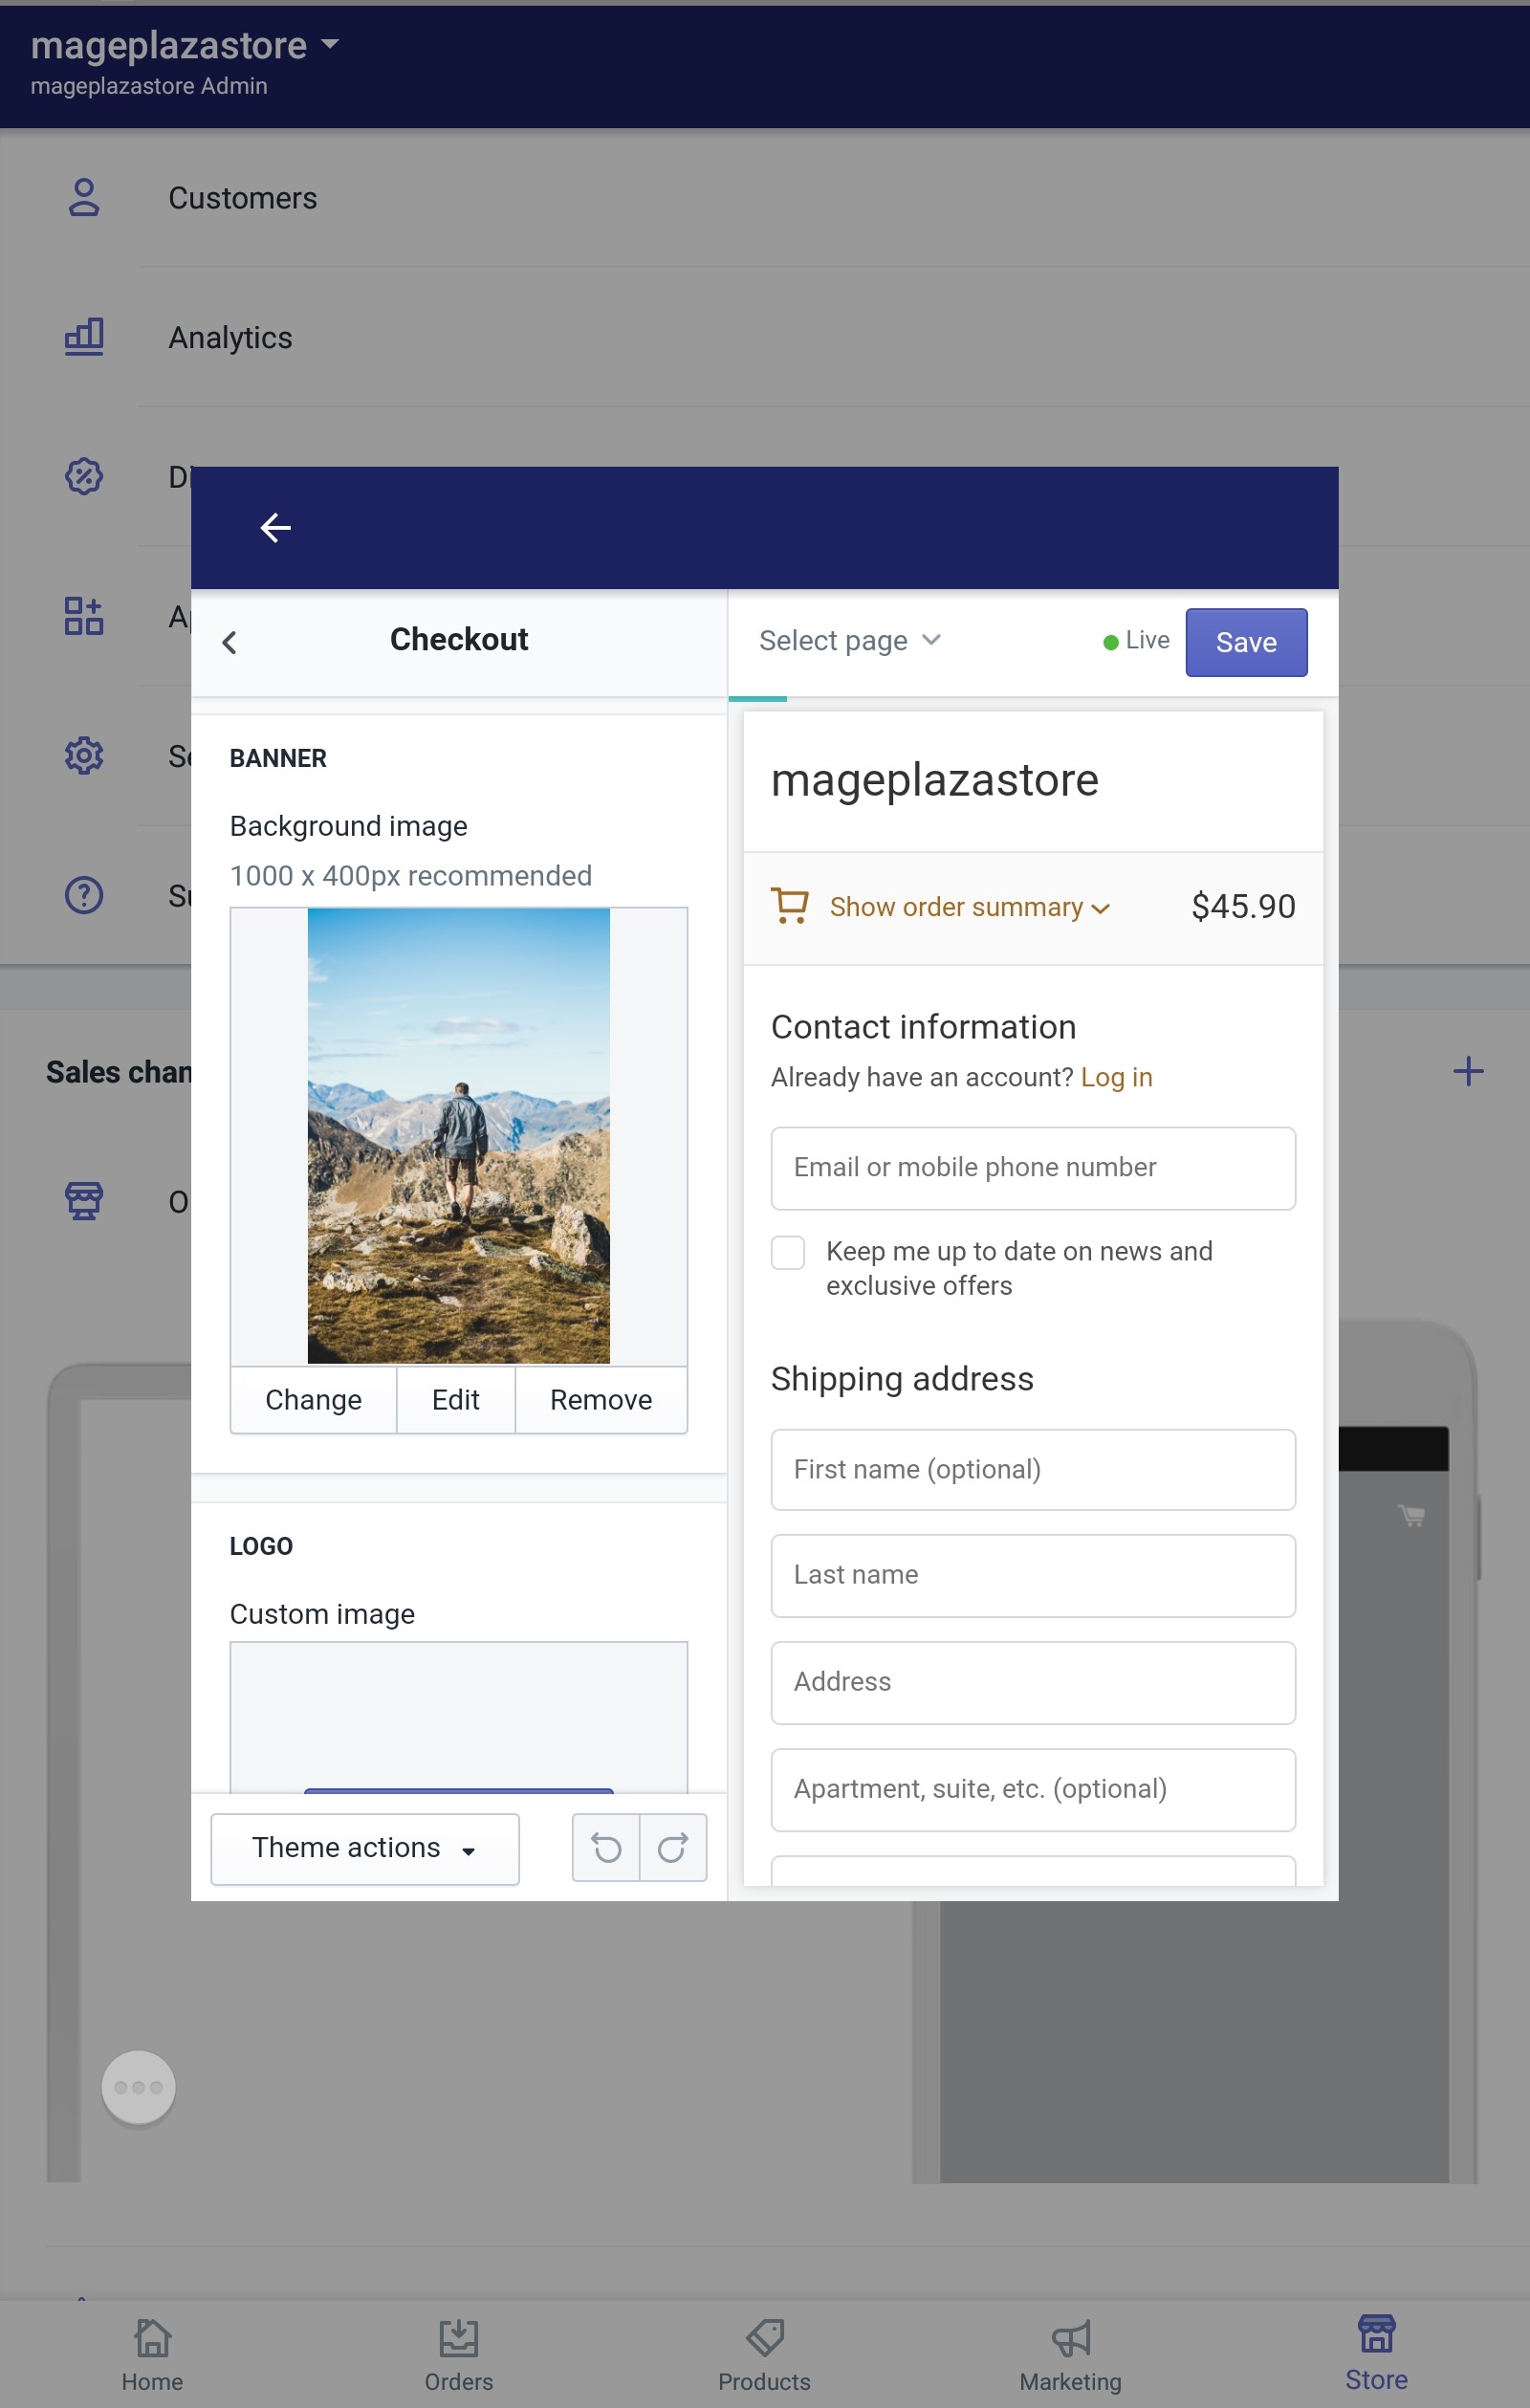
- Step 4: Change the image
Under the image that you want to make changes to, tap Change and upload another image or choose an existing one.
- Step 5: Remove the image
Beneath the image that you want to delete, there is a Remove button, tap on it to remove the unwanted image. This action will not delete the picture from Shopify library.
- Step 6: Saving
After all the steps above, click Save to keep all the changes you made.
To change or remove an image from the checkout page on Android (Click here)
- Step 1: Go to Store -> Settings
When you get access to the home page of your shop from the app, go to Store button and continue by tapping the Settings section on that page.
- Step 2: Tap Checkout
From the store settings section, you can see an option named Checkout. Click on that option to go to the next step.
- Step 3: Tap Customize checkout
Inside the page, there is a field named style. From that field, tap Customize checkout to see the theme editor.
- Step 4: Change the image
Under the image that you want to make changes to, tap Change and upload another image or choose an existing one.
- Step 5: Remove the image
Beneath the image that you want to delete, there is a Remove button, tap on it to remove the unwanted image. This action will not delete the picture from Shopify library.
- Step 6: Saving
After all the steps above, click Save to keep all the changes you made.
Conclusion
To sum up, the above is my instruction on the topic how to change or remove an image from the checkout page on Shopify. I hope you have a good time reading and applying it. To find more instructional writing like this one, check out our posts on selling online.


