Adjust Calculated Rates on Shopify: How to Do It Right
While dealing with the shipping fee, there come the troubles that sometimes, the shipping rate is too high that it cannot attract customers or it is too low to cover the packing cost. In addition to that, you may want to give your customer a discount at the checkout or mark up the shipping rate by adding a percentage or a flat fee. If the rate contains both of them, the flat fee will be added after the percentage is calculated.
Related Posts:
- Show Calculated Shipping Rates at Checkout on Shopify
- Add a USPS Flat Rate Packaging on Shopify
- Add Weight-Based Manual Rates on Shopify
- Add a Calculated Shipping Rate on Shopify
- Add Price-Based Manual Rates on Shopify
This is a writing on how to adjust calculated rates on Shopify which will help you a lot. Please read and follow my instruction carefully.
How to adjust calculated rates
Step 1: Go to Settings > Shipping
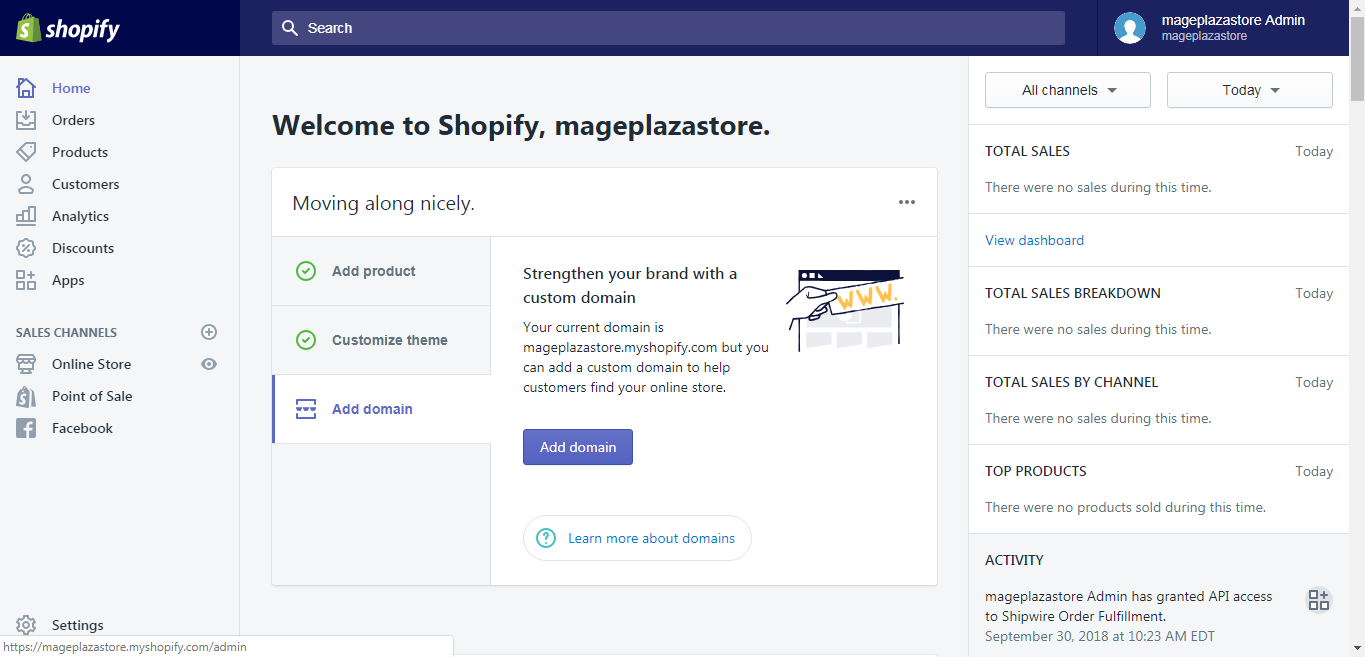
After you logged into your Shopify account, take a look at the bottom of the admin screen, you can see there is a button called Settings with the gear sign next to it. Click on Settings.
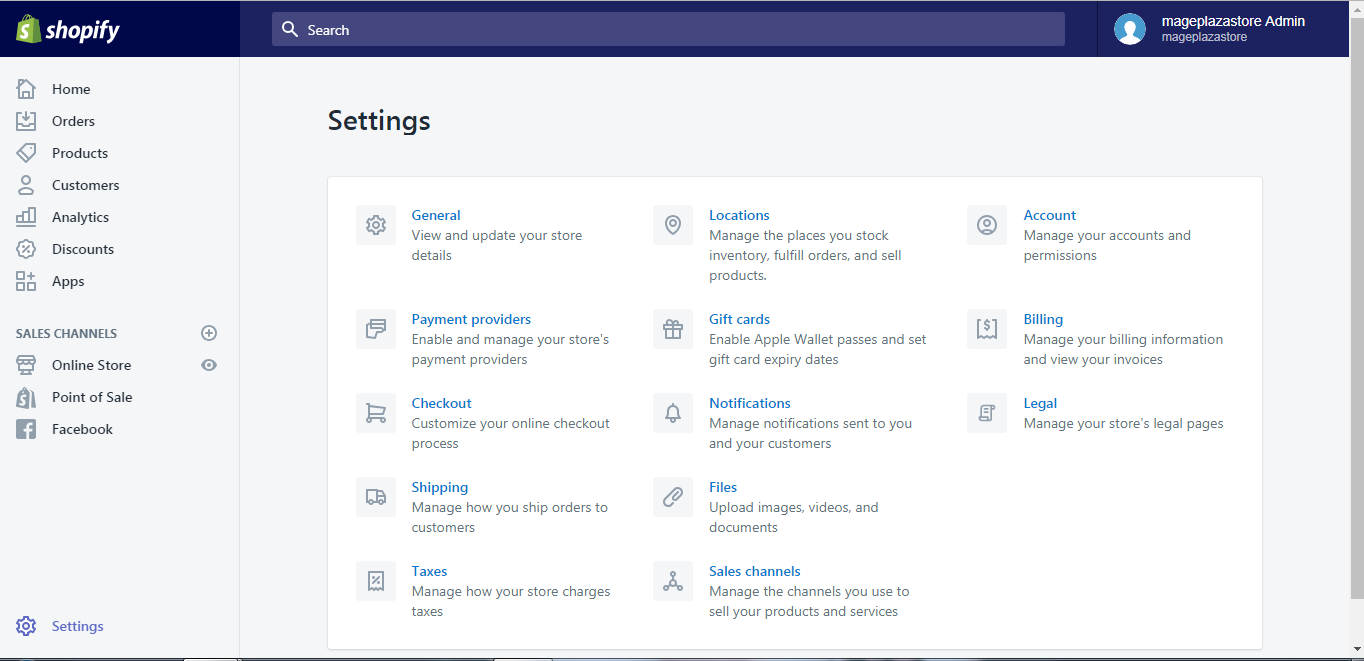
After that, you will be taken to the Settings pages. There are a lot of choices on the page, however, for our purpose, please hit Shipping.
Step 2: Choose the shipping zone
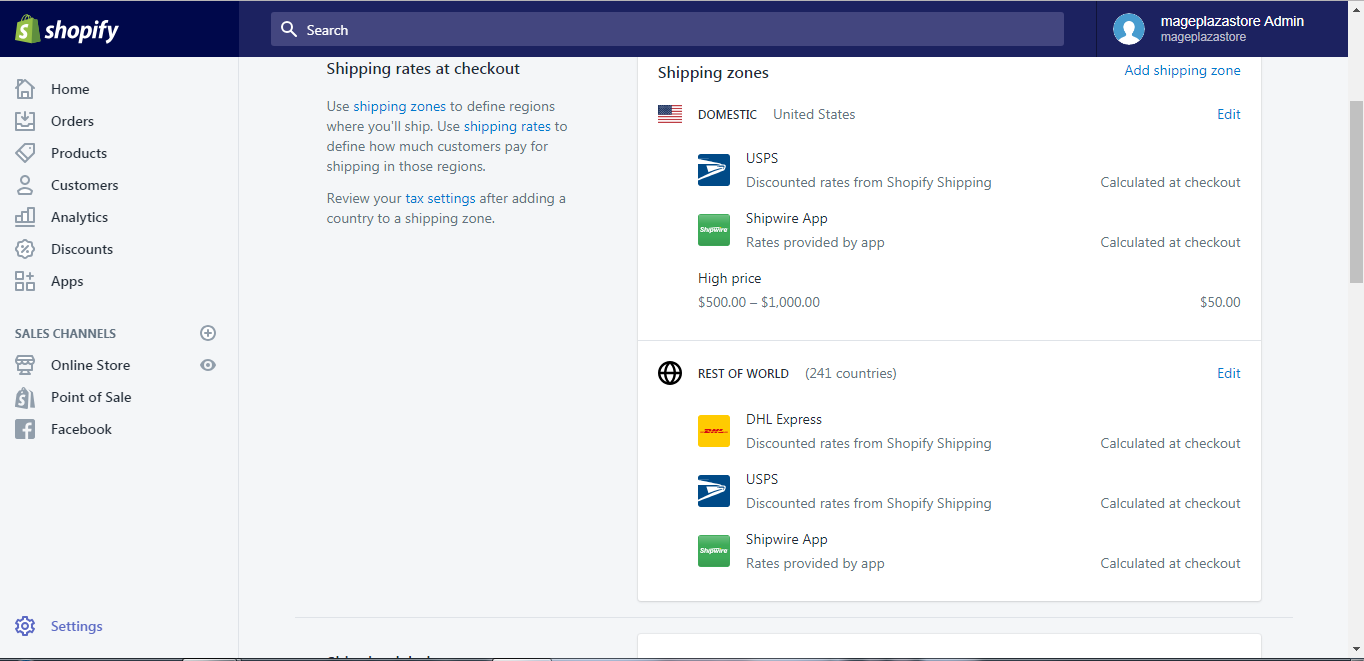
You can see the Shipping rates at checkout area, you can find the shipping zone you need to edit and choose the Edit button.
Step 3: Adjust calculated rates
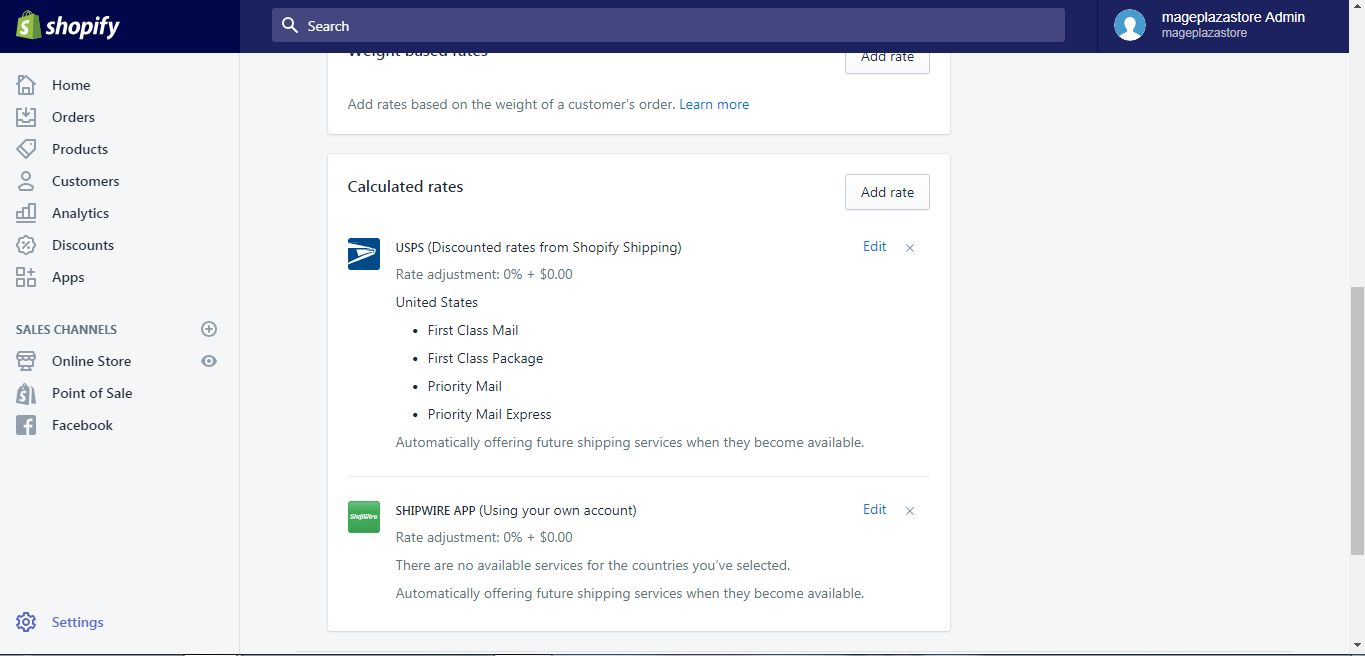
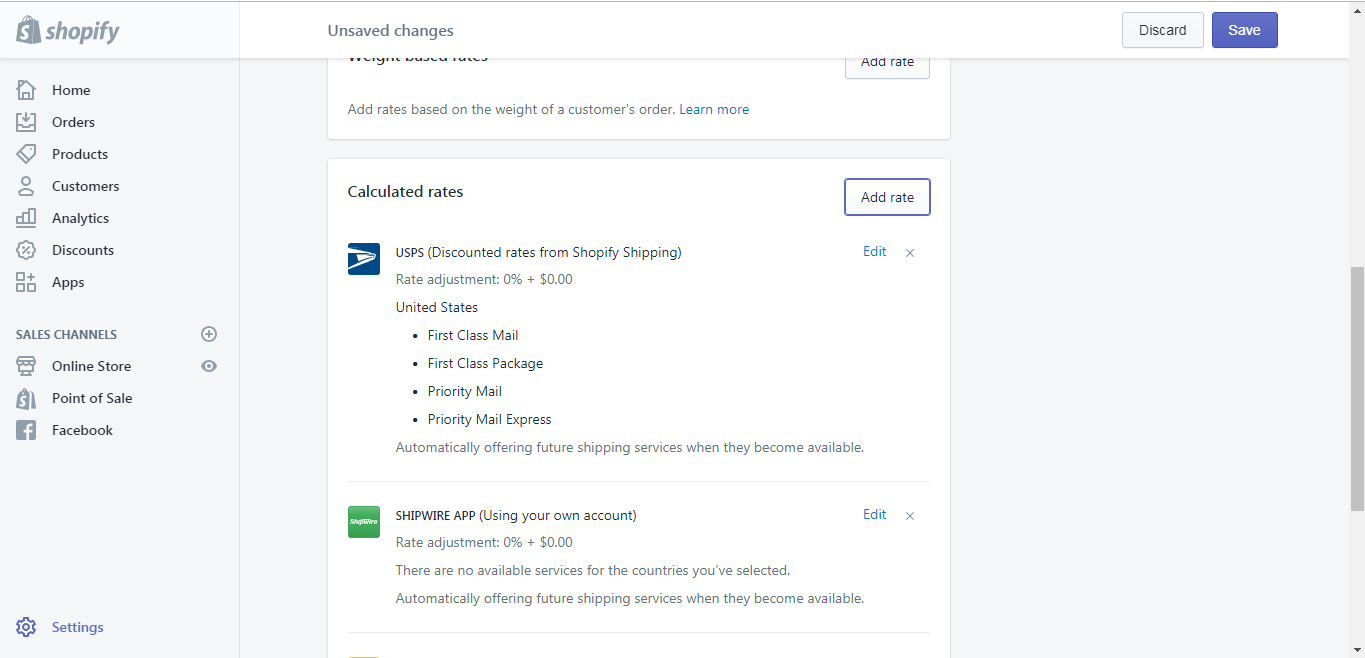
The system will take you to a new page, from this page, you need to scroll down to find a section named Calculated rates. After you find the section, click on the Edit button beside the rate you want to make changes to.
Step 4: Add a percentage or flat fee
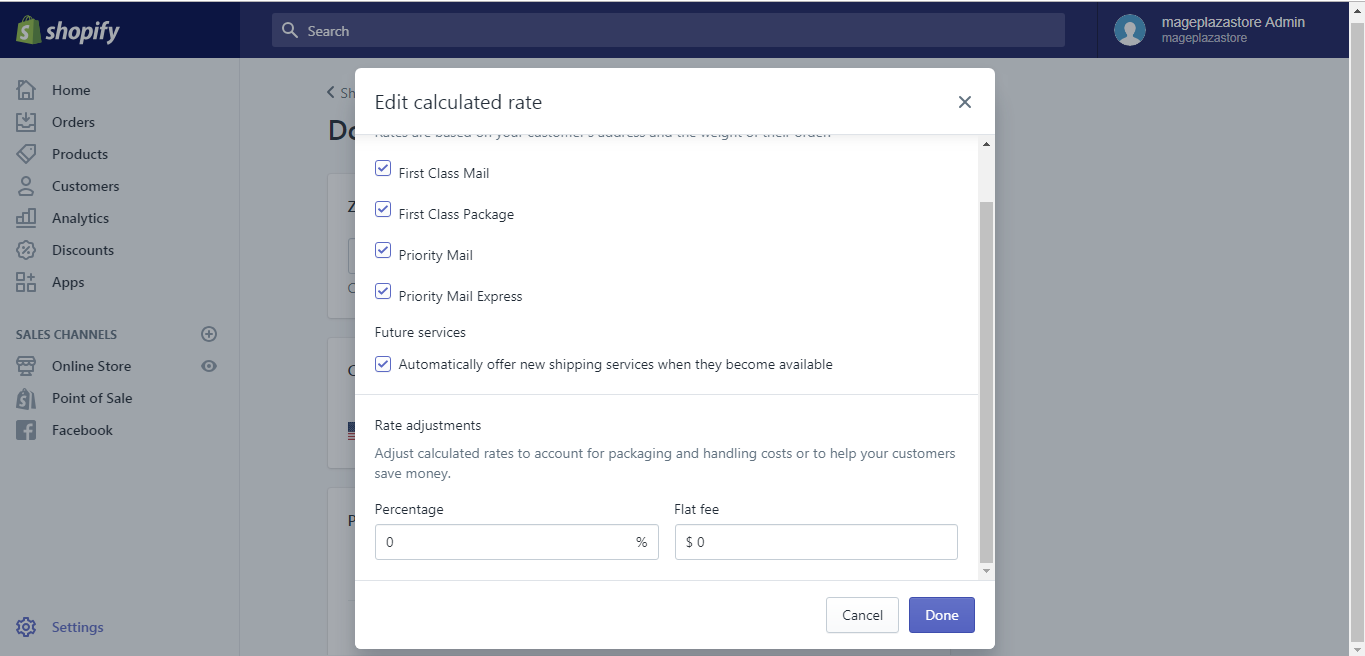
In the new dialog box, you can see the percentage and flat fee field in the rate adjustment area. Add a number you want to the field.
If you want to give your customers a discount, add a negative percentage in the Percentage field.
Step 5: Finish your adjustment
If you are satisfied will all the changes, hit the Done button.

Step 6: Saving
When you get back to the shipping zone page, remember to save all your work by clicking the Save button.
To adjust calculated rates on iPhone (Click here)
-
Step 1: Go to Store > Settings After you logged in your Shopify account in the app, notice there is a
Storebutton at the bottom of your phone screen, go toStore.
In the Store screen, there is a button called
Settings, tap on it.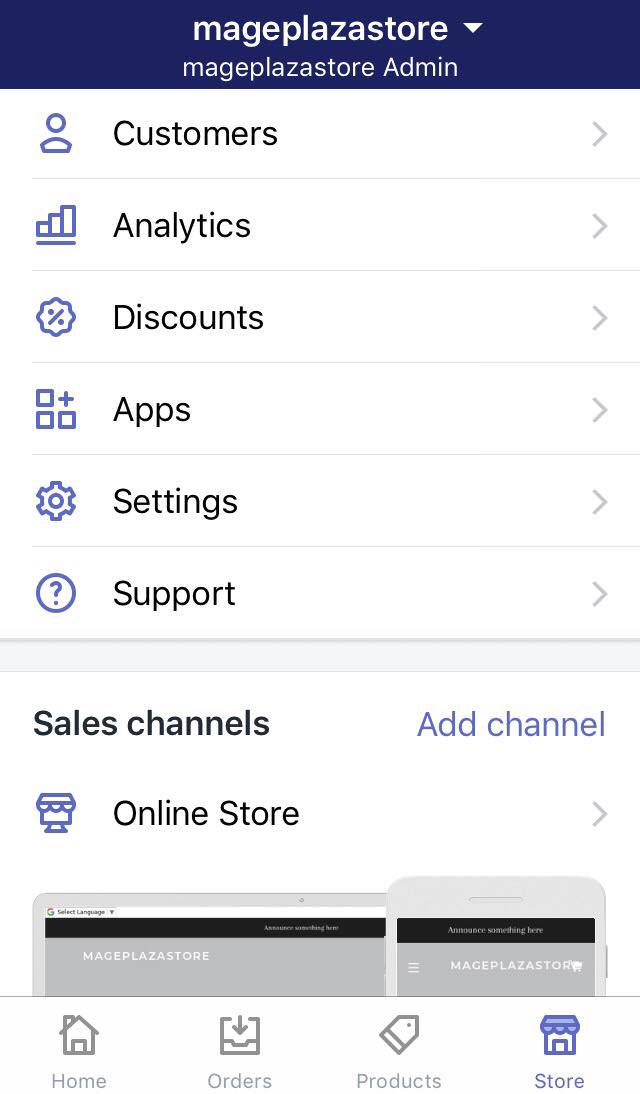
-
Step 2: Go to Shipping After the previous step, you should find and tap the
Shippingbutton in the Store setting area.
-
Step 3: Choose the shipping zone After you get to the Shipping page, you can see the
Shipping rates at checkoutarea, find the shipping zone you need to edit and hit theEditbutton.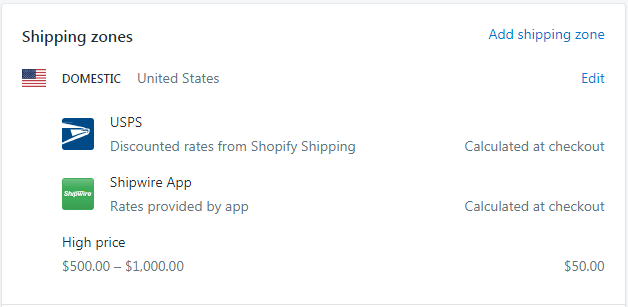
-
Step 4: Edit rate In the section called Calculated rates, tap the
Editbutton.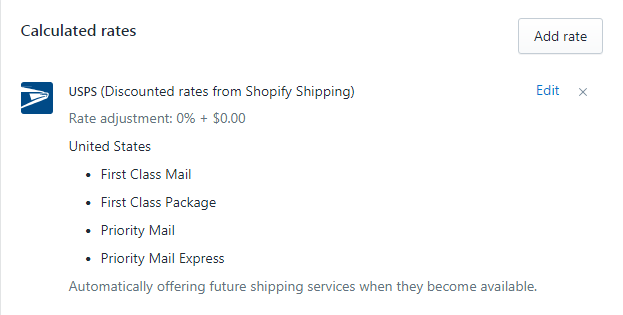
-
Step 5: Add a percentage or flat fee In the new dialog box, you can see the
percentageandflat feefield in the rate adjustment area. Add a number you want to the field. If you want to give your customers a discount, add a negative percentage in thePercentagefield.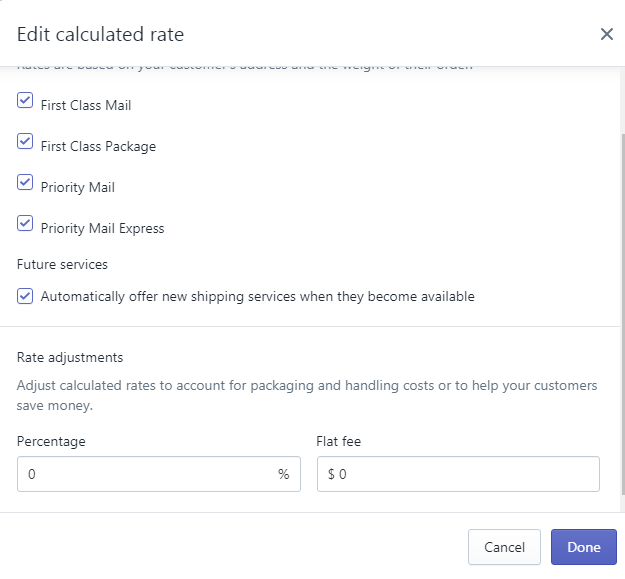
-
Step 6: Finish your adjustment If you are satisfied will all the changes, hit the
Donebutton. -
Step 7: Saving When you get back to the shipping zone page, remember to save all your work by clicking the
Savebutton.
To adjust calculated rates on Android (Click here)
-
Step 1: Go to Store > Settings After you logged in your Shopify account in the app, notice there is a
Storebutton at the bottom of your phone screen, go toStore. In the Store screen, there is a button calledSettings, tap on it. -
Step 2: Go to Shipping After the previous step, you should find and tap the
Shippingbutton in the Store setting area. -
Step 3: Choose the shipping zone After you get to the Shipping page, you can see the
Shipping rates at checkoutarea, find the shipping zone you need to edit and hit theEditbutton. -
Step 4: Edit rate In the section called Calculated rates, tap the
Editbutton. -
Step 5: Add a percentage or flat fee In the new dialog box, you can see the
percentageandflat feefield in the rate adjustment area. Add a number you want to the field. If you want to give your customers a discount, add a negative percentage in thePercentagefield. -
Step 6: Finish your adjustment If you are satisfied will all the changes, hit the
Donebutton. -
Step 7: Saving When you get back to the shipping zone page, remember to save all your work by clicking the
Savebutton.
Conclusion
Above is my writing on how to adjust calculated rates on Shopify. Please have a great time reading and applying it while running your store. To read more instruction like this one, check out our tutorials on managing domains.


