
How to Add Facebook Pixel to Shopify
By Sam Nguyen

Connecting online shopping platforms with social networks is a brilliant idea to attract more customers and expand your market. And adding Facebook Pixel to Shopify helps you a lot, especially in tracking visitors’ flow.
However, not all shop owners know about the Facebook Pixel, why we should add it and steps to install. In fact, it is easy to integrate Facebook pixel with Shopify, which does not require coding skills.
If you still wonder about the function and benefits of adding the Facebook pixel to Shopify, this article that I share with your guys will help you understand these things.
The post will cover three parts, including the definition of Facebook Pixel, steps to add Facebook pixel, and tips to maximize your Shopify Facebook pixel conversion.
What is Facebook Pixel?
This opening part will give you a brief knowledge about Facebook Pixel. You are introduced to Facebook Pixel and reasons to add it to your Shopify.
Facebook Pixel Definition
Understandingly, Facebook Pixel is a piece of code put on your website. When Facebook Pixel integrates with your Shopify, it will track visitors’ flow and their actions on your website. Facebook Pixel has two parts: the base pixel and standard event codes.
The former is the basic piece of code that is put in every header of the page of your website to help you track the number of visitors. The later are additional pieces of Pixel code added to specific pages of your website. There are a lot of standard event codes but, for online retailers like you, you should pay your attention to view content, add to cart, initiate checkout and make the purchase.
What’s the use? Why you should integrate Facebook pixel with Shopify?
Integrating Facebook Pixel with Shopify offers you three main advantages.
First of all, the Pixel allows you to create custom audiences from your Shopify data. What is custom audiences? Custom audiences are audiences that consist of current buyers or people who have shown an interest in your brand and product. You can create your custom audiences by sorting the number of days, a specific webpage in the last X number of days, who added an item in the last X number of days, and that makes a purchase in the last X days. Besides targeting custom audiences, you can also exclude them from your campaign.
Second, you can create lookalike audiences from your Shopify data. In other words, lookalike audiences will increase the number of visits on your online shop. If standard event codes are installed, you can be even more specific. This benefit may boost the profit because of the high potential of buying from these customers.
Third, the combination of Facebook Pixel and Shopify helps to optimize your ads for conversions. Facebook will show your ads to target customers who are likely to take actions and you can easily track your visitor’s flow.
Learn more:
- How to Make Facebook Ads for Shopify
- How to Connect Google Analytics to Shopify?
- Best Shopify Facebook Marketing Apps
Where to add Facebook pixel in Shopify?
When you log in to your Facebook Ad Manager, you will see your Facebook pixel ID. Then you copy this pixel ID and paste into your Shopify admin. In case you do not have this number, you may need to create a new one. “Create a Facebook pixel” is shown on the Facebook Ad Manager, you click that button and follow the guide then you will create a new Facebook pixel.
After that, you log in to your Shopify admin, navigate to Sales Channel > Preferences, you scroll down and see Facebook Pixel section. You paste your Facebook Pixel number there.
Finally, you confirmed: your Facebook Pixel is working well. You check by clicking through anywhere on your Facebook page to your Shopify store.
How to add Facebook Pixel to Shopify
This section will present 4 stages in adding Facebook Pixel to your Shopify store.
1. Before you begin
You need to do two small steps: create a Facebook account and remove the Facebook pixel code.
Create a Facebook Ads account
Obviously, before you add the Facebook Pixel, you need to have Facebook ads account and install the pixel on Facebook. To create an account, you go to Facebook.
Remove Facebook pixel code from your online store
In case you have already had a Facebook Pixel with your online store and you want to create a new pixel, you might need to delete Facebook pixel code from your online store first.
Your Facebook Pixel file ends with theme.liquid file, then you need to remove this file before adding a new one. Here is how you are going to remove it on desktop, you can do similarly with your iPhone or Android devices.
- Step 1: You go to Shopify admin, click
Online store > Themes
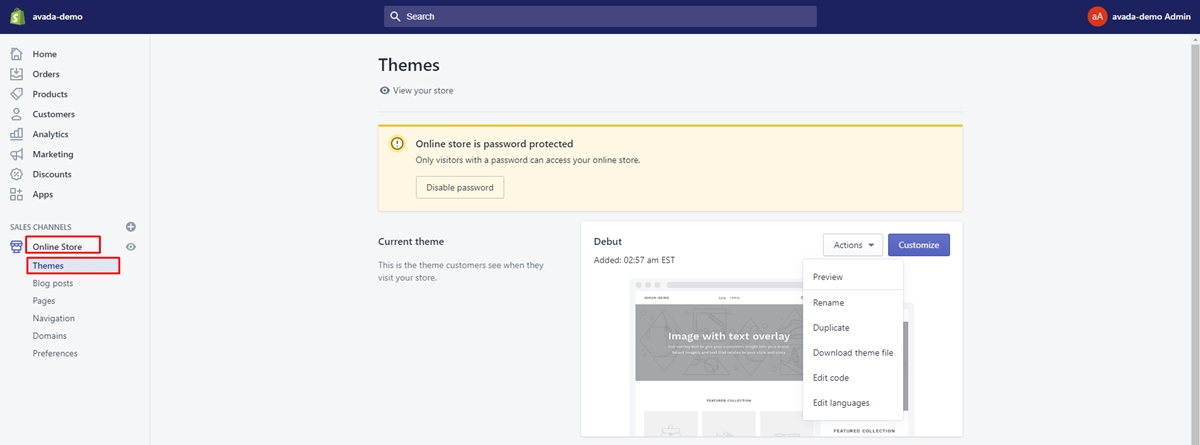
- Step 2: Tab
Actionsand selectEdit codein Current theme
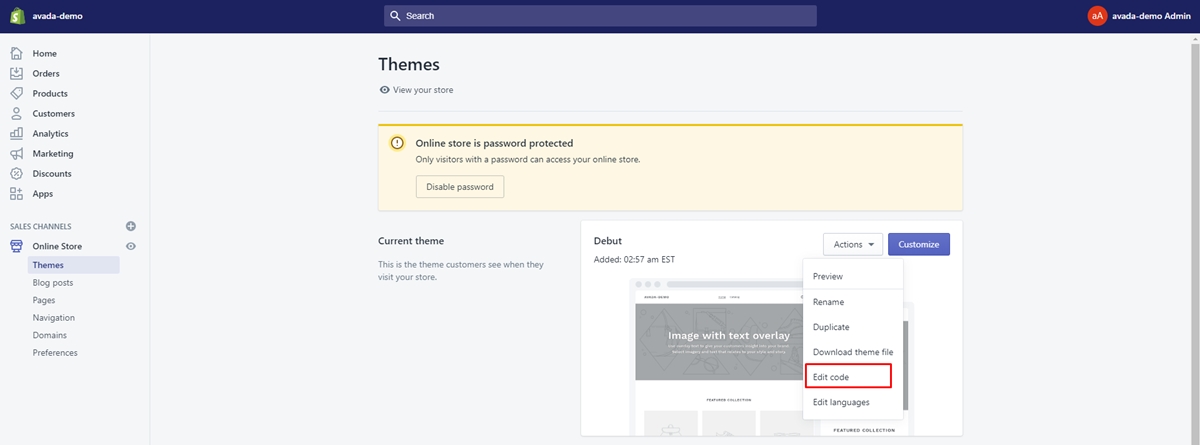
- Step 3: Click
theme.liquidfile to open the code editor
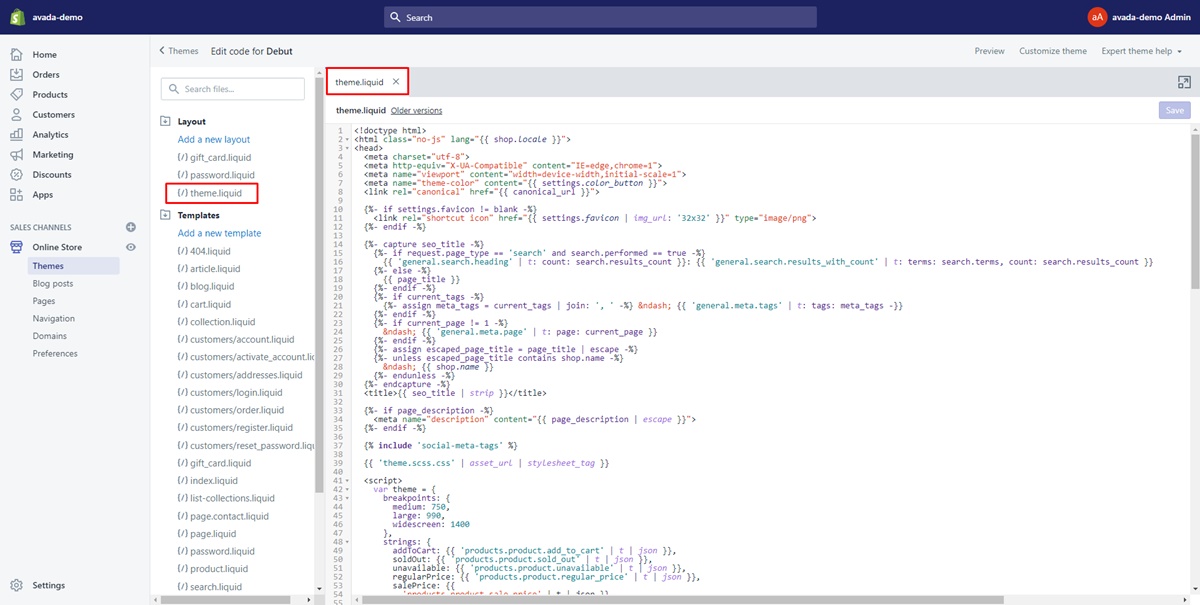
-
Step 4: Delete the Facebook Pixel code, you can find it between
<head>and</head>tags -
Step 5: Save
2. Create a Facebook pixel
It is easy to create a Facebook pixel.
-
Step 1: First, you go to
Pixelstab in Event Manager. -
Step 2: Then you click
Create a Pixel
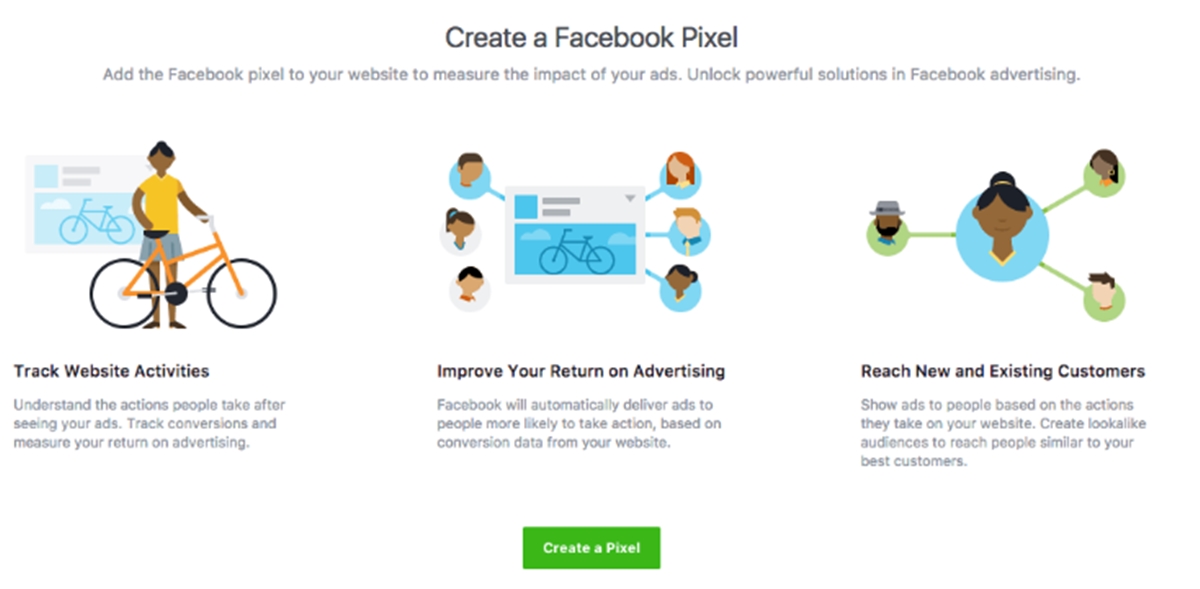
- Step 3: Finally, click
Createin the box to finish creating your pixel.
3. Add a Facebook pixel ID to your online store preferences
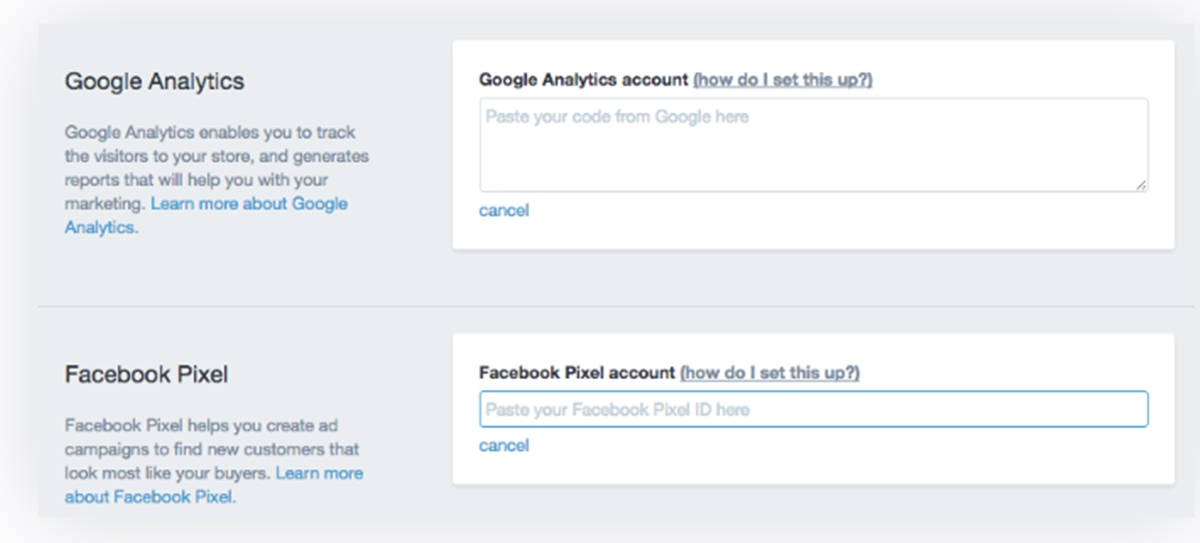
You are able to add a Facebook pixel ID to your online shop in Shopify to integrate Facebook Pixel with your Shopify store. You do not need to edit your online store code. Instead, you insert the Facebook Pixel ID in your online store preferences. Here are steps to add a Facebook Pixel ID to your online store preferences: Visit Online Store > Preferences.
In the Facebook ID section, add your Facebook Pixel. If it is your first time adding a pixel, then you need to enter the Facebook Pixel ID. If you change to a new Facebook Pixel from an existing one, click Change before entering the new Facebook Pixel ID.
4. Facebook pixel standards events
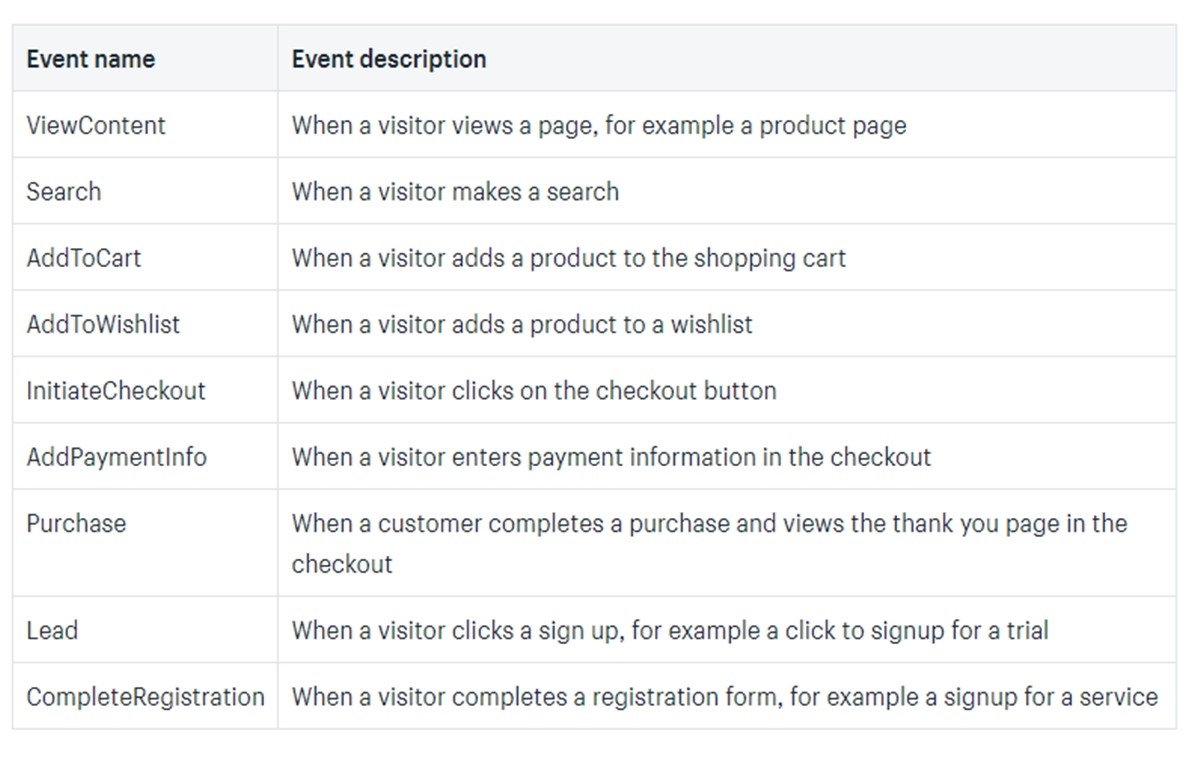
After a Facebook pixel is added in Shopify, the pixel tracks certain events on your online store. From the event data, you can learn from how customers interact with your store. Based on the data and analysis, managers are easy to create campaigns and track conversion at the Facebook Help Center.
So, how to maximize your Facebook Pixel conversion? Let’s go to the next part.
Tips to maximize your Facebook Pixel conversion on Shopify
I will share with you four best tips to maximize your Shopify Facebook Pixel conversion.
Tip 1: Ensure you have sufficient events on your pixel
This tip is important because if there are too few pixel events on your website, you don’t have enough data to overview your campaign and visitor’s flow.
For instance, ten people visit your website and five of them make a purchase, then you said the conversion rate is 50%. This is not statistically significant. So how many pixel events should you have to track the conversion rate? According to Facebook, 500-pixel events is the minimum number that helps you optimize the conversion.
Tip 2: Play around with custom audiences and lookalike audiences
If you do not have the Shopify Facebook Pixel, you need to upload a list of email addresses, phone numbers or Facebook user ID, which will waste your time and your resources because you have to build a large base of newsletter subscribers. However, when your Pixel is installed, creating a list of custom audiences is effortless. You navigate to Audiences, then click Create Audience > Custom Audience > Web traffic.
To get the best result, it is better to use Dynamic Product Ads. Besides, lookalike audiences are a great way of tackling the conversion versus exposure dilemma. Lookalike audiences include people who are extremely similar, regarding their demographics, likes or dislikes, and browsing/shopping patterns to custom audiences.
Tip 3: Use your Facebook Pixel to run dynamic products ads
Dynamic product ads let you retarget the customers who were previously browsing (or already adding your products to their cart) on your website and get them to complete your purchase. With Dynamic Product Ads, you are able to put the same item to the screen so that customers may be curious about other products to shopping more. It is proved that 50 to 60% of customers are more likely to convert when they look at a retargeting ad.
Tip 4: Set up custom conversions
Setting up custom conversion is easy. You navigate to Pixels tool again and click Customer Conversions. After that you set your base rule as URL contains, then decide on your trigger rule.
Final words and Summary
The article helps you understand Facebook Pixel and the benefits of the integration between Facebook Pixel and Shopify.
For beginners, all you need to do is to install your Facebook Pixel. After that, you decide the budget for your Facebook ads. When your site attracts more than 500 events per week, it’s time to optimize your ads, targeting and getting more creative campaigns.
All in all, I do hope that you will get some interesting pieces of information from this article and you - shop owners, marketers - will successfully increase the conversion rate and generate much profits.


