
How to setup/configure Product Options for BigCommerce?

Do you wish to give product variations in terms of scale, color, or material? Do you have customizations such as engraving or specific delivery date? You will be able to add variations to your products using Bigcommerce product options. This article will guide teach you how to create product options, such as size and color and how to create option sets and apply them to products.
How does the Product Option function?
A product option allows a product to have various variations, like size and color, or even custom inputs like checkboxes and text fields. Each product can have multiple values, such as small, medium, and large sizes. Shoppers can create values for some options, such as entering text or uploading files. A variant is a specific combination of these options, like a small, blue shirt.
You may add a necessary option to items that need it (like the size for clothing). That means the shopper must first pick a value (such as small) before adding the item to their cart. Non-required options can also be developed. That is, the shopper has the option to select/enter a value but is not required to do so. This is useful for add-ons or customizations such as engraving.
SKUs, or stock-keeping units, help manage inventory by assigning unique codes to products and their variants. And rules allow you to adjust product details like price, weight, or image based on the shopper's selection of options or SKUs. This system enables personalized and accurate product presentations and pricing.
BigCommerce option sets: Required vs. Optional
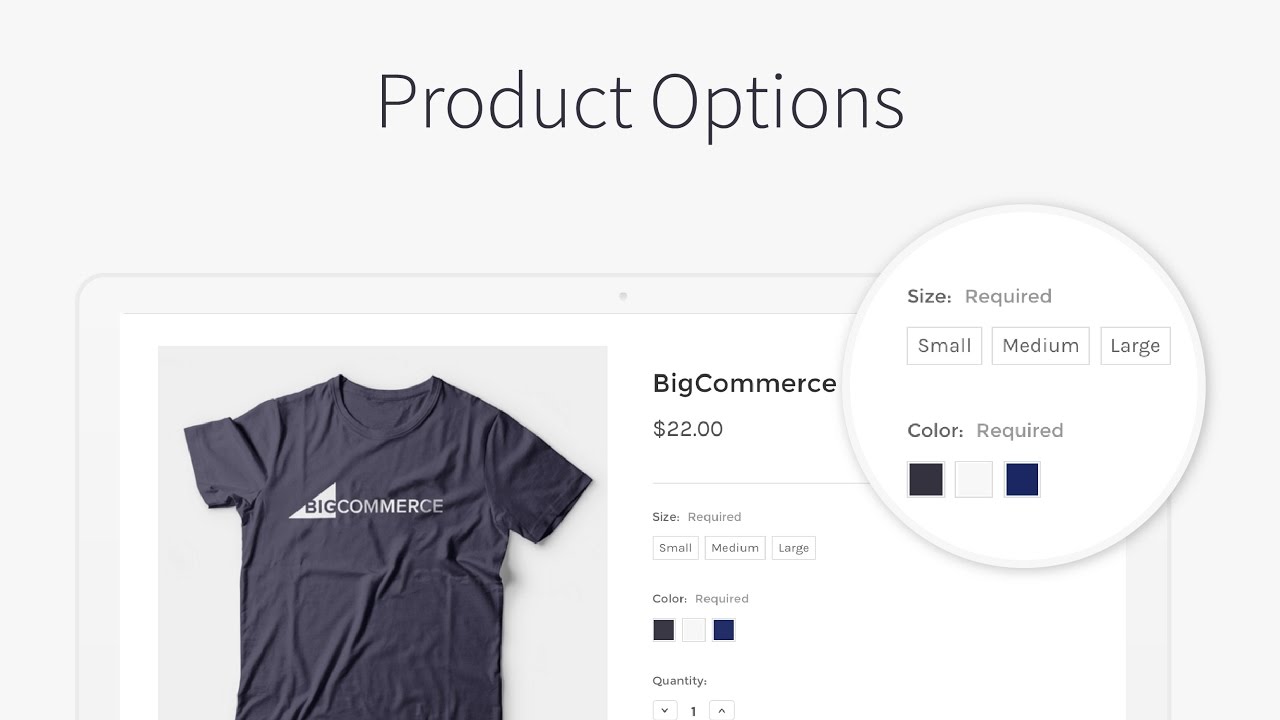
In BigCommerce, you can apply variants to your products, which might include choices like size or color that customers can select. While the terms "necessary" and "optional" are sometimes used flexibly, BigCommerce distinguishes between two types of options: required and optional.
- Required options, such as size, are essential attributes that set a product's specifications. For instance, a T-shirt available in small size is specifically for smaller body frames. The sizes must be assigned to each product, and the selection choice must be required for each of these products.
- Optional options are for features that don't change the product's unique identity in inventory. These are typically for customizations, like adding personalized text or choosing a design for a T-shirt. For example, a customer might select a medium-sized, blue T-shirt (both required options) and then decide if they want it plain, with text, with a graphic, or with both text and graphics (an optional choice).
Differences between v2 and v3 Product Options
If you’re already well acquainted with the v2 Adding Products, you’ll find that the product options are somewhat different in v3. We provide a table containing all the differences between the two available versions.
| v2 Product Option | v3 Product Option |
| “ariant” options and “modifier” options show no differences | There are two types of product options: Variations and Customizations |
| Variant data such as price and weight are calculated using the base product’s data | The variant data is explicit as well as you can use modifier options to obtain computed values |
| Price and weight adjustment rules apply to any option form | Rules can only be extended to modifier options because variant data is explicit |
| Product options must be added to an option set, which must then be applied to a product | Option sets are not used since product options are created directly within the product |
| A custom formula can be used to produce SKUs automatically | Generated SKUs can be edited, but not in the format in which they are initially generated. |
Setup / configure v2 Product options
Step 1: Create options
- Go to “Products” section, click then “Product Options” and choose “Add Create an Option.

These 5 steps are to help you add a product option and option set to your product:
- Go to “Products” section, click “Product Options” and choose “Add Shared Option”.”

- Type information you want to create.

- After finishing information, click “Save” or “Save and add other.”

Step 2: Set the Option sets

An option set is used to associate an item with an option (or collection of options). For instance, if your product is a T-shirt, you can have an option set called T-Shirts that includes Size and Color options. Before an option can be added to a product, it must first be allocated to an option collection, since options are not applied “directly” to products.
Sets may be customized for a single product or shared through several products, eliminating the need to build new sets for similar products. Option sets can also be correlated with rules (such as adjusting the price depending on the selected options). In comparison to product-level rules, option set-level rules are reusable, since a single set may be assigned to several products.
Creating/Editing an Option set
- To create a new option set or edit an existing one, move to “Products” > “Product Options” and choose the “Option Sets” tab. You click an existing option set’s name to edit or choose the “Action” menu for editing the option set, copying it, or editing its rules.

- To create a new option set, choose “Create an Option Set.”

- The option set Name is not visible on the storefront but is used to identify the product or company in the control panel, so give it a name that is descriptive of the product or brand. Press “Add” next to the options you want to use in your product in the Available Options list. When you pick them, they will appear to the right, under Options In This Set. To delete an option from the list, click the minus (-) button.

To delete a specific value (such as Extra Small from a Size option) or to modify the necessary status of a particular option, click “Edit” next to the option under Options In This Set.
- Uncheck the boxes for any values that you do not wish to include.
- When an option is marked as Required, an asterisk appears next to its name.

Apply an Option set to a Single item
To assign an option set to an item, navigate to “Options & SKUs” tab to apply a set. This will activate the left-side SKUs and Rules tabs. To remove an option set, click on None.

Apply an Option set to Multiple items

The Multi-Channel Product List does not accept applying an option set in bulk (enabled when you connect eBay or Amazon channels). However, you can still apply option sets in bulk through import.
You may also add a choice set to several items at the same time.
- Go to Products, select “View” and check the box to the left of each product to which the choice set should be applied. Filter the product list using the search bar.
- Select “Apply Option Set” from the Choose an Action dropdown at the top of the list and click on “Confirm.”
- Pick the option set you want to add to the verified items from the popup that appears.
Step 3: Create SKUs
Important note: Variants
A product’s potential combinations are known as variants or variations.
Additionally, you might also market two sizes (S and L) and two distinct colors (blue and red) in order to capitalize on this market opportunity. As there are two different sizes and four colors in this product, this product has four versions.
SKUs are commonly used to identify variations for inventory monitoring purposes. For example, a small, red shirt, might be something like SHIRT-SM-RD in the SKU.
The word variants and SKU can be used to describe more than just choices like color or height, in fact, SKU can be generated for the following options:
- Color
- Size
- Swatch
- Multiple choice
- Product pick list
- Checkbox
SKUs can be manually entered or generated automatically using the Auto-SKU Generator. To create a SKU, edit a product, click on the Options & SKUs tab at the top, then choose SKUs, and select Create an SKU.

Fill out the following SKU data in the popup that appears:
- SKU (required): product code for the variant/variances.
- UPC/EAN: UPC or EAN of variants.
- Cost: variant cost, mainly used for accounting purposes.
- Price: In terms of wanting this SKU to have a different price from the base product.It will become the new base price prior to the application of any price adjustment guidelines or discounts.
- Options for this SKU (required): Choose the values that should be assigned to this SKU. These are filled in using the related options.
- Image
- Weight: Use if you want this SKU to be heavier than your base product. It will be used as the starting point for any rule changes. If enabled/offered, this is used in real-time shipping quote calculations.
- Width, Height & Depth: SKU physical dimensions; used in real-time delivery quote measurements if enabled/offered. These fields can also be modified in bulk.
- BPN: Bin Picking Number; used to organize warehouses/logistics
- MPN: Manufacturer Part Number
- Enabled: Check to see if your customers can buy this SKU. If this option is unchecked, you can enter a custom Purchasing Disabled Message.
You can also use the following ShipperHQ-specific fields if you have ShipperHQ enabled.
- Shipping Groups: Various shipping choices are available depending on the product purchased.
- Dimensional Rules: Typically used for goods that are packaged differently or separately from the rest of the products.
- Origin Locations: assign an origin location if you ship from several locations.
Step 4: Create rules

You can create specific rules for adjusting the price, modifying the weight, making it unavailable for purchase, showing other images, and stop the processing rules. Rules may be added to individual products or multiple products at the same time by assigning a bulk option set.
Rules can only be generated for the certain following options:
- Color
- Size
- Multiple choice
- Swatch
- Checkbox
- Product lists
On the other hand, other types of options, such as text fields or date fields, cannot have rules applied to them.
While creating a rule, you may wish to limit its application to a single item; you would make a product-specific rule in this case. If you choose to extend the rule to different, related products simultaneously, you can produce an option set-based rule that applies to all products that use the same option set. Additionally, rules can be imported via a CSV file.
To create a rule, edit a product and press the “Options & SKUs” tab at the top. To create a rule, click “Create a Rule”. Choose the option/combination of options to apply the rule to for When These Are Selected.

- To pick them, select the plus (+) next to the option’s name and make your selection.
- Put a checkmark next to or adjustment you want to make when the customer chooses one of the options or combinations above.
- You may need to include additional information for some kinds of rules
Kinds of rules
1. Change the Price: his rule allows you to adjust the price. You can increase or decrease a specified amount (in your currency) or percentage. Additionally, you should select a fixed price. Zero cannot be a fixed price.
2. Change the Weight: his rule allows you to adjust the weight. You may increase or decrease the weight (based on your Physical Dimension Settings your Store Settings). Additionally, you should specify a fixed weight. A constant weight cannot be zero.
3. Make it unavailable for purchase: This rule may be used to hide or make unavailable a specific choice or combination of options. You have two alternatives:
- Hide the choice: Use to hide a specific value or set of values from the client. For instance, if you sell a shirt in a variety of colors and sizes but do not want customers to see the red shirt, you may choose to conceal it.
- Show Unavailable message: Used to display an ‘unavailable’ message when the customer selects a particular choice or combination of options.
4. Display a different image: his rule modifies the primary product image. To be picked, the picture must be saved to your screen. This feature is not compatible with the Image Manager. Choose “Browse” to browse for a new picture on your screen.
5. Stop processing rules: This rule ensures that if a rule is activated, no subsequent rules are triggered. For instance, you can use this if you have a rule that increases price by $50 and another that increases price by $5 for something else, but you don’t want to add the $5 if the customer has already chosen the $50 option.

Step 5: Set the Color

The color display type is used to convey information about the color of a product or one of its traits. It is also used to describe items that come in a variety of colors, such as clothes.
- To add a new color, select any plus (+) button.
- To remove a color, choose the minus (-) button next to it.
The Color section includes:
- Option Name: Give your choice a name. This is for comparison purposes only and is not displayed on the storefront.
- Colors: The color or pattern’s name. This is visible only when the customer’s pointer is hovered over the swatch.
- Hex code: If you have a hexadecimal code (a six-digit color code) for a specific color that you want to use in your swatch, enter it here. The swatch color will be automatically filled in.
- Swatch of paint: Click to open the color picker, then choose a color for your swatch.
Step 6: Set the Size

You use the size information display type to show what size products are available. It is often used to refer to items that come in various sizes, such as clothes, shoes, or food. If you’d rather have your sizes displayed in a drop-down menu or radio buttons, consider a multiple choice option.
- Toadd a new size, click on any plus (+) button.
- To delete a size, select its minus (-) button.
The Size section includes:
- Option Name: Specify the option’s name (internal only, for keeping track of options)
- Values: Each line should include one of the sizes you wish to sell.
- Make Default (optional): This feature allows you to choose a default size. If desired, the customer will choose a different size.
Step 7: Enable Multiple choice

Customers may choose a specific value from a list, such as a color from a range of colors or a material from a range of materials, using the multiple choice display type. This choice is typically used to assist shoppers in selecting a specific variant of a commodity.
For instance, a multiple-choice display form could be used to give salsa with various extents of spiciness or a lunchbox with various characters. You can also mix several choices, such as a candy bar that comes in a variety of sizes and flavors.
The Multiple choice section includes:
- Option Name: This field is for reference purposes only and is not shown on the storefront.
- Display Name: The label that appears on the storefront when an option is selected.
- Type of display: Multiple selection
- Display Style: Select among radio buttons, a drop-down list, or rectangles.
Step 8: Enable the Checkbox

A checkbox display form lets the consumer validate a single statement or add-on..
This option type can be used with option rule logic to perform certain changes, such as changing the image, price, or weight. For instance, if you want the customer to add insurance for $5, you’d create a rule that automatically adds $5 when the Yes checkbox is checked.
The Checkbox section includes:
- Option Name: This field is for reference purposes only and is not displayed on the storefront.
- Display Name: The label shown to the left of the checkbox on the storefront. For instance, would you like a complimentary keychain?
- Default Checkbox Status (Checked/Not Checked): Is the choice checked automatically (Checked), or must the customer manually pick it (Not Checked)?
- Field value: Is shown to the right of the checkbox. For instance, Yes, kindly include a complimentary keychain with my order.
9. Step 9: Set the Swatch

The swatch display form is used to demonstrate a product’s color or texture or one of its attributes.For instance, you might use swatches to allow customers to choose from a variety of fabric patterns.
The Swatch section includes:
- Swatch name: The color or pattern name. This is only visible when the customer’s pointer hovers over the swatch.
- Swatch type: Choose whether the swatch will contain one, two, or three colors, or be a pattern (i.e. an uploaded image)
- Hex code: If you have a hexadecimal code (a six-digit color code) for a specific color that you want to use in your swatch, enter it here. The swatch color will be automatically filled in.
- Color swatch: Select to display a color picker, then choose the color for your swatch
- Upload image: If you’re using a texture or pattern, you can upload an image of it. It will be resized automatically to match your style.
Step 10: Set the Text/number field

Your customer can insert email, messages, or numbers in the text field options to connect with the product they’re ordering. They’re an excellent way to allow shoppers to customize items and can also be used to give you unique details or requests..
When creating a text field option, you can specify the maximum number of characters, lines, and the type of data that your customer can enter (alphanumeric or numeric only)..
Step 11: Set the Date field

The date field display form enables the customer to pick a date from drop-down menus for the month, day, and year. For instance, you might add a date field to allow recipients to specify a delivery date for a surprise gift or a concert date when purchasing concert tickets.
The Date fields section includes:
- Default Value (optional): If you select a date range, it will be automatically applied until the customer changes it.
- Limit Date Range: You can limit the earliest date available, the latest date available, or both (date range) if it is checked.
Step 12: Use the File upload field

The File Upload Field enables your customer to attach a file from their computer to the product details. For instance, you might use a file upload field to collect your customers’ logos for printing on your product.
The File upload field section includes:
- File Types: Specify whether you want customers to be able to upload files of either kind or only the following: images and photos, documents and text files, and other (specify the extensions you accept, separated by a comma (pdf, mp3, zip)).
- Maximum File Size (in KB): Insert the maximum file size that your customers are permitted to upload, or enter 0 to remove the restriction. The server will continue to restrict the file size to approximately 500,000 KB (500 MB).
Step 13: Select the Product Pick list

Customers can select and/can edit additional products when displaying another item on the product selection list. The product pick list choice has two primary uses: upselling related products and offering alternatives when bundling products.
Upselling Related Products
Brand selection lists may increase sales of similar or complementary goods. For instance, if one of your items is a book, you can use a product pick list to provide additional titles by the same author. You might even combine it with a price change rule or SKU product data to create a deal along the lines of “Add another John Smith book and save 30%!”
Bundling Products
Additionally, you can use product select lists if you’re selling a “bundle” of individually purchasable items. For instance, if you’re selling a gift basket that includes a bottle of wine, a cheese, and crackers, you might use product pick list options to allow your customer to choose which wine, cheese, and crackers to include.
Setup / configure v3 Product options
Step 1: Create Variations
- Click “+ Add Variant Option” when creating or editing a product, or click “Configure Options” to edit an existing Variant Option.

- Assign a name to your choice, specify its display type, and specify the values that should be available.
- To add additional values, click “+ Add Another Value.”
- To delete an existing attribute, click the remove button (-) next to it. When a shopper enters the product detail page, the default value will be pre-selected.
- To rearrange the order of options and values on the storefront, click and drag the handle ⋮⋮ to the left of them.
- Once done, click Save Variants.

SKU
Stock keeping units, or SKUs, are alphanumeric codes used to differentiate variants and register inventory. When you add a new variant option, SKUs for all new possible variants are automatically generated. You can edit the automatically created SKUs to add custom identifiers.

Variant image
If you want to use a different image for a variant, click the camera icon underneath the Image column.
- By default, variants will use the primary image for the product.
- A variant can only have one image assigned to it.

Step 2: Use Shared variant options
Suppose you have multiple products that share the same variant options and values. In that case, you can save time by configuring the option once and reusing it through multiple products using shared variant options.
- On the product level, shared variant choices cannot be modified or personalized.
- Editing a shared variant option updates all applicable products; variants with specific SKUs are automatically regenerated.
- If they are currently associated with a commodity, shared version choices cannot be removed.
Steps to set up a Shared variant option

- To set up a new shared variant option, go to “Products,” then “Product Options” and click on “Create Shared Variant Option.”
- To edit an existing one, click on the menu button (⋯) beside it and choose “Edit.”
- Display label: Describes the option visible on the storefront.
- Option name: Identify this shared variant option in the control panel (it is invisible on the storefront).
- Type: The display type of the option on the storefront (Dropdown, Radio Buttons, Rectangle List, or Swatch).
To configure the Values for your option, click and drag the handles (⋮⋮) next to values to adjust their sort order on the storefront, then click on “Save”.
Implementing a Shared variant option

- When creating or updating a product, click “Add Variant Option” and “Add Shared Variant Options” under Variants.
- Select which shared variant options to implement by checking the box to their left and selecting “Add.” When done, click “Save Variants.”
Step 3: Create/Modify Customizations
Customizations are used to adjust items (or variants) and have a mechanism for changing their price or weight on a conditional basis.Since customizations are used to change existing items or variants rather than creating new ones, they lack SKUs and stock. They can be mandatory or optional.
Modifier options can be displayed in a variety of ways on your storefront, depending on their functionality.
- Multiple Choice: Enable shoppers to choose from a list of available values. They can be used to present an upgrade as an alternative.
- Pick List: Enables shoppers to choose from a list of additional items in your catalog.
- Other: Enable the creation of checkboxes and other fields that allow shoppers to enter additional product information. A checkbox, text/number fields, date field, and file upload are all examples of types.
Add a Modifier option

A modifier option is the portion of a customization option in which a shopper communicates. It can take the form of a checkbox, text box, or file upload button.
- Click on “Add Modifier Option” to create a new one, or click “Configure Options” to update an existing one.

- Assign a name to your choice, specify its display type, and specify the values that should be available. Additionally, you can specify default text for date and text styles. To add additional values, choose “Add Another Key.”
- Once done, press “Create Options.”

Add a Rule
- To begin, configure the modifier option to which the rule would apply, then click + Add Rule. Select “Configure Rules” to update an existing law.

- Choose the Modifier Option to which the rule will apply.

- Under Make these changes, you can configure how the price or weight should be changed if the Modifier is chosen.

Step 4: Use Shared modifier options
Suppose you have multiple products that share the same modifier options and values. In that case, you can save time by configuring the option once and reusing it across multiple products using shared modifier options.
- Modifier options that are shared between products cannot be modified or personalized.
- By editing a shared modifier option, all products to which it is applied will be updated.
- If a shared modifier option is currently associated with a product, it cannot be removed.
Steps to set up a Shared modifier option
- To set up a new shared modifier option, go to “ Products”, then “Product Options.” Click on the tab for Shared Modifiers, then select “Add Shared Modifier” Option.

- To edit an existing one, select the menu button (⋯) beside it and click on Edit.
- Display name: Describes the option and is visible on the storefront.
- Modifier Option Name: Identify this shared modifier option in the control panel (it is invisible on the storefront).
- Type: Choose the display type of the option on the storefront.
- To configure the Values for your option, click and drag the handles (⋮⋮) next to values to modify their sort order on the storefront. Click on “Save” when you finish.

Implementing a Shared modifier option

- When creating or editing a product, click on “Add Modifier” Option and then” Add Shared modifier” options under Customizations.
- Select which shared modifier options to add by checking the box to the left of them and selecting “Add.” When done, click on “Create Options.”
Step 5: Set up Multiple choice options
Multiple choice options allow shoppers to choose a specific value for items that come in a variety of variants, such as color or size. They can be produced in two ways: through Variations or through Customizations.

- Swatch — This displays color swatches for shoppers to select.
- Radio Buttons — Arranges options in each column
- Rectangle List — Sets options side by side
- Dropdown — Places options in a drop-down list
Step 6: Use the Checkbox
This is the most basic type of modifier option, and it can be used in a variety of applications. A checkbox choice is often used to provide an extended warranty on a specific product. A checkbox combined with a rule may be used to upsell a similar accessory or service.

- Field Value: Text that appears to the right of the checkbox (“Yes” or “Include”).
- Checked by default: Indicate whether the box is automatically checked when a shopper enters the product description tab.
Step 7: Modify Text/number fields
Buyers can enter email, messages, or numbers using these modifier choices. Text fields are sometimes used to create personalized gift messages or to personalize items such as engraving or embroidery.
Text field
This is a straightforward single-line text field. It is usually used to store the names or messages associated with customized items. Text fields are case-sensitive and support both letters and numbers.

- Default Value: You can specify a default value for your text field if you wish. This can act as an immediate visual cue to shoppers about the type of data stored there.
- I want to limit the number of characters entered: Check this box if your text field choice has a character limit. You may specify a minimum, maximum, or both lengths.
Multi-line Text field
This option is similar to a text field, except that it includes a wider area with several lines for longer content. Along with the characters that can be entered, you can also specify the number of lines.
Number-only Text field
This is similar to a text field, except that it accepts only numeric characters (not letters).
- Default Value: Specify a default value for your numbers-only field if you wish. This can act as an immediate visual cue to shoppers about the type of data stored there.
- Limit numbers by: Set a maximum, minimum, or range of permitted numbers here.
- I want to allow only whole numbers: If this box is checked, decimal numbers (such as 1.5) are not permitted.
Step 8: Set the Date field
This type of modifier option enables shoppers to pick a date from dropdown menus for the month, day, and year. They are often used for time-sensitive items or those that need a personalized delivery date.

- Default Value: Specify a default value for your date field if you wish.
- Limit Date By: Optionally assign an Earliest Date, a Latest Date, or a Date Range.
Step 9: Manage the File upload
Shoppers can upload a file using this modifier option. This is typical for customized items. The uploaded file is included in the customer’s order information and can be accessed during the order verification process.
The File upload section includes:
- Maximum File Size: The largest file that shoppers can upload. This cannot be greater than 524,288KB.
- File Types: Allow shoppers to upload any file type or restrict them to specific file types, such as photographs and photos, text files and documents, and other distinguished extensions you want to permit with a comma. For instance, pdf, mp3, and zip.
File Uploaded by the customers:

- When viewing orders, you can access and import customers’ uploaded files from the cart contents specified in the expanded order information.
- To delete files uploaded by customers, you must log in to your store via WebDAV. The files are located in the folder product images/configured products.
Step 10: Modify the Pick lists
This form of modifier choice enables shoppers to browse your store’s inventory. This feature can be used to upsell related items and add-ons, as well as to bundle products.

- Show product picture on Storefront: Select this option to include thumbnails of products in the catalog.
- Change inventory for these items when purchased: If the products in your list monitor inventory, check this box to indicate that buying through the pick list should adjust their inventory.
- Price adjustment based on the chosen option: If checked, the price of the selected picklist product will be added to the base product. When this option is unchecked, choosing a product from the list has no effect on the price.
- Factor chosen product into delivery calculations
- None: The selected product does not affect the base product’s weight or package dimensions (length, width, and/or height).
- Package: The dimensions of the chosen pick list product will be applied to the package dimensions of the base product.
- Weight: The weight of the selected pick list item will be applied to the base product weight.
Restrictions
- A pick list can contain only simple products (i.e., products without options). When looking for items to add to a select list, products with choices are not shown.
- A shopper can pick only one item from a list at a time; multiple items cannot be selected from the same list. Downloadable goods are not eligible for inclusion in a pick list.
Step 11: Importing and exporting product options
Except for shared variants, the majority of the variations and customizations that can be created in the control panel can also be created through a CSV file import. When exporting product choices, the way the data is interpreted in the export file differs slightly from how it is displayed in the control panel.
For more detail on how exported options look and how to format new options for import, read through this article. Additionally, you can use the Catalog API to build and edit product options.
Conclusion
After reading our work, we hope you will understand more about Product Options and apply them to your own BigCommerce shop.
Do you find this article helpful? If you do, please share our work with everyone who may need it. Sharing not only helps to spread the knowledge but also shows your support for the author.


