
How To Create A Website To Sell Products From Scratch
By Sam Nguyen

In this article, we’ll explore the vital stages of constructing an alluring website designed to showcase and sell your products with utmost finesse.
Key Takeaways
- Find Your Perfect E-commerce Website Builder: Discover the perfect platform for crafting your online store with seamless product presentation.
- Choose The Best Plan For You: Navigate through pricing and features to select the optimal plan that aligns with your e-commerce aspirations.
- Get A Domain Name For Your Store: Secure a memorable and keyword-rich domain name to enhance your store’s visibility.
- Pick Your E-commerce Template: Optimize user experience by selecting an appealing template that resonates with your brand’s essence.
- Customize Your E-commerce Template: Infuse your unique identity into the template, reflecting your brand’s personality and style.
- Add Your Products: Effectively market your products by employing persuasive descriptions and captivating visuals.
- Set Up Payment Methods: Provide convenience and security to your customers with a range of secure payment options.
- Sort Out Your Shipping Settings: Streamline shipping processes and options to ensure timely and cost-effective deliveries.
- Preview, Test… And Publish Your Online Store: Before launching, meticulously evaluate your store’s functionality, content, and design to ensure a flawless customer experience.
1. Find Your Perfect Ecommerce Website Builder
To select the right website builder, here’s what you should do:
1 – Test Your Ecommerce Website Builder:
- Experiment with different platforms to gauge ease of use.
- Determine which builder aligns best with your store’s nature. Choose accordingly, whether you’re starting small or have ambitious growth plans.
2 – Work Out the Natural Fit:
- Identify the builder that feels most intuitive for you.
- Ensure the chosen builder matches your store’s niche.
Our Suggestion: Best Online Store Builders
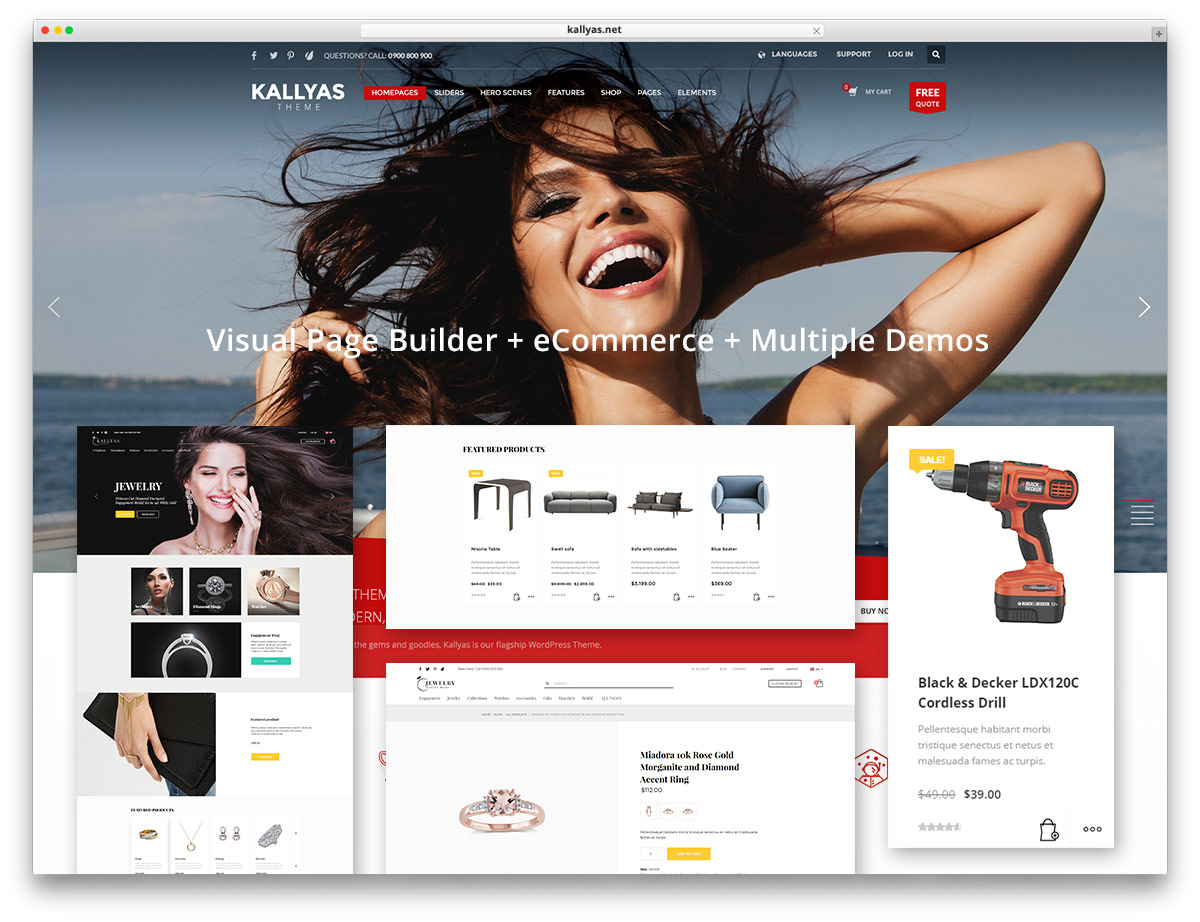
From our research, Shopify and Wix are top players in ecommerce site building. Tailored for various business sizes, they equip you to establish and expand your online store.
Shopify – For Growing Stores
Shopify is an ideal choice for businesses aiming for substantial growth. Known for supporting online stores of all scales, Shopify provides an array of tools and features tailored to meet the demands of a thriving e-commerce venture:
- Professionally designed themes create visually captivating stores.
- Robust inventory management streamlines product control.
- Advanced sales tools optimize revenue generation.
- Shopify’s pricing plans are adaptable, catering to businesses of varying sizes and ensuring scalability as operations expand.
- Transparent transaction fees and payment options enable efficient cost management.
Notably, new merchants can seize a special deal: a 3-day free trial followed by 3 months at just $1 per month, facilitating an affordable entry into the world of e-commerce.
You can click here to see more of this deal.
Wix – For Small Stores
If you’re diving into the world of smaller businesses, Wix shines as a top choice. Built with simplicity and user-friendliness in mind, Wix offers an intuitive platform for small enterprises to establish their online presence and kickstart product sales.
You may choose Wix because it is:
- Simplistic Platform: Wix offers an intuitive interface, making setup a breeze.
- Budget-Friendly: Thoughtful pricing plans suit startups and smaller businesses.
A Checklist Before Moving On The Next Step:
- Finalize your decision on the ideal ecommerce website builder.
- Assess and compare the pros and cons of each platform.
- Conduct thorough testing of your chosen builders.
- Utilize free trials offered by platforms for comprehensive testing.
Remember, this step forms the foundation of your online business, so a diligent and well-informed choice is crucial.
2. Choose The Best Plan For You
Different plans offer varying features. Your choice depends on business size and goals. Paid plans are essential for e-commerce. And also, not many high quality ecommerce platforms today offer a free plan. So the question now is: which paid plan should you go for?
Following these steps can help you conclude which plan is best for you.
1 – Assess Business Needs and Budget
- Evaluate your products and business size.
- Define growth projections to choose the right plan.
2 – Consider Simplicity vs. Features
- Choose a plan based on the variety of products you’ll sell.
- If fewer products, opt for a simpler, cost-effective plan.
Here are the details on Shopify and Wix pricing and features:
Shopify
– Pricing:
| Plan | Monthly Price | Features Included |
| Shopify Starter | $5/month | Set up a basic online store |
| Shopify Basic | $25/month | More features and options for customization |
| Shopify Advanced | $399/month | Advanced reports and external shipping rate integration |
| Shopify Plus | $2000/month | Tailored solutions for big enterprises, dedicated support, advanced features |
– Features:
Shopify provides a range of features to support your e-commerce journey:
- User-Friendly Interface: Shopify offers an intuitive dashboard, making it easy for beginners to manage their online stores.
- Customization: Choose from a wide range of customizable templates to create a unique website that aligns with your brand.
- Payment Options: Accept various payment methods, including credit cards and digital wallets, providing convenience to customers.
- Mobile Responsiveness: Your online store will be optimized for mobile devices, ensuring a seamless shopping experience on all screens.
- App Store: Access to a vast app store with add-ons and plugins for enhancing functionality and integrating third-party services.
- 24/7 Customer Support: Get assistance whenever you need it through their customer support channels.
- SEO and Marketing Tools: Built-in tools to optimize your website for search engines and execute effective marketing campaigns.
Wix
– Pricing:
| Plan | Monthly Price | Features Included |
| Light | $17/month | Website builder only, no e-commerce (sales) |
| Core | $25/month | Basic e-commerce features |
| Business | $35/month | More advanced e-commerce tools |
| Business Elite | $159/month | Premium e-commerce features, priority support |
– Features:
Wix offers a variety of features tailored for online business:
- Drag-and-Drop Editor: Wix’s easy-to-use editor allows you to create a stunning website without any coding knowledge.
- Template Variety: Choose from a diverse collection of templates tailored to different industries and design aesthetics.
- Online Store: Seamlessly integrate e-commerce functionality to showcase and sell your products.
- App Market: Access a wide range of apps to enhance your site’s features, including booking systems, forms, and more.
- Mobile Optimization: Ensure your website looks and functions well on mobile devices for a broader audience reach.
- SEO Tools: Wix provides tools to optimize your website’s search engine visibility, helping potential customers find you.
- Customer Support: Benefit from Wix’s customer support resources, including guides, forums, and ticket-based assistance.
Note on What to Prepare Before Moving On:
- Ensure the chosen builder’s features meet your store’s needs.
- Start with an affordable plan, upgrading as your business flourishes.
Remember, selecting the right plan lays the groundwork for a successful online store. Tailor your choice to fit your business’s specific requirements and ambitions.
3. Get A Domain Name For Your Store
Domain names are essential components of URLs that uniquely identify your store. A well-chosen domain name is pivotal for a thriving online business. It bolsters brand identity and fosters customer trust.
Consider the following points when securing the perfect domain for your store:
- Reflect Your Brand: Choose a domain name that aligns with your business identity and represents your products.
- Keyword Integration: Incorporate relevant keywords to enhance search engine visibility and attract potential customers.
- Simplicity: Opt for a name that’s easy to spell, remember, and type to ensure accessibility.
- Domain Extension: Select a suitable domain extension (e.g., .com, .net, .store) that resonates with your target audience.
- Avoid Hyphens and Numbers: Keep it clean and professional by avoiding hyphens and numbers that can confuse customers.
- Research Availability: Verify the domain’s availability using domain registration platforms or domain name search tools.
- Check Trademarks: Ensure your chosen name isn’t trademarked or copyrighted to prevent legal issues.
- Short and Memorable: Aim for brevity to improve recall and make it memorable for potential customers.
- Avoid Copyright Infringement: Steer clear of names that closely resemble existing brands to avoid copyright concerns.
- Consistency: Maintain consistency with your brand name across social media profiles and other online platforms.
A Note Before Moving On The Next Step:
- Ideal Domain Name: Ensure your chosen domain is relevant and memorable and opt for a country code if it suits your market.
- Availability Check: Verify your domain is free and fits your budget.
- Purchase and Renew: Secure your domain through your builder and set a renewal reminder to prevent loss.
4. Pick Your Ecommerce Template
The template you pick shapes how your website looks and works, directly affecting how users interact and buy. A smart choice ensures great product display, user-friendly navigation, and a design that reflects your brand. This sets your online image and impacts how trustworthy and professional your site appears, ultimately swaying visitors to become buyers.
How Do You Pick The Right Template?
To create a successful online store, follow these steps for choosing the best ecommerce template:
- Define Your Brand: Understand your brand’s identity, values, and target audience to inform your template choice.
- Ecommerce Emphasis: Prioritize templates tailored for online selling, highlighting products and sales features.
- Mobile Optimization: Opt for templates ensuring seamless mobile functionality to accommodate a diverse user base.
- Personalize the Look: Choose customizable templates that align with your brand’s distinct aesthetics.
- User-Friendly Layout: Select templates with intuitive navigation and layouts that guide user interactions.
- Speed and Performance: Opt for templates optimized for swift loading, enhancing user experience and SEO.
- SEO Enhancement: Choose templates with integrated features to boost search result rankings.
- Integration Flexibility: Ensure templates are compatible with necessary plugins and apps.
- Tested and Trusted: Evaluate templates through demos and user feedback for reliability.
- Support and Updates: Select templates with robust support and regular updates for stable performance.
What Features Do You Want Your Store To Have?
When considering the features for your online store, delve into these key aspects:
- Product Showcase: Highlight items with captivating images and detailed descriptions.
- Smooth Navigation: Ensure effortless browsing and seamless movement for shoppers.
- Efficient Search: Implement a robust search bar for quick product discovery.
- Mobile-Friendly: Optimize your store for mobile devices, expanding your reach.
- Secure Checkout: Offer a safe and seamless payment process with diverse options.
- Inventory Tracking: Monitor stock levels and set alerts to prevent stockouts.
- Social Proof: Allow customers to share reviews and ratings for credibility.
- Social Media Linking: Integrate social media for wider exposure and interaction.
- Accessible Support: Provide customer assistance through chat, email, or phone.
- Sales Insights: Employ analytics tools to track sales, trends, and customer behavior.
Strategically choosing these features shapes a functional, appealing online store tailored to your customers’ preferences and enhancing their shopping journey.
Many Shopify themes, both free and paid, have really great looks and are feature-rich. You can check this out to see if they are the best fit for you.
What Style Of Homepage Do You Want?

Your online store’s homepage acts as the virtual entrance for customers, providing the first glimpse of your offerings. It plays a vital role in creating a positive user experience and boosting conversions.
Tailoring the homepage style to cater to your target audience while effectively displaying products and promotions is key. Whether you choose a minimalist, vibrant, or informative design, it should align with your brand identity and resonate with potential customers.
By grasping your audience’s preferences, you can create a captivating homepage that guides visitors seamlessly, increasing the chances of purchases.
How Do You Want Your Customers To Navigate Your Store?
When designing your online store’s navigation, step into your customers’ shoes. Make it intuitive, allowing easy exploration of categories, product details, and checkout. Menu structure and key elements like search bars, filters, and call-to-action buttons impact user experience greatly.
Smart navigation ensures swift access to desired items, browsing related products, and smooth checkout. Plus, organized navigation boosts SEO, elevating your store’s search rank and drawing organic traffic.
Before Moving On The Next Step:
- Domain Check and Purchase: Secure a suitable domain name and set a reminder to renew it timely.
- Upcoming Steps Preparedness: Ensure domain selection and purchase are complete.
- Future Growth Consideration: Choose a template that accommodates future expansion.
- Brand Consistency: Ensure the template resonates with your brand image.
5. Customize Your Ecommerce Template

Customizing strategically helps direct visitors’ attention, highlight key products, and simplify navigation, leading to more engagement and conversions. By personalizing your e-commerce template, you shape a digital store that embodies your brand. This draws customers in to explore, engage, and buy.
Also adjusting design, colors, fonts, and visual elements creates an immersive shopping journey aligned with your brand. Perfecting product placement and creating eye-catching banners enhances your store’s appeal and usability. This is where the magic of e-commerce template customization truly shines.
Check These Before Moving On:
- Content Replacement: Ensure your template no longer carries default content and make your site truly yours by incorporating your brand’s elements.
- App Integration: Consider apps that enhance your site’s usability and install them as needed, knowing you can adjust later.
6. Add Your Products
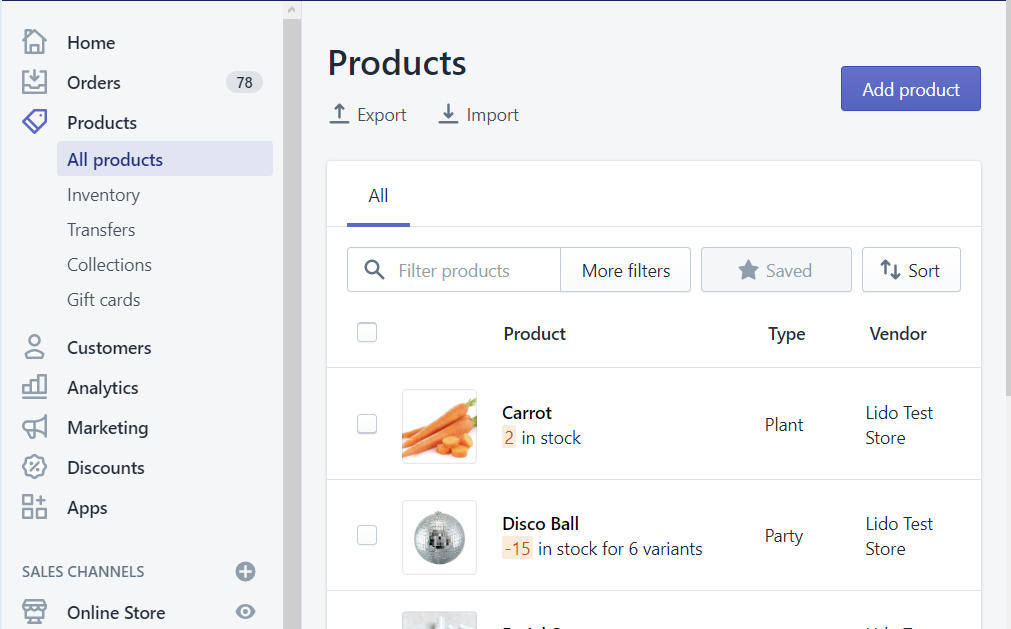
Now we’ll walk you through adding products to your website for a successful online store. To create a seamless shopping experience, follow these steps:
- Log in to your admin panel, head to “Products” or “Inventory,” and select “Add Product.”
- Provide detailed info, high-quality images, accurate descriptions, and prices.
- Organize products into categories for easy browsing. Specify stock availability and variations.
- Optimize descriptions with keywords for better search visibility.
- Foster trust with customer reviews, and keep inventory updated.
- Consider offering discounts or bundle deals to attract more customers.
Craft a well-structured product page, influence buying decisions, and turn visitors into satisfied shoppers.
How Do You Write Winning Product Descriptions?
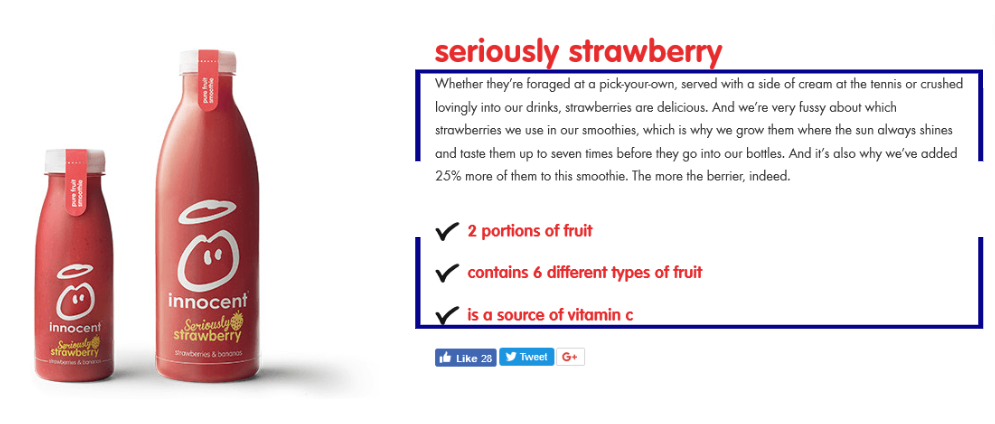
Crafting compelling product descriptions is essential for driving sales, but certain pitfalls should be avoided:
- Complex Jargon: Steer clear of industry jargon that might confuse or alienate potential customers.
- Clichés: Avoid overused phrases that lack originality and fail to captivate your audience.
- Long Sentences: Keep descriptions concise and easily digestible to maintain reader engagement.
Moreover, integrating SEO principles into your product descriptions enhances their discoverability. Incorporate relevant keywords naturally to optimize for search engines, ensuring your products reach the right audience.
How Do You Take The Best Product Images?
Capturing the best product images is crucial for showcasing your offerings effectively and enticing potential customers. Quality images provide a closer look at your products, enhancing their perceived value and boosting trust.
Double check these aspects of your images:
- Lighting: Use natural light or diffused artificial light to avoid harsh shadows and create accurate color representation.
- Background: Opt for a clean, neutral background that doesn’t distract from the product.
- Steady Shots: Use a tripod or stable surface to prevent blurry images.
- Angles: Capture products from various angles to provide a comprehensive view.
- Details: Zoom in to highlight intricate details and textures.
- Consistency: Maintain a consistent style across all images for a cohesive look.
- Editing: Edit images to adjust brightness, contrast, and remove any imperfections.
Taking the time to capture high-quality product images will elevate your online store’s visual appeal and make a positive impression on potential buyers, driving conversions and sales.
What About Building Product Categories?
Product categories are a crucial organizational structure for your online store. They serve as navigational pathways that guide customers to relevant products and simplify their shopping experience.
Building product categories involves creating distinct groupings for your items based on their characteristics, use cases, or target audience. Each category should be easily recognizable and intuitive, enabling visitors to quickly locate what they’re looking for.
To effectively build product categories, consider these steps:
- Understand Your Products: Analyze your inventory and identify common themes or attributes among your products.
- Group Similar Items: Organize products that share similarities into the same category. This helps customers find related items easily.
- User-Friendly Names: Choose clear and descriptive category names that accurately represent the products within.
- Logical Order: Arrange categories in a logical sequence that mirrors how customers might browse your store.
- Hierarchy: Create a hierarchy if necessary, with broader categories leading to more specific subcategories.
- Visual Representation: Consider using images or icons to visually represent each category, aiding in quick recognition.
- Keep It Manageable: Don’t overwhelm customers with too many categories. Strive for a manageable number that covers your main product offerings.
Before Moving On The Next Step:
- Craft Descriptions and Photos: Write engaging, informative product descriptions and capture high-quality, clear product images.
- Organize Products: Decide on clear and relevant categories and ensure products are well-categorized for customer ease.
- Upload Products: Utilize platform tools to add products accurately.
7. Set Up Payment Methods
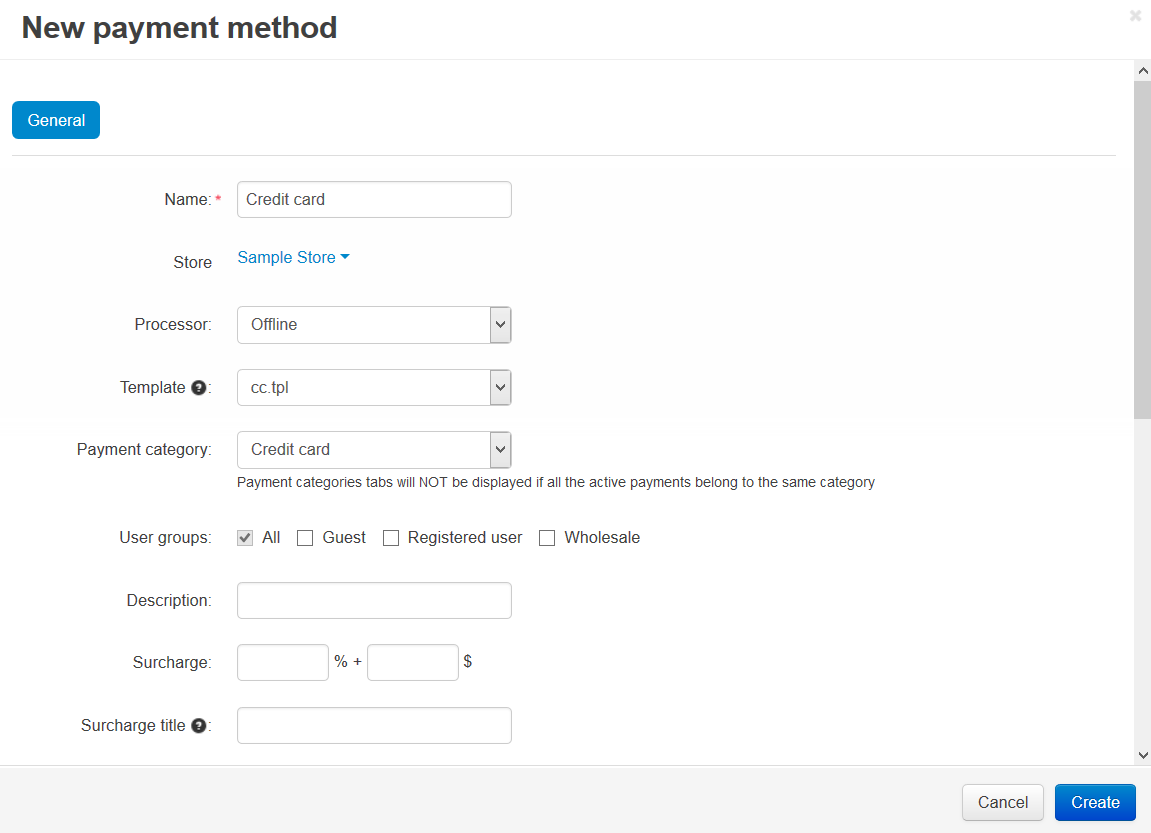
Building trustworthy payment systems is crucial for your online store’s financial transactions. These methods solidify the link between you and customers, ensuring safe value exchange. Providing varied, trusted payment choices boosts confidence, convenience, and conversions.
What Payment Options Can I Add?
Selecting the right payment options is pivotal for your online store’s success. Offering diverse payment methods accommodates different customer preferences, enhancing their shopping experience. Common payment options include:
- Credit/Debit Cards: Enable secure card payments, the most common choice for online transactions.
- Digital Wallets: Integrate PayPal, Apple Pay, or Google Pay for convenient and swift payments.
- Bank Transfers: Provide customers the option to transfer funds directly from their bank accounts.
- Cryptocurrency: Accept digital currencies like Bitcoin for tech-savvy customers.
- Cash on Delivery: Offer the traditional COD option for those who prefer paying upon receipt.
- Buy Now, Pay Later: Collaborate with services like Afterpay or Klarna to allow installment payments.
- E-wallets: Consider regional e-wallets popular in specific markets.
How Do I Choose The Best Payment Method?
Choosing the perfect payment method for your online store requires careful thought. Consider customer demographics, location, and product nature.
Popular choices: cards, digital wallets, alternative gateways.
Balance fees, security, and speed for a smooth, secure payment experience that suits your audience. Prioritize trust and convenience for loyal customers, aligning with your store’s goals.
What About Security?
Ensuring robust security is pivotal when crafting a website to sell products. To fortify your online store:
- Employ SSL encryption, safeguarding customer data during transactions. Regular updates to plugins and platforms bolster defense against vulnerabilities.
- Enhance your overall cybersecurity by consistently practicing strong password management, ensuring an additional layer of protection for your digital assets.
- Prioritize payment gateways with built-in security layers, gaining customer trust.
- Undertake routine security audits, evolving with emerging threats, and offer transparent privacy policies.
Vigilance safeguards both your business and customer interests!
How Much Are These Payment Options Going To Cost?
When you’re deciding how to handle payments on your website, it’s key to grasp the potential expenses. Typically, payment processors ask for about 2-3% of the transaction amount, plus a fixed 30¢ fee. Keep in mind that these charges can differ, so it’s smart to check various processors and their terms before deciding.
As you create your product-selling website, focus on picking a payment processor that fits your budget and sales. Taking a close look at these costs will guide you to the best decision, guaranteeing seamless financial transactions on your online platform.
Before Moving On The Next Step:
- Assess Payment Options: Consider fees, ease of use, compatibility and opt for a gateway that suits your business model.
- Secure Your Site: Confirm SSL certificate presence and acquire one if it’s not already in place.
8. Sort Out Your Shipping Settings
Enhance the user experience by fine-tuning your shipping settings. Specify delivery specifics, expenses, and options. Leverage free shipping thresholds to motivate larger orders. Collaborate with reliable carriers for accurate tracking.
Dive into local preferences and carrier effectiveness. Scrutinize data to optimize routes and hasten deliveries. Introduce expedited choices for urgent orders. Cultivate trust through transparency to minimize cart abandonment.
The options each ecommerce website builder offers
What Is Your Shipping Origin Address?
When setting up your online store, your shipping origin address matters. It kickstarts shipping calculations and defines zones. Integrate it accurately in your site’s shipping settings for precise costs and smooth order handling.
Delve deeper: Opt for an address close to carriers’ hubs, aligning with your audience. A smart origin choice cuts costs, speeds up delivery, and boosts satisfaction. Also, sync this with your contact info for a pro touch. Attention to detail builds e-commerce success.
What Shipping Zones Do You Want To Ship To?
When you’re building your online store to sell products, it’s vital to pick the right shipping zones. These zones outline where you’ll deliver and control shipping expenses. Study your audience and market demand to choose regions wisely.
Think about shipping rates, delivery speed, and local rules. Dig deeper by checking rivals’ strategies and customer input. Boost user experience by clearly showing available shipping zones at checkout.
What Are The Different Shipping Options?
When setting up your online store, understanding the various shipping options is crucial. Here are five key methods:
- Free Shipping
- Flat Rate
- Real-time Quotes
- Store/Local Pickup
- Rate by Order Price
Free shipping
Free shipping is a strong way to boost sales. It entices customers by eliminating extra costs, reducing cart abandonment, and increasing conversions. But analyze its impact—consider shipping costs, pricing, and profits. Balance attraction with profitability. Highlight the offer on your site’s key pages.
Flat rate
Selling with a flat rate simplifies pricing, improving shopping. Yet, study costs carefully to cover expenses while pleasing buyers. Factor in shipping, packaging, overhead. Adapt as needed for an edge.
On your site, spotlight flat rates. Clear pricing builds trust, cuts cart abandonment. Persuasive wording highlights value. Track sales, satisfaction, costs to optimize and thrive.
Real-time quotes
Effortlessly add live stock quotes to your site. Engage users with up-to-date market info. Use APIs for smooth data integration. Tailor to preferences, build trust, and boost interaction. Elevate by adding analysis, interactive charts, historical context, trend insights, and source credibility. Ideal for traders and investors.
Store or local pickup
Create your online store with options: store pickup for quick access, saving on shipping, or local delivery for added convenience, ideal for busy customers. Analyze audience and location, offer user-friendly choices, communicate during checkout. Elevate satisfaction and streamline operations with the right approach.
Rate by order price
In the world of crafting websites to sell products, nailing how you price items based on order value is key. A pricing strategy must walk the line of attracting customers and securing profits. Go deeper by studying rivals’ prices, market shifts, and customer views. This mix breeds a winning pricing strategy for thriving in e-commerce.
Shipping Services
When setting up your online store, choosing the right shipping services is pivotal. Start by understanding your product’s specifics – weight, dimensions, and nature. This guides your selection of shipping carriers, from global giants like FedEx and UPS to local options. Speed matters, so prioritize quick deliveries for customer happiness.
Factor in costs, offering choices like standard and expedited shipping to cater to different needs. Free shipping thresholds can also boost order values. Seamlessly integrate shipping into your site using plugins or APIs to show real-time rates at checkout. Provide tracking numbers and order updates via email for transparency.
Clear returns policies foster trust, and analyzing shipping data helps optimize routes and plan for peak seasons. Remember, efficient shipping fuels customer satisfaction, driving your online store’s success.
Before Moving On The Next Step:
- Shipping Origin Address: Set your location as the shipping point and align it with your courier’s service areas.
- Courier Partnership: Choose a reputable courier and review their rates, coverage, and services.
- Package Weights: Measure products accurately for shipping calculations.
- Shipping Options: Define clear shipping choices and costs for customers.
9. Preview, Test… And Publish Your Online Store
Before the grand reveal of your online store, the crucial stages of previewing, testing, and publishing come into play. This is your ultimate quality check, ensuring your digital storefront is set for a seamless customer journey.
Preview for looks and function, aligning aesthetics with your brand. Testing delves deeper, hunting glitches and hitches. By meticulous prep, your online store shines, ready to charm your audience.
Double check these before publishing your site:
Does Your Checkout Work?
For successful online sales, ensure a smooth checkout. Check payment, test orders, and analyze cart abandonment. Simplify steps, offer guest checkout, clear CTAs, security, transparent pricing. Prioritize mobile and refine regularly for better user experience and more sales.
Do Your Store’s Functions Work?
Before your online store goes live, make sure all functions are smooth. Test product search, navigation, cart, and checkout thoroughly. Try different scenarios to catch bugs. Check compatibility across devices, prioritize user accounts and payment gateway testing. Optimize for success with responsive design and intuitive UI.
Have You Checked Your Store’s Content?
Before your online store goes live, verify content accuracy. Check product details, descriptions, and prices for credibility. Delve deeper by refining product info, images, and categorization. Write persuasive copy, keep style consistent, and A/B test to boost conversions. Reliable, compelling content cultivates trust and spurs sales.
Does Your Store Work On Mobile?
Ensure your store functions seamlessly on mobile devices. Check layout, buttons, and responsiveness. A deep dive involves testing across various devices, resolving issues promptly. A mobile-friendly site enhances user experience, boosts sales, and aligns with modern online shopping trends.
Have You Tested Your Store On Different Browsers?
Testing your online store is vital, especially for browser compatibility. Different web browsers interpret websites differently, leading to varying user experiences. Ensure your store works smoothly on popular browsers like Google Chrome, Mozilla Firefox, Safari, and Microsoft Edge.
Consistency across these platforms ensures all customers enjoy a seamless shopping experience, regardless of their browser choice.
Before Moving On:
- Test Checkout Process: Ensure all payment options work seamlessly and verify accurate calculations and cart details.
- Thorough Site Review: Hunt for errors across all site sections.
- Device Compatibility: Test on various devices for uniform performance.
- Confirm Settings: Review and confirm all settings.
- Publish with Confidence: When satisfied, make your store live.
Option 2: Use WordPress With Bluehost and WooCommerce
This option empowers you to harness the flexibility of WordPress while benefiting from the robust e-commerce capabilities of WooCommerce, creating a tailor-made online store that aligns with your unique vision and goals.
How to Build an Online Store in 9 Steps
Step 1: Decide If WordPress Is Right For You
Deciding if WordPress suits your website goals involves weighing its benefits and drawbacks against other platforms.
Should You Use a Website Builder or WordPress to Build Your Online Store?
Choosing between a website builder and WordPress for your online store has unique benefits. Website builders like Shopify and Wix offer user-friendly interfaces, suitable for non-tech users.
Using a Website Builder:
Pros:
- Simplicity: Website builders offer user-friendly drag-and-drop interfaces, requiring minimal technical skills.
- Templates: Pre-designed templates facilitate quick store setup, ensuring a professional look.
- Hosting & Security: Most builders handle hosting and security, alleviating maintenance concerns.
- Updates: Automatic updates keep your store’s software current.
Cons:
- Customization Limits: Templates can restrict advanced customization options.
- Scalability: As your store grows, you might outgrow some builder’s limitations.
Using WordPress:
Pros:
- Flexibility: WordPress offers extensive customization possibilities through plugins and themes.
- E-commerce Plugins: WooCommerce, a popular e-commerce plugin, enables powerful online store functionalities.
- Ownership: You have complete control over your website and data.
- Scalability: WordPress can accommodate complex and large-scale stores.
Cons:
- Learning Curve: WordPress requires more technical proficiency, especially for beginners.
- Hosting Arrangements: You need to arrange hosting separately.
Deciding between a website builder and WordPress depends on your comfort with technology and customization needs. Website builders suit beginners, while WordPress appeals to those seeking advanced control. Choose wisely based on your goals and resources to create a compelling online store.
Before Moving On The Next Step:
- Conduct Research: Delve into WordPress resources to gain insights.
- Assess Your Needs: Identify your store’s specific requirements.
- Evaluate Fit: Determine if WordPress is the right fit for your business.
Step 2: Find Reliable Web Hosting
Among the array of hosting providers, Bluehost stands out as a recommended choice for its dependable services and tailored solutions.
With a track record of hosting millions of websites, Bluehost offers a robust and user-friendly platform that caters to varying business needs. Its hosting packages are designed to accommodate the demands of e-commerce, ensuring optimal performance, security, and scalability.
By entrusting your online store’s hosting to Bluehost, you lay a stable groundwork that sets the stage for a successful and seamless shopping experience for your customers.
Before Moving On:
- WordPress Compatibility: Assess if WordPress suits your website’s goals and complexity and consider its user-friendliness and customization options.
- Reliable Hosting: Choose a trustworthy hosting provider like Bluehost and check reviews and features offered.
- Host Plan Selection: Study various hosting plans and features and choose a plan aligned with your site’s demands.
- Smooth Sign-Up: Complete the hosting sign-up process accurately.
Step 3: Choose and Register a Unique Domain Name
Your domain name is the address that customers will use to find your website, so it needs to be memorable, easily spelled, and closely tied to your store’s identity.
Ideally, it should align with your store’s name. Registering your chosen domain ensures it’s exclusively yours and not already taken by someone else.
Remember, domain prices vary based on the registrar and domain type, with some web hosts even offering a free domain for your first year.
Tips for Domain Selection:
- Avoid Complexity: Opt for simplicity, eschewing numbers and hyphens, which complicate memorization and verbal sharing.
- Embrace Uniqueness: If your desired domain is taken, steer clear of appending numbers; instead, brainstorm a fresh alternative.
- Stay Relevant: While the quest for originality is tempting, prioritize relevance over eccentricity.
Before proceeding, ensure you have:
- Brainstormed Domains: Mull over potential names that resonate with your store’s essence.
- Checked Availability: Ascertain if your preferred domain remains unclaimed.
- Registered Your Domain: Typically accomplished during sign-up.
- Scheduled Renewals: Set reminders or activate auto-renewal to safeguard your domain’s continuity.
Step 4: Install WordPress and Set Up WooCommerce

To set up your online store effectively, you’ll first need to install WordPress. Opting for a reliable host like Bluehost ensures a hassle-free process. Bluehost not only installs the latest WordPress version upon signup but also automatically integrates WooCommerce and its storefront theme. This eliminates complex technical tasks, saving you precious time.
With WordPress and WooCommerce ready, log in and begin configuring your dashboard. Access the “Welcome to WooCommerce” notification to initiate store setup. Follow the intuitive steps, input vital details like store location, chosen currency, and shipping specifics, including sales tax for physical goods.
Before You Move On:
- Installed WordPress and WooCommerce (likely facilitated by your host)
- Engaged with WooCommerce’s setup wizard, propelling your store creation journey.
Step 5: Add Products to Your Store
Moving forward in your quest to establish a thriving e-commerce platform, it’s crucial to expand your online store’s product range. Your virtual store demands a collection of products, and now it’s the opportune moment to integrate them.
Navigate to the Products section within your WordPress dashboard, where you’ll find the straightforward “Add New” button. This phase entails multiple essential aspects that collectively shape an engaging product presentation:
Product Title and Description
Craft engaging and informative product titles and descriptions that highlight the unique features and benefits of each item. Clear and concise descriptions aid customers in making informed purchase decisions.
Create Product Categories
Organize your products into well-defined categories that streamline navigation and help customers easily find what they’re looking for. Intuitive categorization enhances the user experience and facilitates effective browsing.
Add Product Data
Populate each product listing with accurate and detailed information, such as pricing, availability, sizes, colors, and any other relevant specifications. Complete and accurate product data fosters transparency and trust.
Add a Short Product Description
Provide a succinct overview of each product, capturing its essence and key selling points. A brief description serves as a quick preview, enticing customers to explore further.
Upload Product Photos
High-quality, visually appealing product images are essential for showcasing your offerings. Multiple images from different angles provide customers with a comprehensive view, enhancing their understanding and interest.
Before Moving On:
- Complete Product Entry: Ensure all products are added and verify product titles and descriptions.
- Accurate Information: Double-check product details for accuracy.
- Visual Excellence: Confirm professional product photos are uploaded.
Step 6: Pick Your Perfect Design Theme

Be Wary of Free Themes
While free themes may seem enticing, they often lack the customization options, support, and security features that premium themes provide. Invest in a reputable paid theme to unlock a range of tailored features and a polished appearance.
Make Sure You Pick an Ecommerce Theme
Opt for a theme specifically designed for e-commerce. These themes come equipped with features essential for online stores, such as product showcases, shopping carts, and seamless checkout processes.
Choose Built-In Features Wisely
As you explore themes in WordPress, you can tailor your choice by selecting the features you prefer. Keep in mind that feature-packed commercial themes might be pricier and slower to load.
On the other hand, you can easily opt for themes from the WordPress library via your dashboard by going to Appearance and then Themes. This route provides a more lightweight and budget-friendly solution.
Before Moving On:
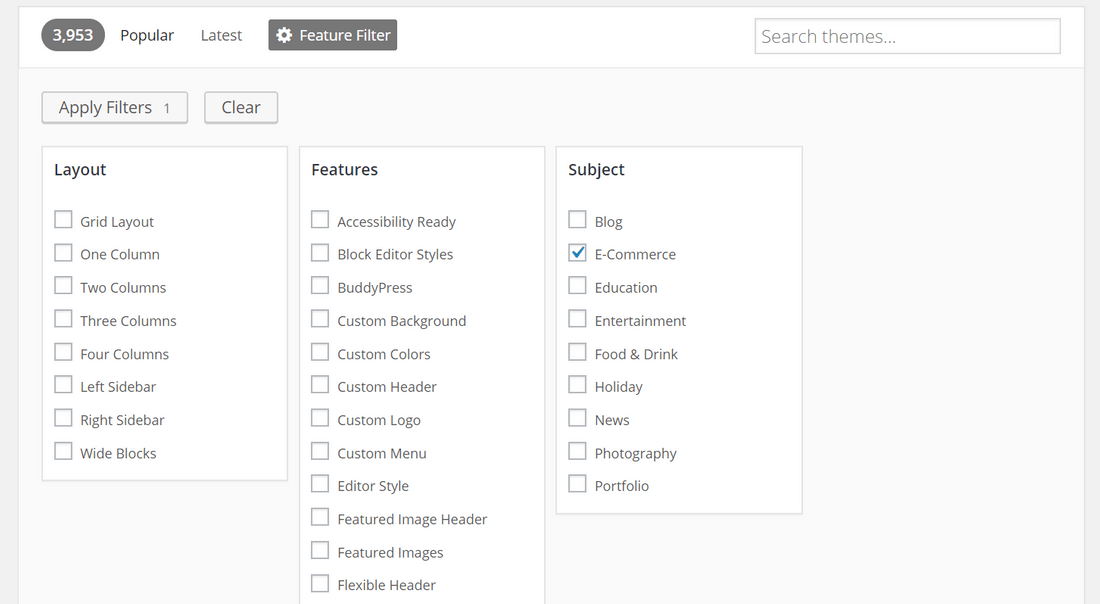
- Theme Exploration: Browse themes in the WordPress theme library and apply filters to refine your search based on preferences.
- Trustworthiness Check: Ensure the chosen theme has good reviews and is from a reliable source.
- Installation: Install the selected theme for your WordPress site.
Step 7: Customize Your Store
To tailor your store’s appearance, access your theme settings through the dashboard’s Appearance section, then choose Customize. This allows you to fine-tune your theme’s design, encompassing colors, page layouts, typography, and more.
For a foundational store, you need to:
- Craft a compelling homepage.
- Create category and product pages.
- Design an About page.
- Include a contact page.
- Provide shipping and returns policies.
Augment as needed and ensure design consistency throughout your online store. Customize your theme to align with your brand identity, always keeping your target audience in mind to create the desired vibe.
Before Moving On:
- Theme Customization: Personalize your theme to reflect your brand.
- Color Scheme Selection: Decide on a cohesive color palette.
- Font Choice: Select fonts that match your brand’s style.
- Additional Pages: Add any required supplementary pages.
- Consistency Check: Confirm design uniformity across your store.
Step 8: Choose and Install Helpful Plugins
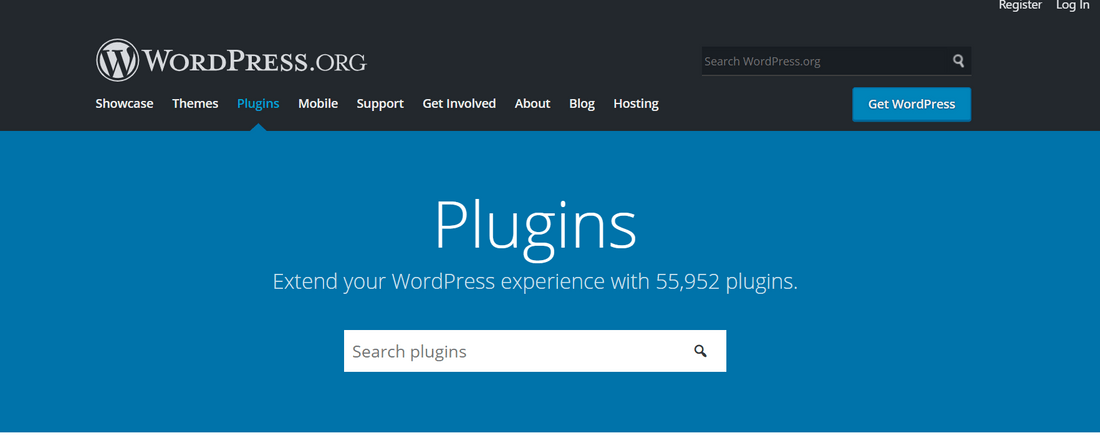
Enhance your online store’s functionality with plugins – similar to apps – that add extra features and customization options. With a wide range of choices available in the WordPress plugin directory and WooCommerce extensions store, you can tailor your store to your needs. Consider these functions:
- Extra Security Measures: Safeguard your store with added security layers.
- Testimonials: Showcase customer feedback to build trust.
- Subscription Forms: Capture leads and grow your audience.
- Store Locator: Help customers find your physical locations.
- SEO Tools: Improve your store’s visibility in search engines.
Most plugins offer a free version, but some require payment, so check before installation.
Before Proceeding:
- Pinpoint Added Functions: Reflect on enhancements for your store.
- Browse for Plugins: Navigate the WordPress plugin directory.
- Evaluate and Refresh: Confirm plugins are current and well-rated.
- Integrate New Plugins: Seamlessly install chosen plugins.
Step 9: Carry Out Final Checks, then Publish
Before hitting the Publish button, ensure your store is error-free and polished. Consider these key points during your final checks:
Links and Navigation:
- Verify all links are correct and functioning.
- Ensure a smooth user journey across the site.
Content Accuracy:
- Double-check for typos and grammatical errors.
- Ensure all images and media are displaying correctly.
User Experience:
- Test the site’s usability and responsiveness.
- Ensure a seamless and engaging experience for visitors.
Once you’re confident in your store’s quality and performance, it’s time to make it live!
Before Proceeding:
- Thorough Self-Review: Take the time to review your store personally and address any potential issues.
- Seek Third-Party Feedback: Gain fresh insights by having someone else explore your store and provide feedback.
- Publish with Confidence: When you’re satisfied with your store’s condition, feel assured as you click the “Publish” button.
Using a Website Builder to Build an Online Store: FAQs
Choosing the best online store builder depends on your unique business needs. Shopify offers scalability for growing enterprises, while Wix suits small to medium-sized businesses. Research features, pricing, and reviews to find your perfect fit for a successful product-selling website.
Certainly, Wix offers a comprehensive e-commerce solution, empowering you to effortlessly manage your online store. With user-friendly tools, you can display products, handle inventory, set up secure payments, and execute effective marketing strategies. Whether it’s a small venture or an expansion, Wix’s features help create a captivating online store that drives sales and connects with your audience.
When seeking a budget-friendly e-commerce platform, consider pricing, transaction fees, and features. Wix and Weebly offer competitive entry-level plans, making them accessible for small businesses. Evaluate features to ensure they match your business needs before choosing based on cost.
Website builders provide convenience, but you can explore custom options. CMS like WordPress or Joomla, paired with e-commerce plugins like WooCommerce or VirtueMart, offer flexibility. Hiring a developer for a tailored site is also an option. Consider your skills, budget, and control preferences to choose wisely.
Online store creation time varies based on platform, customization, and expertise. Builders offer quick setup in days or weeks. CMS like WordPress may take longer due to customization. Full customization or pro help extends to weeks or months. Clear goals, planning, design, content, testing shape an effective, polished store.
Building an Online Store With WordPress: FAQs
Beyond WooCommerce, explore alternatives like Easy Digital Downloads and WP eCommerce for WordPress e-commerce. Tailored to specific business types, these plugins offer varying features. Research and compare to choose the right fit for your store.
Certainly, WooCommerce is a free e-commerce plugin for WordPress. Nevertheless, you should be aware that additional expenses may arise. These costs can include premium themes, payment gateways, and extensions that enhance your online store. Plan your budget accordingly to cater to these potential enhancements aligned with your store’s needs.
WooCommerce comes highly recommended for online store development, praised for its versatility, user-friendliness, and robust features. Seamlessly integrating with WordPress, it offers a familiar interface for managing websites and e-commerce. Customizable and extensible, it adapts to your needs, while its active community and updates ensure a reliable foundation.
How to Build an Online Store: FAQs
Crafting an online store’s budget hinges on factors like platform choice, design intricacy, and added tools. Opting for integrated plans could cost $10-$300 monthly, while tailored approaches via WordPress entail hosting, domains, themes, and plugins. Remember ongoing expenses like domain renewal, hosting, and marketing.
Though free options exist, like WooCommerce and Magento, for creating basic online stores, remember the trade-offs. Costs for domain, hosting, themes, and extensions might apply. Free plans have limitations; investing in your store ensures functionality and a pro customer experience.
Choosing the right online store builder depends on your unique needs and business type. Consider Shopify, WooCommerce (for WordPress), Wix, BigCommerce, and Squarespace. Shopify offers user-friendliness, WooCommerce integrates with WordPress, Wix provides simplicity, BigCommerce scales well, and Squarespace excels in aesthetics. Research and compare for the best fit.
E-commerce platform costs differ based on features and providers. Wix, Weebly offer budget-friendly options. WordPress with WooCommerce is cost-effective, considering free core plugin, though extensions, themes, hosting could incur charges. Compare to find best fit.
Several online store builders impose extra charges for transactions, often in addition to monthly plan fees. These fees depend on your chosen e-commerce platform and payment gateway. For instance, Shopify and Wix may levy fees for third-party gateways but could lessen or eliminate them when using their own payment options. Carefully assess fee structures across platforms to align with your budget and business goals.
Indeed, apart from specialized e-commerce platforms, you can explore other routes for crafting your online store. Content management systems like WordPress, Joomla, and Drupal can be paired with e-commerce plugins (WooCommerce, Easy Digital Downloads, Magento) for customization. Alternatively, you can opt for a custom e-commerce solution via a developer or agency, aligning with your budget and control preferences.
Crafting an online store’s timeline hinges on factors like platform choice, product complexity, and your web expertise. Utilizing pre-designed templates in e-commerce builders yields a swift launch (hours to days), while bespoke CMS stores demand weeks for design, development, and testing. Allocate time for prep and polish to ensure a seamless, visually pleasing storefront.
Certainly, although WooCommerce stands out as a widely used e-commerce plugin for WordPress, it’s worth noting that various alternatives like Shopify, BigCommerce, Magento, or tailored solutions provide unique attributes for crafting online stores. To choose the right fit, assess your needs and compare platform features.
Certainly, WooCommerce functions as a free plugin complementing your WordPress site, delivering core e-commerce attributes at no outset expense. Nonetheless, supplementary costs might emerge from optional extensions, premium themes, payment gateways, and enhancements refining the plugin per your store’s requisites. Prudent budgeting for these additions ensures a thorough, polished online store.
Opt for WooCommerce to craft your online store effortlessly. Seamlessly blending with WordPress, it’s user-friendly, customizable, and rich in features. Backed by a strong community, updates, and adaptability, it scales with your business, offering reliability and versatility in one, making it a top e-commerce choice.
Bottom Line
With this guide on how to create a website to sell products, we hope that you are well equipped with the fundamental knowledge of creating a website and can start your ecommerce business from now on.


