
How to Fix the WooCommerce Product Gallery Not Working

Good WooCommerce product gallery is of great significance. It supports sales of your online store and boosts your entire brand image. It is undeniable that the product gallery certainly makes a great impression on buyers and conveys your brand story to them. This is to say; you should pay attention to create a good product gallery for your WooCommerce store.
However, there are some situations in which your product gallery stops working due to some unwanted issues. This is risky as it might directly impact your sales. Do not worry! As we have explored tons of cases that you want to deal with the one not working, so we have come up with instructions on how to fix the WooCommerce product gallery not working. Let’s get started to see how to do it and apply the solution to your online business.
Why is your WooCommerce product gallery not working?
Before getting to know to fix this problem, it is a must to have a brief of what causes the product gallery not working. By knowing that, you could be able to find better solutions and cope with them easily. In most cases, there are probably two main reasons.
-
You update to the WooCommerce latest version: When you make up your mind to update your WooCommerce to enjoy up-to-date features and functions, this activity might break your product gallery, leading to it not working.
-
The Theme and Plugin Conflicts: There is no denying that the incompatibility between themes and plugins causes the WooCommerce product gallery to stop working.
How to fix the WooCommerce product gallery not working?
With the two most common issues as above mention, we can know the reasons for this. So, in this blog post, we will guide you on fixing the WooCommerce product gallery not working due to these causes. Now, let’s take a look at the solution for each cause, and you can apply it to your site.
1. Fix product gallery not working due to the update
As we mentioned above, an update of WooCommerce might be one of the reasons to make your product gallery not working. In some cases, it will not work on updating an update, so the below is what you could follow to see how to deal with it step by step.
Step 1: Deactivate and delete the plugin
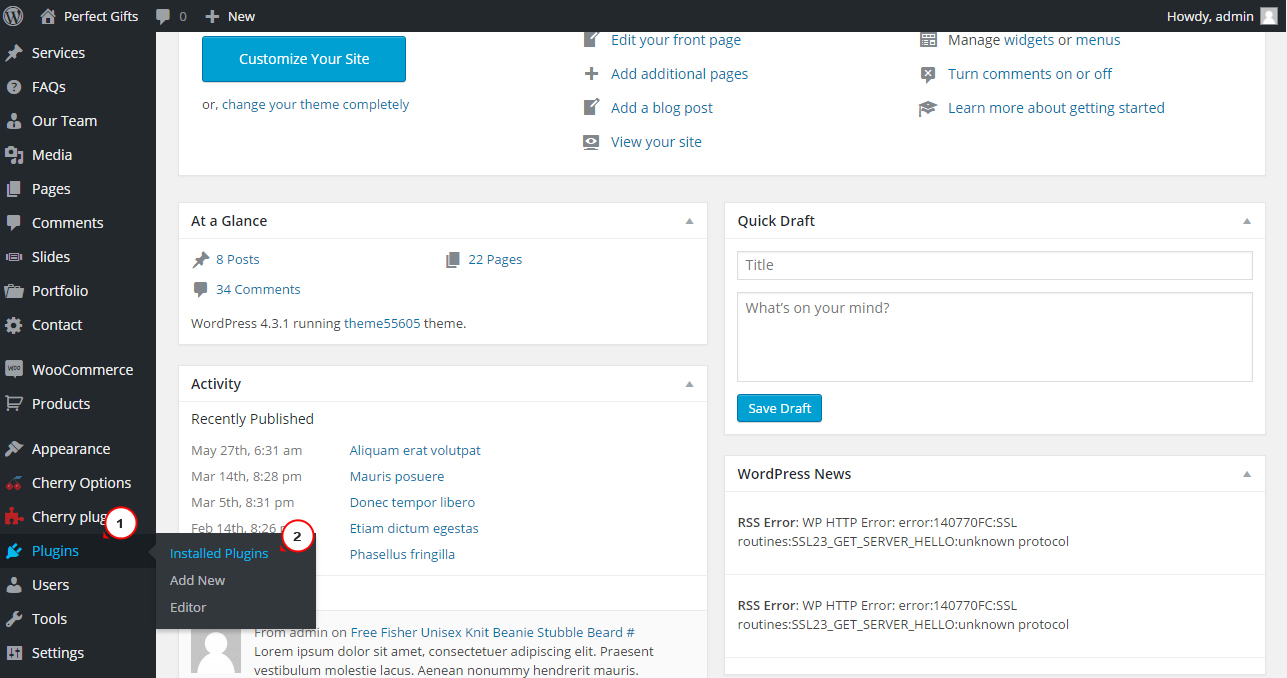
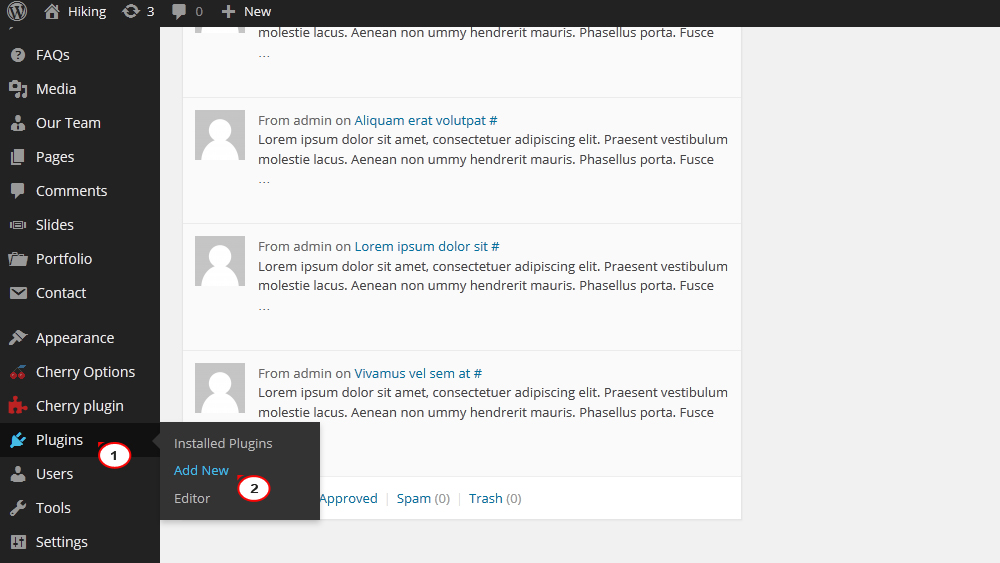
In this situation, your task is to deactivate as well as delete the plugin Cherry WooCommerce Package. As you can notice that the image will not change as you hit on the thumbnails. Now, it’s time to head to your section “Plugins” in the WooCommerce dashboard and click on the section “Installed plugins”. Checking out the below screen will help you follow better:
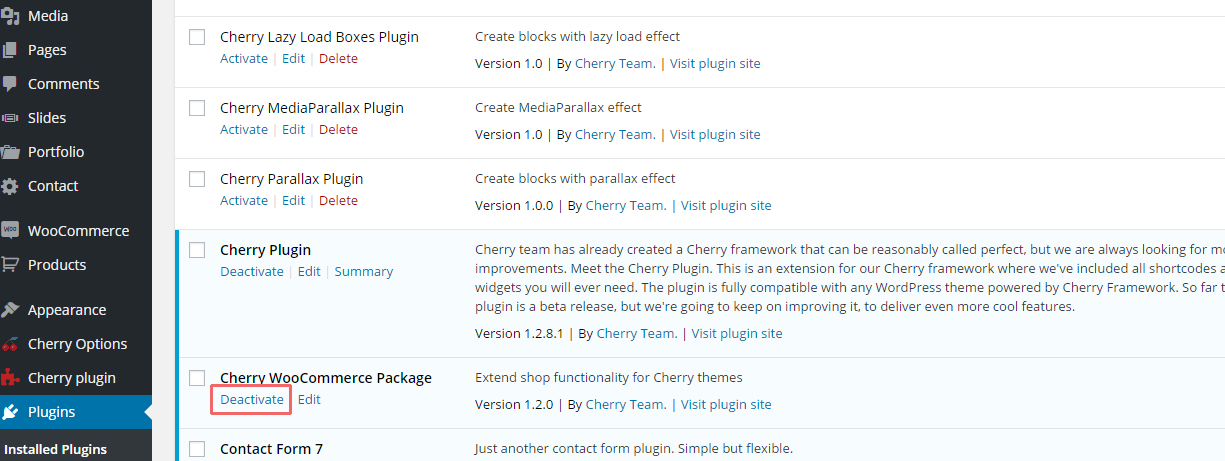
When you are here, you are required to find the plugin Cherry WooCommerce Package. Scroll down a bit, you can encounter it. Under its title Cherry WooCommerce Package, you will see two options “Deactivate” and “Edit”. As you are dealing with the product gallery not working, you need to choose the option “Deactivate” to get this plugin deactivated.
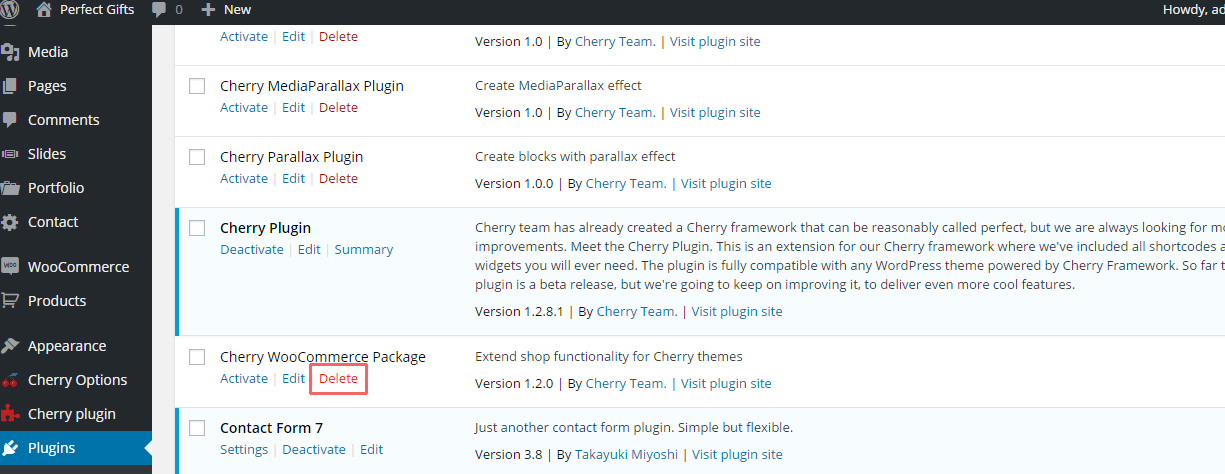
After deactivating this plugin, your next task is to delete it. As soon as you deactivate it, another option named “Delete” will appear. That is when you hit on it to delete the Cherry WooCommerce Package.
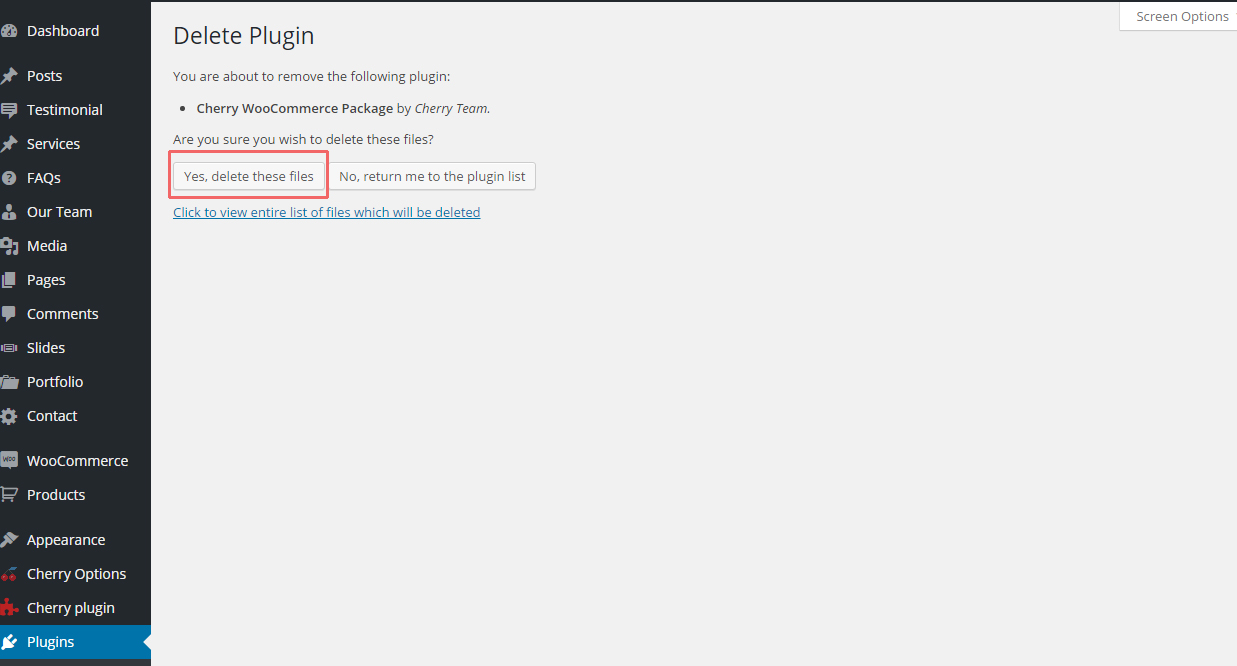
Next, WooCommerce will ask you one more time about deleting this plugin or not. When you are here, to make your activity meaningful, do not hesitate to click on the section “Yes, Delete those files”.
Step 2: Download the updated plugin
In the first step, you have done deleting the current plugin Cherry WooCommerce Package. Now, you will need to download the updated plugin. It is a must thing to do to make this updated plugin compatible with the updated WooCommerce version.
To download it, you will visit the official site of Cherry Framework to download the package to your computer. The address is http://www.cherryframework.com/. After you finish downloading it, the next thing you can implement is to unzip the CherryFramework.zip package that you have downloaded. Next, remember to follow the folders “includes/plugins” for locating the archive “cherry-plugin.zip”.
Step 3: Upload the downloaded plugin
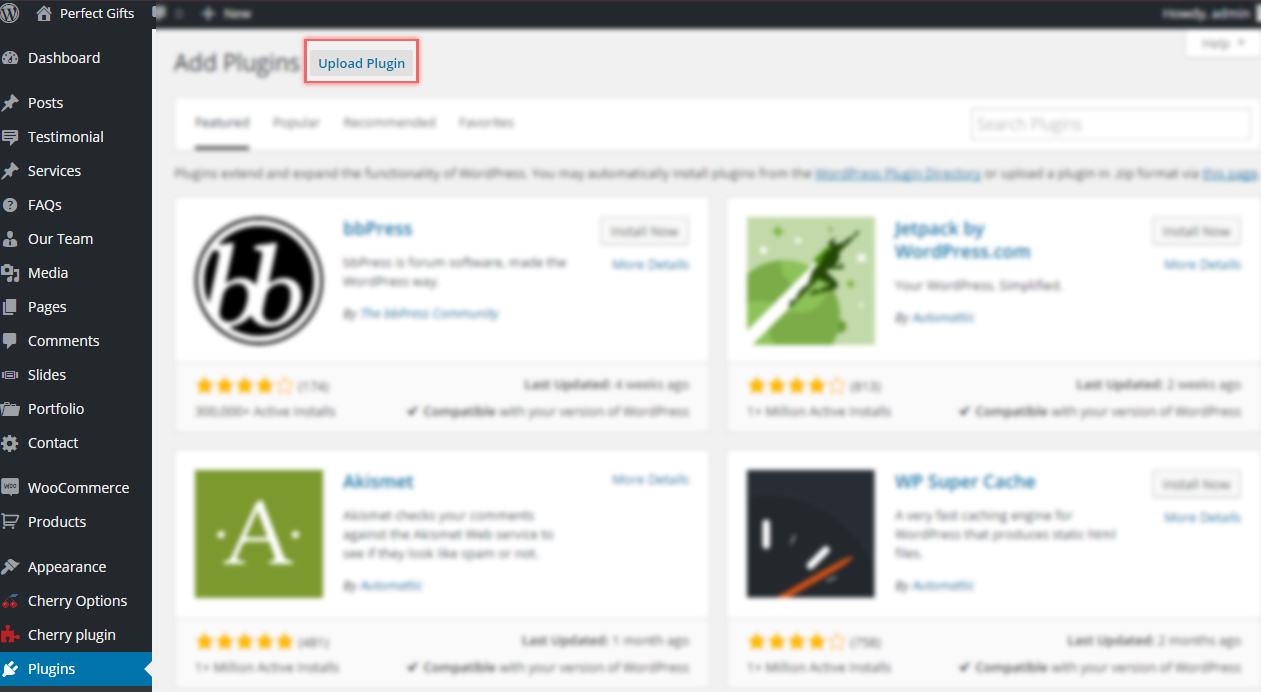
In the second step, you are done downloading the updated plugin. So, proceed to the next step for uploading it. Here, you will hit on the section “Upload plugin”.
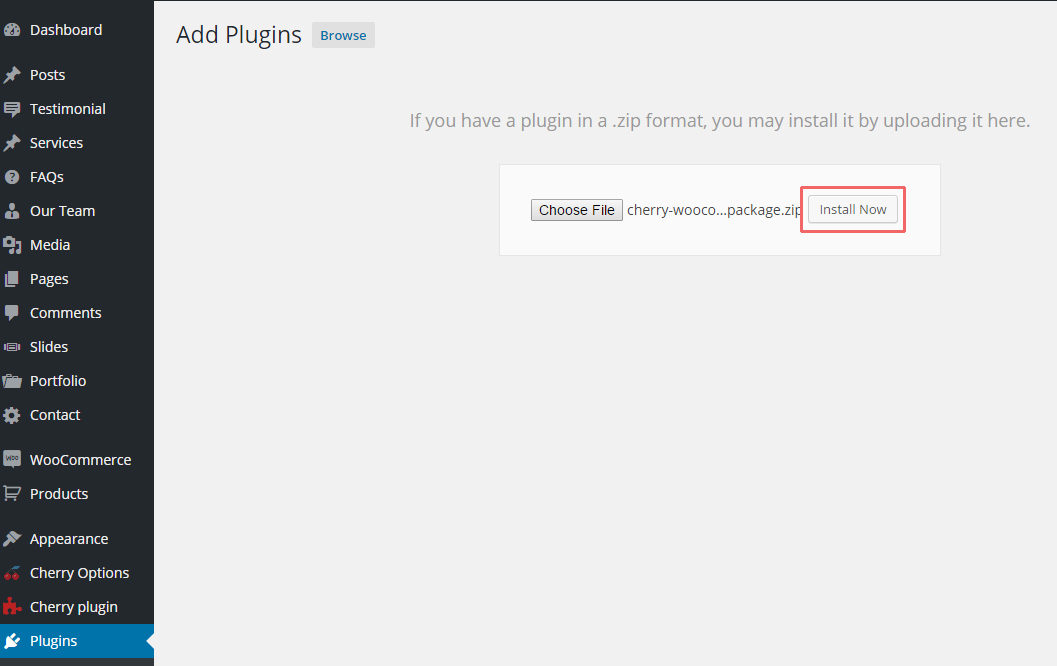
And you need to choose the downloaded file for installing the plugin.
After that, the plugin needs to be activated for use.
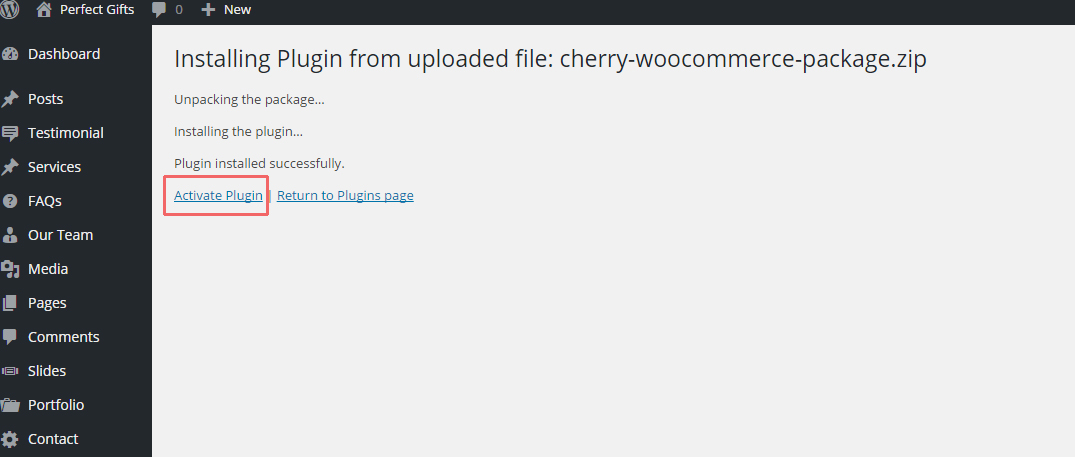
The final thing to do is to refresh the page and congratulation you have successfully fixed the WooCommerce product gallery not working due to updating WooCommerce. So, if you have updated to the latest version of WooCommerce and found that your product gallery stopped working, this solution is perfect for solving the issue.
2. Fix product gallery not working due to conflicts of theme and plugin
In case, you do not update your WooCommerce, and your product gallery does not work. Do not hesitate to take the conflicts of theme and plugin into account. In several situations, the incompatibility of plugins, themes, and your site causes the product gallery not to work. Hence, it is a nest to test if there exists any conflict among them. In doing so, you could be able to cope with it easily.
Step 1: Delve into a conflict test
This conflict is often known as a malfunction or error resulted from two code parts displaying conflicting signals. Let us take an example for you to understand deeper. Plugin A will display the signal of putting the store’s order in a status named “Completed” while plugin B aims at preventing this status from happening.
Plugins and themes come with extra features and functionality. This indicates that there exists more code currently running on the WooCommerce site. As a result, your site could be subjected to a higher risk of being incompatible. If you are using plugins within WooCommerce and WordPress, you could be guaranteed compatibility between plugins, extensions, and themes. However, the thing is that the 3rd party products can cause your WooCommerce not to work properly and perfectly with WooCommerce software. That is why it is a must to take a conflict test to figure out the problems and solve them better.
Step 2: Implement the backups & staging
Do not forget to create a backup and staging before testing to see if there is any conflict. So, now you should backup your site immediately. Deactivating or reactivating your plugins will not cause any issues. And a great backup is time-saving and energy-saving, to be honest.
As there are plenty of hosting providers that come with a perfect backup plan. However, in this article, you could follow how to back up your site with the use of Jetpack Backup.
There is no denying that Jetpack Backup is one of the most amazing tools to help you restore your WooCommerce site. To use Jetpack for restoring data, you should seek to serve credentials from your hosting provider. There are several ways to perform this activity with Jetpack as below:
- Restore to a specific event
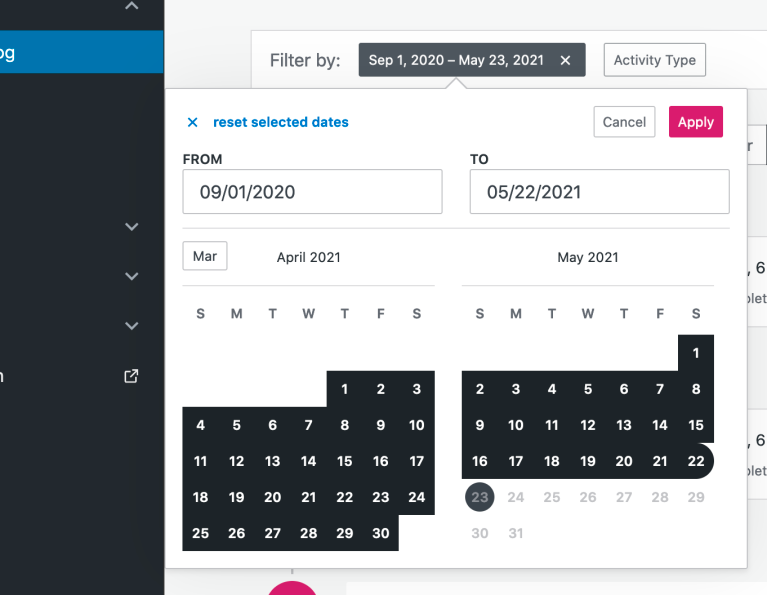
If you choose to restore to a specific event, you will need the real-time solution for backup, including Jetpack Complete, Jetpack Backup Realtime, and Jetpack Security Realtime. First, you need to open the activity log. Then, your next task is to apply the “Filters” for searching by selected days to find which event you will restore.
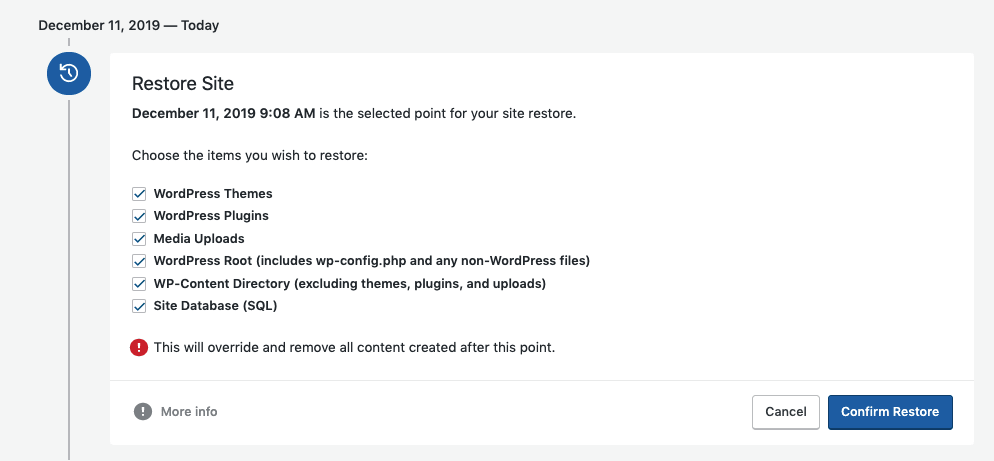
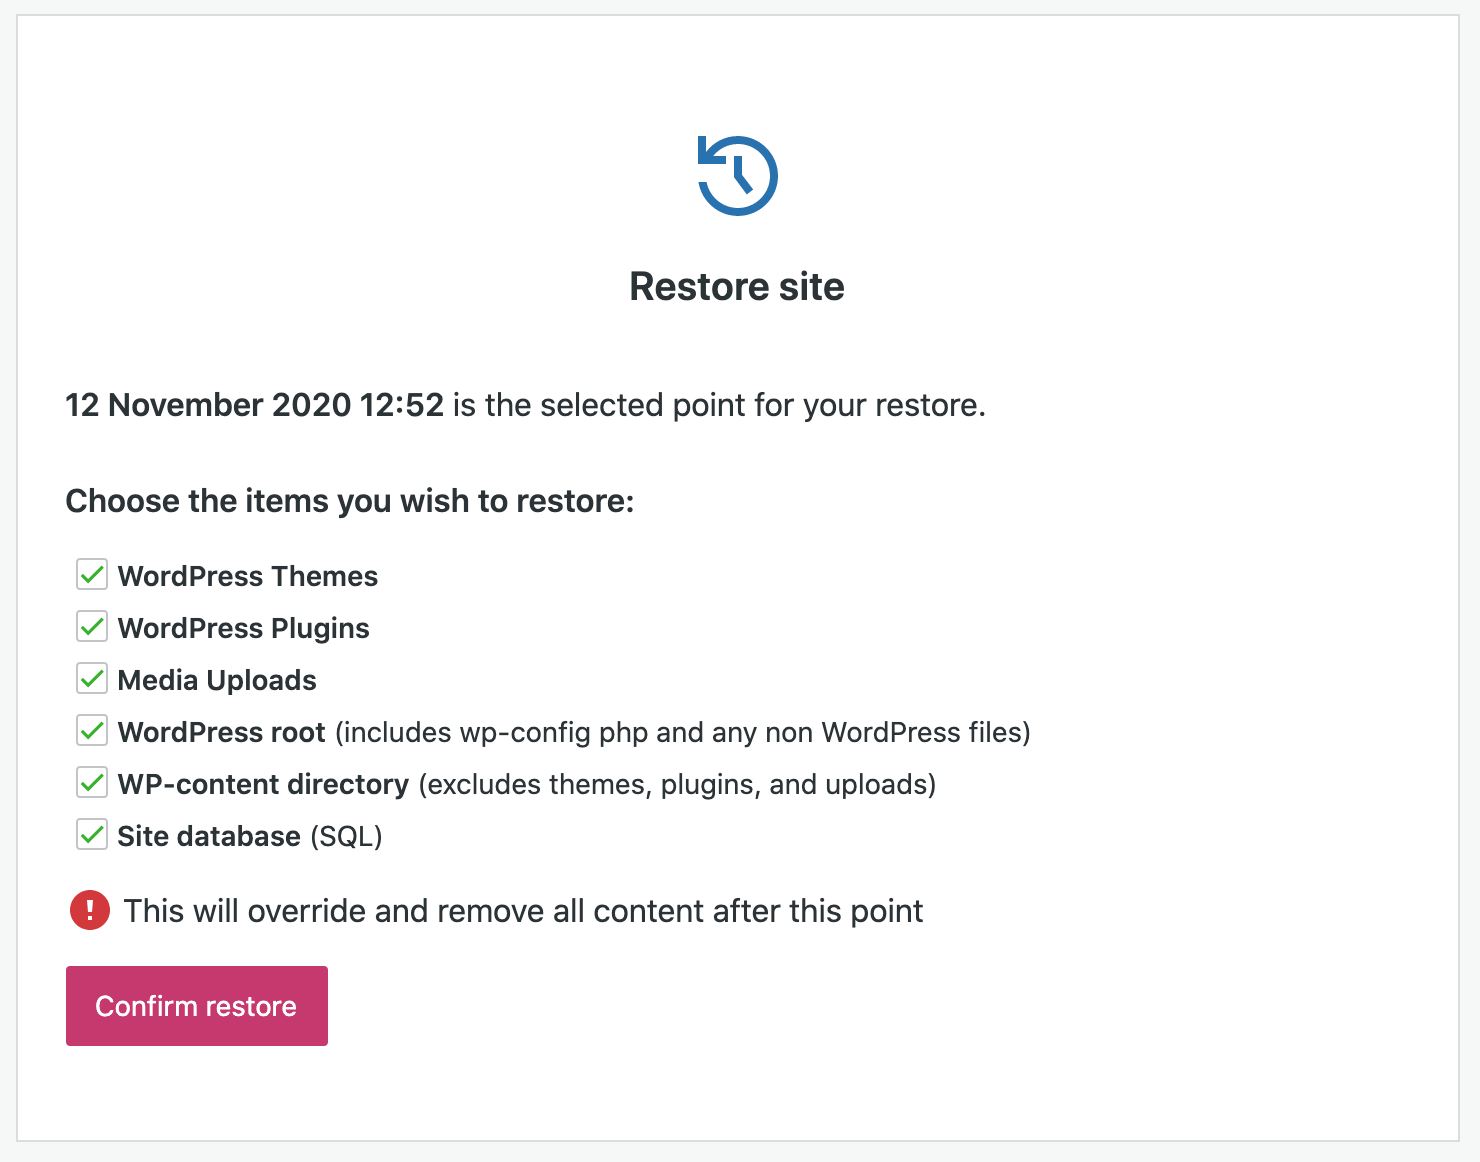
After that, there is a need to choose the icon ellipsis to select “Restore to this point”. This will open the dialog box named “Restore Site”.

When you are here, you have to pick up the option “Confirm Restore”.
Then, the restore process can begin and you receive the email update related to the restoring progress.

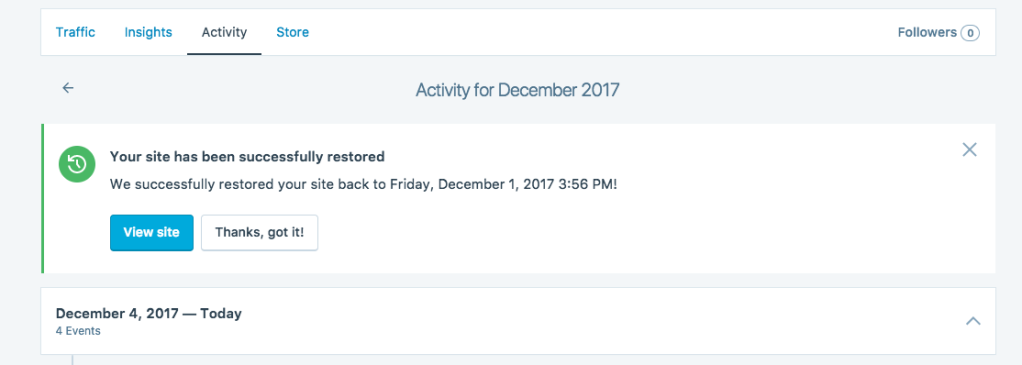
As soon as you have completed the restore, one confirmation message will be displayed as below:
It is time to hit on the button “View Site” for viewing your website restored to a particular event chosen by you.
- Restore to a specific day
Besides restoring to a specific event, you can select to restore your WooCommerce website to a specific day. In doing so, you will open the Backup page by heading to your Jetpack and choose the section “Backup”. As you are done, you can notice the most updated backup of your website. Or you can see your scheduled time for your upcoming backup in case your site has not completed a backup today.
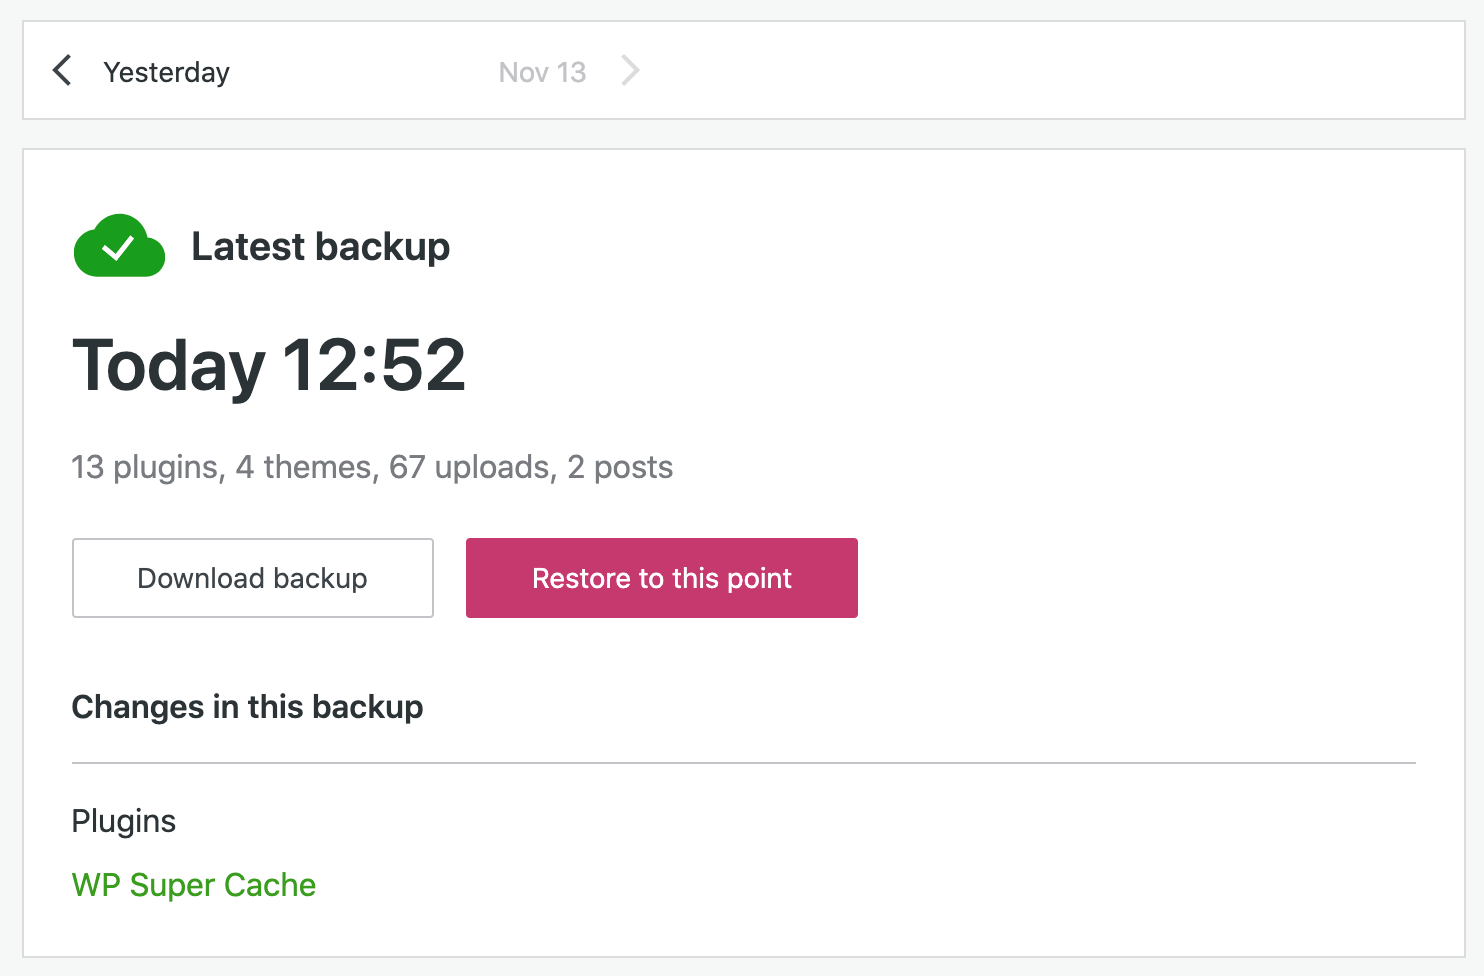
Proceed to the next step by using your navigation bar for seeking what day you are about to restore your site. Each day could display the time for the most updated backup in that day, coupled with any modifications included in the backup.
After finding what day you would like to restore your website to, you need to choose “Restore to this point” for restoring to your most up-to-date backup point on that day. Choose which items you are fond of restoring, then hit the button “Confirm Restore”.
In case you choose one among the Real-time solutions for backup, the other events on that day could be listed under your latest backup. Hence, you can restore to another point of that day in case of your need and requirement.
- Download the backup
If you are keen on downloading your backup, you also need to open the activity log. Next, you will apply the filters for searching by selected days.

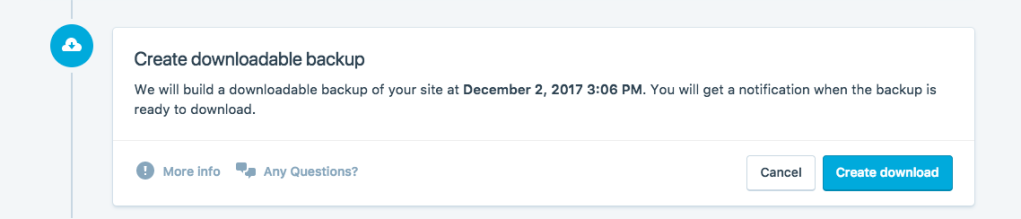
After choosing a particular day, you will be required to seek the event you are about to use before clicking on the icon ellipsis with three dots. Here, take no hesitation to select “Download backup”.

Next, you will be taken to a page named “Create the downloadable backup” where you need to hit on the button “Create download”.
Then, you are capable of following the downloading creation progress by navigating to your activity log top.

If everything is done, you will notice one confirmation message. In this section, you could use the button “Download” for downloading the backup. Along with that, an email also includes a link that you could use for downloading the backup.

When you have finished downloading your backup, you can apply that for restoring your site manually.
Step 3: Testing and deactivation
When you completely back up your site, you can feel safe for the testing and deactivation process involving theme and plugin conflicts. Several things require you to do for troubleshooting the plugin and theme conflicts are as below:
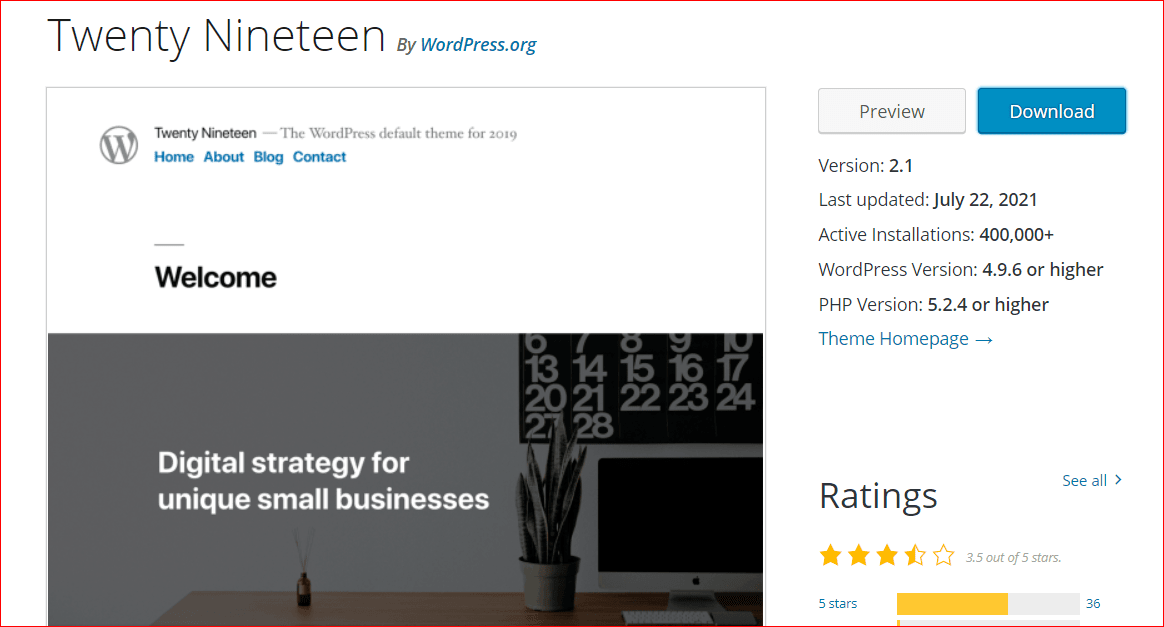
- Switch to the default theme in WordPress
To have smooth testing and deactivation, you are highly recommended to switch to the default WordPress theme like Twenty Nineteen to check if any problem persists. In case of yes, you could move on to the next steps. In case not, this means that your theme might be resulting in the problem. Therefore, you can contact the theme author to require them to deal with it, or you could change the theme.
- Deactivate every plugin temporarily
The second thing to do is temporarily deactivate all your plugins ( not including WooCommerce and its extensions).
- Test to check whether the conflict exists or not
After that, you need to check if there is any conflict that still exists. To test it, you need to determine what kind of conflict that you are experiencing. In case that conflict happens when you browse your Dashboard or site, you need to penetrate a similar location. The two examples are features that do not work on your product edit screens or a button that does not show on your cart page.
The second case is that if that conflict occurs after a particular process, you have to follow as well as recreate these identical steps. The two examples are an order marked with the status “On Hold” rather than “Complete” after your product A can be paid for or added and an error that shows when adding two items to the shopping cart.
The third case is that if that conflict does not exist anymore, the plugins, extensions, or themes you have deactivated in the previous step yield the conflict. In case that conflict still exists, you should see the below must-use & drop-in and failed conflict tests.
Now, it is a critical task. You will need to determine what plugin could cause the conflict. In doing so, you can reactivate all plugins separately and in succession. What’s more, testing one more time after every reactivation is also a good method to go. In terms of the process-related conflict, it means that you need to recreate a similar procedure again and again.
Step 4: Rely on several helpful tools
If you want to fix your product gallery not working after the testing and deactivation process, it would not be complete without replying to several helpful tools. This is to say, these tools will be a helping hand to heal you deal with these problems. One of the top recommendations is to use Health Check by WooCommerce.
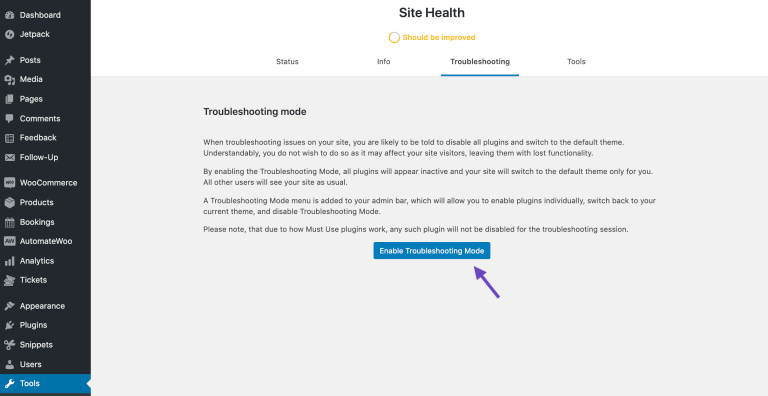
After installing and activating this plugin, you will go to the section “Tools” and choose “Site Health”.

After that, as you want to troubleshoot the issue, your job is to head to the section “Tools” where you will click “Site Health” as well as “Troubleshooting”. Next, you need to choose the mode “Enable Troubleshooting”.
As soon as you are in this mode, you are capable of controlling what plugins and themes would be enabled in your troubleshooting session. At first, all plugins must be disabled. So, for testing WooCommerce, you will navigate to the section “Plugins” to hit on “Enable when Troubleshooting”.

Then you can view your site, you will notice the certain session in which Heal Check sets your plugins and theme. It will be normal when being viewed by visitors to your site.
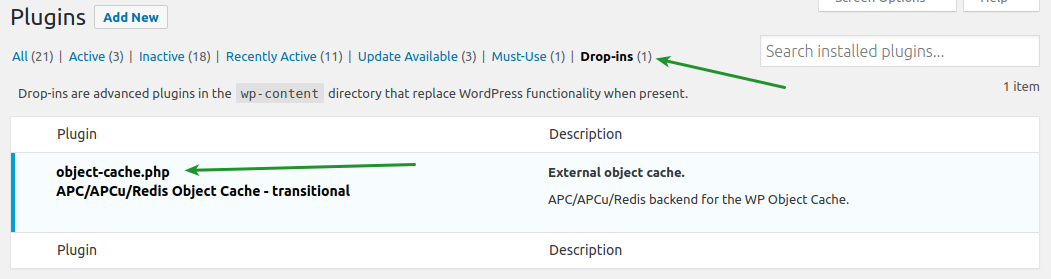
Step 5: Must-use and drop-ins
It is also worth paying attention to the must-use and drops-in plugin. If they are in your list of plugins on several sites, they could not be directly deactivated yourself. And they can become a cause for this conflict.
As you know that several plugins will be installed by a different plugin. And the function could be the helper plugin. Hence, when you do any conflict test, deactivating the other parent plugin means you also deactivate those ones. If this conflict persists when performing your tests, it could have resulted from a drop-in installed by the host. In such cases, you should contact the hosting company to seek help for deactivation.
Conclusion
If you have difficulties with your WooCommerce product gallery, you should fix it as soon as possible to endure a smooth operation for your online store. Or else, you could suffer from a great loss of sales within a short time. Hope you could find our article helpful, then you can follow easily to fix the unwanted problems related to your product gallery in WooCommerce. Share this with those who are concerned and stay tuned for our upcoming great articles.


