
How to Upload Files During Checkout on WooCommerce

Shoppers in most eCommerce businesses do not have to submit any files. However, for various reasons, certain businesses may need consumers to submit certain papers (ID, passport, driving permit, etc.). If this is the case, then an upload files button during the checkout phase is more important than ever.
Fortunately, today’s article is going to solve your problems. We will guide you through a tutorial on How to create a WooCommerce upload file during checkout using both a plugin and manually. Along with this is a list of potential plugins which can help online store owners to fasten the process. Keep reading to find out more!
How to Upload Files During Checkout on WooCommerce
Before getting into the real matter, it is recommended that online merchants should create their own child theme for the WooCommerce store. In this way, if there is an automated update while setting up, your customizations will remain the same.
The tutorial today might take you quite a while and require you to keep a close eye on each step. Therefore, we have divided it into small basic steps so that you can easily follow:
Step 1: Download the plugin
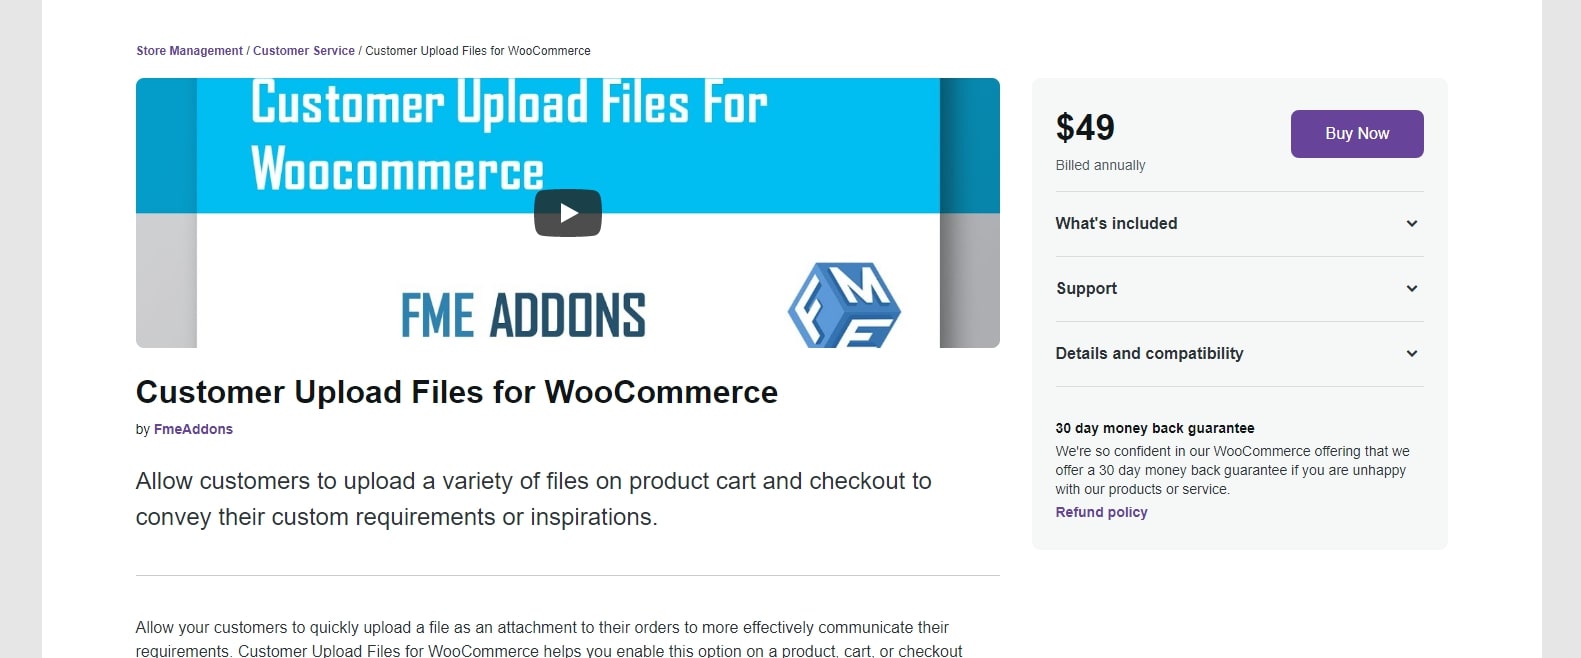
First of all, it is required that you have already installed a plugin specifically for WooCommerce upload files purposes. If you have your own choice, you can skip this step. On the other hand, you can quickly download a plugin called “Customer Upload Files for WooCommerce” just like us and go to Plugins > Add New to upload the file:

Wait for a few minutes until the installation phase is complete, click on “Install Now” and “Activate” to move on to the next step!
Step 2: Add uploading rules
When you navigate to the WooCommerce > Settings > Upload Files from your WooCommerce Dashboard, there are two sections for you to make decisions on. The first one is called “Add Rule”, where all the settings related to your rules of uploading files during checkout is displayed, including:
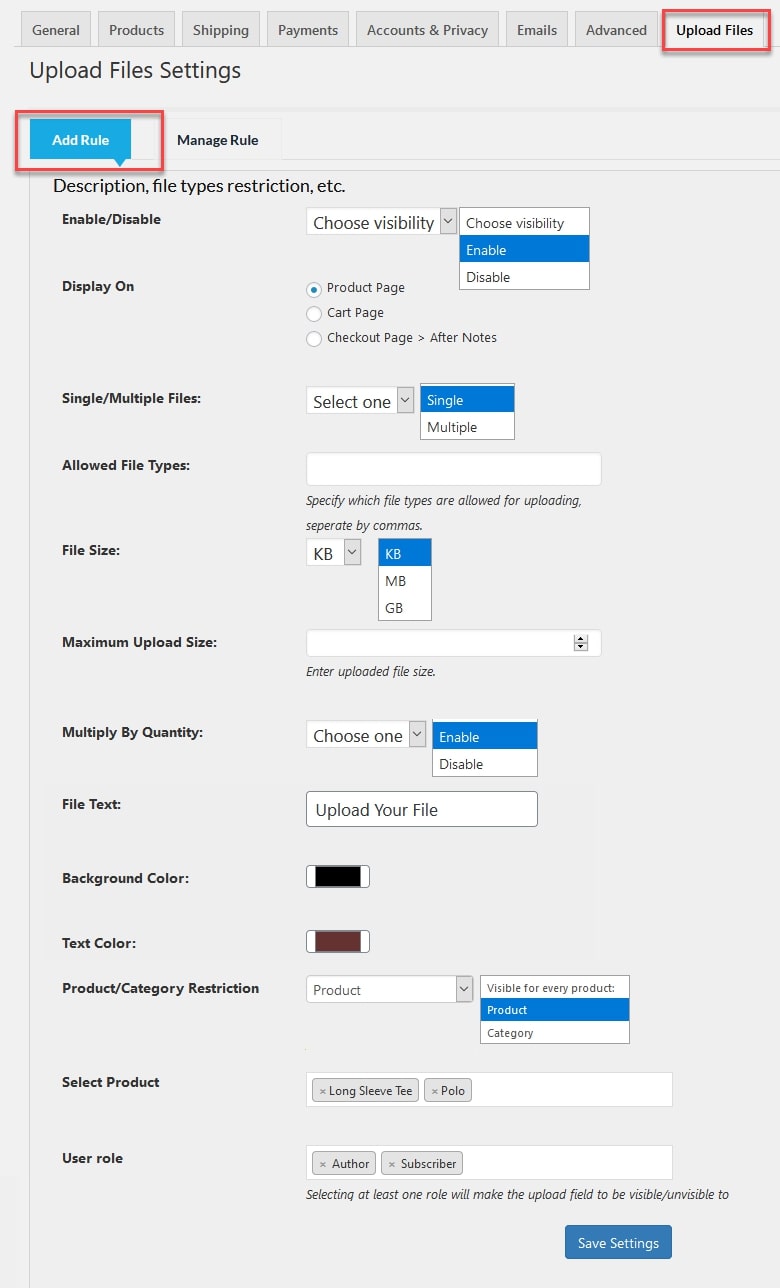
- Enable/Disable: Whether to apply the rules or not
- Display On: for this one, you will be ticking on the “Checkout Page > After Notes” selection - where your WooCommerce upload files features would be available
- Single/Multiple Files: Enable single or multiple upload options for files
- Allowed File Types: limit the types of files that your consumers can upload
- File Size: Choose KB, MB, or GB
- Maximum Upload Size: Enter the maximum file size to be uploaded
- Multiply By Quantity: Enable it to multiply product quantity upload charges
- File Text: edit the “Upload File” button text such as “Choose File” or any other way of your choice.
- Background Color: change the background color for that button to fit your website’s style.
- Text Color: then we change the text color.
- Product/Category Restriction: Choose goods, categories, or all products, allow the upload file option
- User role: Choose the user role if you only offer certain user roles for this facility
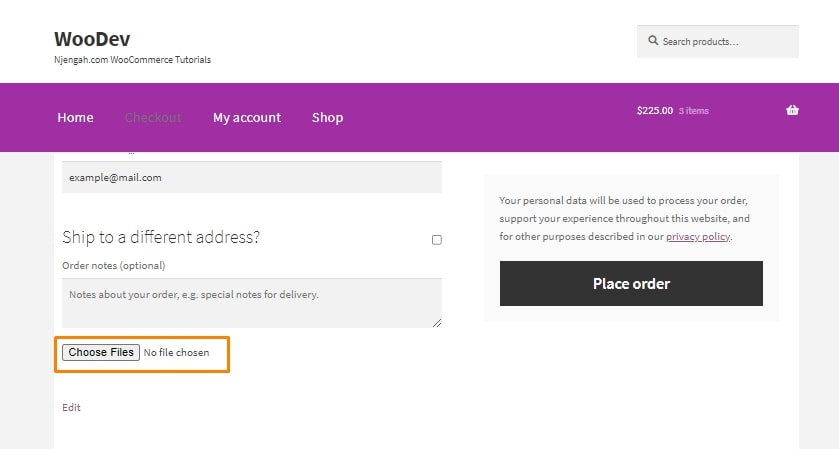
There you go, your WooCommerce upload files feature has been available on the Checkout page right at the moment you click on “Save settings”!
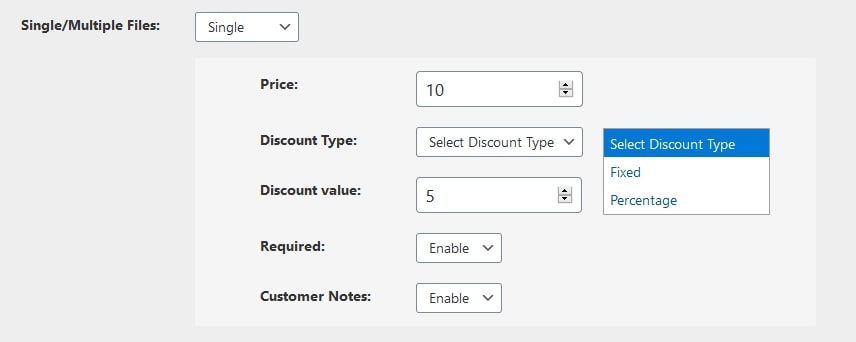
Step 3: Change the settings
For each file upload, you may define the pricing and also offer a fixed or % discount. Make the file upload necessary and let the customer note for the upload of each file:
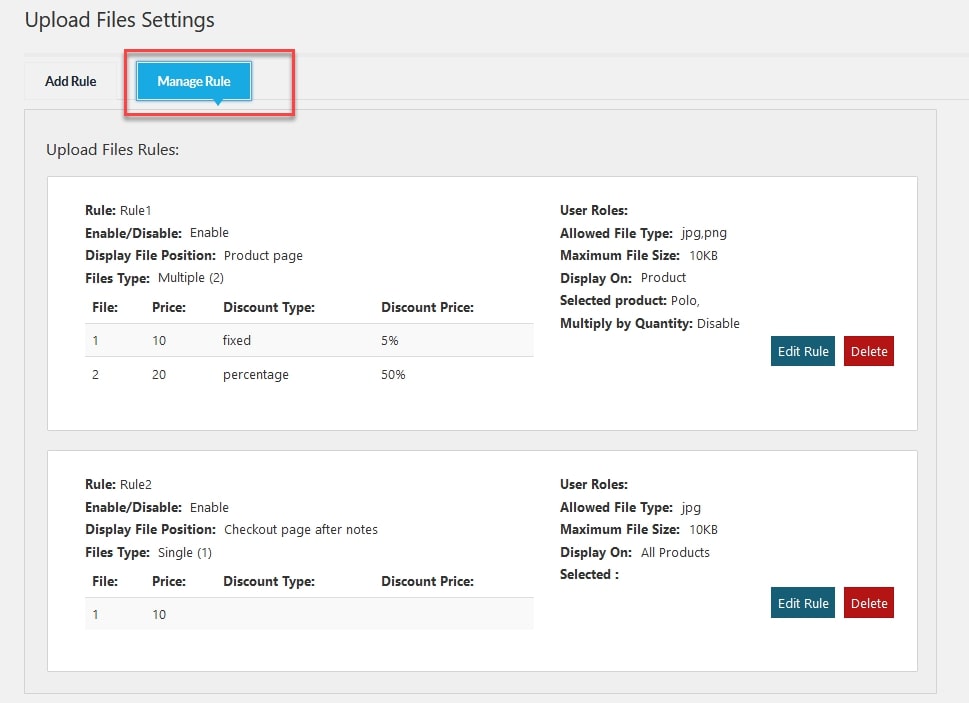
Step 4: Manage created rules
Scroll down a little bit and you will see the “Manage Rule” section, in which you can view all the rules with full information made by you. The rules may be modified and deleted from here:
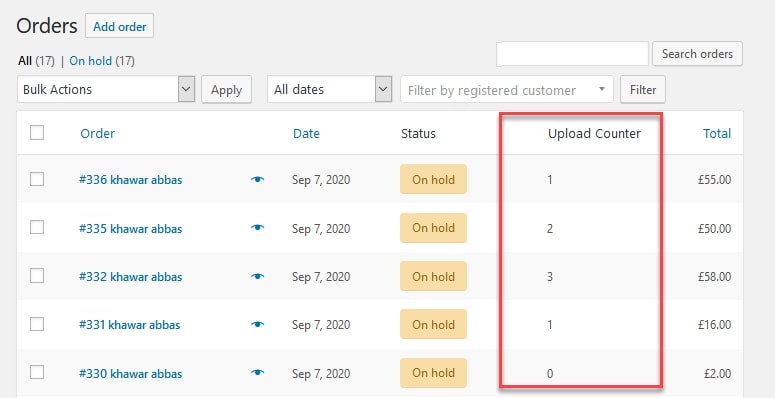
Step 5: Keep track of uploaded order
When you go to the WooCommerce > Orders page, a new column called “Upload Counter” will be in the order table. This column allows you to know which customer has submitted the file and the quantity of files:
Step 6: Processing orders
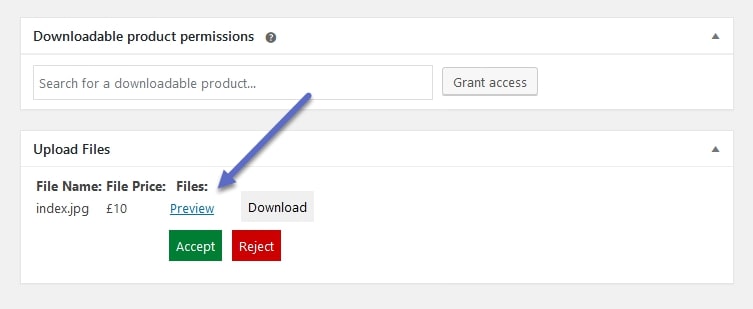
You may see the uploaded client files by accessing each order, approving the submitted files or disapproving them:
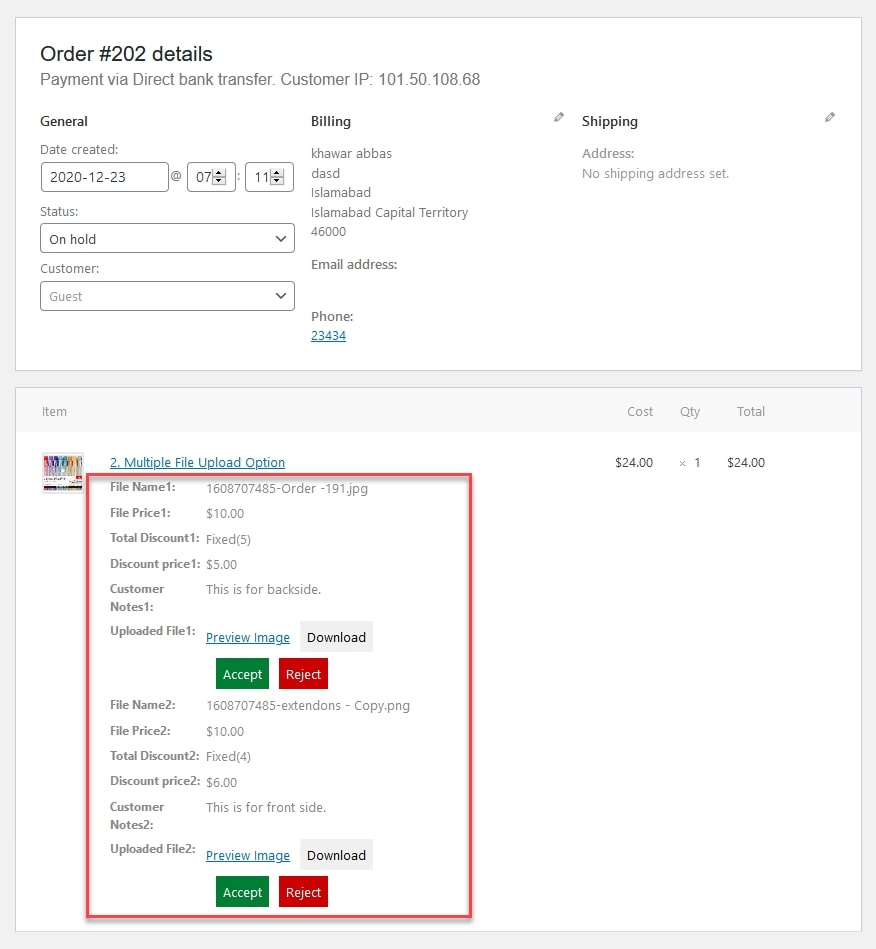
When consumers upload the file from the product page, the uploaded file is shown in the “Item” area:

If the client uploads the file from the cart or checkout page, it will be shown in the “Upload File” area at the bottom of each purchase:
Step 7: Manually adding the snippet
There is another way for you to add a WooCommerce upload files button to your Checkout page. However, for these manual settings, you need to have a decent level of coding knowledge. From your WooCommerce Dashboard, locate the Appearance Menu > Theme Editor selection on the left-hand side of the screen. After that, look for your functions.php file and paste in the following source code into your theme file:
<?php
// for upload image
add_filter( 'woocommerce_shipping_fileds', 'njengah_filter_upload_shipping');
function njengah_filter_upload_shipping($address_fields) {
// $address_fields['file_upload']['required'] = true;
$address_fields['file_upload'] = array(
//'label' => __('Upload your ID', 'woocommerce'),
'required' => false,
'class' => array('form-row-wide'),
'clear' => true);
return $address_fields;
}
//Using this function to show Upload field button during checkout
function njengah_file_field(){
$uploadFile = "";
$uploadFile .= '<div id="upload_CNIC_image">';
$uploadFile .= '<input id="file_upload" name="file_upload" type="file" multiple="true">';
$uploadFile .= '<span id="">';
$uploadFile .= '</span>';
$uploadFile .= '</div>';
echo $uploadFile;
}

add_action('woocommerce_after_order_notes', 'njengah_file_field');
Don’t forget to “Save” your modifications and take a quick look at the results on your Check Out page:
Top 4 plugins for WooCommerce upload files during checkout
As we have mentioned previously, it is advisable for online retailers to install a plugin in order to add a WooCommerce upload files button during their checkout process. For this reason, we have gathered 4 best plugins for you to choose from. Based on the price, efficiency and customer satisfaction, we hope that this list will help you to pick out the best one for your online business:
Customer Upload files for WooCommerce
Customer Upload files for WooCommerce allow customers to upload product, cart, or checkout files from the product page. This application includes many file handling settings which allow you to regulate the input received from users. You may allow numerous file uploads as an admin or limit the quantity or file type. You may also accept or refuse an upload and notify your shoppers through email.
Their other key features include:
- Allow consumers to upload product, cart or checkout files
- Allow clients to preview, remove, and re-upload a file
- File approval email alerts
- Upload several files, however the owner may impose a restriction on file size, quantity and kind
- Charge consumers for uploading file
Flexible Checkout Fields WooCommerce
Flexible Checkout Fields WooCommerce is also a promising plugin that you can try out. Up to the present, it has attracted up to 60,000 users every day with tons of positive reviews from customers. Not only does it offer online merchants the ability to adjust their Checkout page with WooCommerce Upload Files feature in any style depending on their preferences but also packed with a wide range of other helpful features:
- You can rearrange built-in WooCommerce fields and custom ones you may add with the drag and drop editing system.
- Easily arrange custom fields on your Checkout page to make it more appealing to the consumers’ eyes.
- Feel free to restrict and set up your upload files button from file types, sizes to button colors, texts and so on.
Checkout Files Upload for WooCommerce
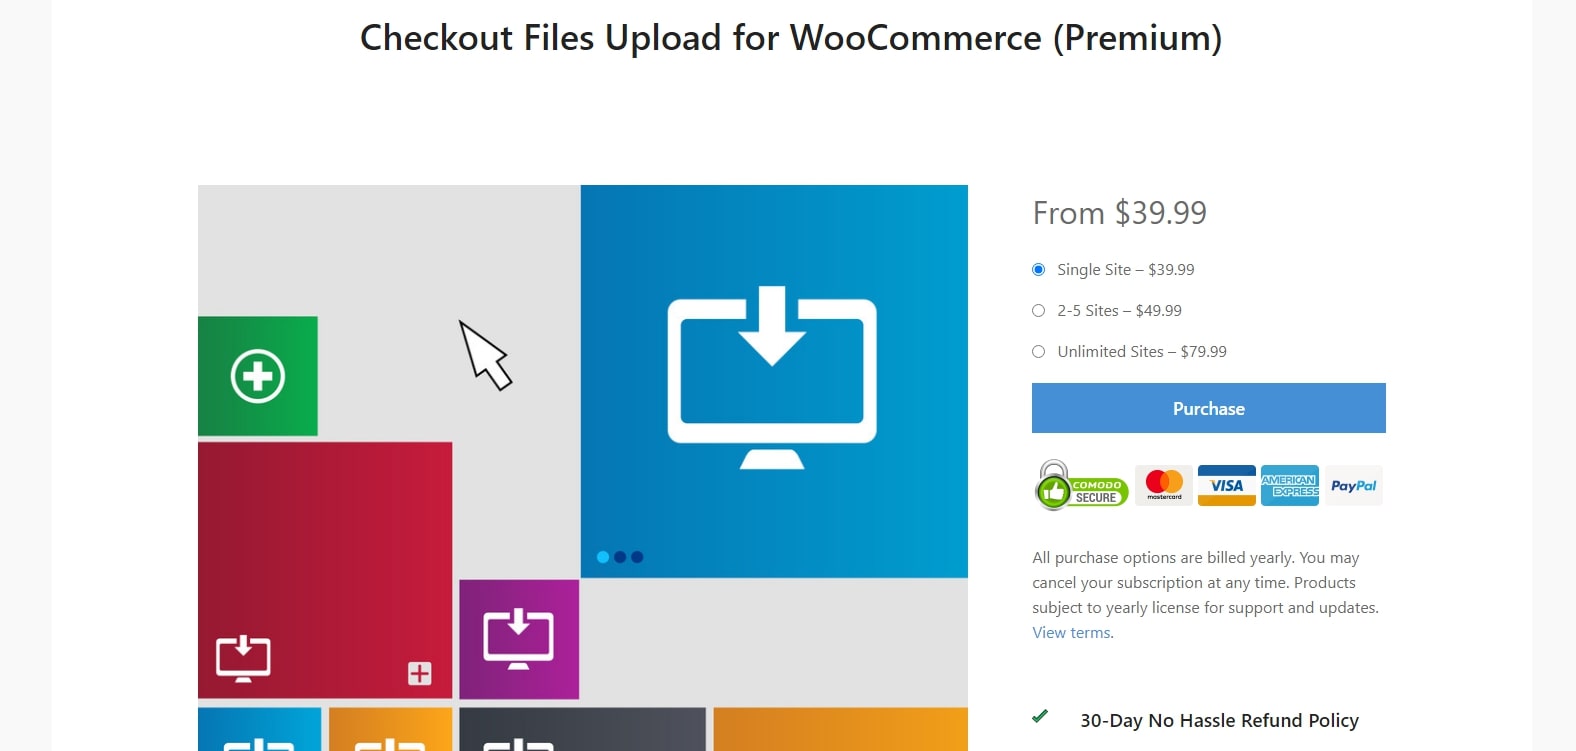
Checkout Files Upload for WooCommerce by WP Wham allows consumers to submit files not only on the Checkout page but also either on the Thank you page or on their My Account page after checkout. This program provides all essential file handling settings, including establishing a maximum file size limit, number of files and even validating the picture dimension. The upload box may also only be restricted to the checkout page if specific items are in the basket. When the file is approved or denied, the client receives a notification email with the status information.
Some of its key features are:
- Limit number of files, maximum size, and even picture dimensions validated
- Set the appropriate location for the checkout button
- Field upload only when a linked product is in the basket
- Set personalized labels and messages
Checkout Manager for WooCommerce by QuadLayers
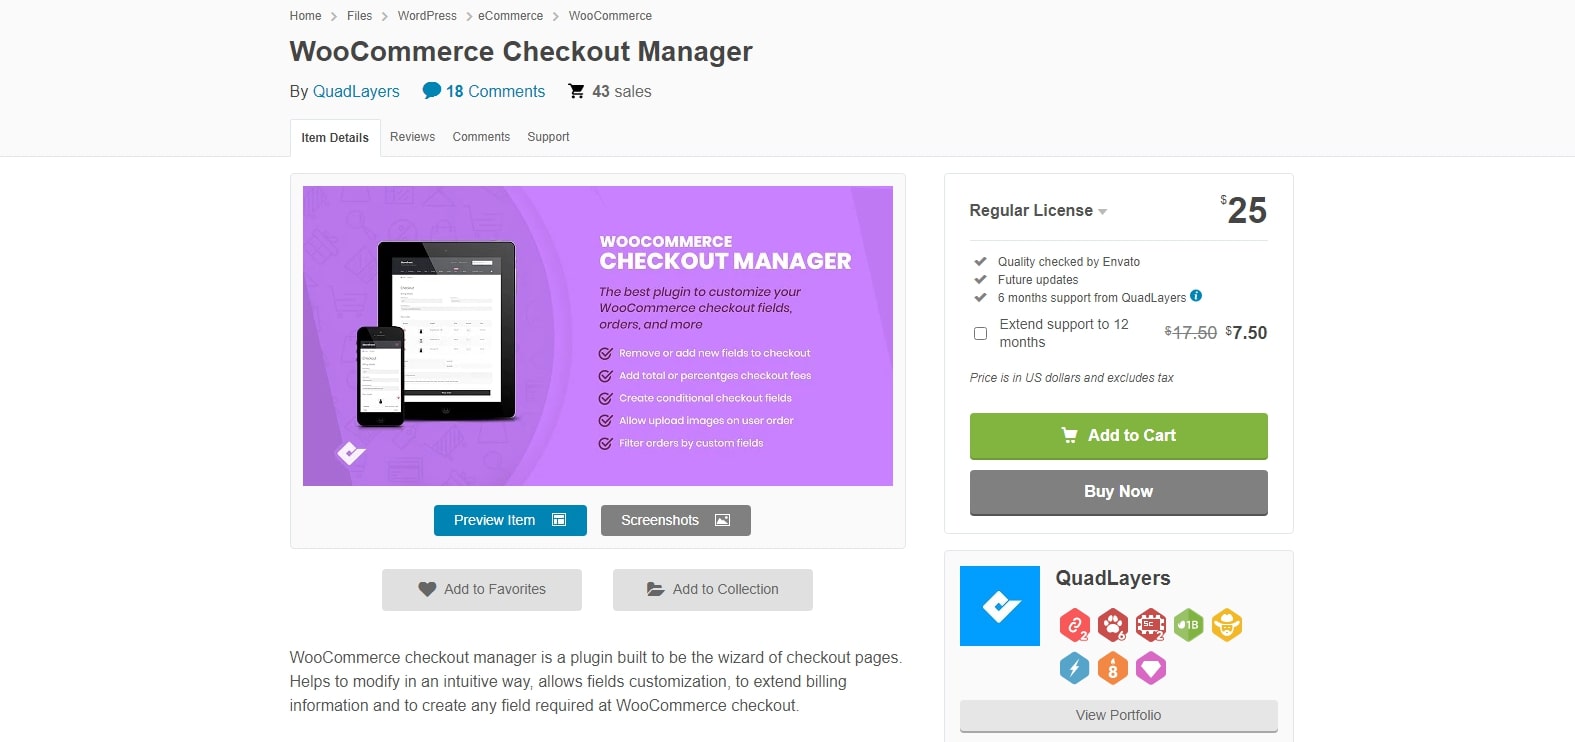
Last but not least, you can not miss out on the Checkout Manager for WooCommerce by QuadLayers. The great thing about this feature is that it offers additional features specifically intended to enhance your checkout page to increase conversion rates, such as adding, deleting or editing fields, fees, creating conditional fields, setting custom labels and more. You may enable your clients to upload files during checkout using this tool. You may specify many upload button settings such as text or label. In addition, only certain items or categories may be enabled.
Outstanding features:
- Add a button for uploading WooCommerce files
- Easy access for both admin and customers to submitted files
- On the checkout page, add, edit, change and reorder fields
- Customize text, labels, choices, look, and more fields
- Create conditional fields that only appear under a certain circumstance
Wrapping up
To sum up, if you are offering customizable products, then creating an upload field on your Checkout page becomes more necessary than ever. We hope that this article has answered your questions on How to add a WooCommerce upload file on your Checkout page and attract more customers in the long run.


