
How to Use Attribute to Search and Filter Products in WooCommerce

Attributes and Categories are information about the product properties such as size, color, gender, and so on. Add them to each product and offer extra data to allow customers to search for items by category and attributes. This article will support you using Attribute to search and filter products in WooCommerce.
Why upgrading your product filter will optimize your store?
In practice, just a small percentage of customers enter a store knowing exactly what they’re searching for. The majority are “just browsing”, looking at what’s available so they may evaluate their options.
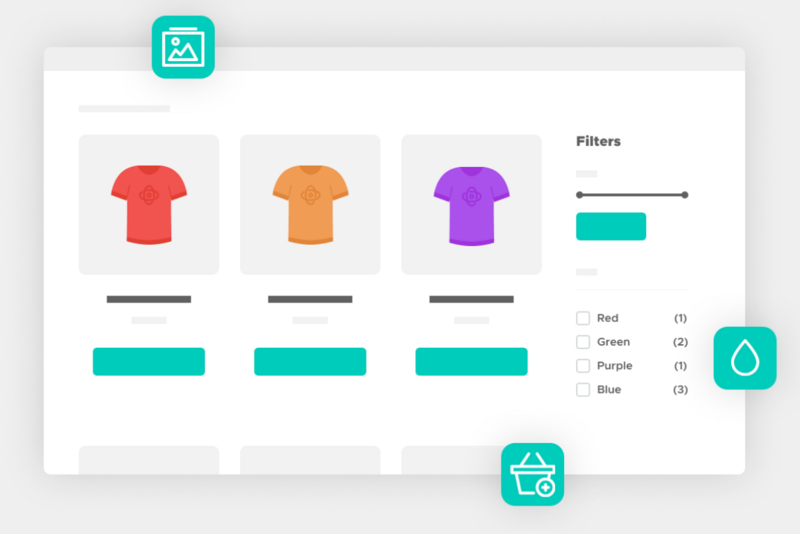
This is when product filtering works. Customers may use filters to look through hundreds of items and choose the ones that are right for them. Filtering may enhance your store’s customer experience, increase product views, and eventually increase conversions.
Firstly, product filters help customers find what they want more quickly. Filters narrow the options to navigate through dozens of useless goods and reduce distractions on the road to buy by allowing customers to limit down their selections by criteria such as size, color, and brand.
Secondly, filters also aid in the reduction of decision fatigue, resulting in boosting sales. According to Columbia University research, looking at the bigger display only resulted in a 3% purchase conversion rate, whereas looking at the smaller display resulted in a 30% conversion rate.
How to filter products by attribute in WooCommerce?
Step 1: Set up your filter widgets
You’ll need to activate the filtering widgets on your online shop before you can fully set up filtering by attribute. These widgets display on the shop’s sidebar, as tags, categories, and so on. Following these steps to enable these widgets:
- Go to Appearance > Widgets
- Drag & drop the Filter Products by Attribute widget into the sidebar
- Click Save
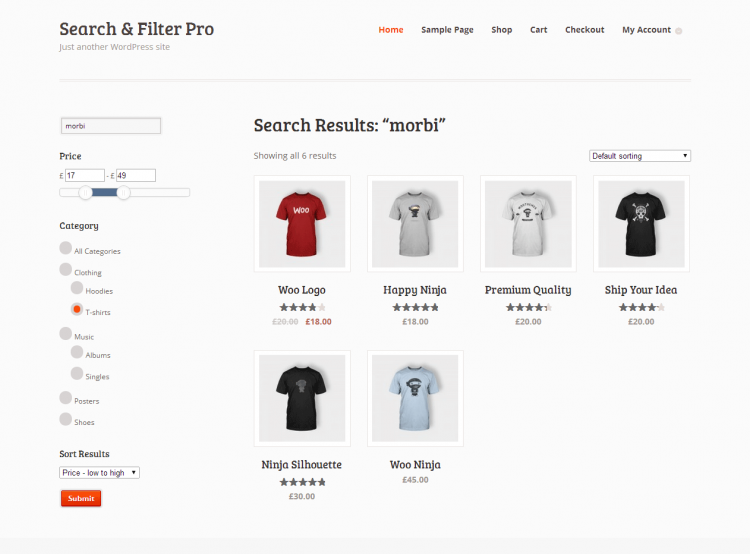
The filter products by attribute widget should now appear on your store’s sidebar. The appearance of this will be determined by the theme and settings of your shop.
Now that we’ve got the essentials in place, it’s time to improve this function by using a plugin to provide your clients with better results.
Step 2: Install Show Single Variations
When clients search for goods in your business, Show Single Variations provides them with better results. Customers will see relevant product photos instead of the generic parent product when filtering your products by attribute. To get started, you have to purchase the Show Single Variations plugin or use a 14-day trial version. It lets customers link a set of different product categories together based on attribute(s), while still managing them as distinct goods. All items will be neatly sorted by characteristics using an appealing swatches style, similar to how variation swatches for typical variable products look.
Then follow these steps:
- To upload a plugin, go to Plugins > Add New > Upload Plugin.
- Select the downloaded zip file, upload it, and then click Activate.
- You’ll need to input your license key when it’s been activated.
Step 3: Enable filter products by attribute
Set the product attributes in Products - Attributes section
After you’ve installed Show Single Variations, the first thing you should do is process your product visibility. For all of your goods and variants, this will specify the default visibility settings.
- Go to **WooCommerce > Show Single Variations.
- Click Process Product Visibility.
- The process will run and notify you when it is completed.
After that, you may adjust the visibility of each variant. When a buyer uses WooCommerce filter by attribute, you can choose which versions you wish to see as individual goods.
- Go to your variable product edit page of choice.
- Scroll down to the Product Data section and click Variations
- Expand the variation you would like to edit.
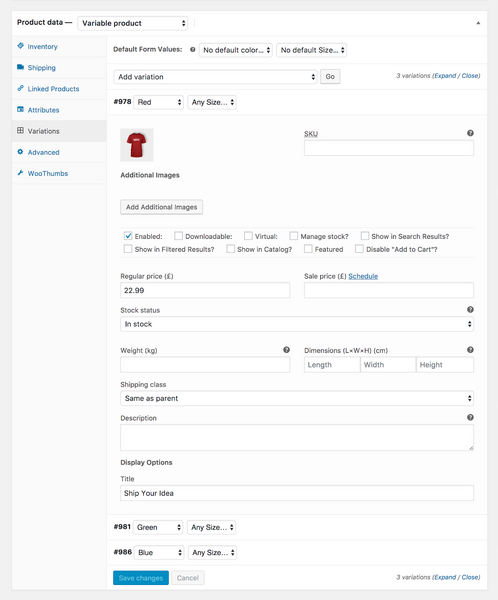
- Show in Search Results, Show in Filtered Results, Show in Catalog, Featured, and Disable “Add to Cart” are among the new checkboxes available.
- Click Show in Filtered Results

Then click Save Changes. When you go to your store catalog and filter by attribute, you’ll see the individual product/s instead of the parent product.
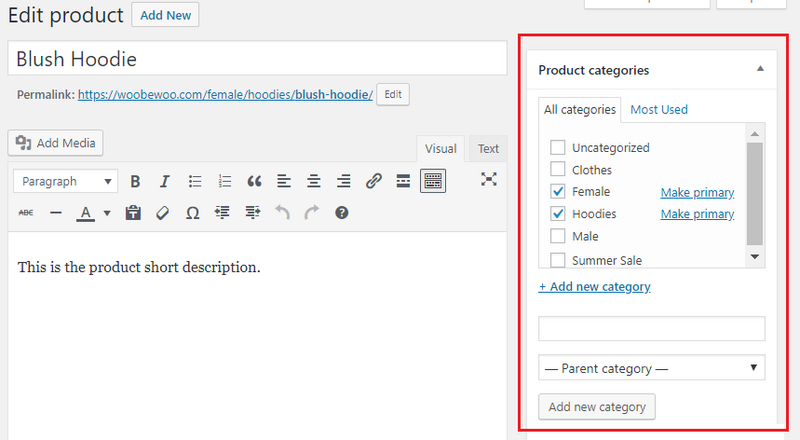
Set the categories in Products – Attributes section
To create a new attribute, enter the information in the Add new attribute field. Set a name (for example, color) and a slug, then hit the Add attribute button. The list will be expanded with a new characteristic. When you open a product, go to the Product data section, click the Attributes tab, and choose a new attribute from the drop-down menu: color, size, etc. Each characteristic can have one or more alternatives. Then, for each product you alter in this manner, save characteristics and update it.
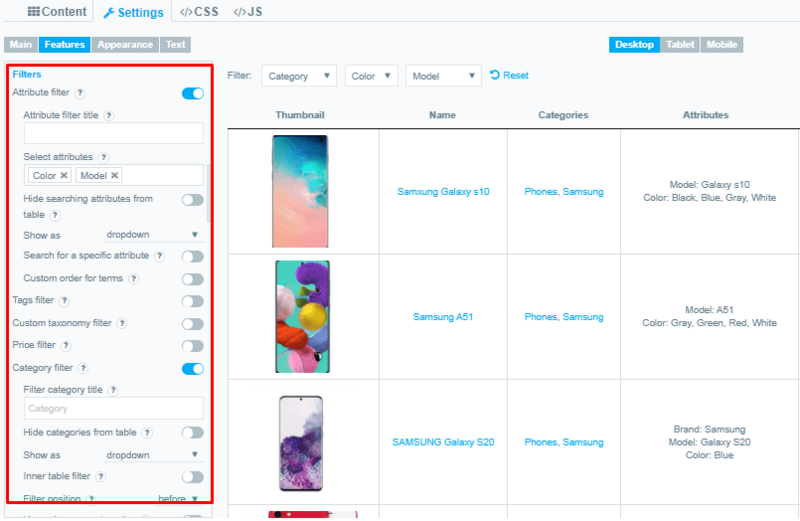
Attribute and Category Filter
Add dropdown menus above the table if you want consumers to be able to discover goods based on qualities and categories. On the Product table settings page in the Feature Tab, enable the Attribute and Category Filter check-boxes. Enable attribute filtering and choose the sorted attribute: Size, Color, or any other custom attribute. The category filter works for all categories that have been added to the items, such as gender, product type, clearance, and so on. Only enabled category and attribute columns are compatible with filters. This is a must-have feature for every WooCommerce online store, with filters for your consumers and complete management for you. Your consumers may filter by qualities and all categories after these simple settings and get exactly what they’re looking for!

Some notes when using product filtering to improve your customers’ experience
Despite the obvious advantages to both merchants and consumers, easy-to-use product filters are hard to achieve. Therefore, below are some notes that help your store to reach the customers’ needs.
Choose the “right” filter categories
When it comes to product filtering, there are no golden rules. You must consider the distinguishing qualities of your items and which ones are most significant to your clients in order to design useful filters for your site. For example, when your customers buy a laptop, they do not care what kind of processor that the new laptop has, but they indeed care about its storage capacity.
Use the words your customers use
Sometimes, from the sellers’ view, we often showcase our vocabulary of industry jargon, which makes customers confused. Therefore, make your filters as mainstream and easy-to-understand as possible to prevent alienating or confused customers.
Show only relevant, collection-specific filters
In general, the best filters will differ depending on the collection. It would be absurd to buy baseball hats based on their weight and temperature rating, yet weight and warmth are far more important when purchasing a sleeping bag or down jacket. Instead of displaying a complete set of store-wide filters on every page, just show filters that are relevant to the goods now being viewed.
Make it easy to find, add, and remove filters
If a user does not immediately discover what they are looking for, they may easily adjust the results by deleting the current filters and attempting another combination. Because invisible filters are as good as non-existent filters, it’s critical to make them as visible as feasible.
Use filters to merchandise products
Filters not only assist clients in narrowing their search and expediting the purchasing process, but they also remind them of the importance of particular parameters. Customers will filter for it both on your site and elsewhere if you choose to add a specific filter.
Final thoughts
While it may appear that restricting consumers’ options is detrimental to improving conversions, it really aids them in identifying what they want faster and checking out before they become overwhelmed or distracted by other options. Use category filters on your eCommerce website to simplify the purchasing process and make product discovery as simple as possible for your visitors. Hopefully, this tutorial will make installing product filtering by attribute a breeze.


