
How to Upload Files to WooCommerce Products

If you are taking bespoke orders from your customers, you are in desperate need of a WooCommerce upload files feature. Consider how useful it would be if your consumers could send you a picture, PDF, or even an Excel file if that’s what you need. By creating the upload file button for your WooCommerce products, it will increase the productivity of your online business as the clients can easily attach files and add additional comments whenever they want.
In today’s article, we will be guiding you through the setting up process of WooCommerce upload files feature using a plugin and several potential extensions for you to try out. Keep reading to find out more!
How to upload files to your WooCommerce products
Actually, enabling the file uploading feature is much easier than you think. With our tutorial divided into small basic steps, it will only take you up to half an hour if you carefully follow the instructions. You can check out the images attached below each step as a comparison with your work.
Without further ado, let’s get right into it!
Step 1: Install the plugin
In this guideline, we will be using a plugin called WooCommerce Product Add-Ons Ultimate to activate the WooCommerce files upload feature for an online business. Therefore, the first thing we need to do here is to download the extension by entering the WooCommerce Dashboard > Add News > Plugin and click on “Choose File” button in the center of the screen:

You can either select the plugin files or just simply drag and drop it into the box. Continue to choose “Activate” and “Install Now” to move on to the next step!
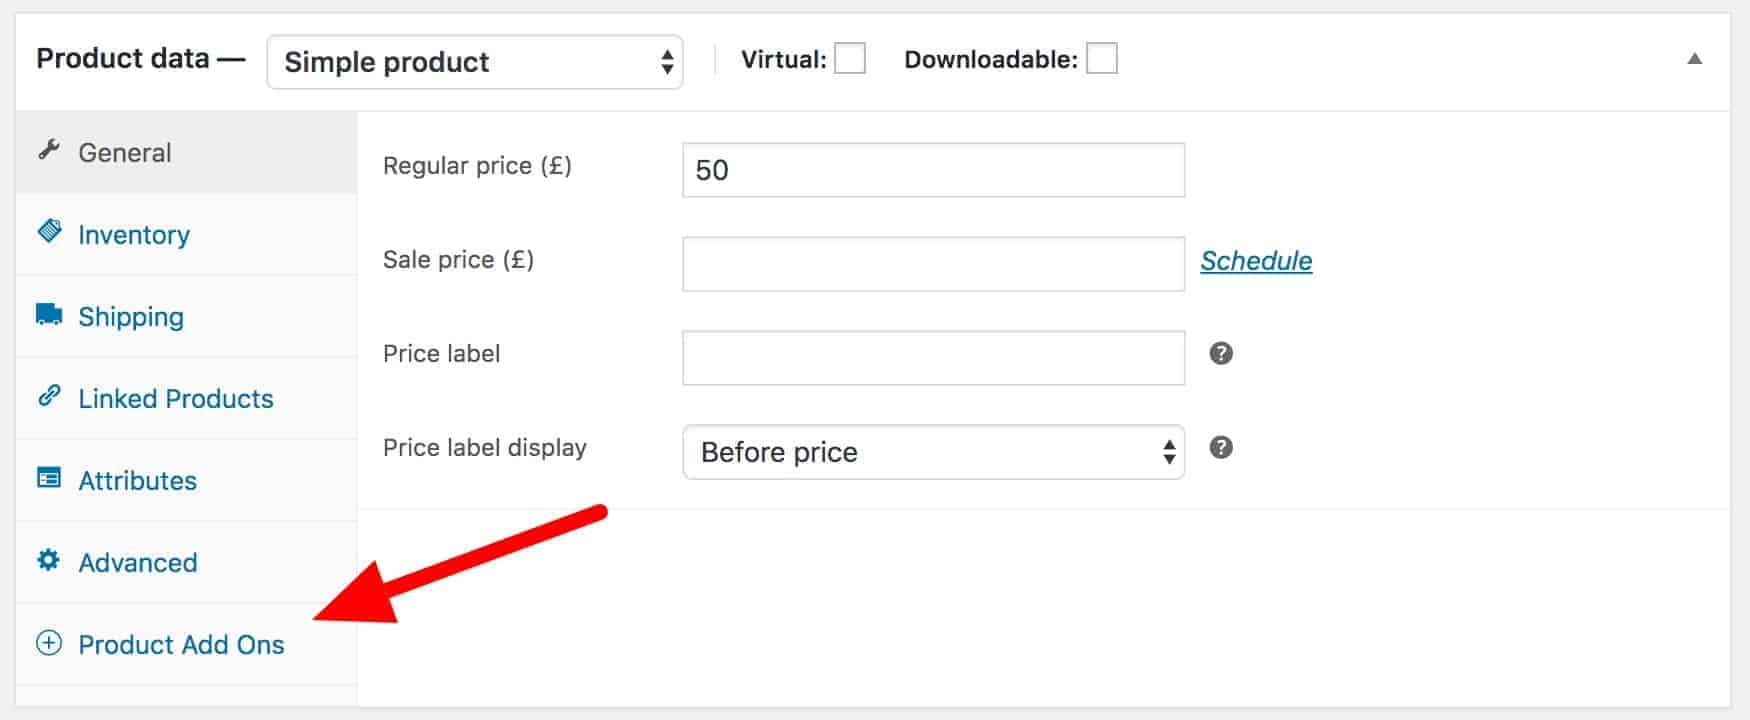
Step 2: Add a new custom field
Next, you will have to create a brand new custom field where your customers are able to upload the files. When you navigate to the “Product data” section from WooCommerce Dashboard > Products, quickly click on the “Product Add-Ons” tab:
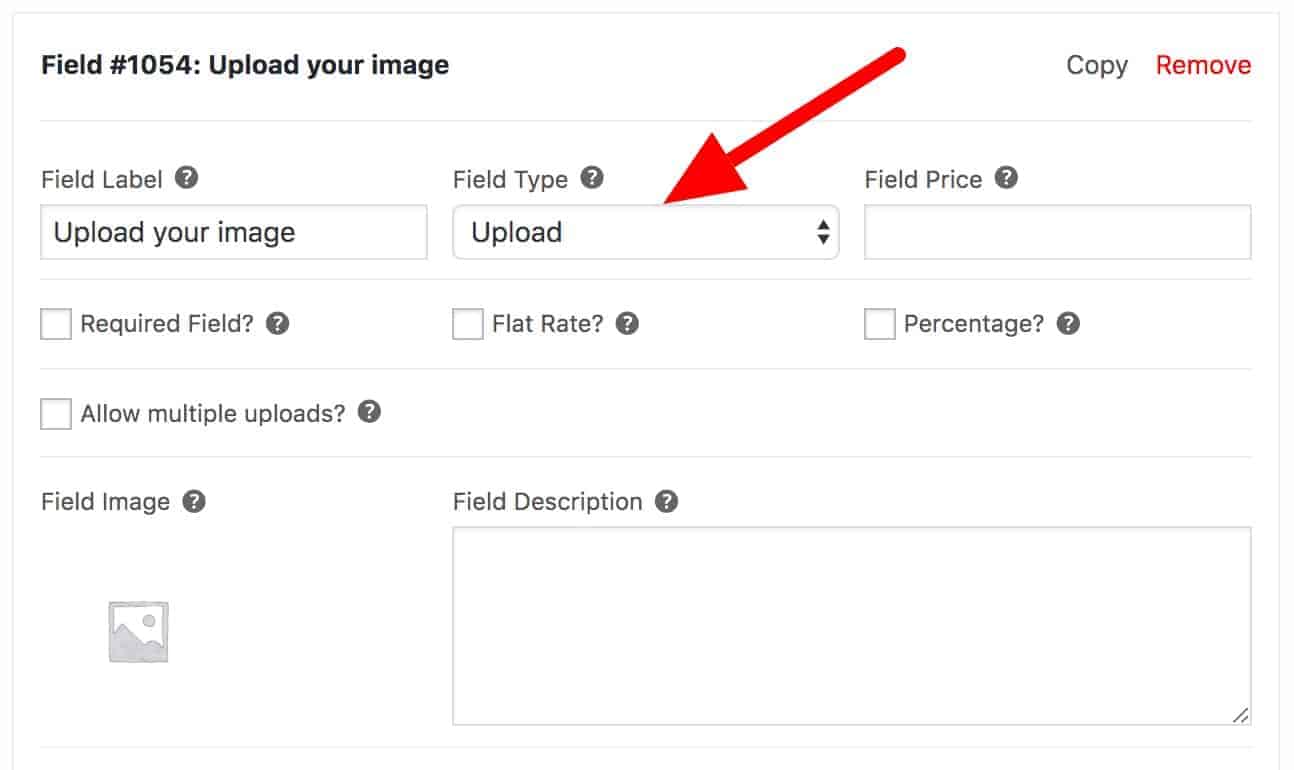
Then choose the “Add Group” and “Add Field”, your screen will look like the image below. Change the dropdown of “Field Type” into “Upload” and feel free to assign a label for this custom field based on your preferences:
“Save” your modifications and check out the results on your frontend:

Step 3: Deciding the maximum file size
A great thing about using WooCommerce Product Add-Ons Ultimate while creating WooCommerce uploading files fields is that you can limit the size of the files that your consumers are enabled to upload. By navigating to WooCommerce > Settings > Product Add-Ons from your dashboard, you can type in the number of MB that is eligible for your website:

Step 4: Limit the file type
Not only is the size limited but also the file type can be solely determined by online store owners. For security purposes, WooCommerce Product Add-Ons Ultimate only allow customers to upload the following file types:
- JPG/ JPEG
- PNG
- GIF
If these are still not fulfill your personal requirements, quickly access the functions.php file of your child themes and paste in these snippets:
<?php
// Add PDFs to list of permitted mime types
function my_prefix_pewc_get_permitted_mimes( $permitted_mimes ) {
 // Add PDF to the list of permitted mime types
 $permitted_mimes['pdf'] = "application/pdf";
 // Remove a mime type - uncomment the line below if you wish to prevent JPGs from being uploaded
 // unset( $permitted_mimes['jpg|jpeg|jpe'] );
 return $permitted_mimes;
}
add_filter( 'pewc_permitted_mimes', 'my_prefix_pewc_get_permitted_mimes' );

// Add PDF to the list of restricted file types
function my_prefix_pewc_protected_directory_allowed_filetypes( $restricted_filetypes ) {
 $restricted_filetypes[] = 'pdf';
 return $restricted_filetypes;
}
add_filter( 'pewc_protected_directory_allowed_filetypes', 'my_prefix_pewc_protected_directory_allowed_filetypes' );
Step 5: Showing the image thumbnail
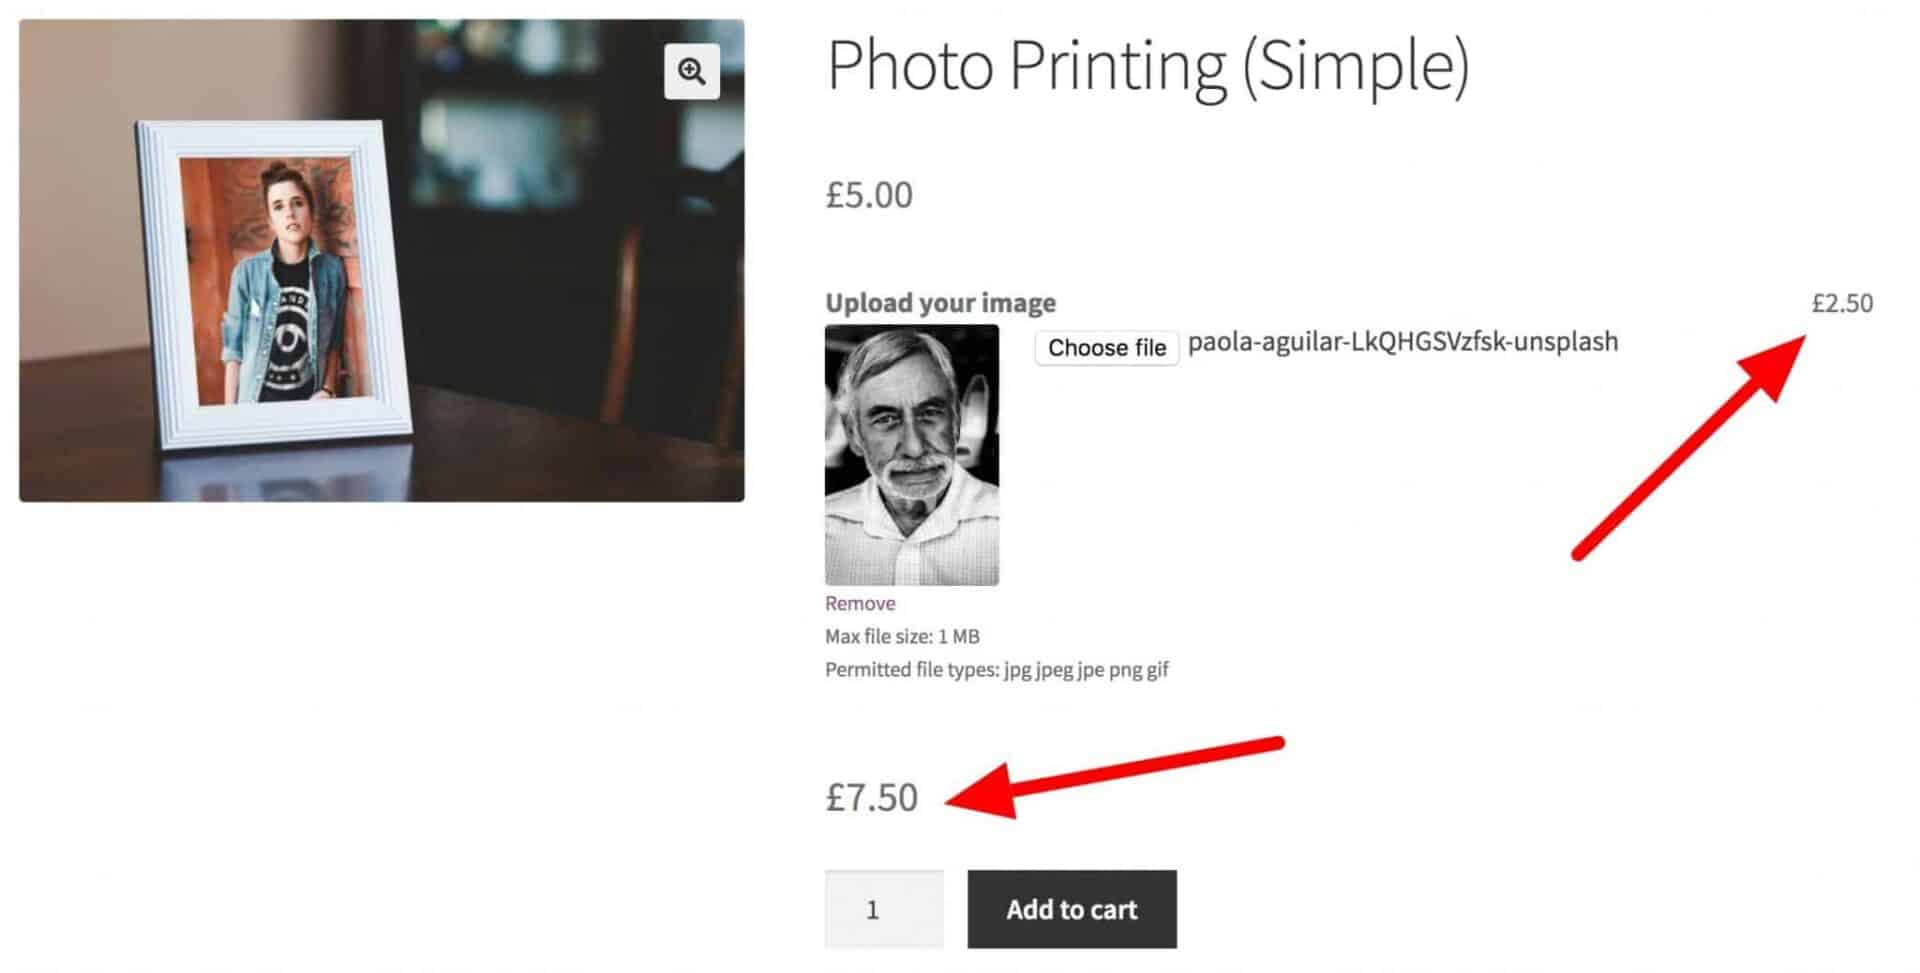
If a client wants to add a picture to your product page before clicking on “Add to Cart”, the plugin will verify that the image’s dimensions and other attributes are valid to upload. To have a preview of the image uploaded, the picture will be shown as a thumbnail when the user clicks to go to the cart or checkout:

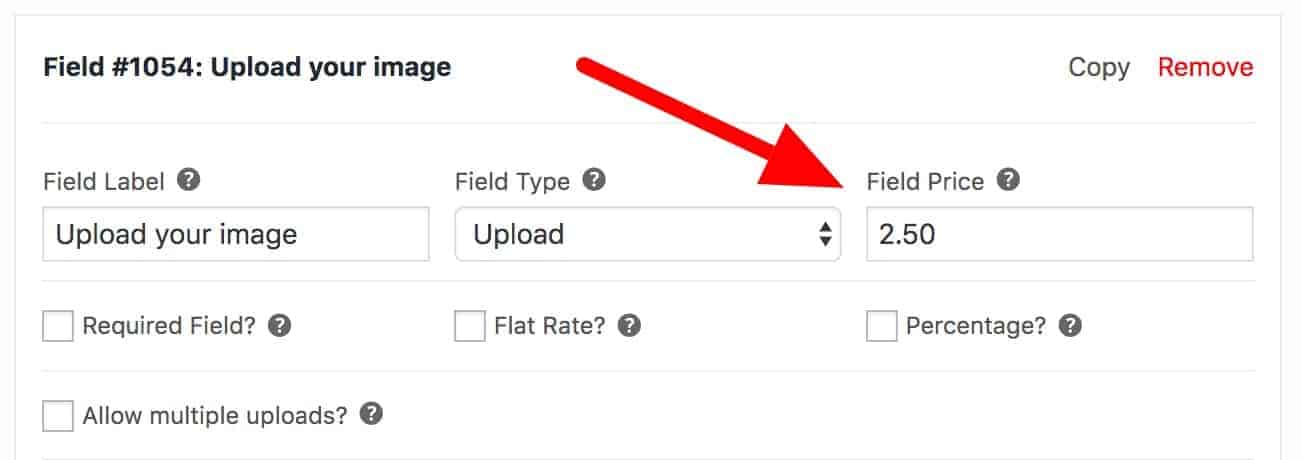
Step 6: Automatically calculate the price
When images are enabled, customers may want to purchase more copies of them. Additional fees may be charged on top of the basic product price if so. To input an image file’s pricing, just type in the value in the ‘Field Price’ box:
At this point, whenever one of your consumers upload a file onto your WooCommerce products, the price will be automatically updated according to the price field you have decided previously:
Step 7: Attach the uploaded files to emails
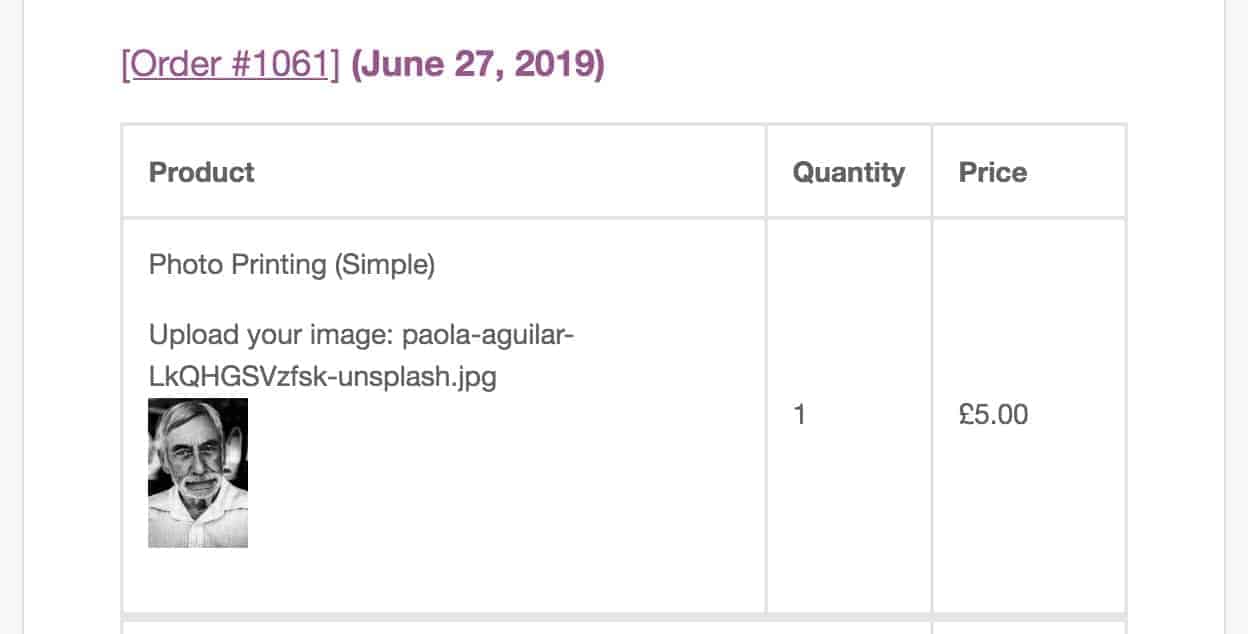
You can even attach the WooCommerce uploaded files to your customers’ order emails by ticking on the checkbox at WooCommerce > Settings > Product Add-Ons alternative, just like what we did in this picture:
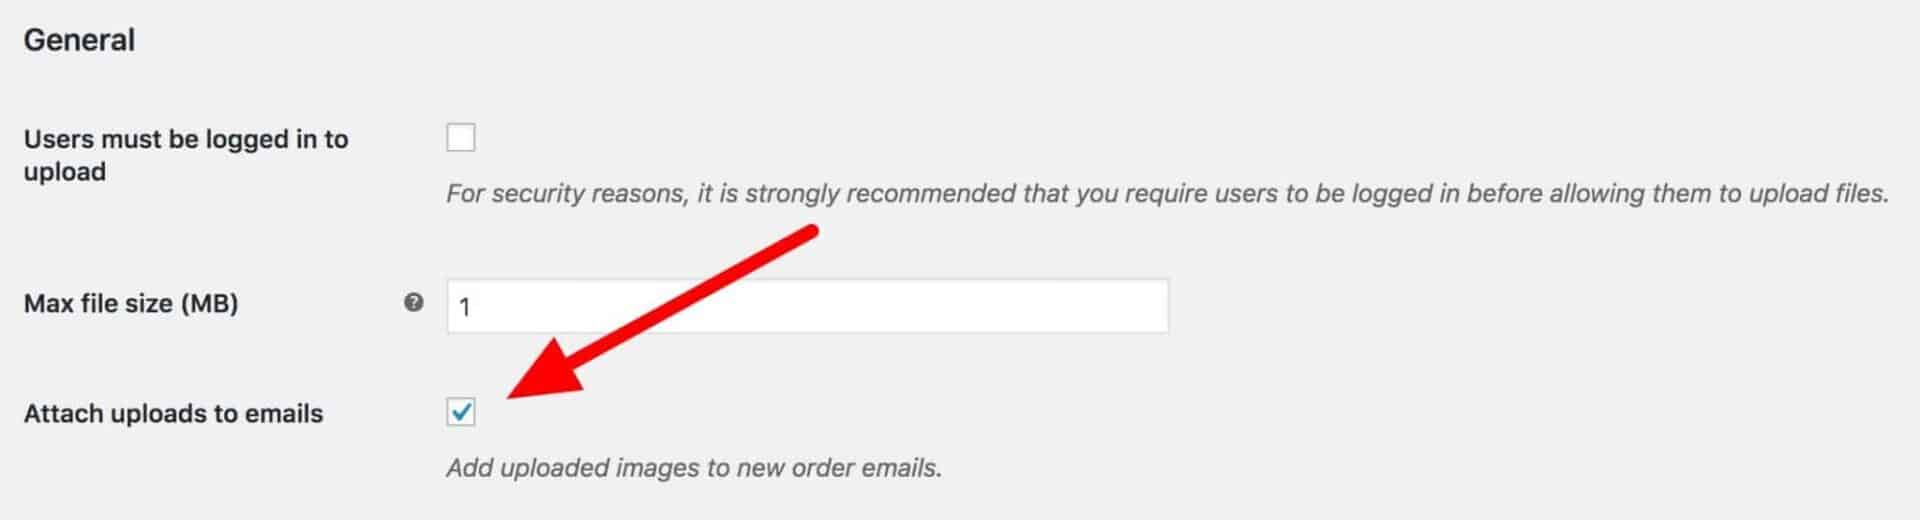
Now you consumers can have a grasp of their uploaded image and a follow-up thumbnail for it in their emails after sealing the deal:
Step 8: Bulk images uploading
Furthermore, there would be times when your consumers made a large purchase and required multiple files to upload simultaneously. This functionality is also available while using this plugin. Just select the “Allow Multiple Uploads” option in your upload field settings and all of their WooCommerce files upload will be transferred right to your website:
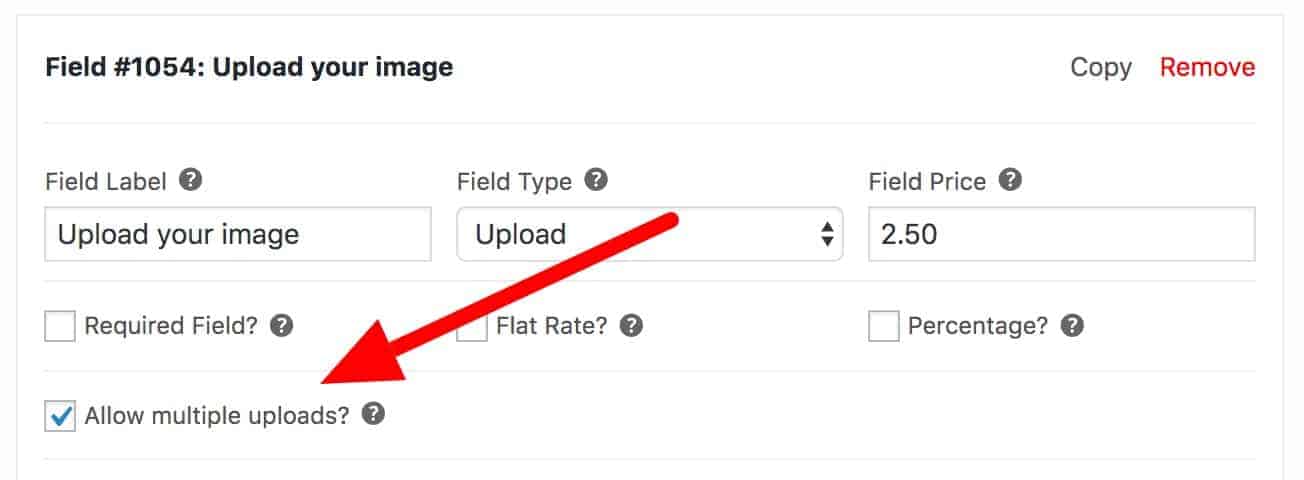
When you go through the product page, you will notice a little change. Instead of “Choose File”, the button now reads “Choose Files”. As a result, the user is now able to upload files in bulk. Other aspects of the order and the cart, such as thumbnails in the cart and on the order form, will be identical to the single field setup:

Top 4 plugins for WooCommerce upload files to products
As we have mentioned before, the plugin that we used for the tutorial is WooCommerce Product Add-Ons Ultimate. However, this may not work for all situations, all online stores or just simply may not fulfill your requirements. Don’t worry because we have it covered.
Below is the list of top 4 plugins for WooCommerce upload files to products. We have conducted research on the basis of their popularity, customer reviews and efficiency in the long run. Hence, it will be much easier for online retailers to pick out the best one for their business:
Customer Upload files for WooCommerce
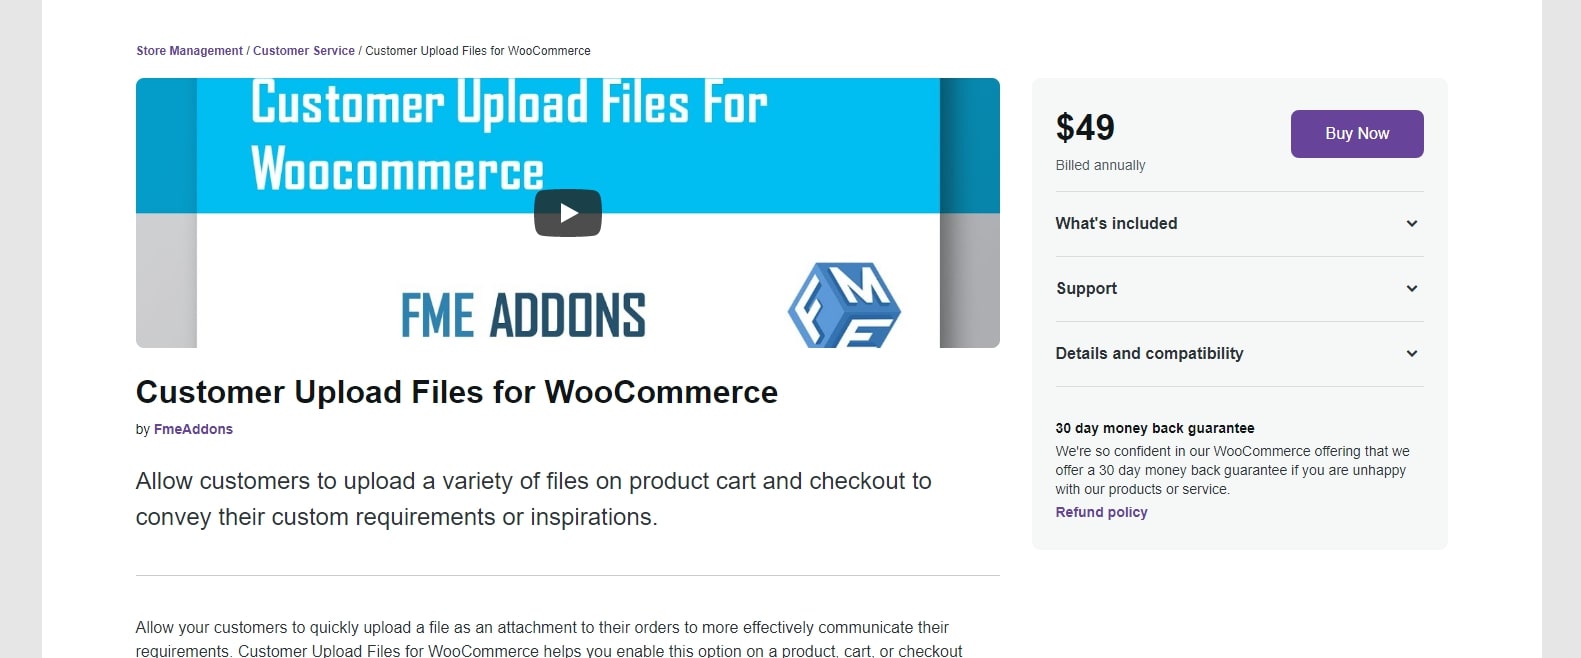
At the top of the list, Customer Upload files for WooCommerce is a promising extension, which works precisely as expected. File upload option on the checkout page is easily enabled with this plugin. For the product pages, you may also activate the upload option if you like and let your clients upload as many files as they wish to your website. Also, you have full control over the WooCommerce upload files type as well as the size of them.
In addition, the upload field can be restricted by product, product category and user role. Another benefit is being able to offer items without the file upload form alongside those who do. As a last feature, you may charge more for further file uploads. Where this is possible, it may be a very effective method to increase your revenue streams.
WooCommerce Upload Files
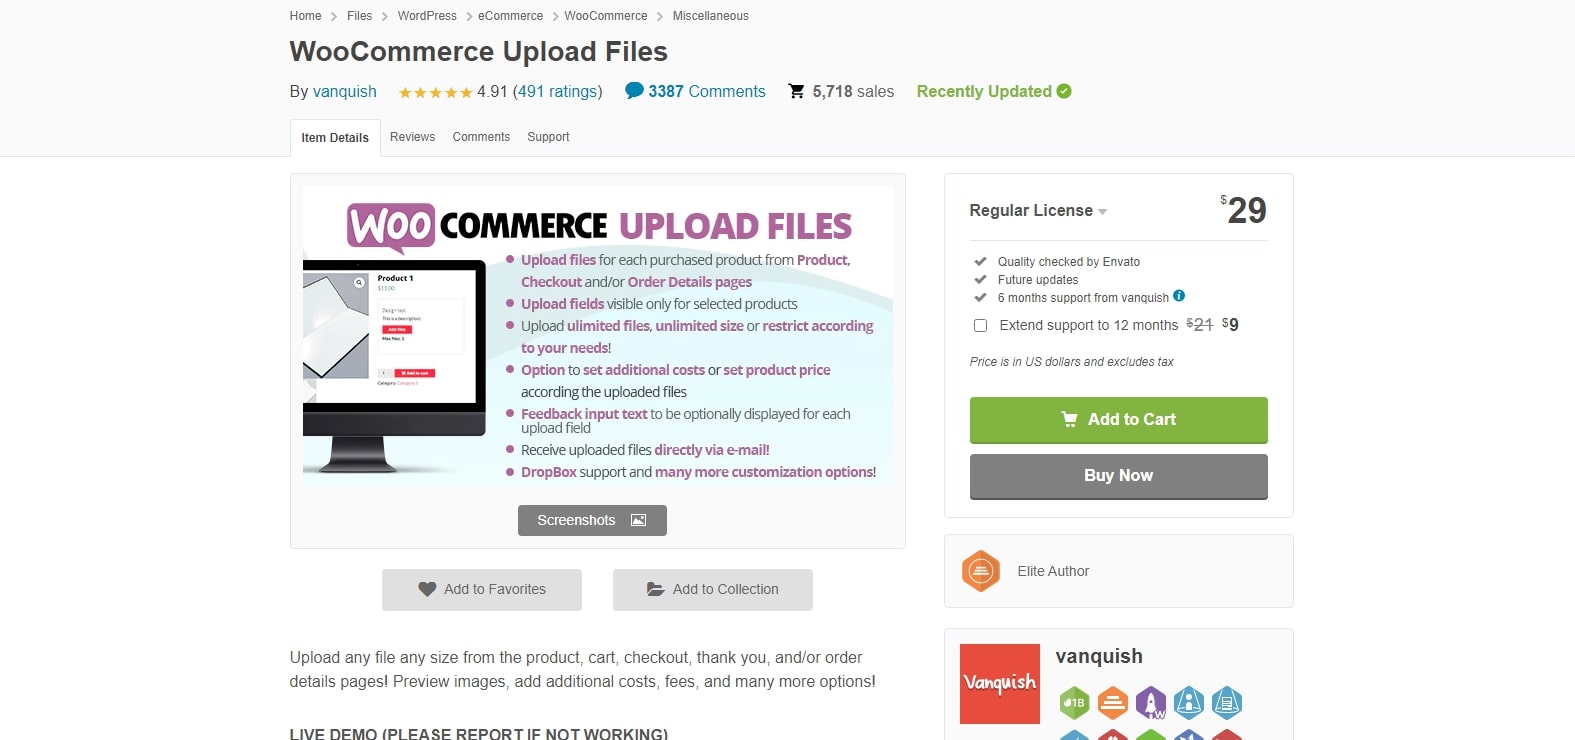
If you are looking for a premium plugin with all the bells and whistles, then WooCommerce Upload Files is the one for you. On your WooCommerce website, you may also upload any file size and kind. The order detail, thank you, checkout, and cart section pages are all good places to put those file uploads.
You will undoubtedly need a large amount of storage space to store and upload your stuff. This plugin is well aware of this, which is why it includes Dropbox support. This feature allows you to store files to your Dropbox account, which is useful if your computer’s files are full.
Besides, WooCommerce Upload Files also includes email notifications and attachments. When a customer submitted a file to a certain page, this displayed your work. It will immediately send an email notification to your inbox.
WooCommerce AJAX file upload
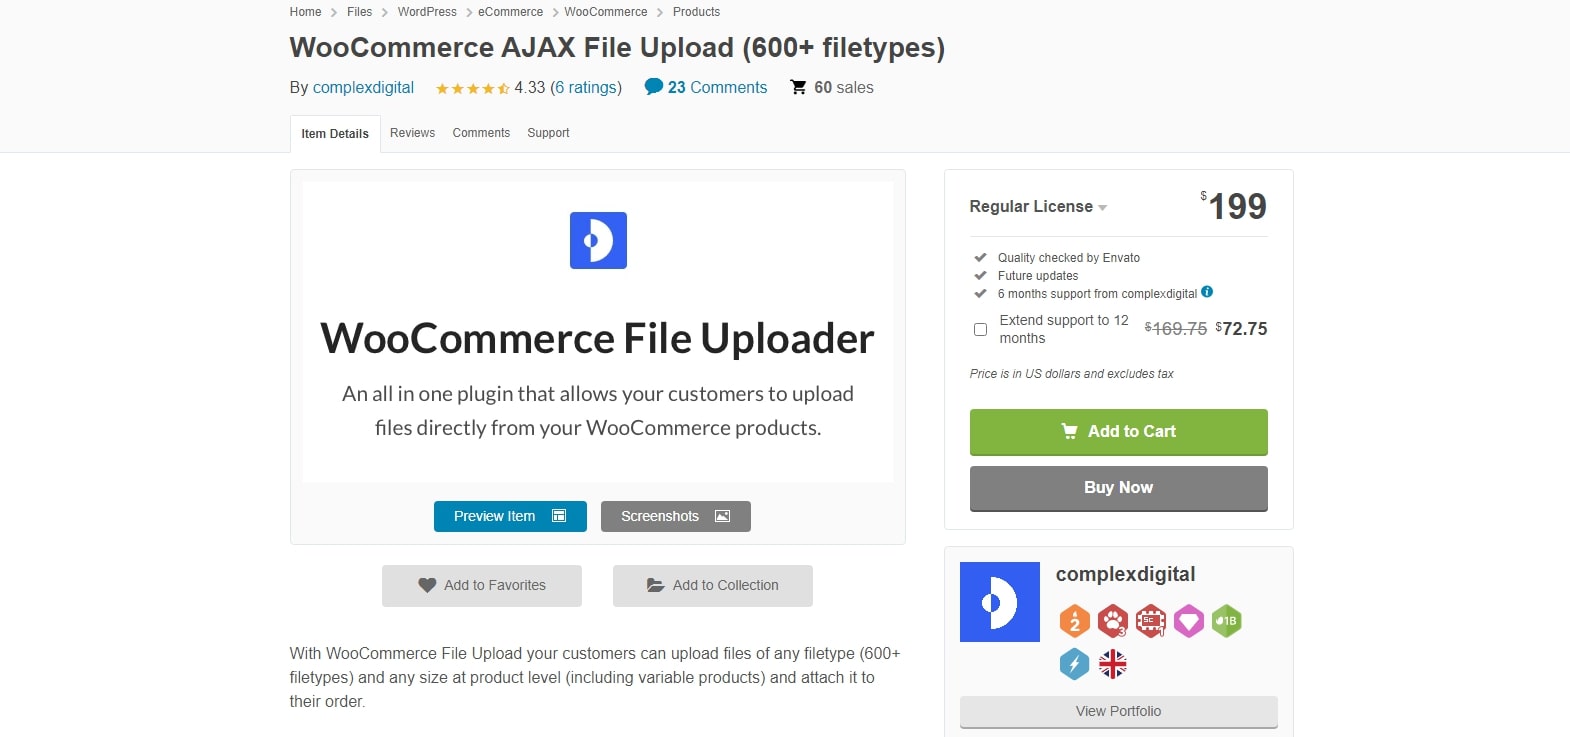
Last but not least, WooCommerce AJAX file upload plugin will be a perfect fit thanks to its contemporary features along with user-friendly interface. What makes this extension stand out is that instead of utilizing a normal button to choose a file, it adds a visually appealing upload window to the website where visitors may drag and drop their files to upload them. Customers may also click on the box to upload files the old-fashioned way. The uploaded files are shown in an elegant grid below, which is more appealing than a simple list of files.
With all these awesome features, why not give it a try, right?
Conclusion
To sum up, we hope that this article on How to set up WooCommerce upload files has answered all of your questions and highlights the importance of allowing your consumers to upload files for the products. From then, it can generate your profits in the future!


