
How to Turn On/Off Store Notices in WooCommerce

WooCommerce stores frequently use the store notice to communicate with their clients about informational messages such as delivery delays to a specific zone due to weather conditions, free shipping, promotions, events, holiday special, or any other marketing initiatives by displaying a site-wide message. These notifications will show on the store’s homepage, enabling customers to quickly get information as soon as they visit your WooCommerce site.
Sometimes you’ll want to turn messages on and off as you want, change the content of notifications, or even set a notification schedule, but you’re not sure how to do that. In fact, setting up turn on/off notifications is like a breeze. This post will guide you on how to turn on / off store notices in WooCommerce in the simplest way possible.
Now, let’s begin!
How to turn on store notices in WooCommerce
Step 1: Access to WooCommerce’s Store Notice customization interface
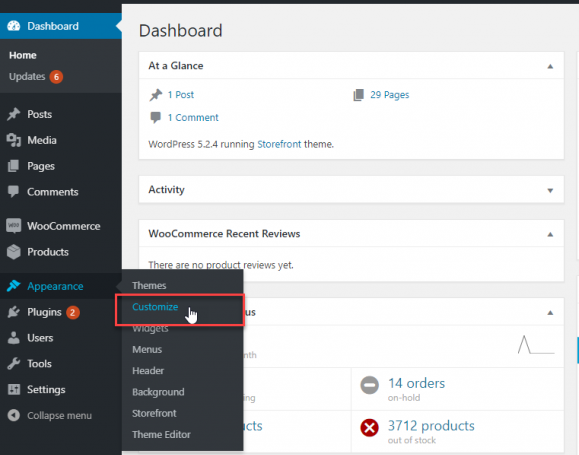
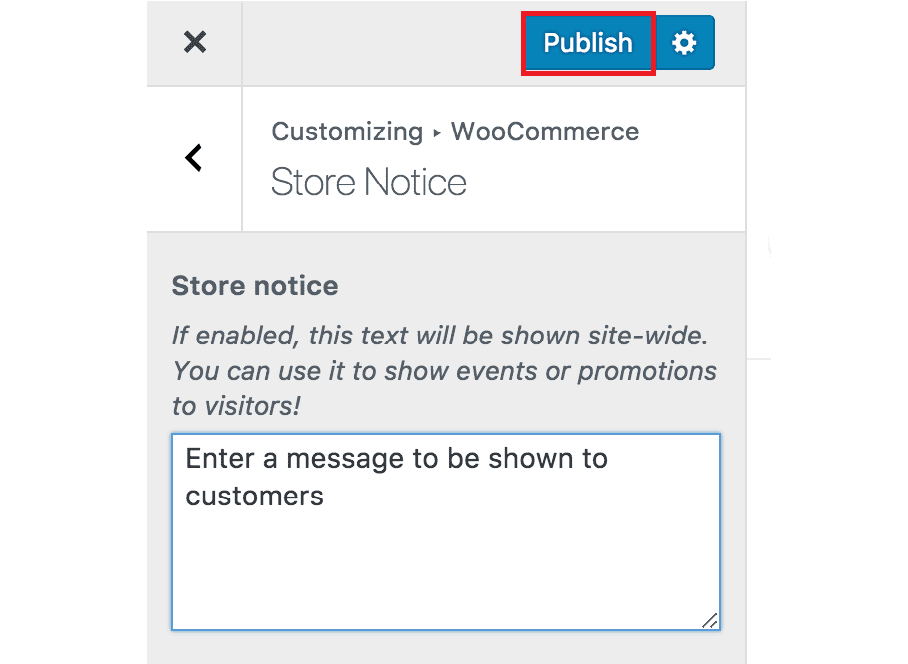
So first, you need access to WooCommerce’s store notice customization interface by going to Appearance > Customize. Next, in the customize menu, click on WooCommerce. You’ll see five customizable options, including Store Notice, Product Catalog, Product Page, Product Images, and Checkout.
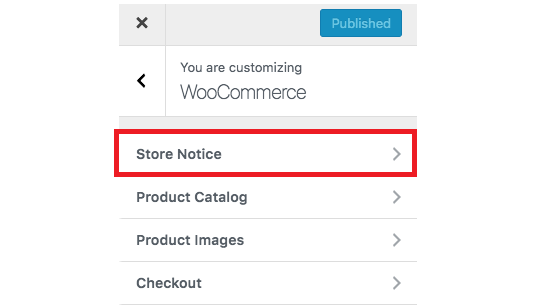
To begin customizing, choose Store Notice
Step 2: Enter the notice for the store
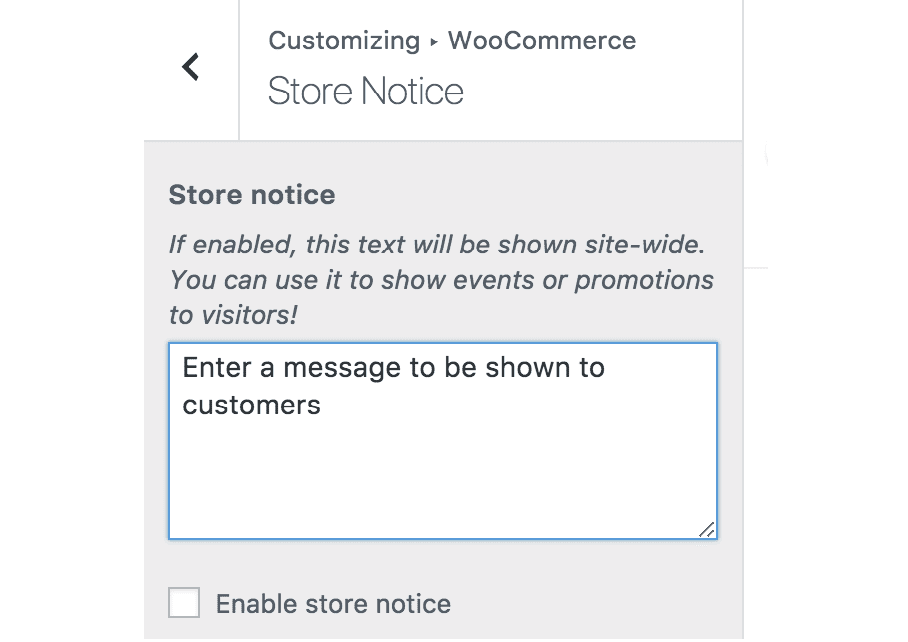
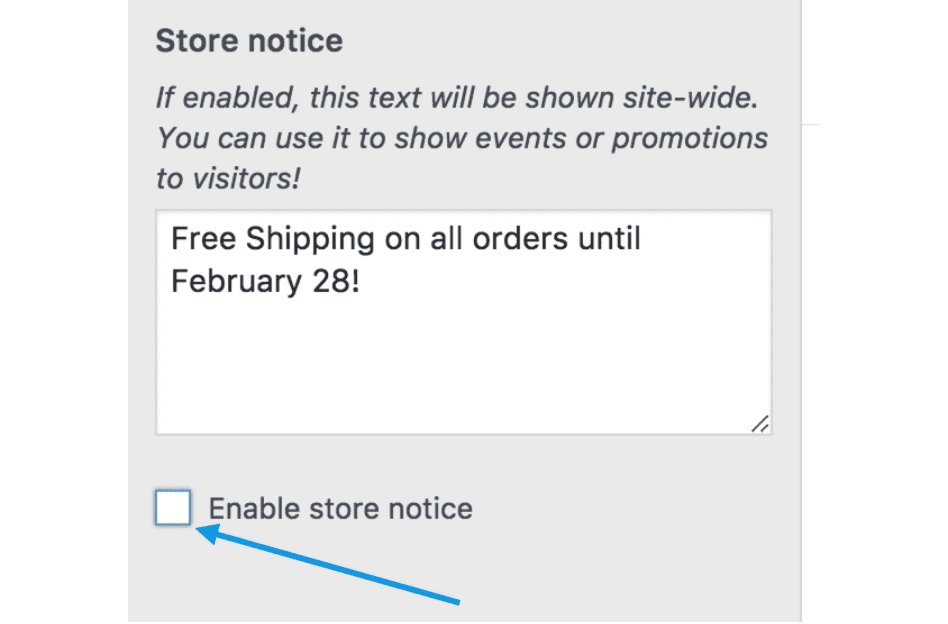
At the message description box, enter the message you want to send to your customers. It can be:
- Informational: A note informing visitors of shipment delays, or a “away” notification.
- Promotions: A note promoting an upcoming event, a holiday special, a deal on some goods, or free shipping.
Step 3: Enable store notice
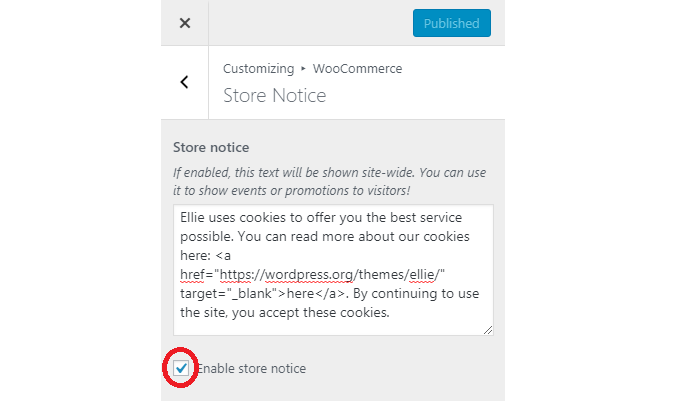
After entering the store notice, simply tick on the “Enable store notice” box in the left corner. The store announcement will then show as a preview on your homepage.
Step 4: Publish store notice
When you’re ready for your store notice to go live, click on the Publish button in the top right corner. The store notice will be published on the front end of your store/website. In addition, a skip button will display to the right of the message, allowing the client to choose to ignore it if they don’t want to see it.
How to turn off store notices in WooCommerce
To update or turn off store notices in WooCommerce, simply follow the same procedures as to set store notices.
Step 1: Access to WooCommerce’s Store Notice customization interface
Go to Appearance > Customize > WooCommerce > Store Notice
Step 2: Turn off the store notice
If you want to turn off the store notice, untick the “Enable store notice” box to stop showing to visitors.
Delete the old store notice and enter the new one when you want to change the message content.
Step 3: Save changes
After editing, click the Publish button to save the changes.
How to schedule a store notice in WooCommerce
Moreover, WooCommerce also provides an option that allows you to set store notice schedules on your site. When running a limited-time promotion or terminating a sale/discount, the schedule option for store notice might be useful.
Following these steps to set up a store notice schedule for your WooCommerce store:
Step 1: Access to WooCommerce’s Store Notice customization interface
Go to Appearance > Customize > WooCommerce > Store Notice to access the current/published notice.
Step 2: Turn off the store notice
At the next stage, you need to untick the “Enable store notice” box.
Step 3: Open the schedule panel
To open the schedule panel, click on the gear wheel next to the Publish button. Then, select Schedule on the right menu.
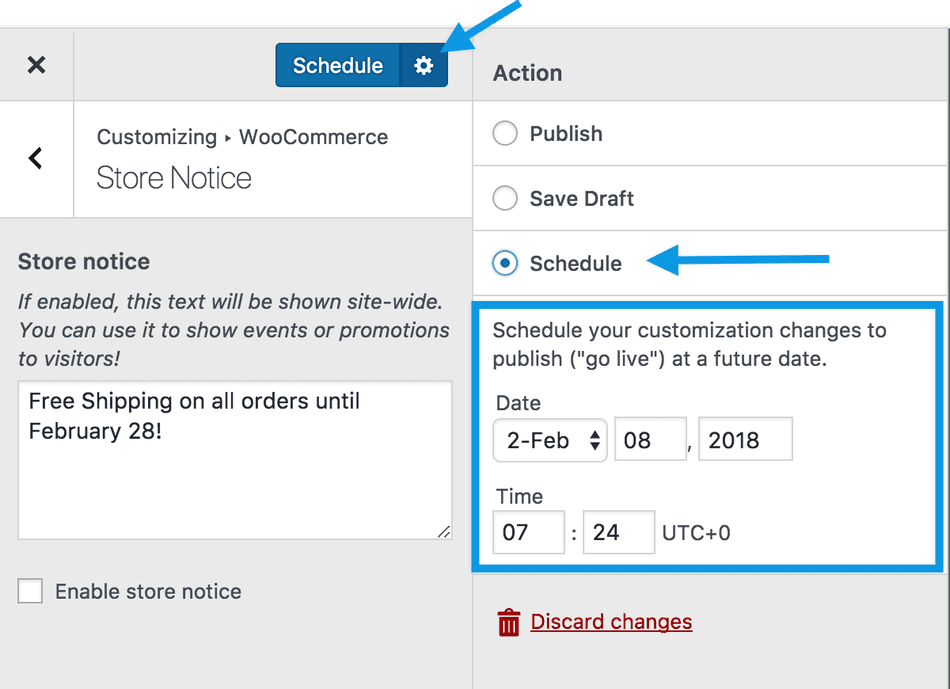
Step 4: Setting date and time for the store notice
To pick the day and time for the store notice, use the up and down arrow buttons or enter from the keyboard.
Step 5: Save changes
After setting the date and time for store notice, choose Select to apply the changes you made on the particular set Day and Time.
Note: Removing the store notice by unticking the “Enable store notice” box does not automatically end the promotion. If you want to totally end the campaign, you must disable the sales discounts, coupon codes, or limited-time offers.
Final words
All of the procedures to turn on or off store notices in WooCommerce are explained above. Generally, the processes are quite simple to follow; you only need to follow these four basic steps:
- Access to WooCommerce’s Store Notice customization interface
- Enter or edit the store notice
- Enable or disable the message by a tick or untick the box “Enable store notice”
- Click Publish to save changes
After reading this post, we hope that you have a better understanding of how to turn on / off store notices in WooCommerce. Don’t hesitate to leave a comment for us if you are still confused about something.
Thanks for reading!


