
How to Show WooCommerce Categories in your menu

Navigation is essential to the success of an online store. Users must be able to readily find what they’re looking for. Given the critical nature of menus, one of the most effective ways to optimize navigation is to include product categories in the WooCommerce menu.
This article will introduce you How to show WooCommerce categories in your menu with just a few simple steps.
Why you might want to add Product Categories to the Menu?
Conversion optimization is critical for increasing your sales and revenue from your WooCommerce store. Apart from an attractive checkout page and a well-designed theme, your store should be simple to navigate. This is sometimes ignored, yet it is critical. To ensure that users have a positive purchasing experience, you must make it simple for them to find what they’re looking for.
A simple and well-designed menu is critical for assisting users in navigating your site. Menus contain critical information, which is why they are typically located at the top of websites. Maintaining a clean and structured menu, on the other hand, can be difficult if you have a large number of products, categories, and sub-categories.
For instance, suppose a shopper wishes to purchase a Samsung smartphone from your online store. Wouldn’t it be wonderful if customers could navigate right to the Samsung mobile phone area from the menu and quickly locate the device they’re looking for? Improved navigation enables you to enhance the user experience and raise conversion rates.
That is why adding product categories to your menu can have a significant impact on the success of your business.
How to show WooCommerce Categories in your menu
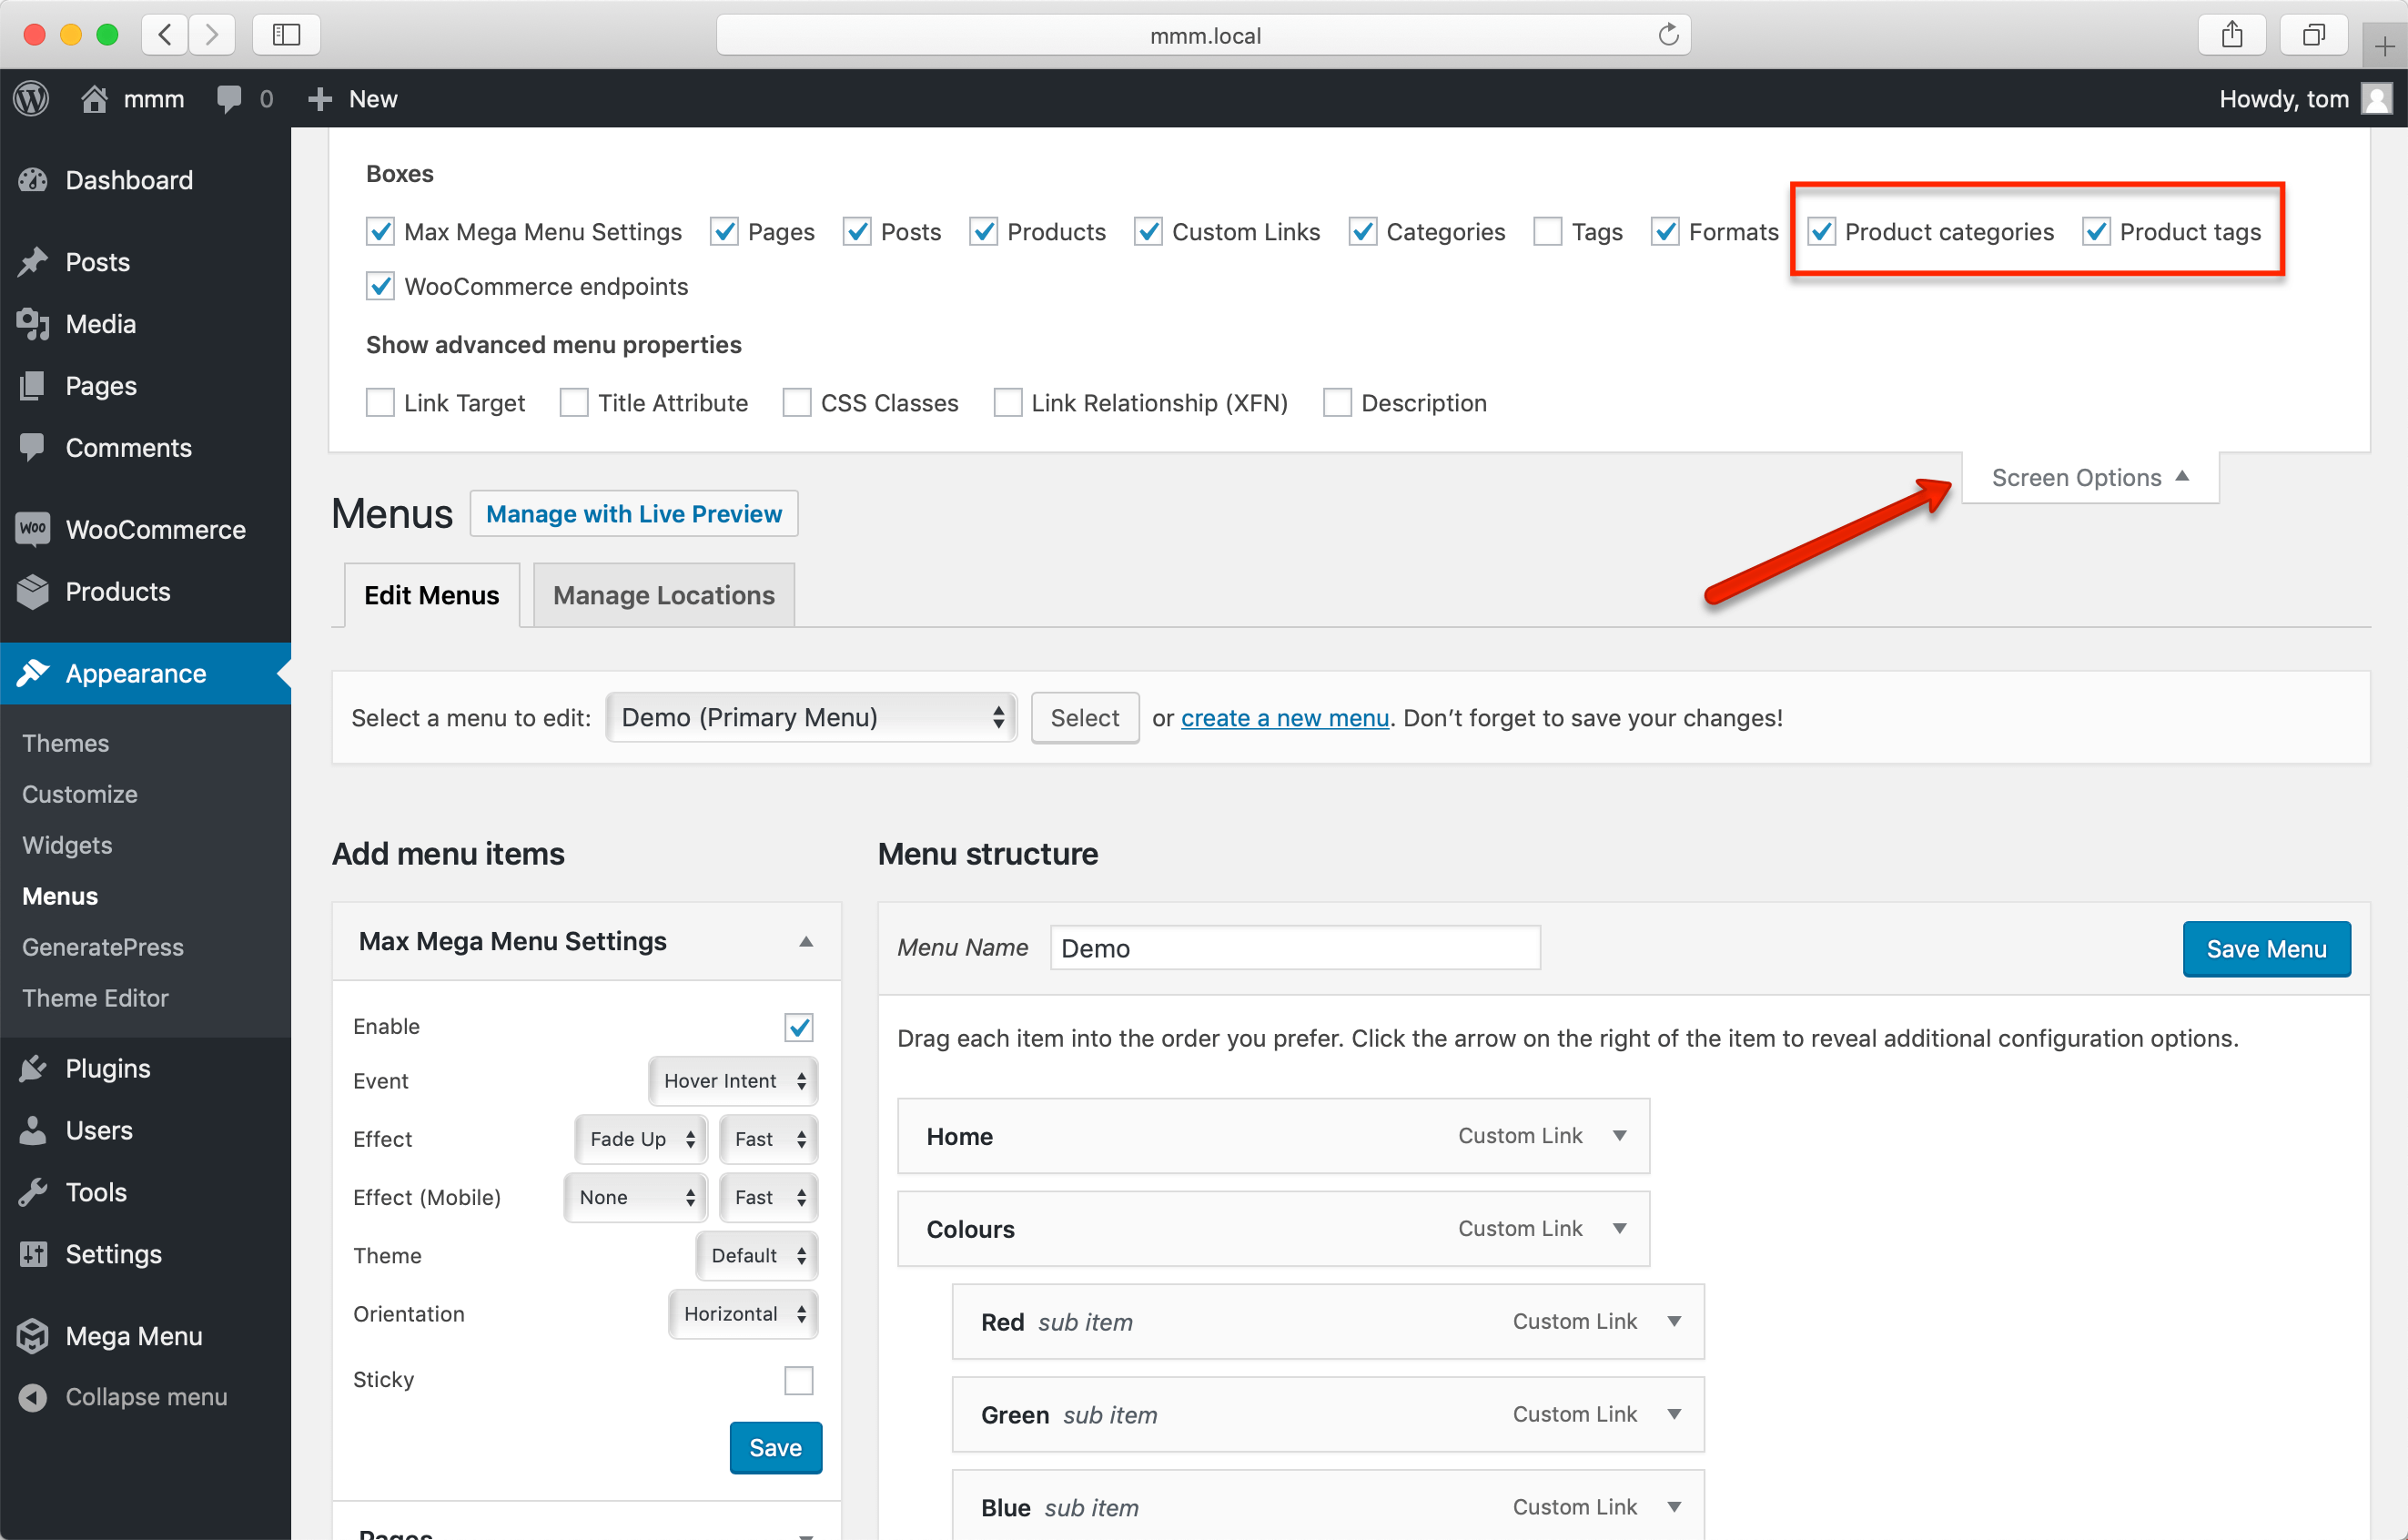
Step 1: Enable Product Categories
Expand the Screen Options section at the top right of the page by going to Appearance > Menus. Product categories and Product tags should be enabled.
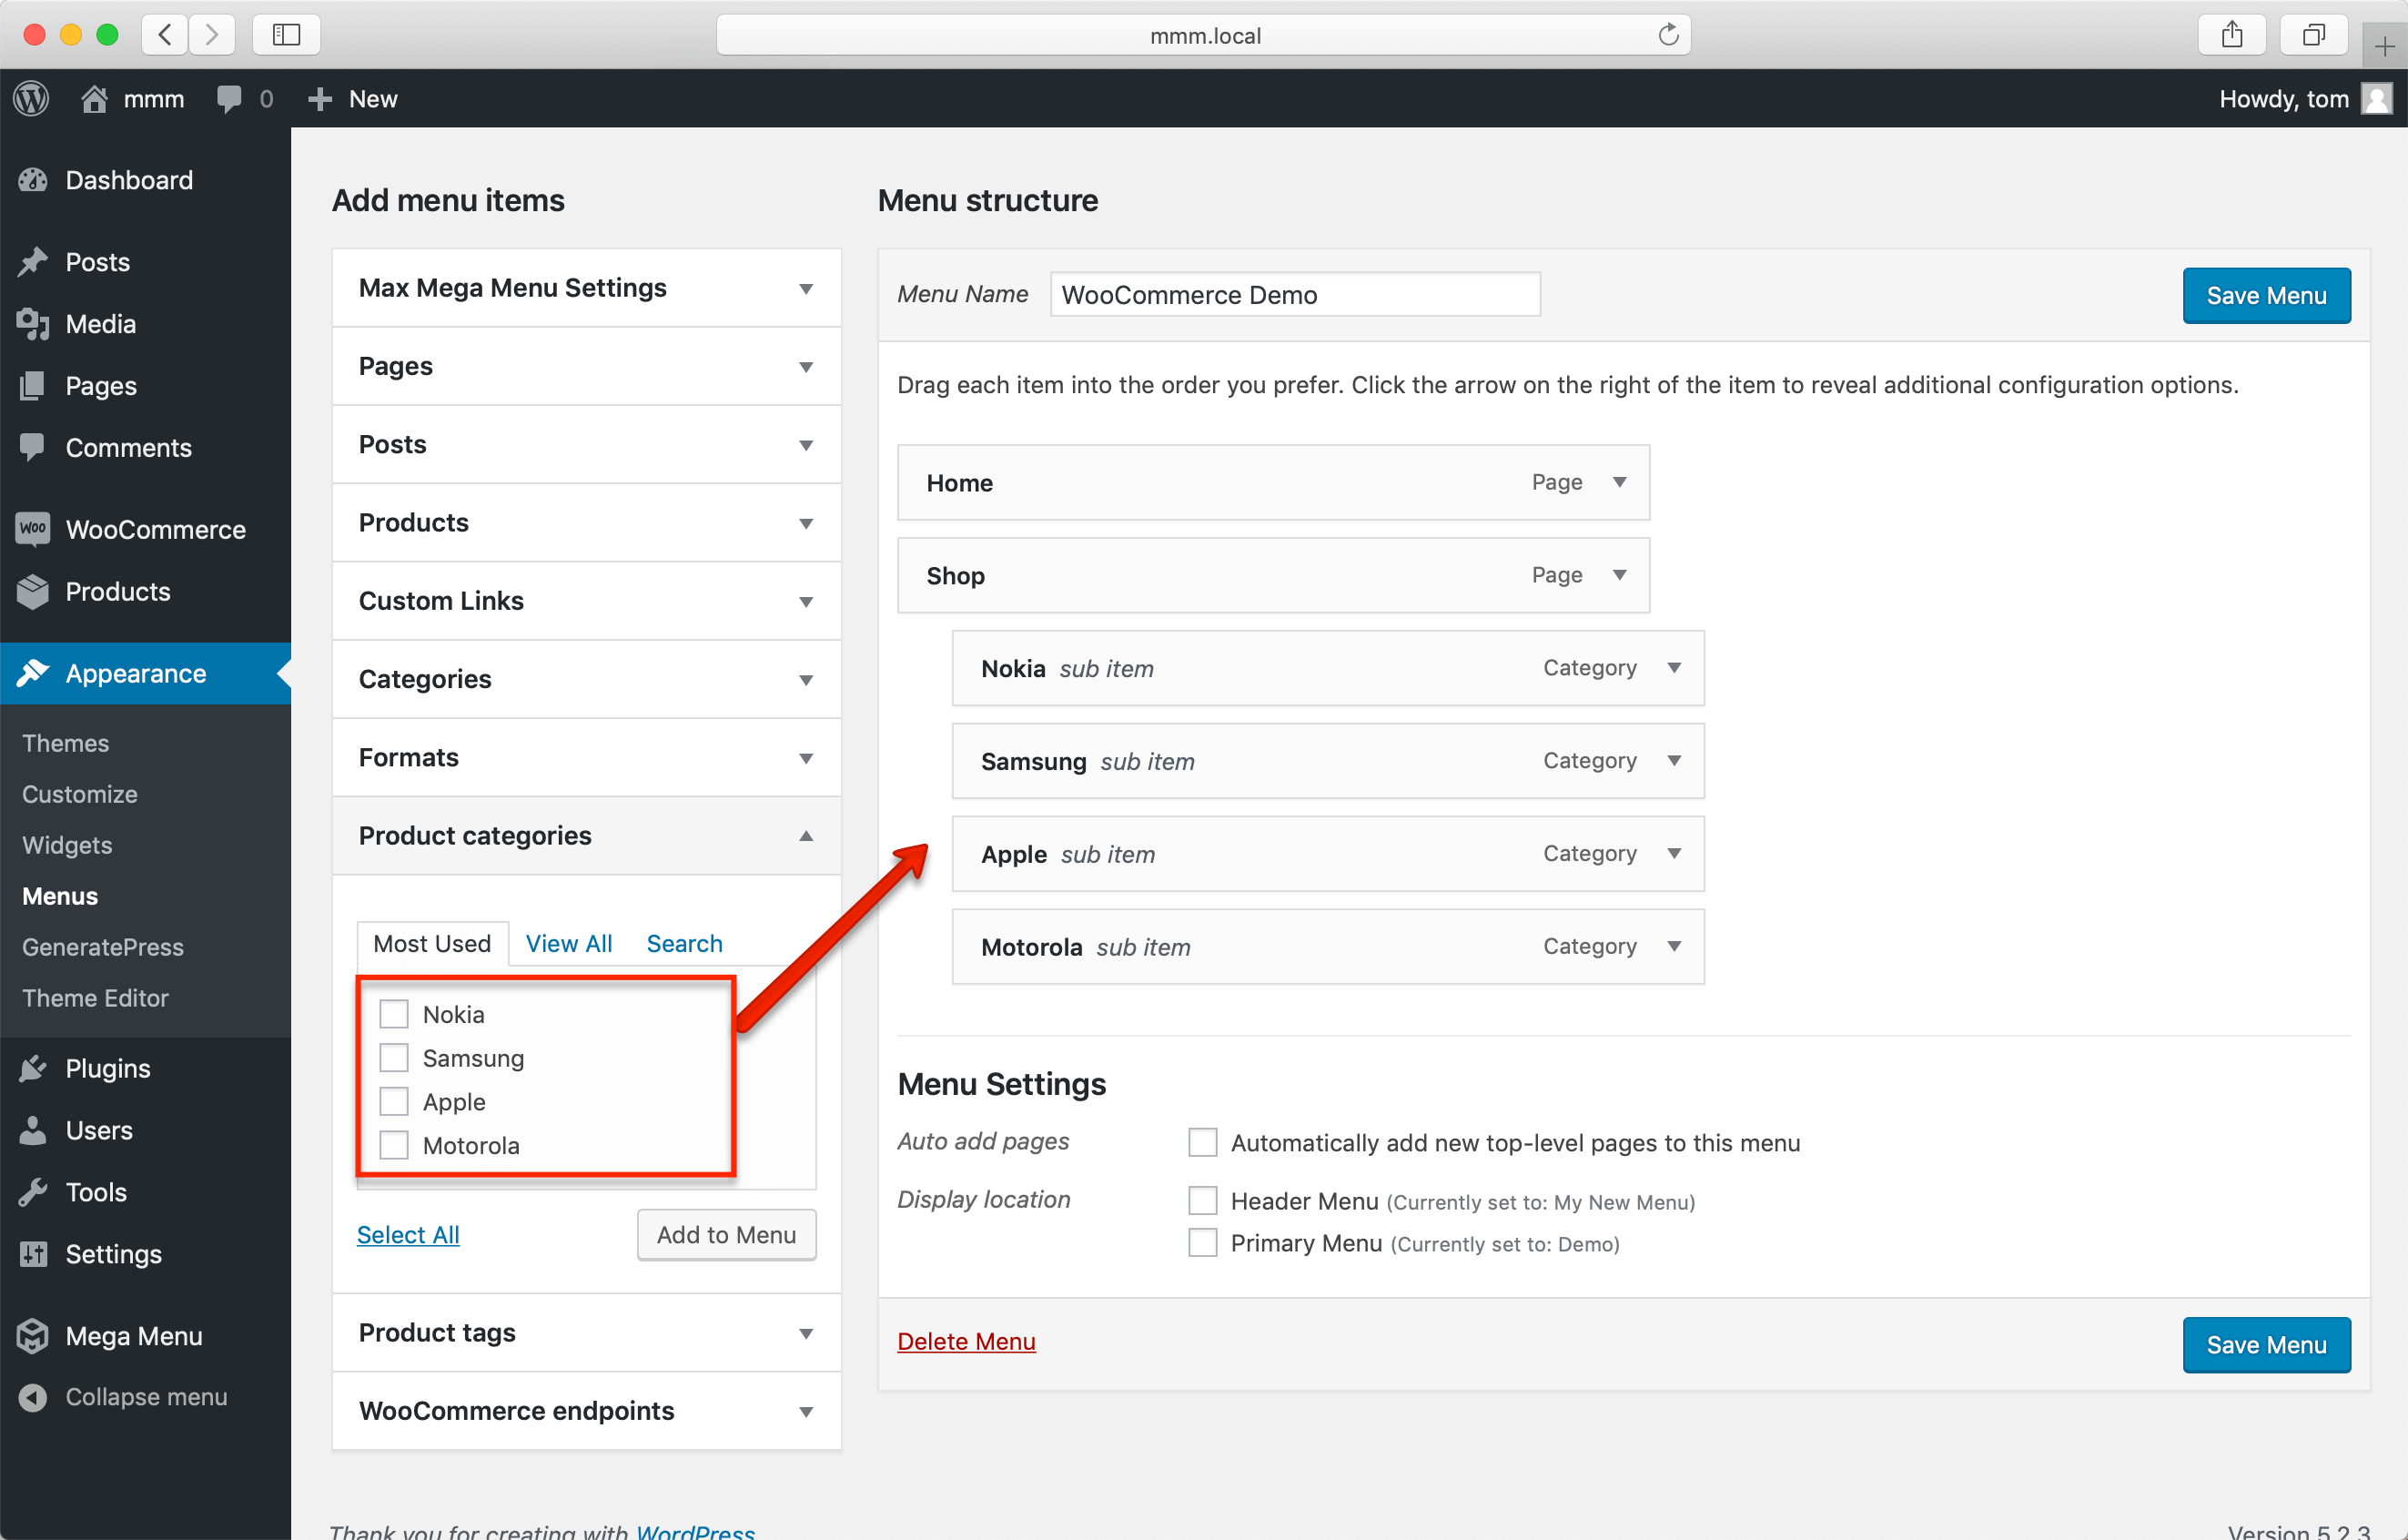
Step 2: Set up the Menu
Create a Shop menu item and then submenu it with your Product categories.
If you have provided a description of your Product categories, it will be transferred over to the description of the menu item when it is added to a menu. At this time, you may decide to delete the descriptions:
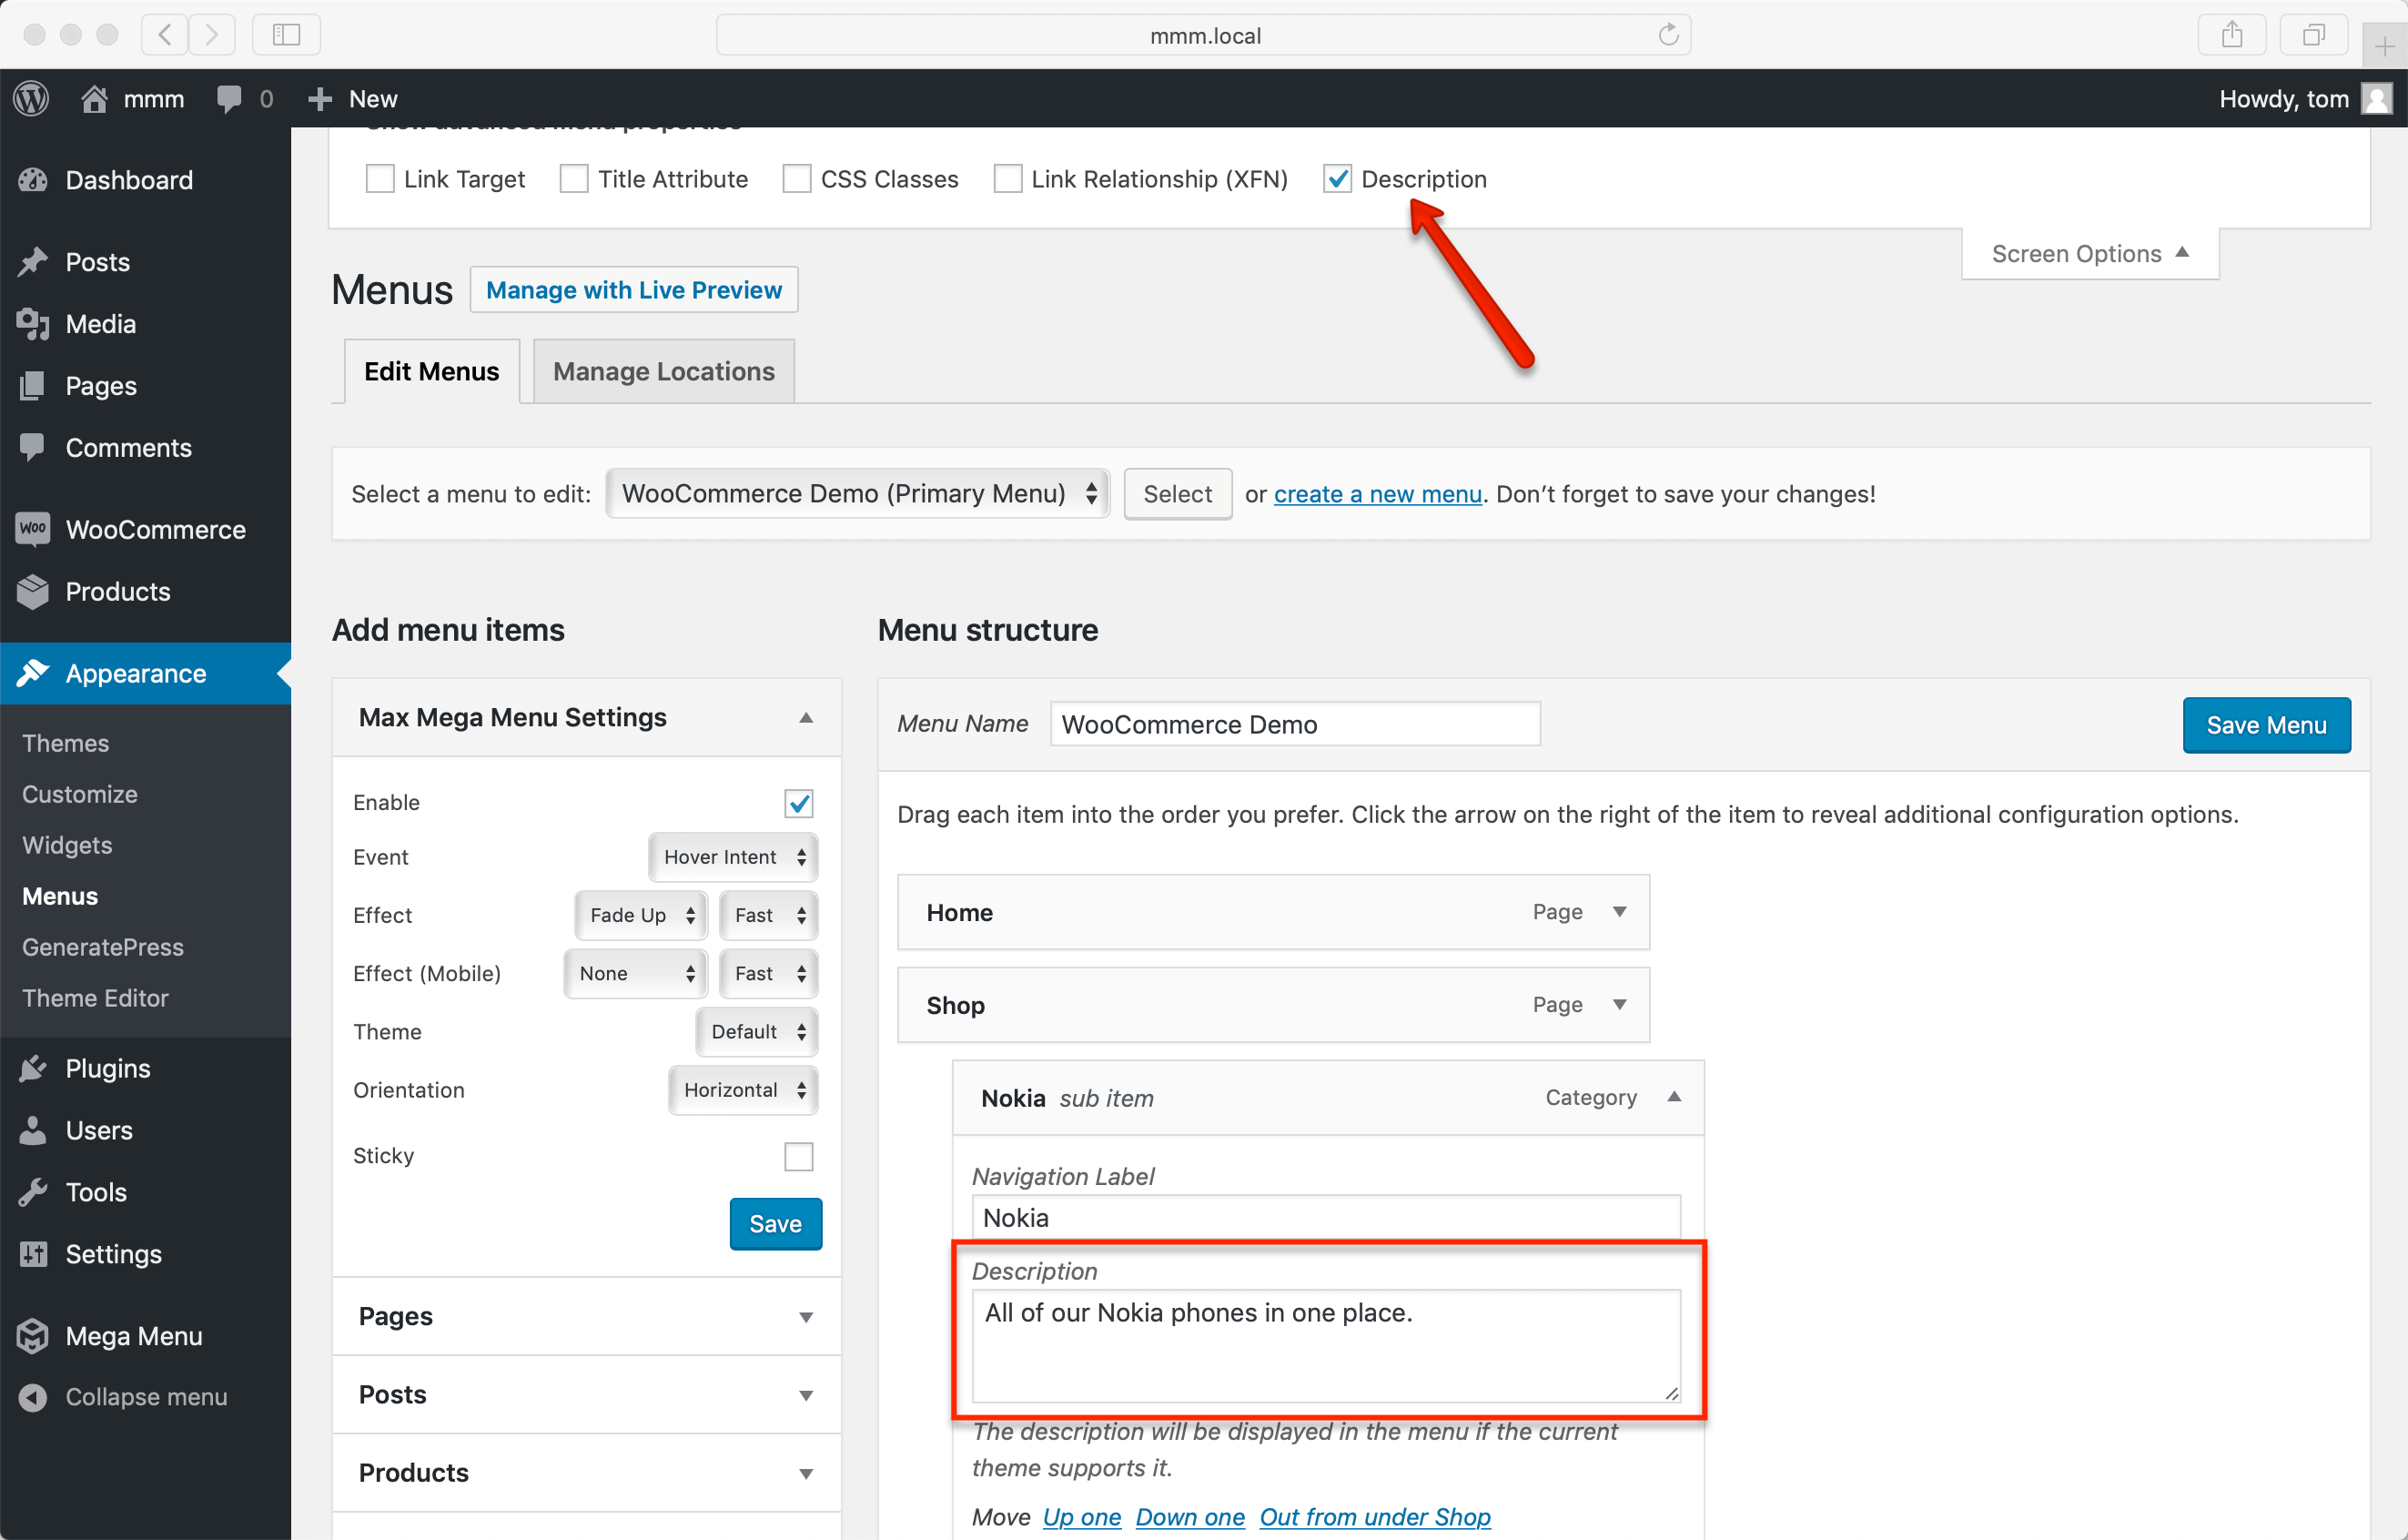
Save the menu after the configuration.
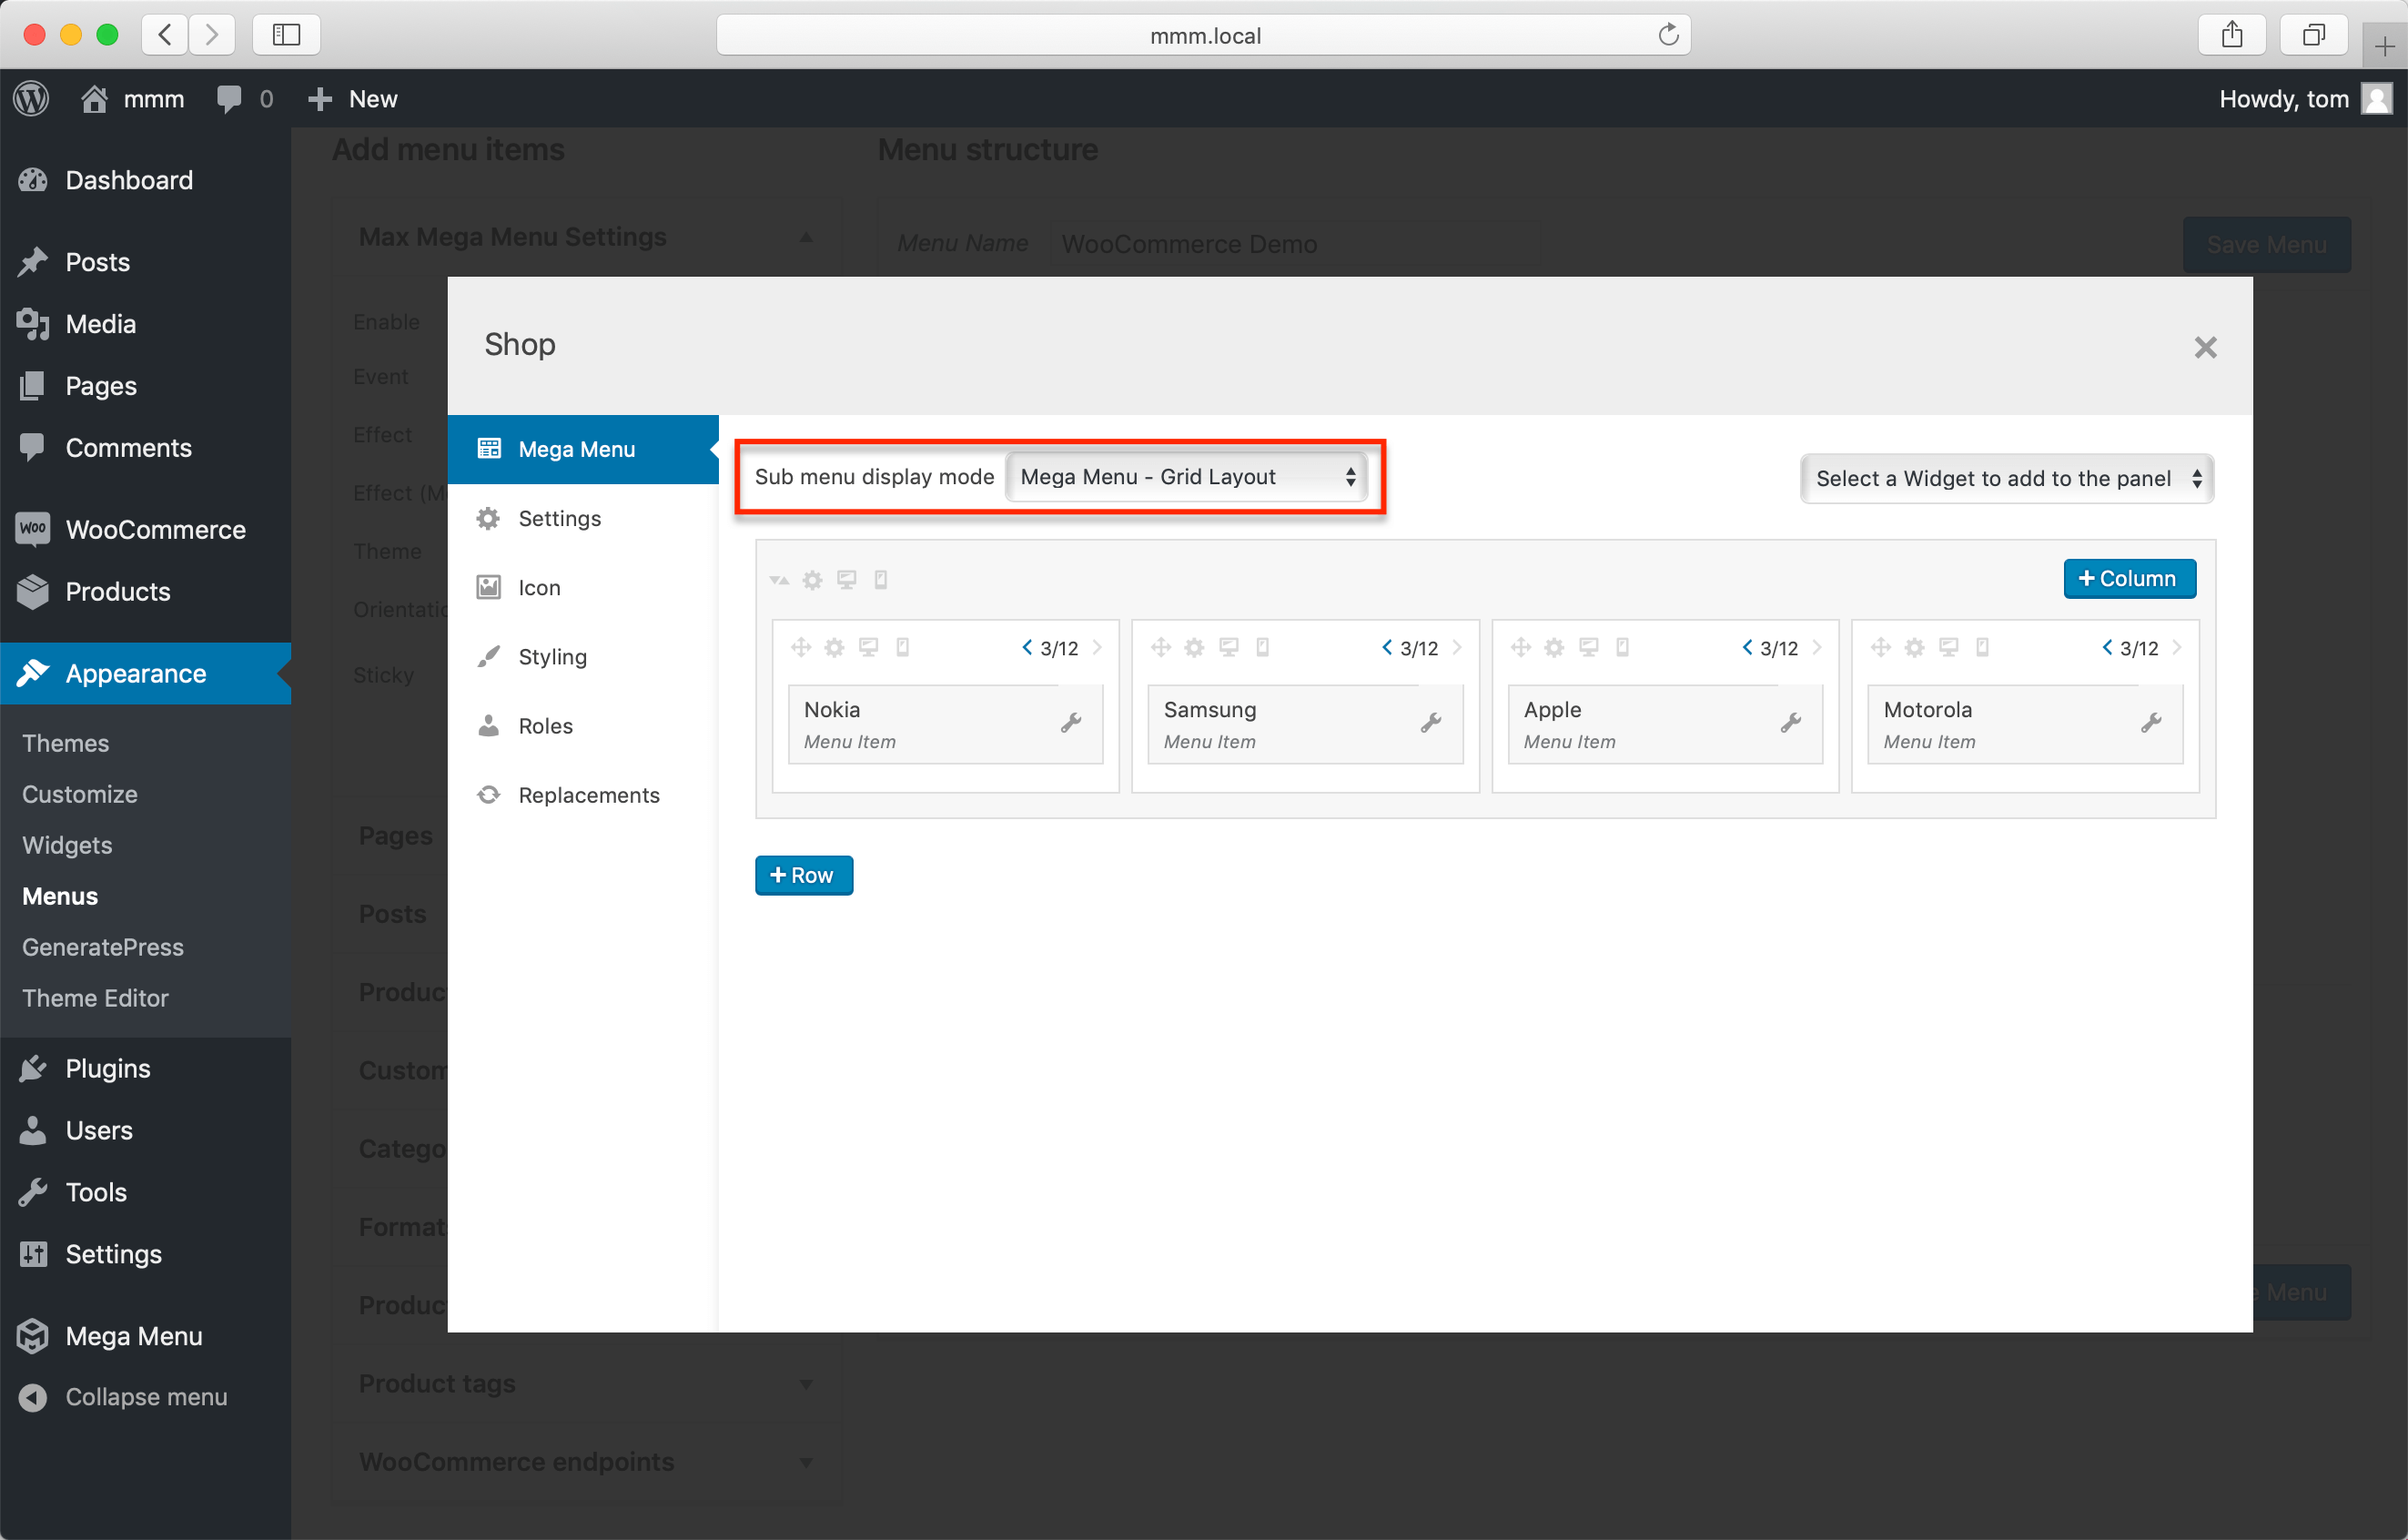
Step 3: Setup the Mega Menu
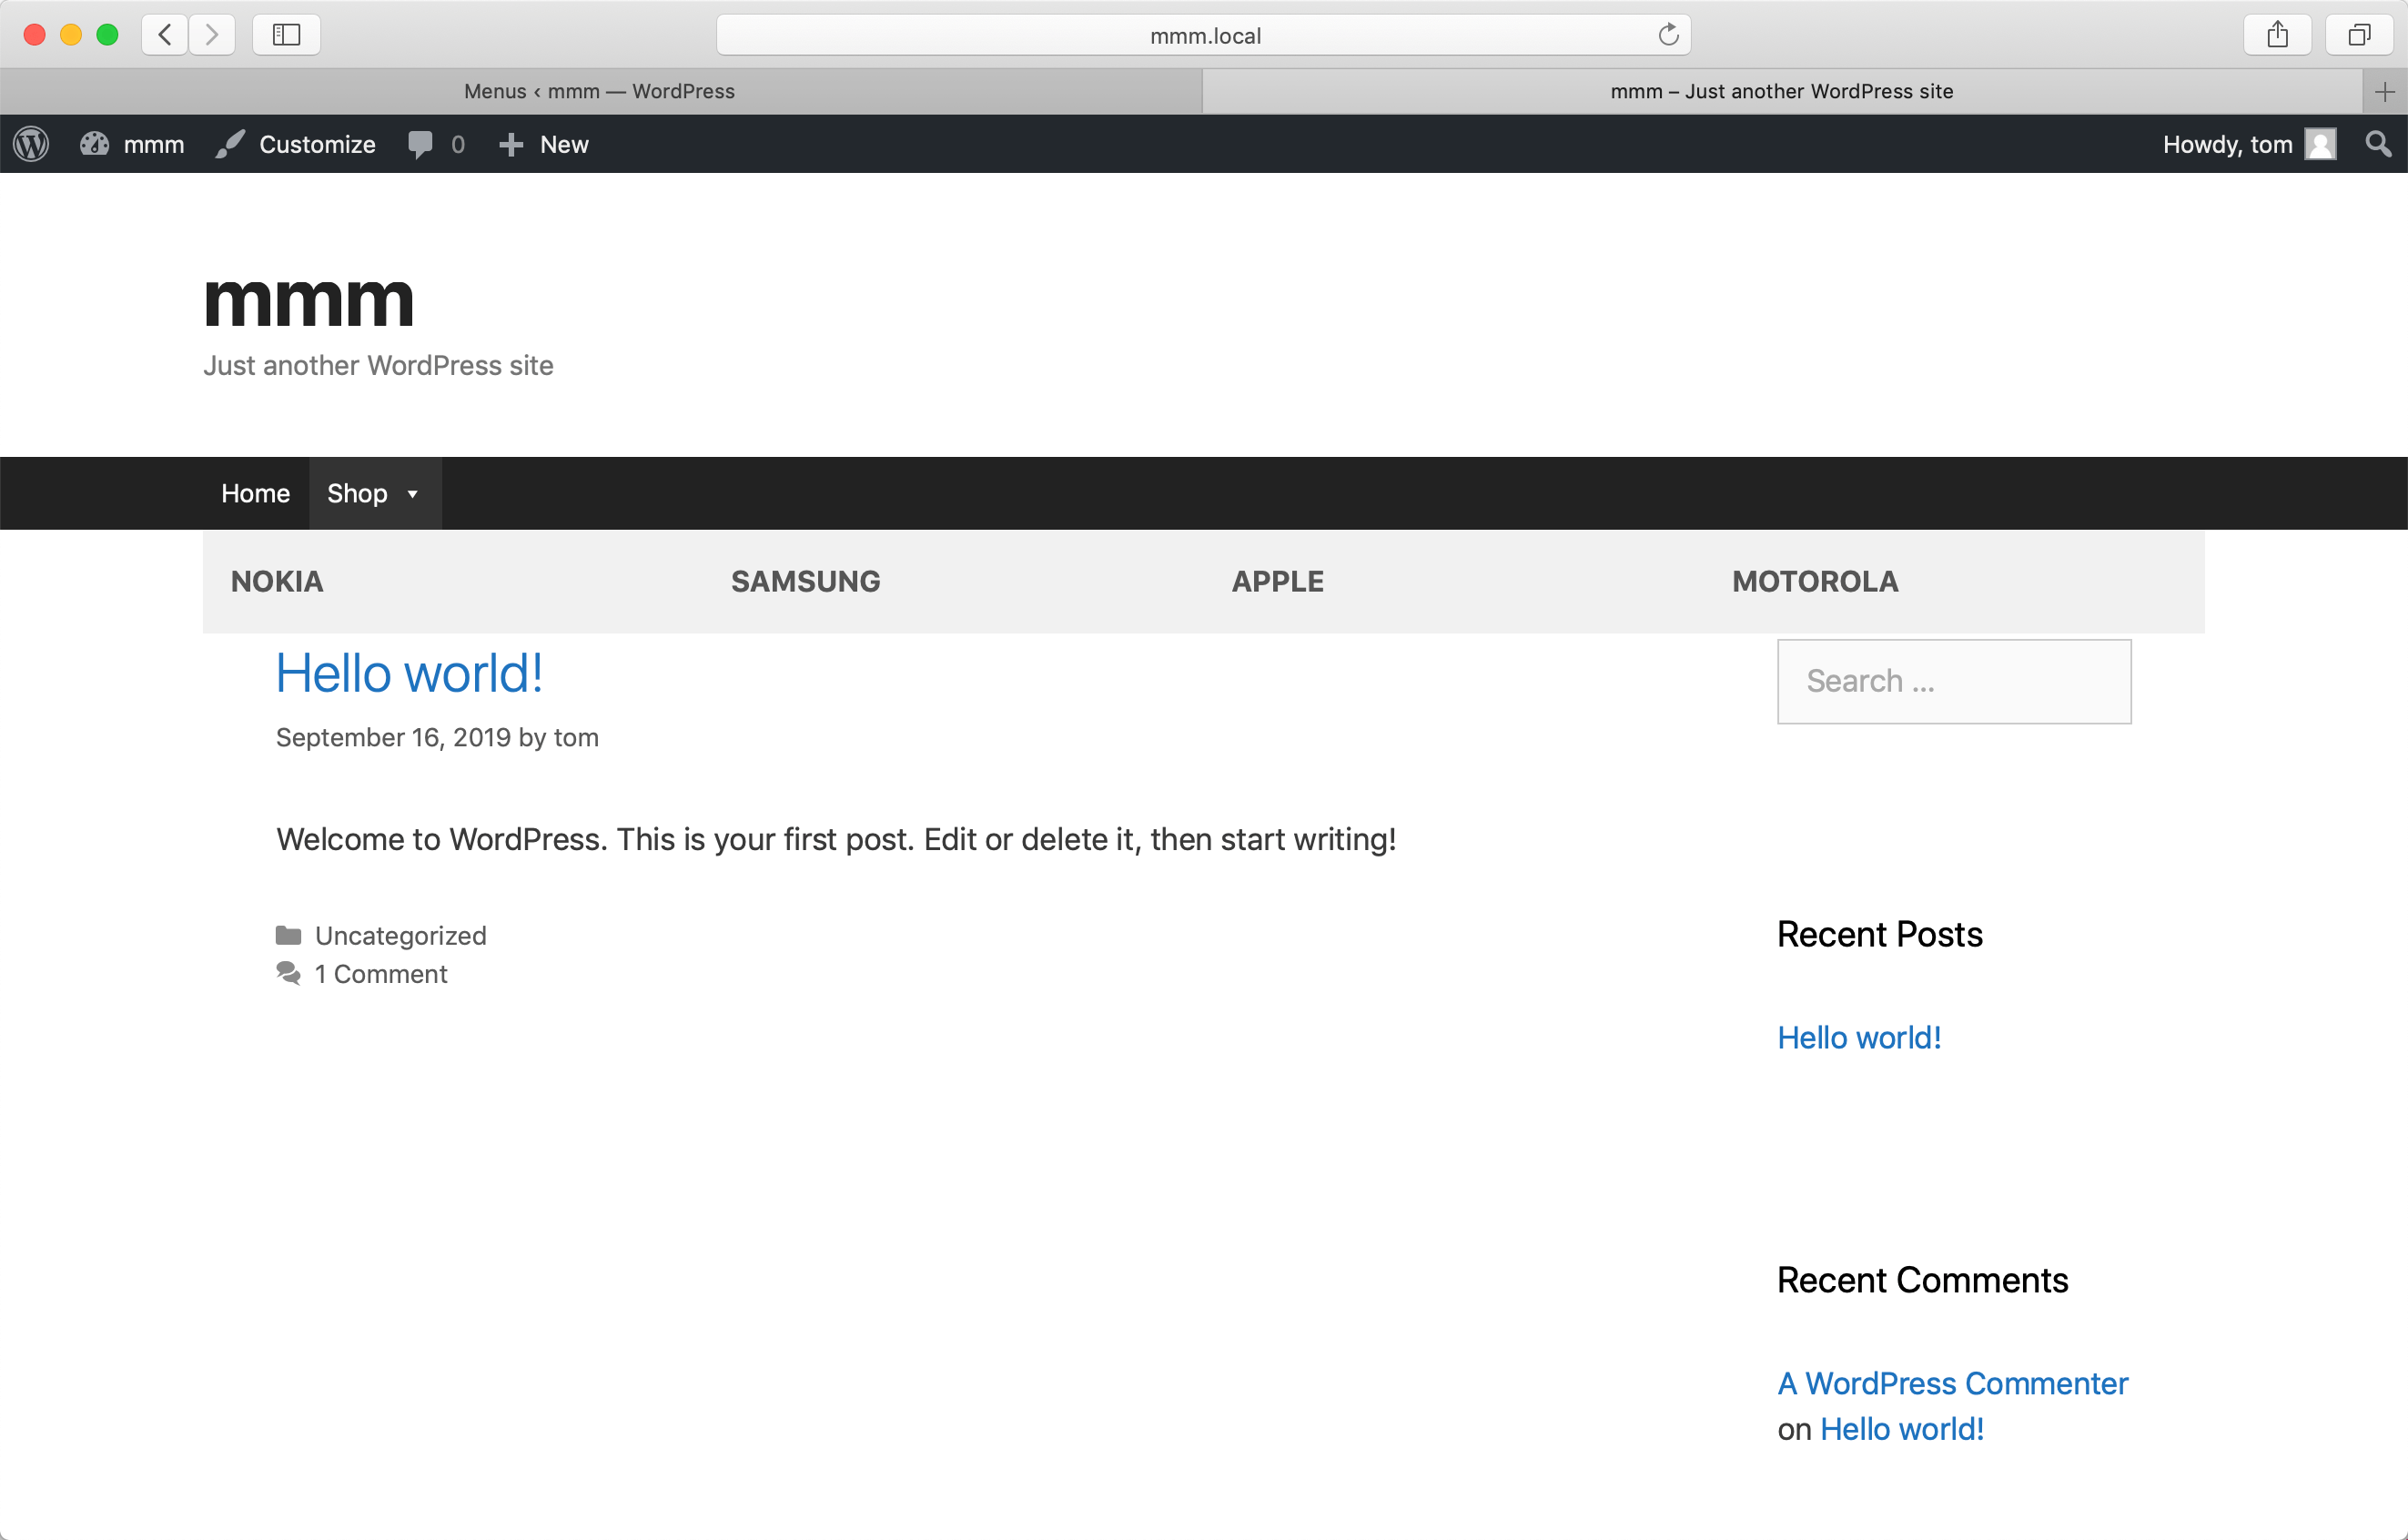
Go to the Shop menu items and click the blue Mega Menu button to the right. Select Mega Menu – Grid Layout as the Sub Menu Display Mode.
The grid structure will be filled with the submenu items automatically (in this case, our product categories). Sort these items into four columns.
On the front end, our menu now appears as follows:
Step 4: Customize the categories using icons
In this stage, we’ll customize the WooCommerce menu items with custom iconography. This feature is included in Max Mega Menu Pro. Users of the free plugin may substitute dash icons.
Navigate to the Nokia menu item and click the blue Mega Menu button. Set the Icon Position to Top in the Settings tab and save the settings.

Select a custom icon and adjust its size in the Icon tab.
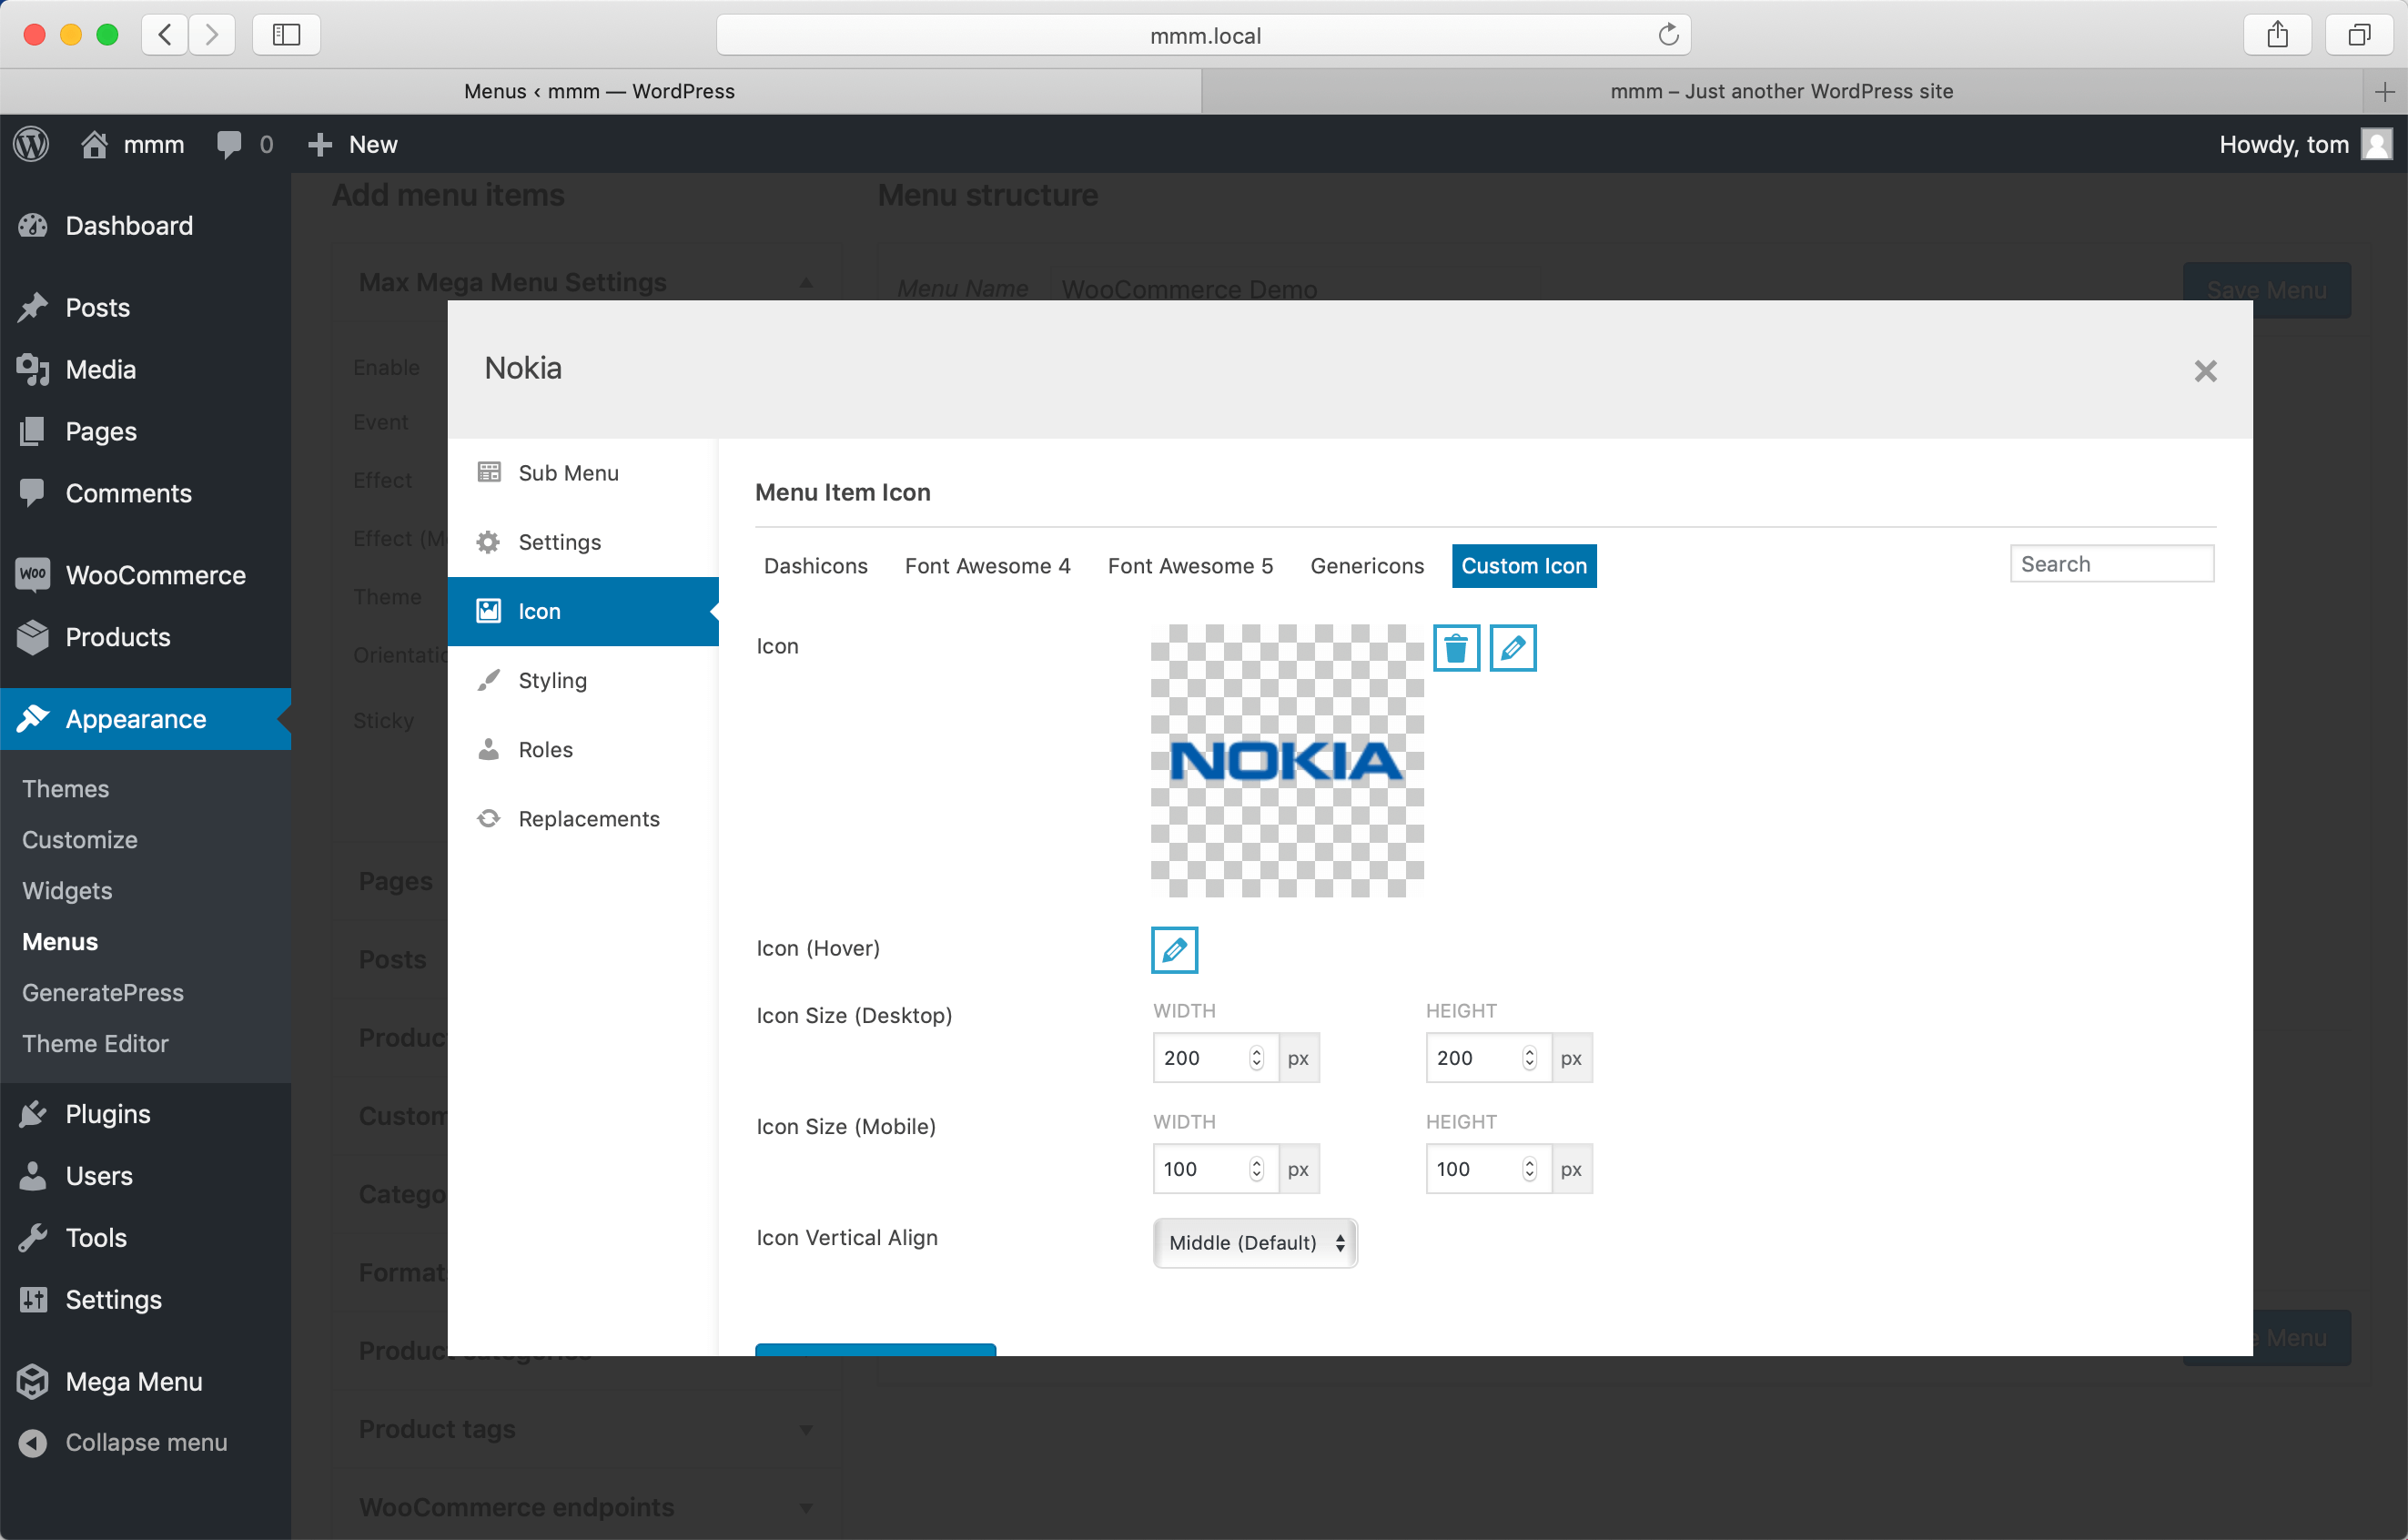
Save the custom icon and continue with the remaining product categories.
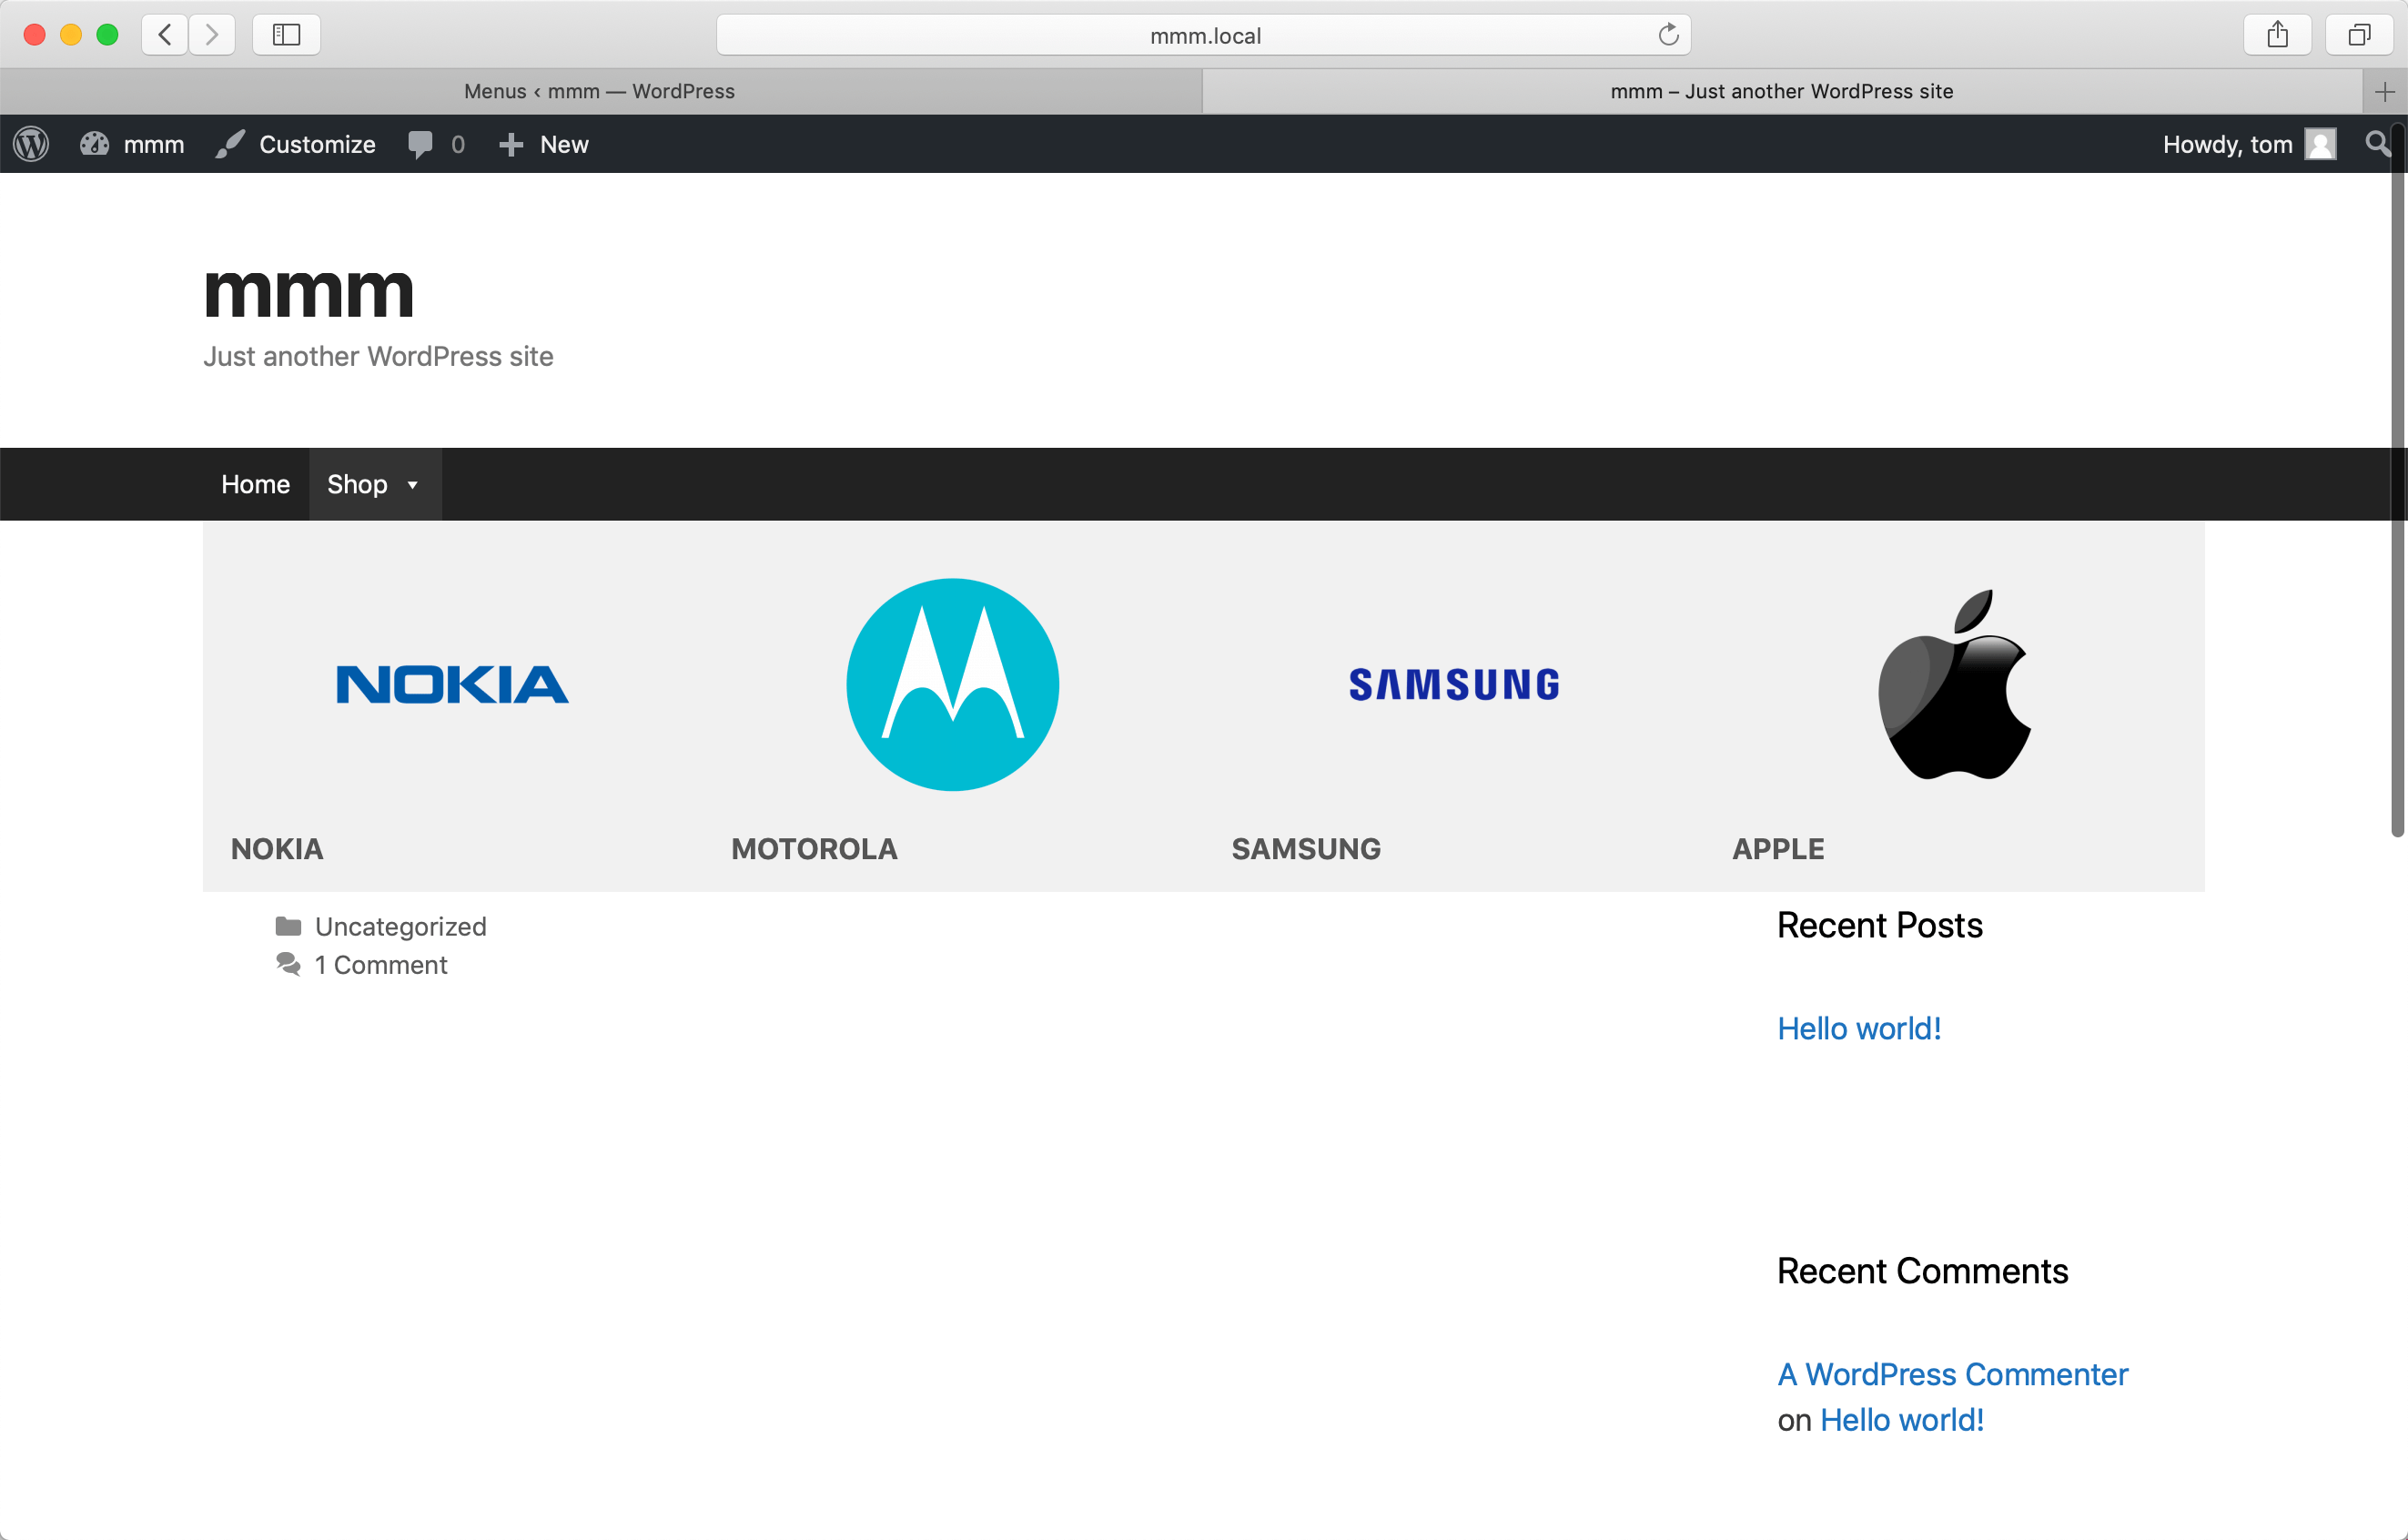
Once the icons are inserted, our menu will look as follows:
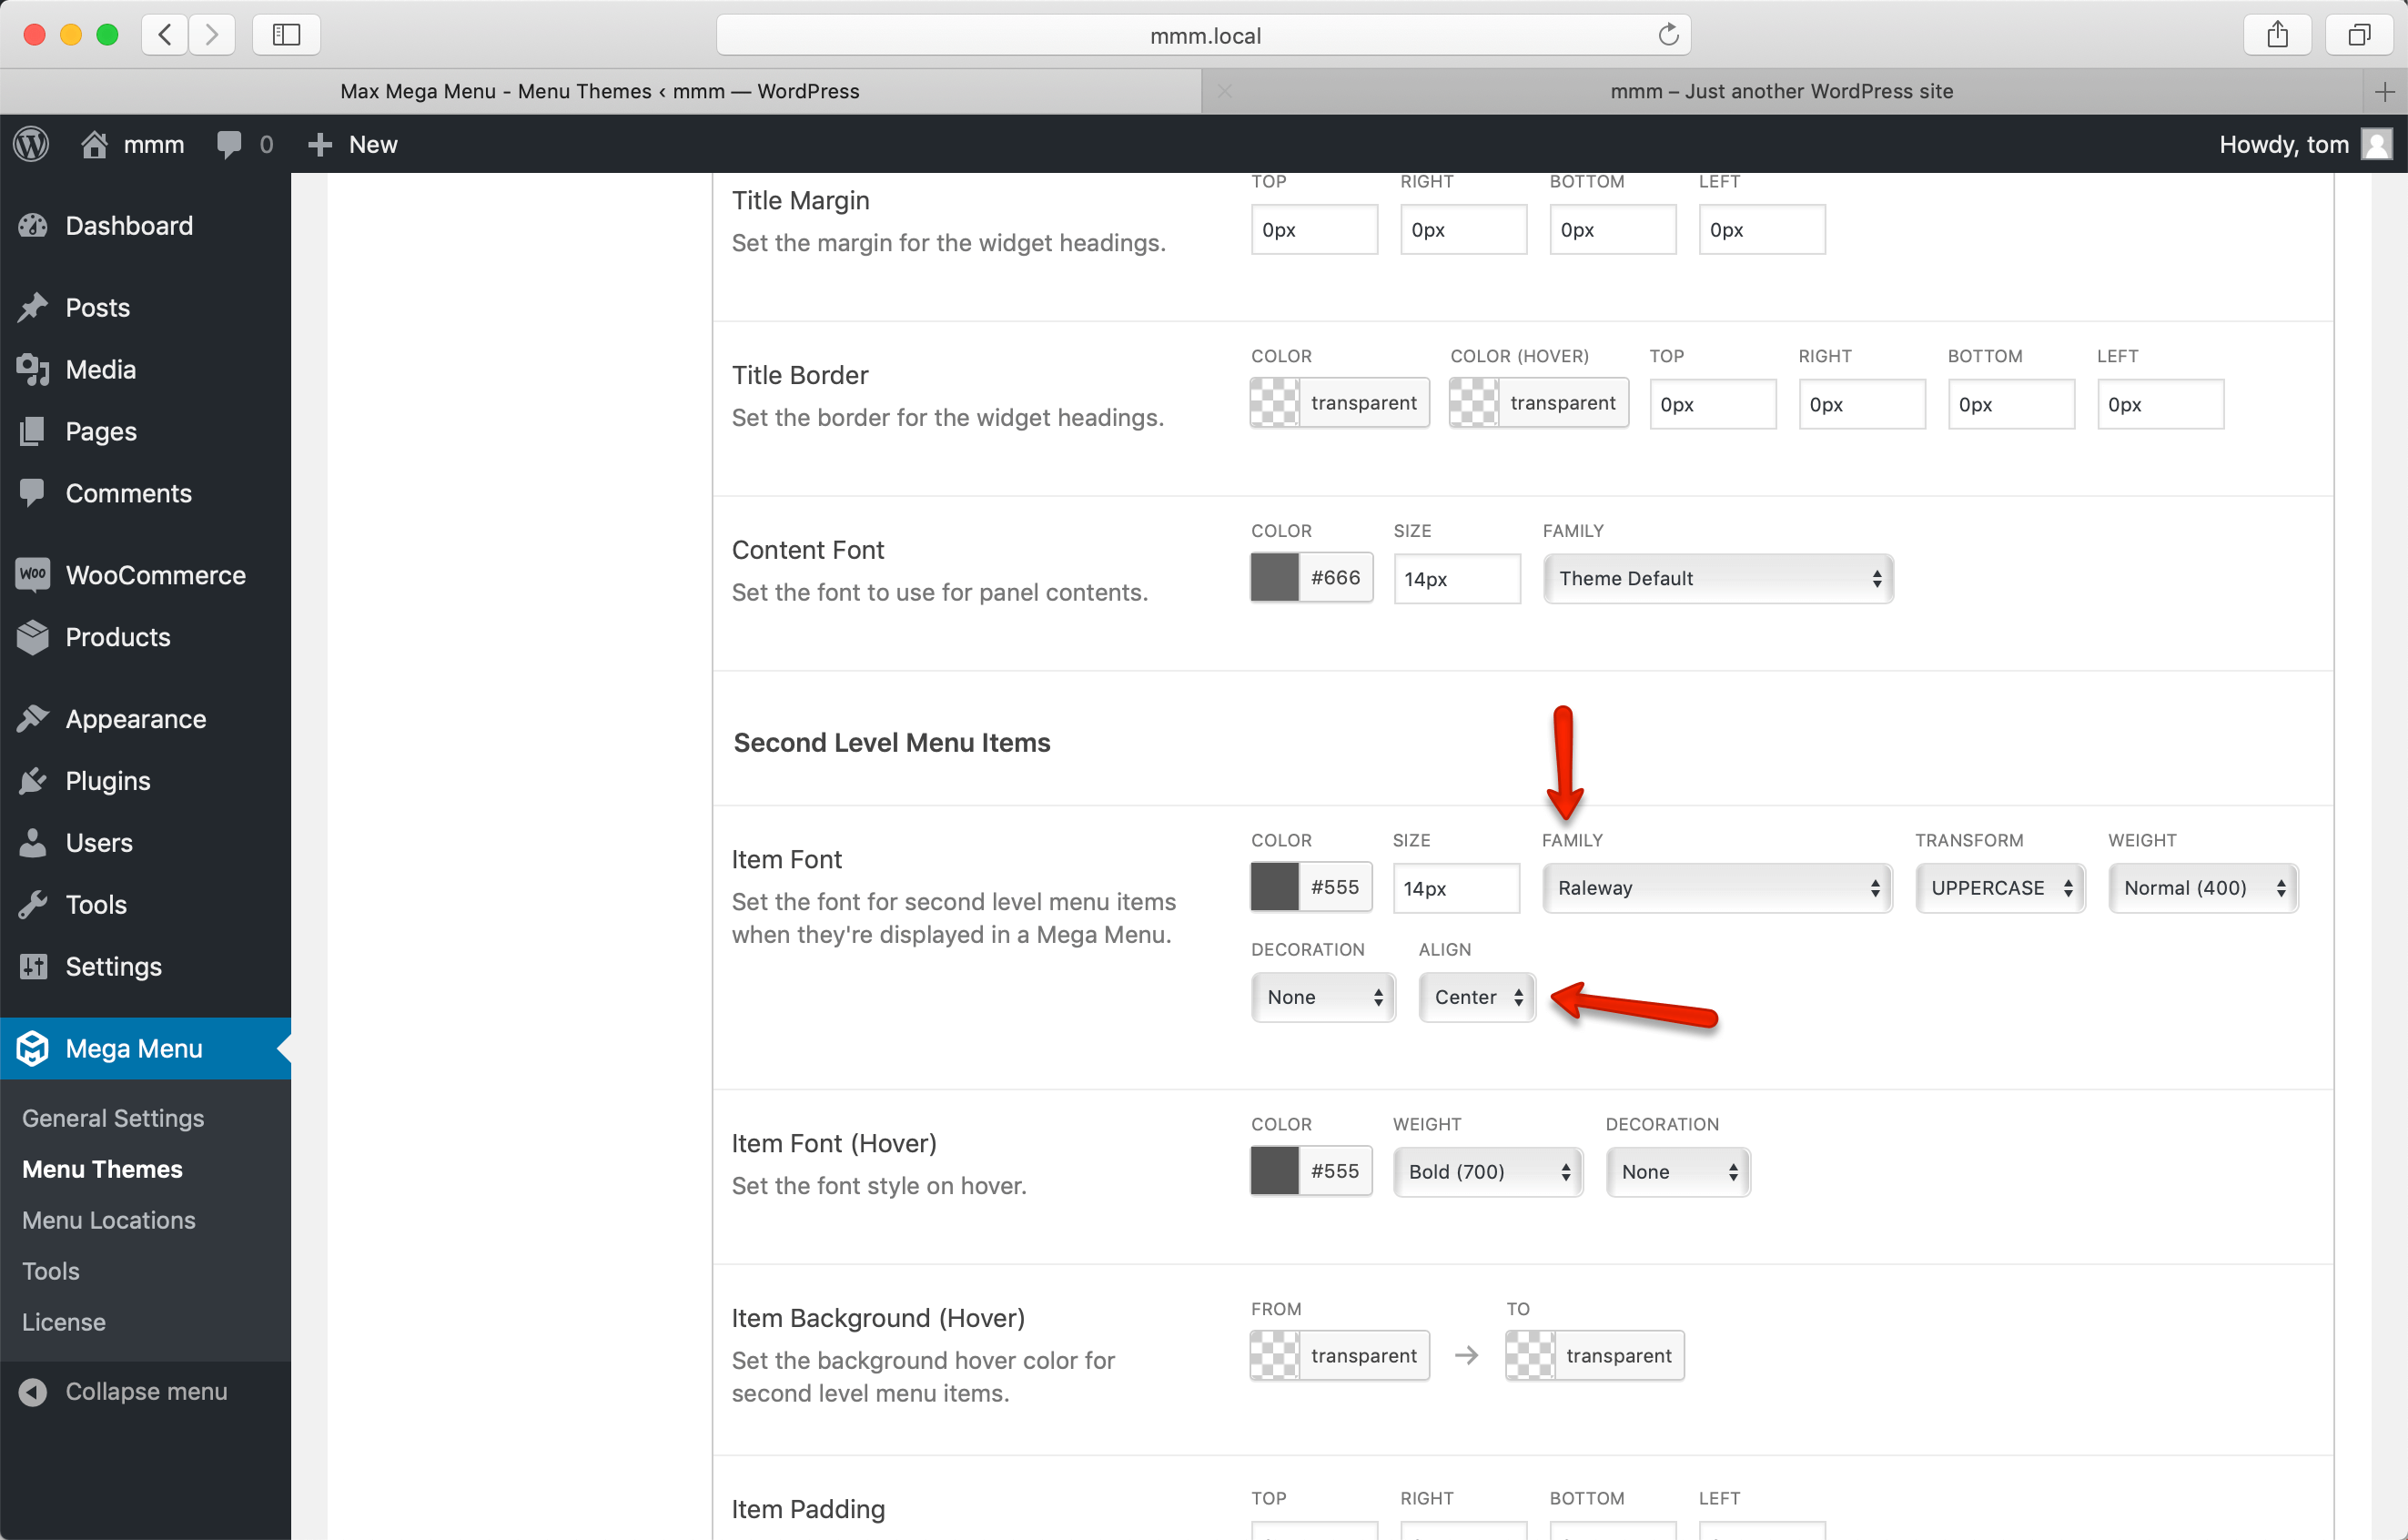
Step 5: Text styling
Each icon’s accompanying text should be centered. We’re utilizing normal menu items to show the categories within the menu in order to take advantage of the Theme Editor’s built-in features. Navigate to Mega Menu > Menu Themes > Mega Menus and scroll down to the section under Second Level Menu Items. This is where you may configure the font choices.
If you’d rather style your products separately (without influencing other second-level items in your menu), you can do so with Custom Item Styling.
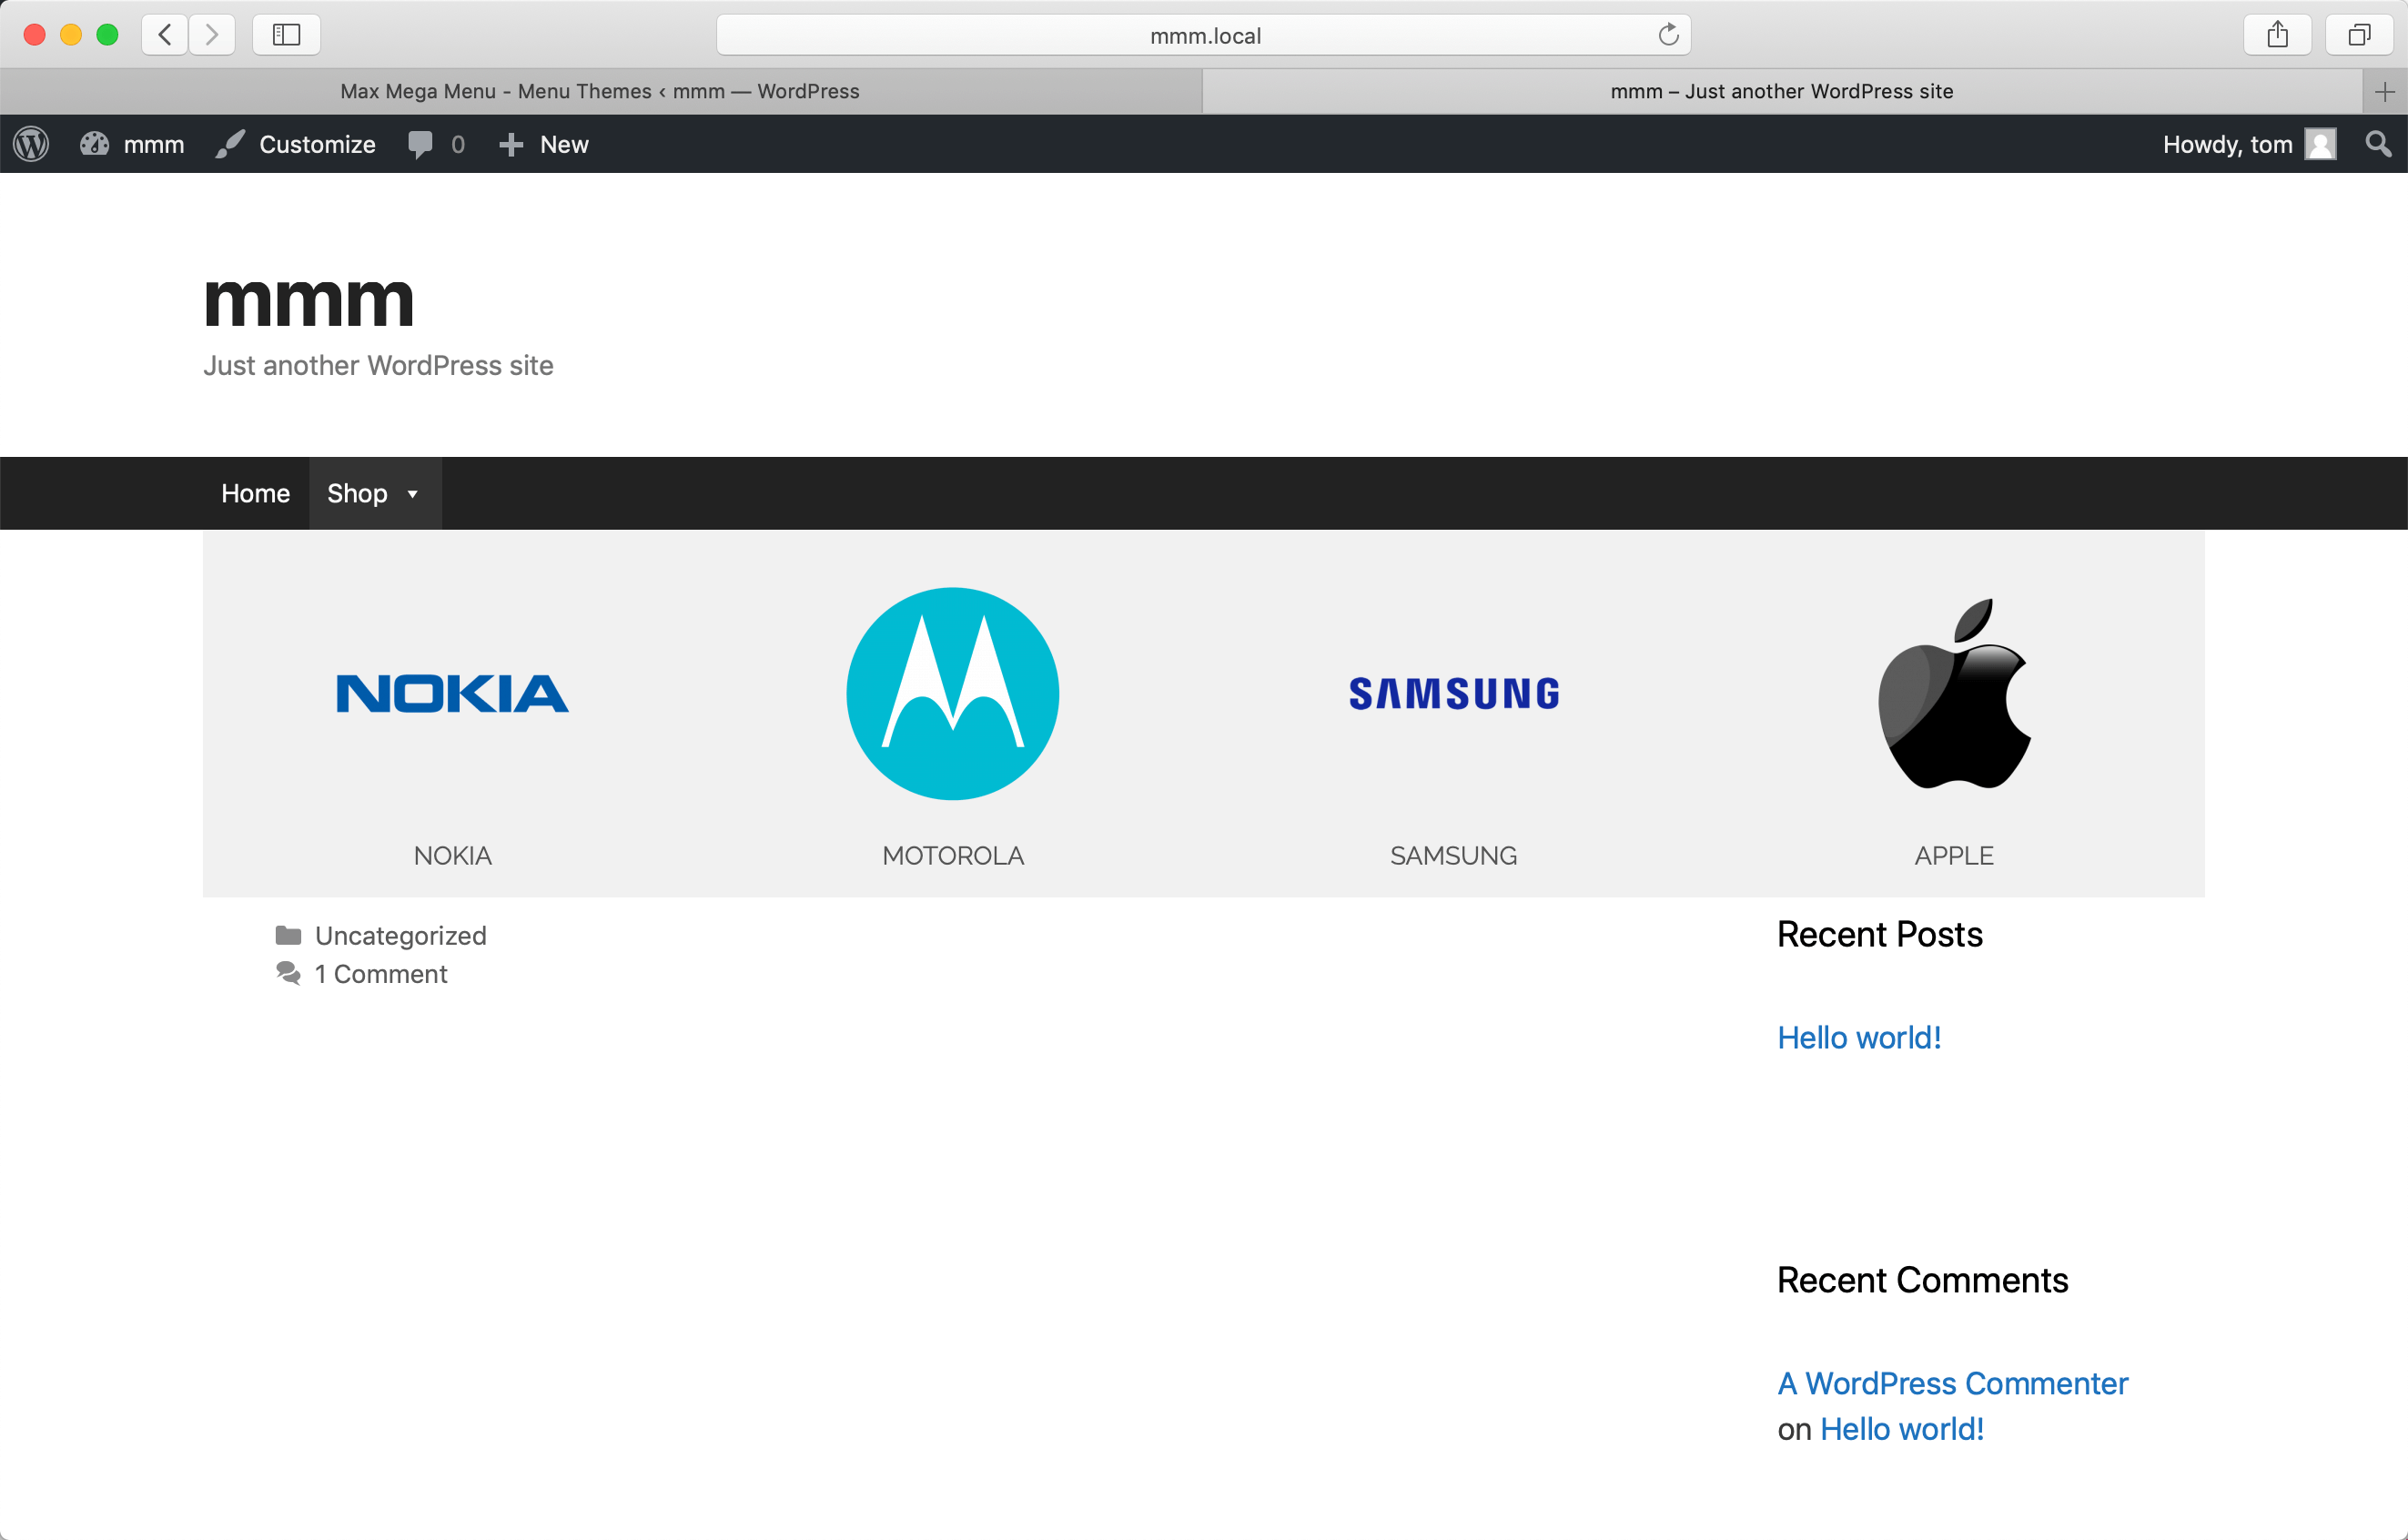
Final Result
This is the result of all the configurations we made above:
Problem may occur while adding WooCommerce Categories in your menu
You are unable to see the products or category meta boxes?
If you are unable to locate any of these meta boxes within your WordPress Menu sections, they are most likely hidden within your Screen Options.
To correct this, at the top of the window, click the Screen Options tab and toggle the checkboxes for the concealed elements.

Final thoughts
Adding product categories from the WordPress admin dashboard is a simple and quick process that takes only a few minutes. After reading through this article, we hope you are now able to set up your WooCommerce menu categories quickly and seamlessly.
Do you find this article informative? If you do, please share this post with your friends and coworkers, and stay tuned for more useful instructions, tips, and advice from AVADA.


