
How to Add a Shopping Cart to WooCommerce

WooCommerce has withstood the others in terms of powering multiple eCommerce sites. It even matters when it comes to built-in features of the WP shopping cart, coupled with further add-ons. So, if you equip your WooCommerce store with a shopping cart, it will offer a better experience for shoppers.
The benefits of a shopping cart on this kind of platform are undeniable. And the existence of a shopping cart in WooCommerce is a must to improve the store itself on account of its significance. Therefore, take it into consideration, and let’s go with us to explore how to add a shopping cart to WooCommerce. Do it, and you will be amazed!
The benefits of a shopping cart in WooCommerce
Before going into details of step-by-step instructions, we will first come up with the obvious benefits of a shopping cart in WooCommerce. By knowing that, you could feel more eager to add it to your WooCommerce and have fun with it!
-
You are able to display one or even more products to sell in your store
-
The creation of a shopping cart help buyers to preview and browse myriad choices to select what they will buy
-
It allows customers to process the payments by credit card on your site through myriad payment gateways such as Stripe and PayPal
-
It comes with extra features such as saving cart history, support payment services
-
A WooCommerce shopping cart provides a fitting design t fit your website well
How to add a shopping cart to WooCommerce
Now, it is time to add a shopping cart to WooCommerce and you can start selling myriad products on one single site. Follow our below instructions strictly and you could do it successfully.
Step 1: Preparation
To add a shopping cart to WooCommerce, you need to have WooCommerce installed and activated already. Hence, you can proceed with further steps easily and quickly. In case you have not set up an account on this platform. See our following guide.
- Install WooCommerce
With this first step, installing and activating your WooCommerce is a necessary thing to do. As WooCommerce charges users no fee at all, you could make a free download from WordPress.org. Then, just finish the download and activate it.
Another way to install your WooCommerce is to navigate to the area of WordPress administrator. Approach the section “Plugins” and select “Add New”.
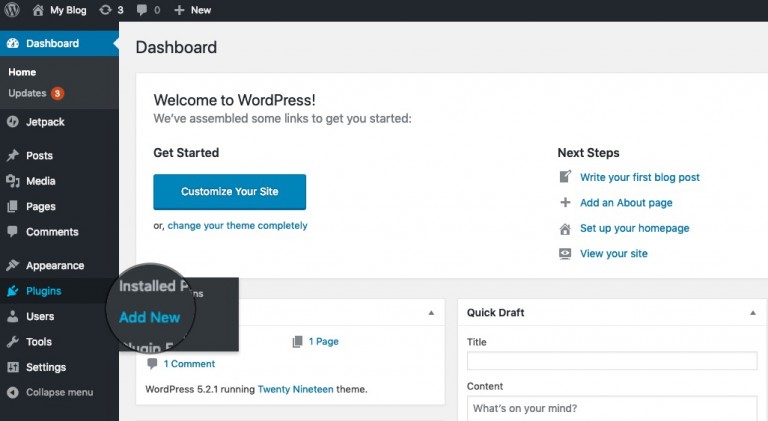
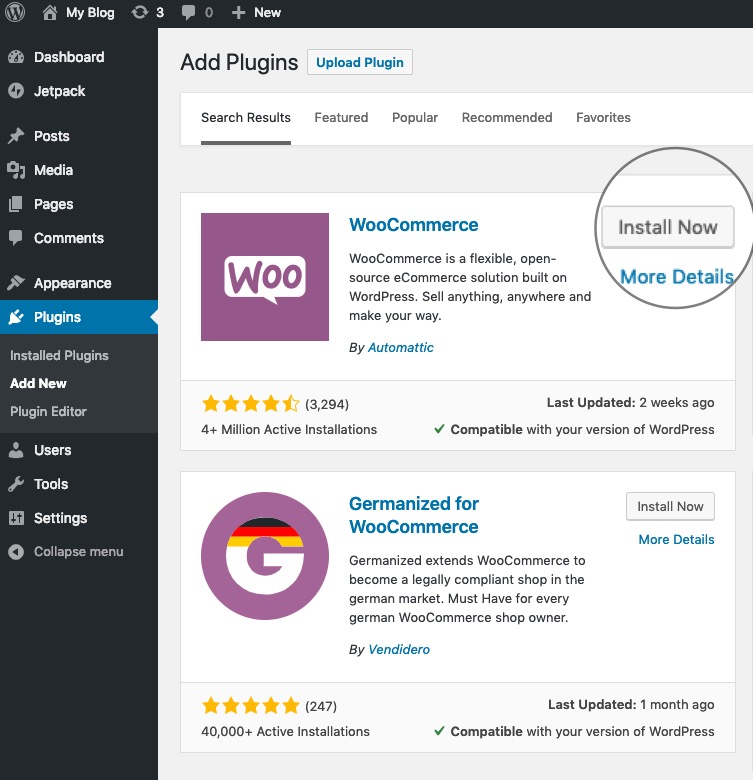
Your next move is to your search field where you can select “Terms” from your dropdown menu. Here, type in that text box with “WooCommerce”. This search field will understand that you are in search of the WooCommerce plugin. Then, the 1st result “WooCommerce” will appear. Click the button “Install Now” to start installing it.
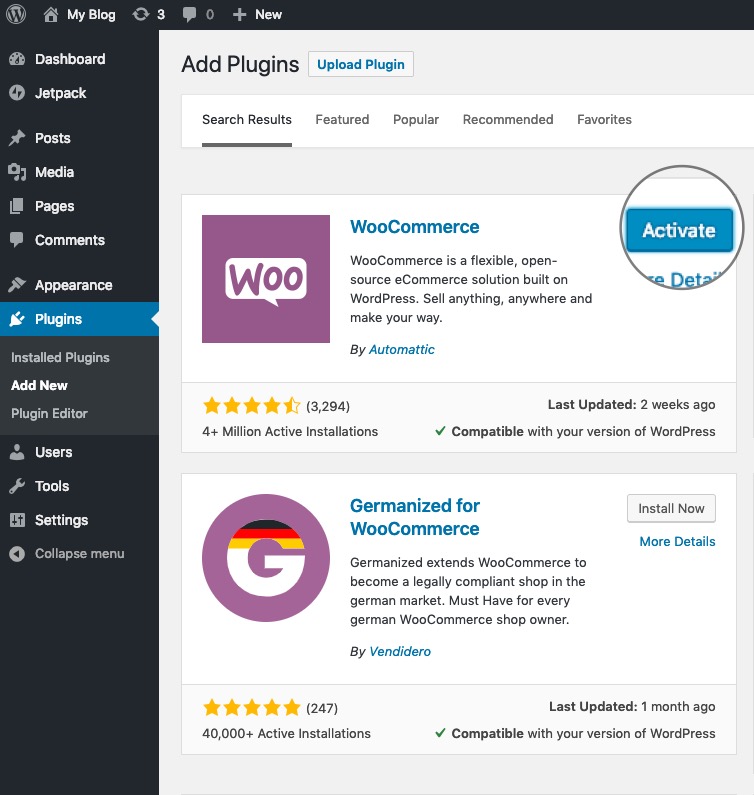
After that, WooCommerce will be downloaded as well as installed automatically for WordPress. When its installation is done, choose “Activate” to have it enabled.
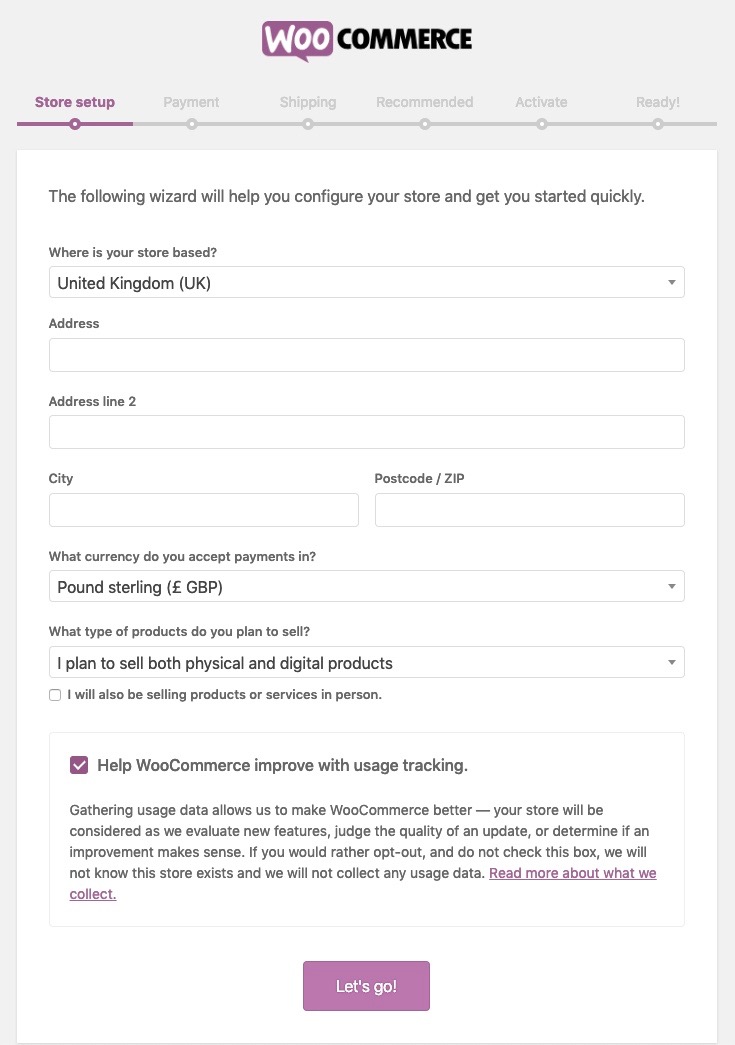
Next, you will be taken to the initial configuration of the plugin’s wizard. And this leads you to see a page “Store Setup”. Here, you could configure the store location, the currency, along with the store address that you are going to apply for. What is more, this wizard also comes with all basic setups such as core pages, including checkout pages, and shopping carts, payment gateways, as well as shipping options.
Select the option that fits your WooCommerce store, site, and your target audience. Go ahead with choosing the button “Let’s Go” and continue with further steps.
- Execute the configuration of Payment, Shipping and within WooCommerce
When everything is okay as regards WooCommerce installation, you move to another not-to-be-missed step is to configure the payment as well as a shipping option for your store. Several payment methods are available; thus, you can pick up one or more than one among them. Then, enable the payment options for WordPress. As soon as you are done selecting the expected payment options, click the button “Continue” to move to another step.
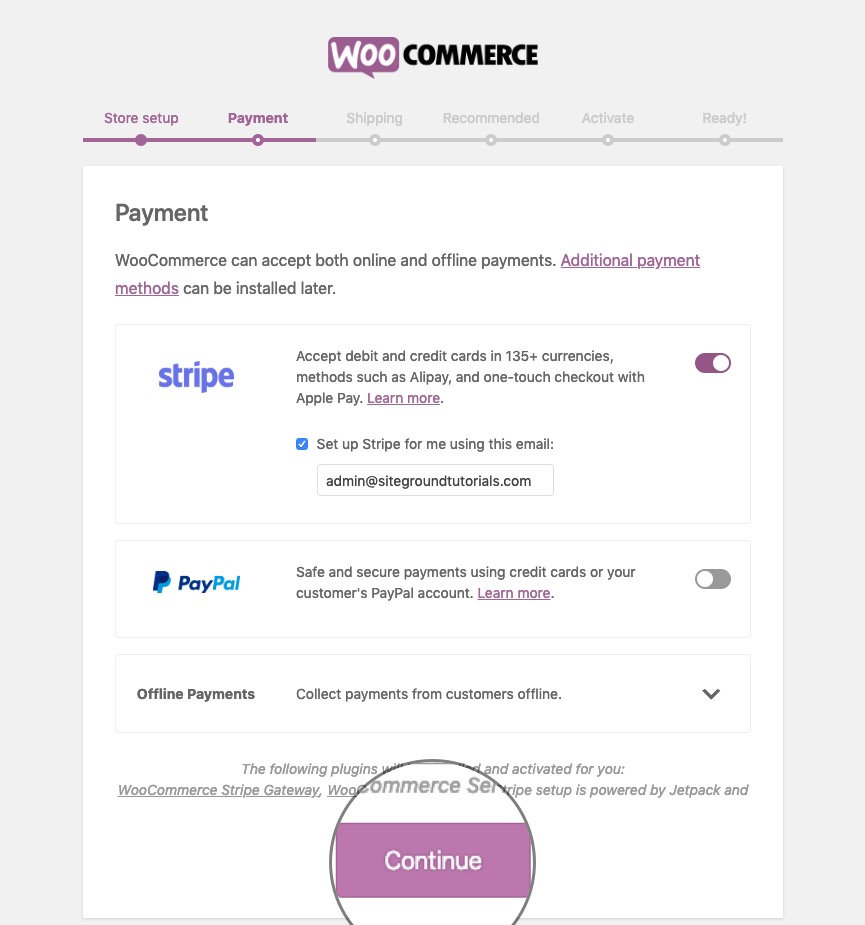
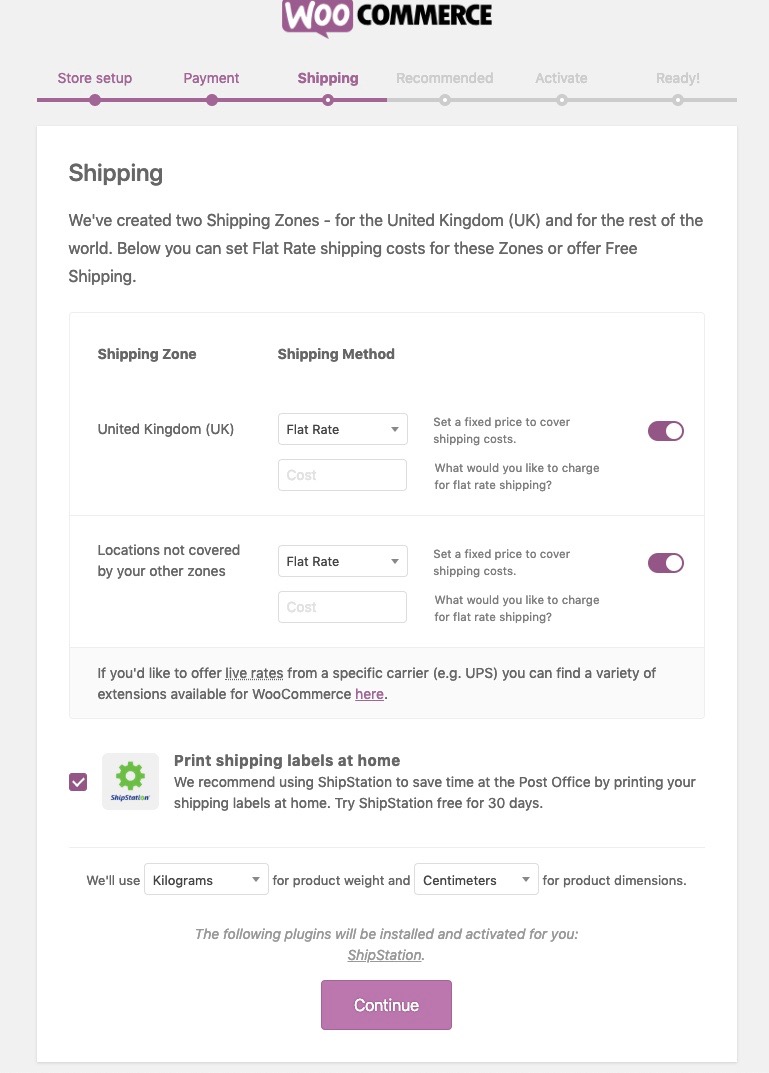
By clicking “Continue”, another page will open. This is where you could configure your Shipping options. Among these options, choose the proper one and click “Continue”.
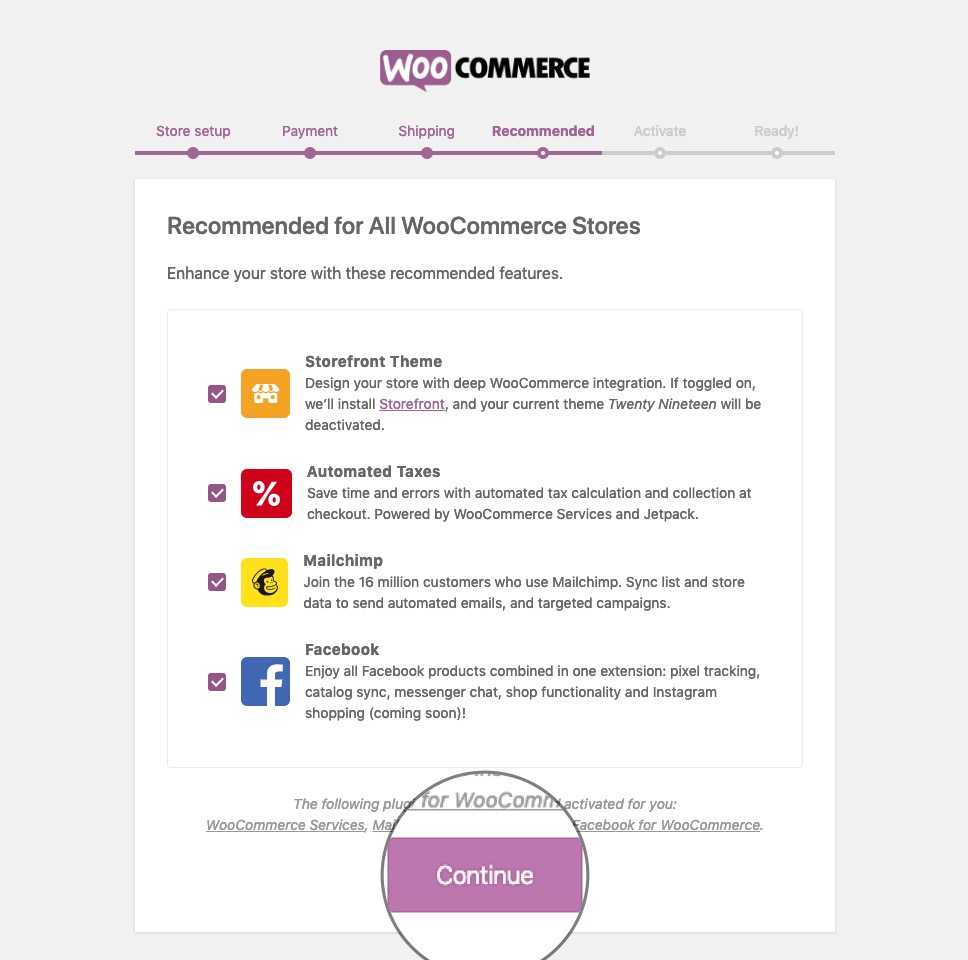
Step 2: Build Storefront theme for WooCommerce shopping cart
Building your Storefront theme is a must-do step and this step is known as “Extras”. You will need to install as well as activate your Storefront theme, along with enabling Facebook, Mailchimp, and Automated Taxes. As you can see, this Storefront theme will be designed specifically to be applied to WooCommerce. Hence, if you wish to use this theme, do not hesitate to tick the box next to each section.
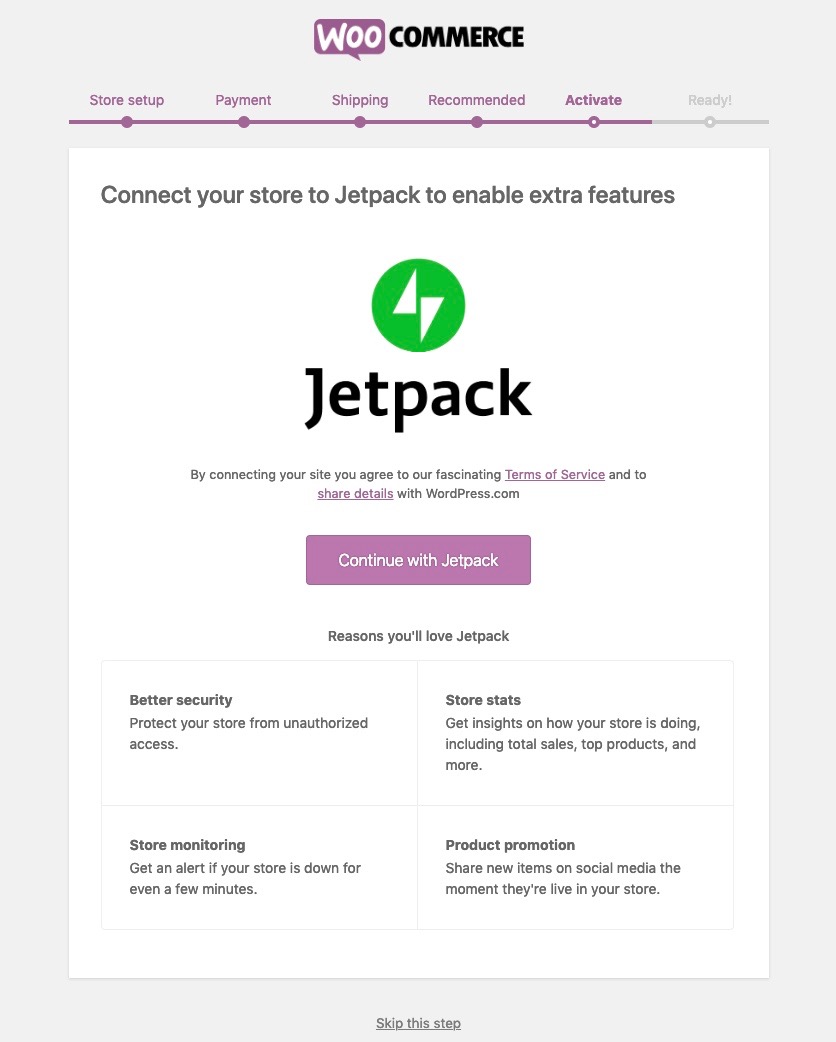
Move to another step to activate your Storefront theme. This requires you to connect Jetpack to your store. Select the button “Connect with Jetpack” and you will go to the page of Jetpack authentication. In case, you are not keen on the connection between your WooCommerce store and Jetpack, you could skip this step by clicking the button “Skip this step”.
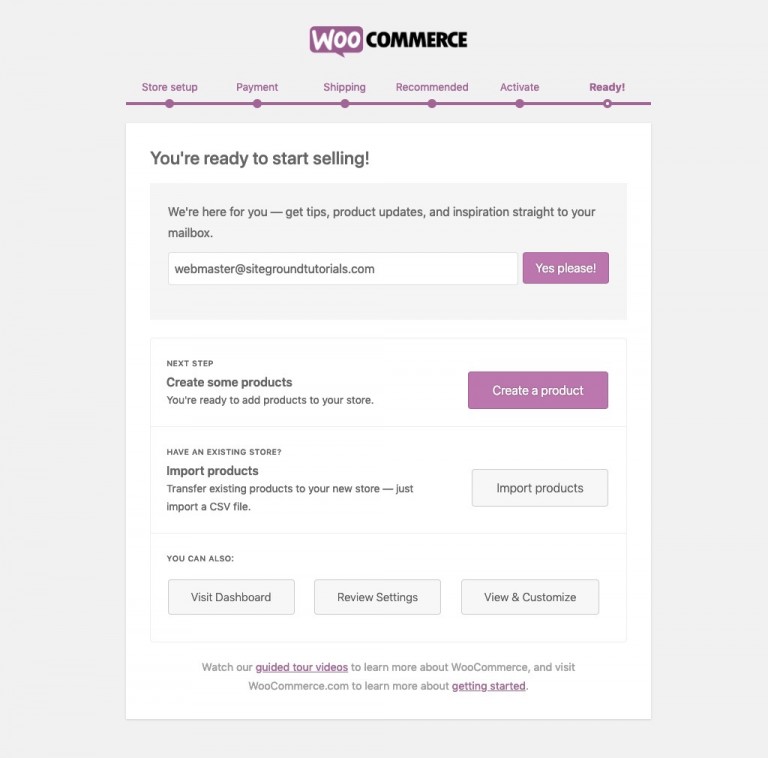
Congratulations! You have successfully installed and created basic setups on your WooCommerce website. Let’s together start executing the next steps to reach a full completion of adding a shopping cart to WooCommerce. By clicking the button “Create your first product”, you now could create one or more brand-new products. Or in case you have your .csv file filled with product information that comes from your previous website, you could select “Import products from a “CVS file” for importing them.
Step 3: Create new products
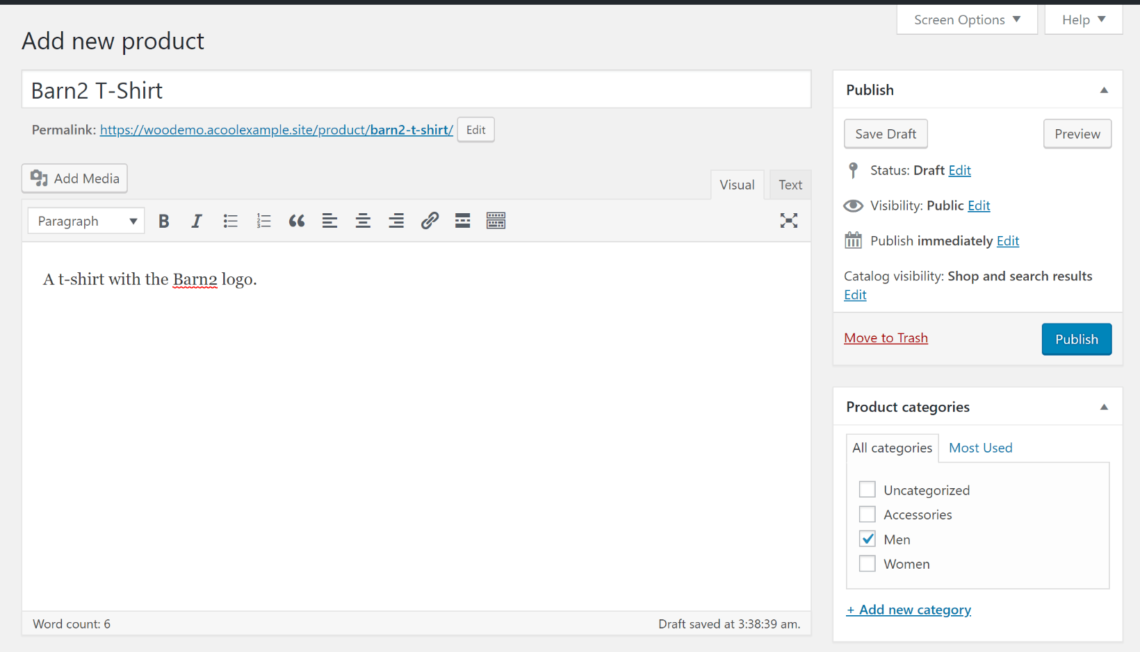
Once you have completed the principle installation and configuration in your WooCommerce, are you willing to add new services or products to your store? To implement this, you need to approach the section “Products” and choose “Add New”. Here you will enter some of the information related to your added products or services, including title, description, categories/tags, and images.
In the next step, configuring product-specific settings is a prerequisite. To do it, you could make the most use of the box “Product data”. Several boxes are places that you need to fill out some information: prices, shipping measurements, shipping details, or inventory status.
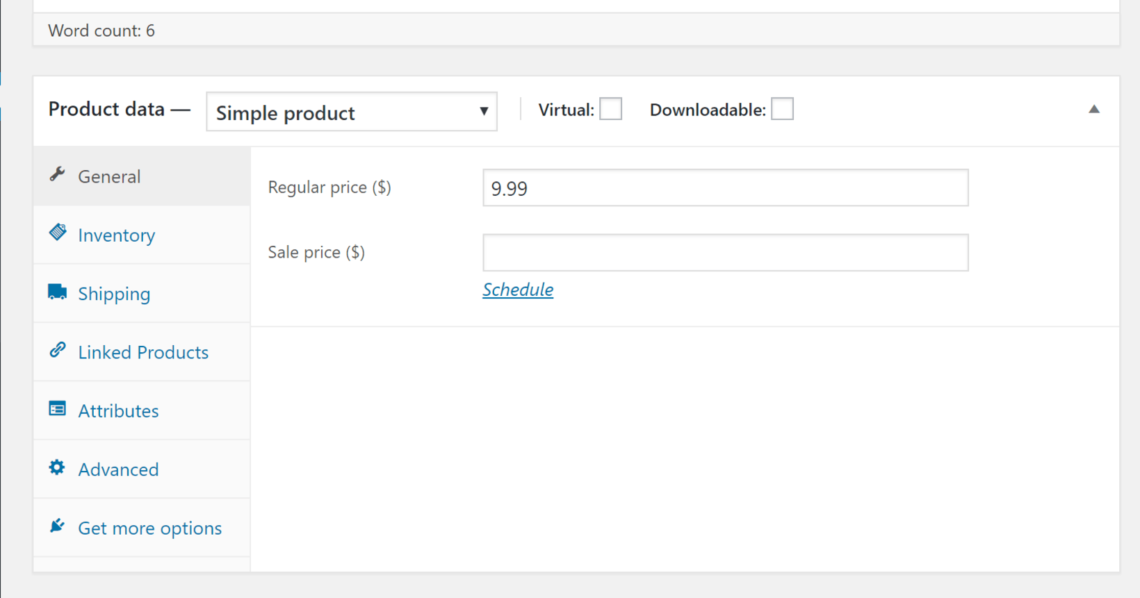
Additionally, you could also choose to set up variations and attributes. This configuration allows you to sell myriad versions of your product. For instance, you could set up different colors and sizes for a product. Therefore, customers can select from multiple choices for preferred variants. Moreover, you are also able to charge different kinds of prices based on what a customer will select.
Step 4: Further customization
Once you have added a shopping cart to WooCommerce, you could continue with further customization to make it look and work better. In short, there are several things that you should take into account to improve your WooCommerce shopping cart. See below and see what you need to do in this situation.
- Improve your WooCommerce shopping cart by using the table layouts
WooCommerce, by default, lists products in a layout that is similar to most eCommerce sites. In this product list, you only get product images without details of each one. So, if you want customers to see more information about your products, you could take advantage of the table layouts to list your products.
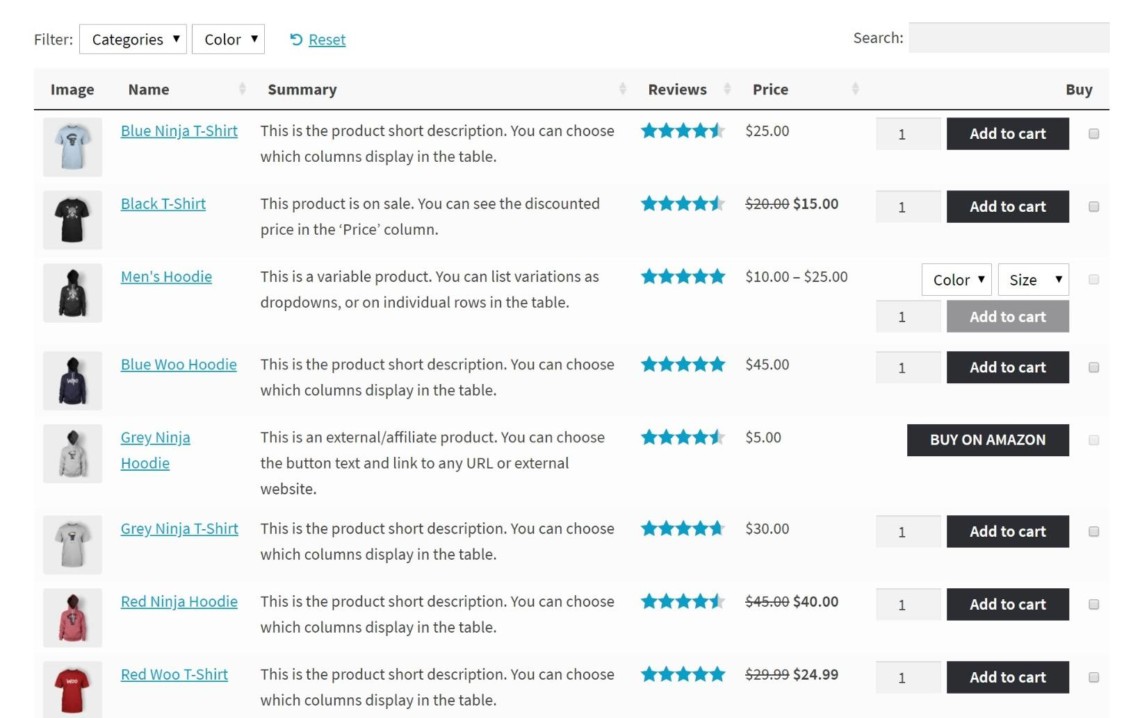
By using them, you can show much more information about every product, display more products without taking much space, and allow shoppers to select myriad products from this list and add them to their current shopping cart simultaneously. In adding this kind of table layout, you can use the WooCommerce Product Table.
It will give you a chance to manage what type of information you will display in your layout. Furthermore, WooCommerce Product Table even comes with filter and sort options, product search, or include your products with certain attributes, tags, and categories.
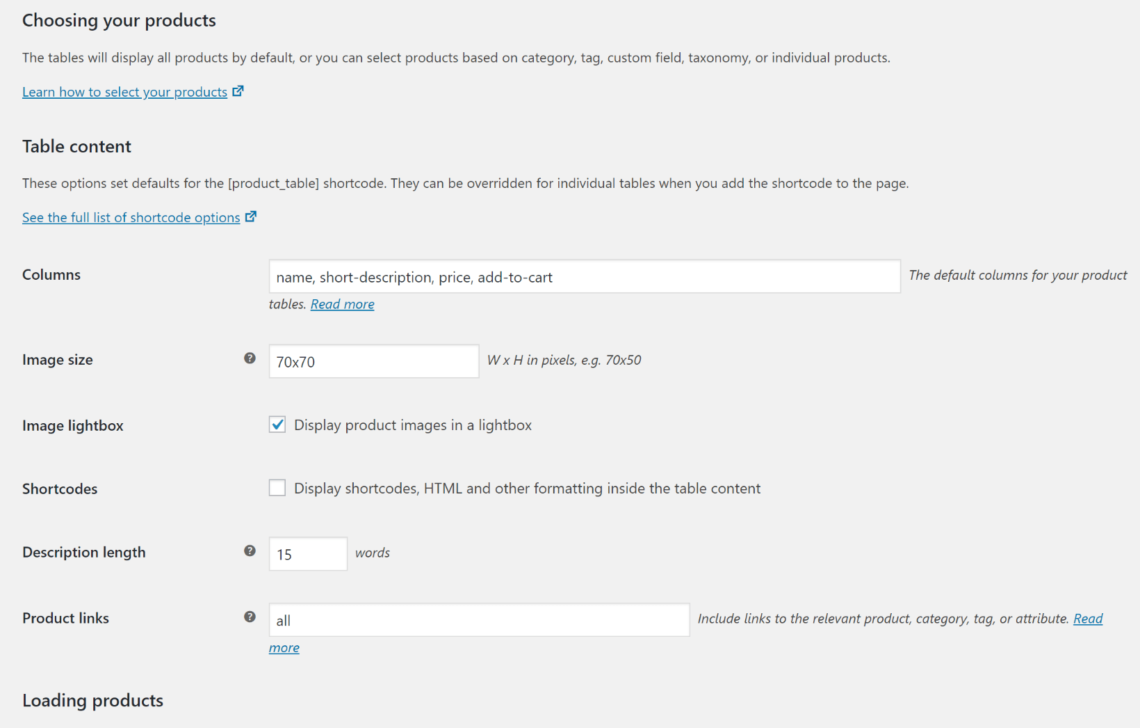
Firstly, you need to set it up. Then, you navigate to “WooCommerce”, click “Settings”, and choose “Products” as well as “Product Tables”. When you are here, you could do some more steps to configure the settings.
-
Columns: select the information that you are fond of displaying for every product.
-
Image lightbox and image size: control the way that product tables will handle images.
-
Add-to-cart button allows you to create checkboxes for customers to choose many different products and add to their shopping cart.
-
Variations: In case you are using various products, this function allows you to control how you will show them in the product table.
-
Product filters: This gives you a chance to add product filters such as allowing shoppers to filter by product attribute, tag, or category to your product table.
Once you are done configuring the above-said settings, you can now create the layout of your product table using the shortcode [product_table]. This shortcode displays every single store’s product by default. However, you could add the shortcode modifiers that will then display your products from specific tags, categories, and other taxonomies.
Let us take an example. In case you wish to show products from your t-shirt category, this shortcode is for you: [product_table category=”t-shirts”]. Or there are some cases where you wish to create extra filter options. Do not worry! WooCommerce Product Table is here to provide you with helpful filter widgets so that you could add them to the sidebar.
- Utilize WooCommerce Quick View Pro
Your WooCommerce shopping cart would become more useful if it comes with the function of a quick view for every product. This helps customers view all details of every product without clicking through to any product page. Henceforth, we recommend using WooCommerce Quick View Pro because it could work well for all types of shop layouts in WooCommerce.
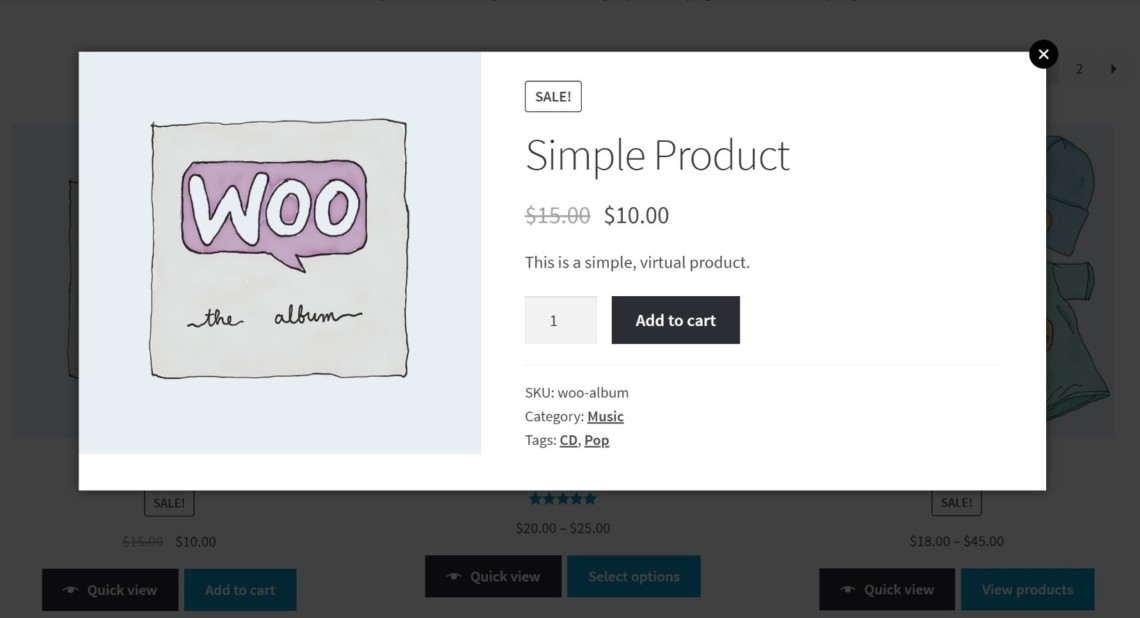
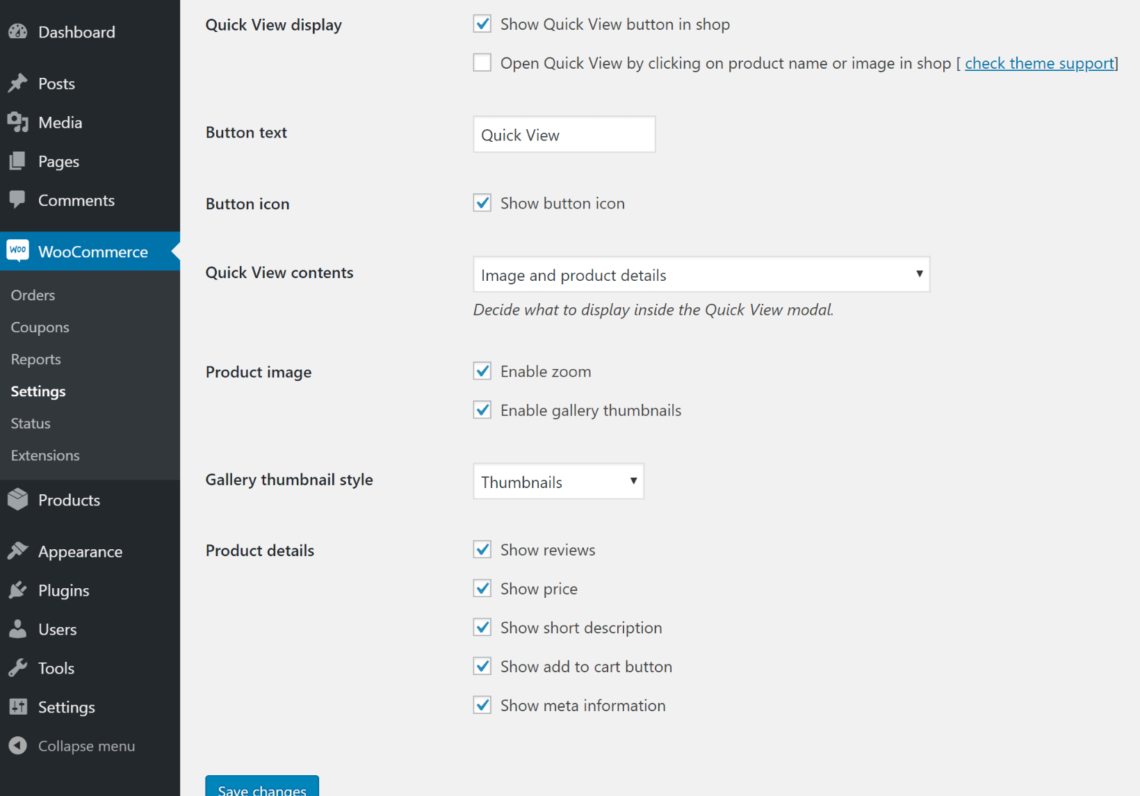
With WooCommerce Quick View Pro, you are able to display reviews, price details, product images & galleries, product descriptions, meta-information of product, and add-to-cart button. So, start using it by installing, then activating it. After that you navigate to “WooCommerce”, pick up “Settings”, select “Products” before choosing “Quick view”.
In terms of the traditional layout of eCommerce, WooCommerce Quick View Pro will activate itself by default. In case you are applying the previously mentioned WooCommerce Product Table for adding one product table, you can now create one quick-view column. This helps you add a button “quick view” to every item in the table.
Top 3 WooCommerce shopping cart plugins
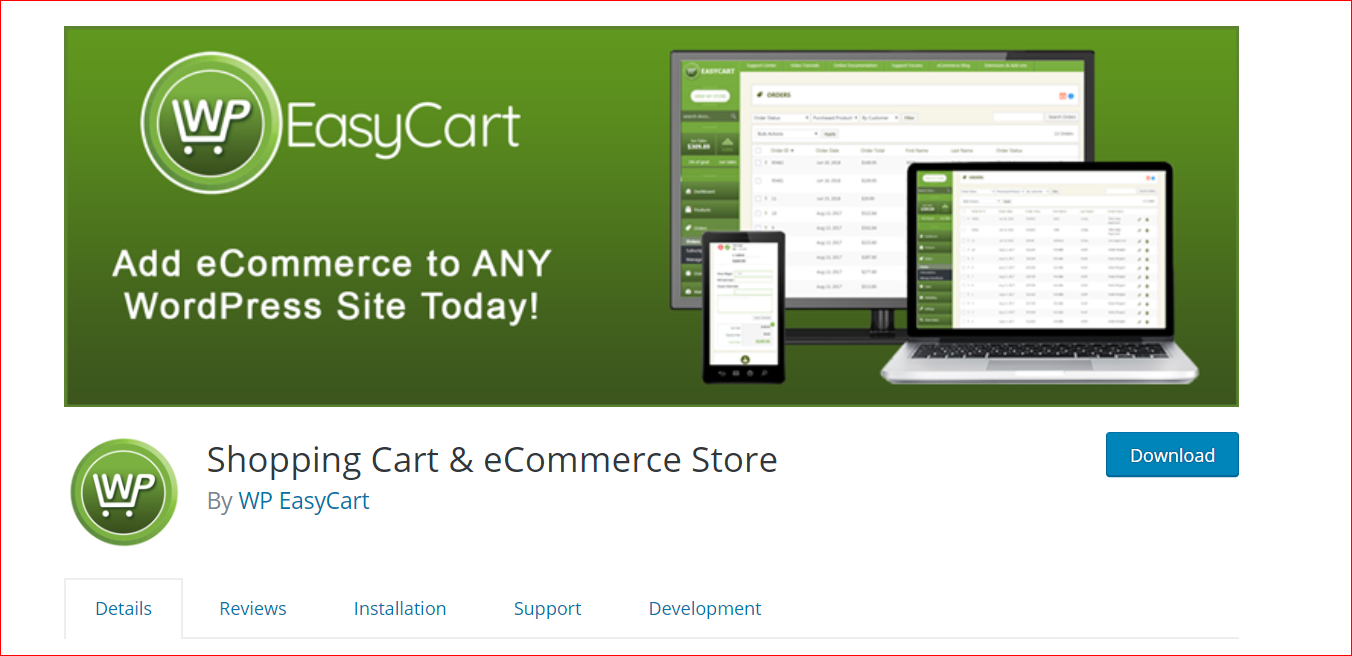
1. WP EasyCart
WP EasyCart has become a popular WP shopping cart plugin for eCommerce users. It lets users create an account, Cart, and Store for different shopping purposes. Owing to its useful features, including the provision of taxes pricing, shipping, order management, and multi-currency features, WP Easy Cart has significantly improved your WooStore.
Moreover, using EasyCart, you could keep everything from managing your orders, printing, managing receipts, packing slips, informing consumers of their purchases, and viewing order information in good control. Specifically, you could even do more than that because it offers such services as order editing, extra shipping integration, and payment processors.
Main features
-
Manage your online store easily
-
Offer multi-currency and multi-language support
-
Come with Shipping and Taxes information with a table of rate shipping price, percentage, and weight
-
Provide a notification Dashboard
-
Support not only direct payment but also such payment gateways as PayPal, Redsys, Realex, or Skrill.
2 . Cart66 Cloud
As an easy-to-use plugin, Cart66 Cloud has a reputation for assisting users in tackling unwanted marketing issues. It provides you a whole process from setting up the WooCommerce shopping cart to figuring out payment solutions. To be more particular, Cart66 Cloud also helps you set up one secure system to send email receipts as well as notifications or even secure digital products.
Main features
-
Helpful services for product management and detailed inventory
-
Be supportive for users to sell digital products
-
Offer subscription features, SSL certificates, security, and complaint connection features
-
Come with the services of recurring billing, donations, and so on
-
Help to manage address book, order history, store credit card easily
3. eCommerce WD
There is nothing better than the satisfaction of customers who buy your products. And Metrilo is one of the most popular shopping cart plugins that focus on user experience. And it also aims at easing the admin role in managing the store. Thanks to advanced features such as searching, sorting, and filtering, customers can search for products easily and add them to their shopping cart quickly.
More than that, you are also able to install the shipping options, along with tax types. Then, you could apply these settings to your products individually or collectively. Especially, this plugin offers services integrated with social media, so the system of rating, reviews, and comments is available.
Main features
-
Come with tax management and shipping method
-
Advanced system of orders and reports
-
Product add-ons with Filters and stripe integration
-
Provide multiple styles of viewing products
Final thoughts
There is no denying that your WooCommerce store will be taken to the next level with the existence of a shopping cart. Thanks to it, customers will find your store friendly to their experience. They will feel happy while shopping at your store. Hence, you should add a shopping cart to your WooCommerce as soon as possible and provide consumers with the utmost feeling.


