
How to Connect your Shopify to WooCommerce Easily

If you are running a WooCommerce store, it is highly recommended that you integrate with other platforms to utilize the most advanced features and benefits from two platforms. Especially, the integration between Shopify and WooCommerce is the most popular one as both of them come with great flexibility for the other to work great.
This is to say, you should connect your Shopify to WooCommerce as soon as possible to improve your store, product, and sales as well. Now, let’s delve into how to connect your Shopify to WooCommerce integration for a better performance of your online business.
Exclusive Offer: Get Shopify 33 days for just $1 + The Online Store Starter Kit
Start your 3-day free trial, and enjoy your first month of Shopify for 1$ plus the premium package designed especially for new Shopify merchants!
Why should we connect Shopify to WooCommerce?
As you can see, the integration between these two platforms is becoming increasingly popular. To be more specific, it has brought about tons of benefits that you should not ignore. Let’s see why we should connect Shopify to WooCommerce. So, you can understand deeper about them.
-
Come with the flexibility: By connecting to WooCommerce, your Shopify store can enjoy the great flexibility from WooCommerce as it is an open-source where you could modify, copy, or change your source code.
-
Boost SEO: Both Shopify and WooCommerce are robust online platforms, so they will ensure that your products will appear in the sight of the right persons.
-
Offer free shipping as well as sell internationally: The integration between Shopify and WooCommerce will make it more suitable for your online store to sell in volume.
Learn more: Shopify vs WooCommerce
How to connect your Shopify to WooCommerce easily?
Now it is time to learn how to connect your Shopify to WooCommerce. The below instruction aims at guiding you through step by step. Hence, you can integrate the greatest features of those two powerful eCommerce platforms, thereby enhancing customers’ experience, coupled with store performance.
Step 1: Set up the Shopify store
The first and foremost step is to set up a Shopify store before the integration. If you already own one, you could skip this step to move on to the next one. If not, you need to implement this process to facilitate the entire integration procedure. First, go to the homepage of Shopify to fill in the required information related to the email address for starting your free trial.
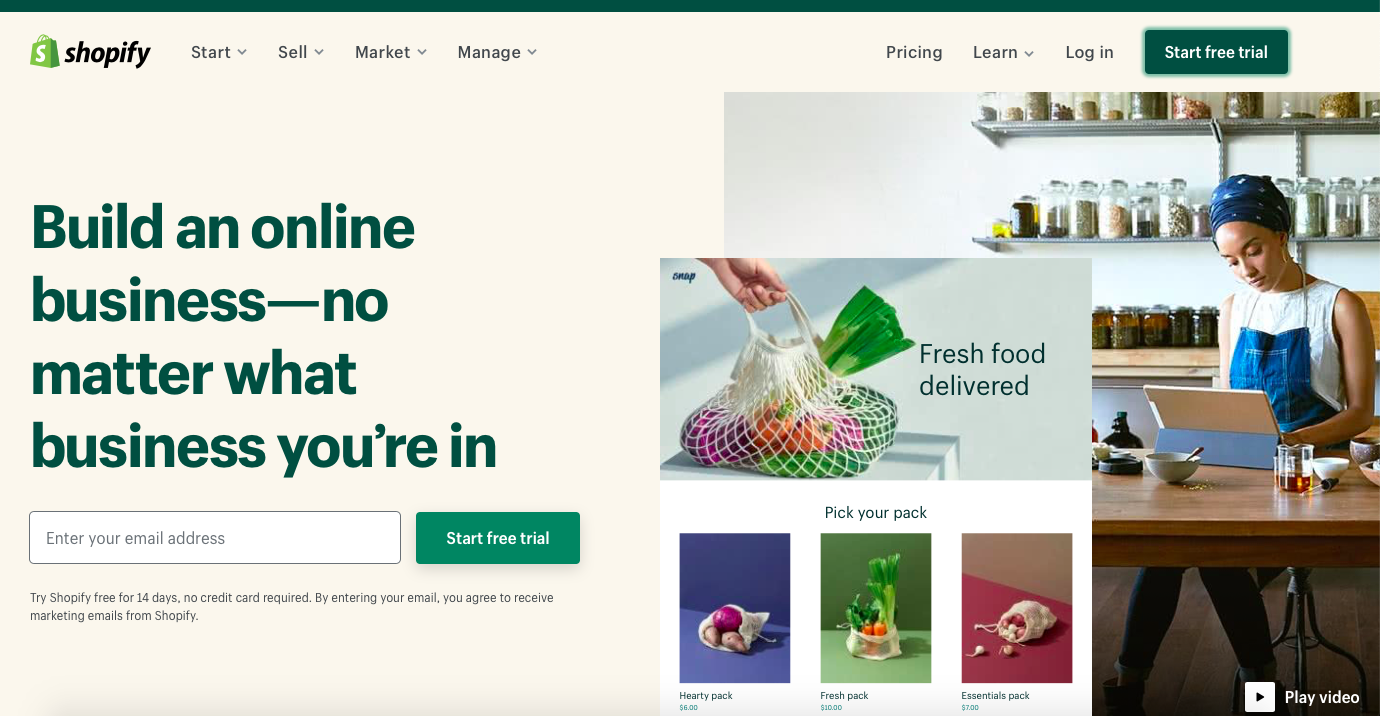
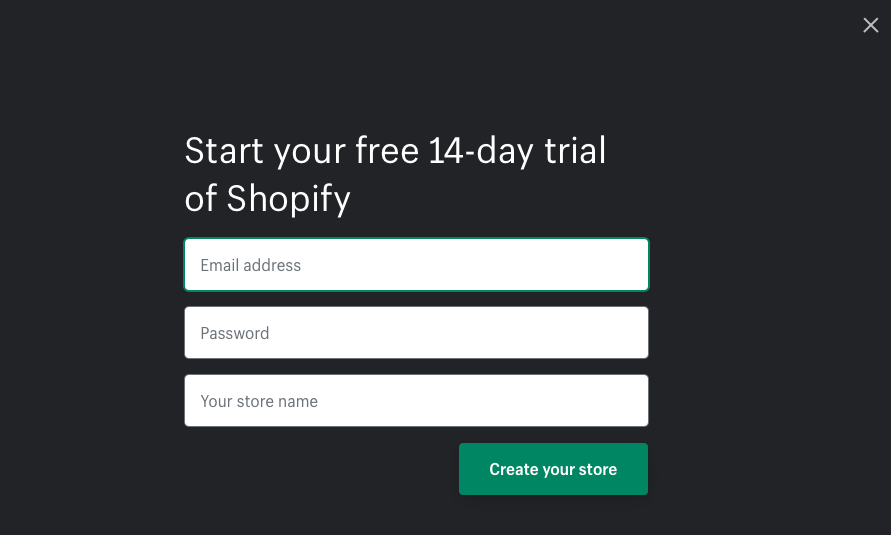
Next, you will proceed to hit on the button Start a free trial where you can notice a screen for signing up. Here, you need to enter your store name, email address, and password. What you need to fill in will be displayed on the following screen.
Another not-to-be-missed step is to answer some of the questions you will get from Shopify. This will ensure that Shopify can understand your needs and concerns better. Continue by selecting the answer from Shopify’s dropdown list. And, select “Next”.

As soon as you are done entering this part, it is time to pick up the button “Enter my store”. After that, you would be taken to the Shopify store’s homepage. And that it is. Your store on Shopify is ready for selling.
- Work with payment gateways
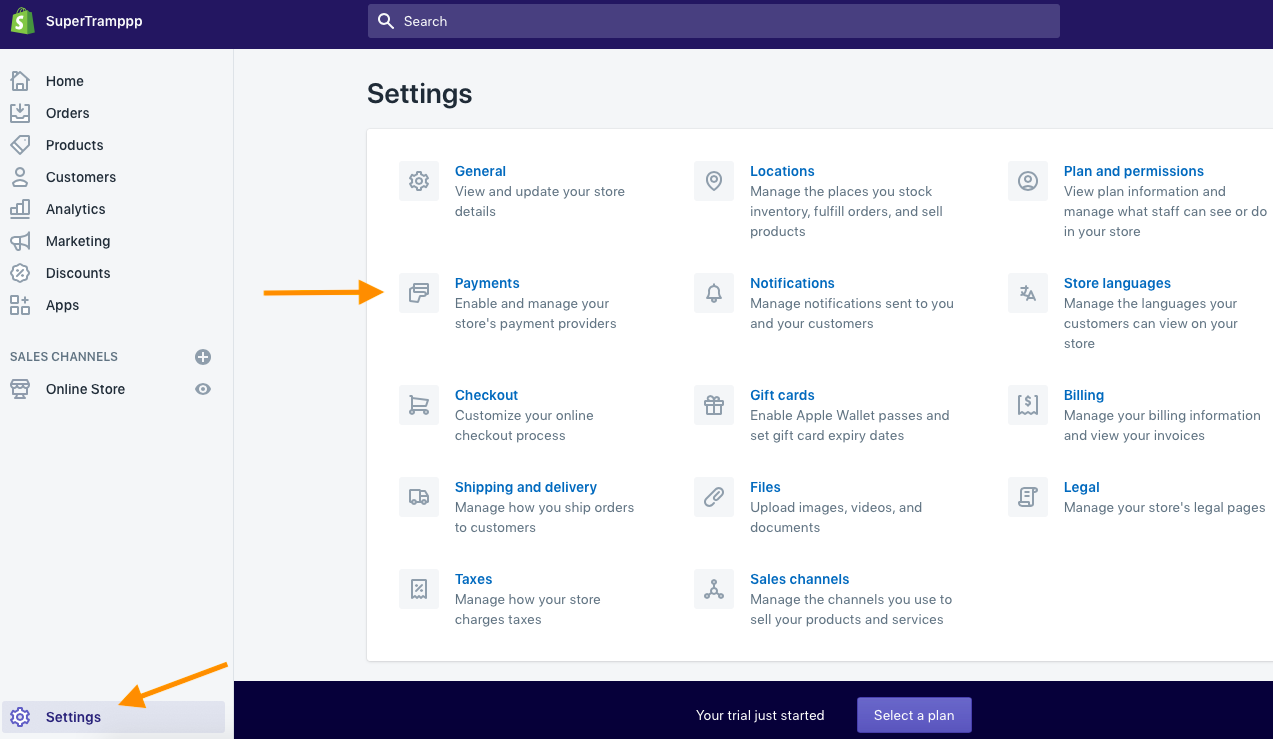
In setting up your store on Shopify, do not forget to work with payment gateways. By setting it up, your Shopify store can accept payment from your customers. In doing so, hit on the section “Settings” that lies in your homepage’s bottom corner. When you are here, you will encounter the section “Payment”. Do not hesitate to hit on it for processing further steps. Check out the screen below to see how this part is illustrated in your Shopify account.
Your store will be willing to accept such payments as PayPal together with PayPal’s Express Checkout by default. If you have already set up the PayPal account with your logged-in email address, accepting payment instantly is what you can do now. But if you have not had any, Shopify will aim at sending you one email that includes the step-by-step instructions on the way to create a new merchant account for PayPal.
What is more, you could choose to accept several alternative forms of payment, including GoCoin, BitPay, or credit card. Moreover, it is also possible to select extra options that can be Amazon payments, Apple Pay (this will be coming soon), or you can choose from multiple payment options of Shopify payment list.
- Work with shipping options
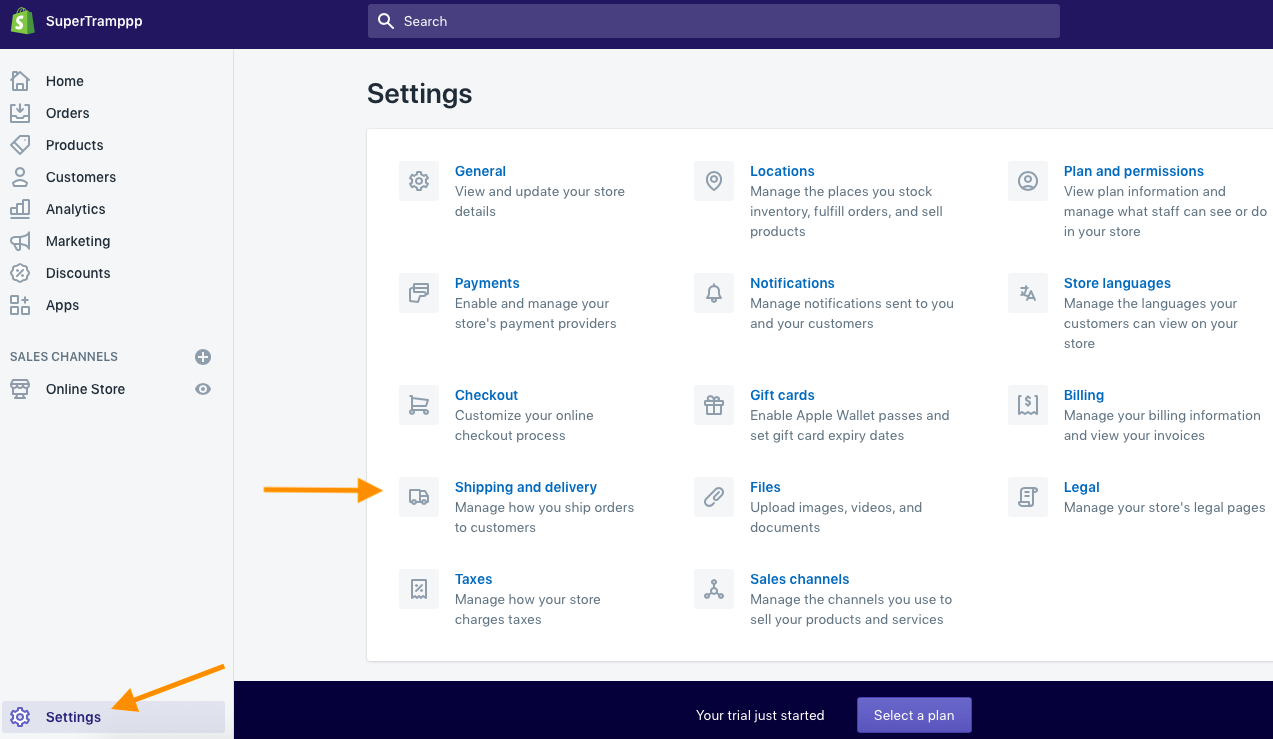
After you complete setting payment gateways, proceed to another step to set up the shipping methods for your store. Like what you do in the previous step of setting your payment options, you keep clicking on the button “Setting” and hit on “Shipping & delivery”.
In this section, your shipping origin would be set as the store address you already filled in when setting up a Shopify account. However, you can edit this easily if you want. To do that, you need to click on the button “Changing shipping origin” where you can define your shipping rates as well as zones for delivering products and items to these locations.
- Work with Shopify plan
A Shopify plan is necessary to make sure that your store is activated and becomes effective for selling. Shopify will provide store owners with myriad pricing tiers that come with extra features. Those features will mostly depend on what type of plan you are about to select. These plans range between $39 and $399 each month. Visit Shopify’s pricing page for more details.
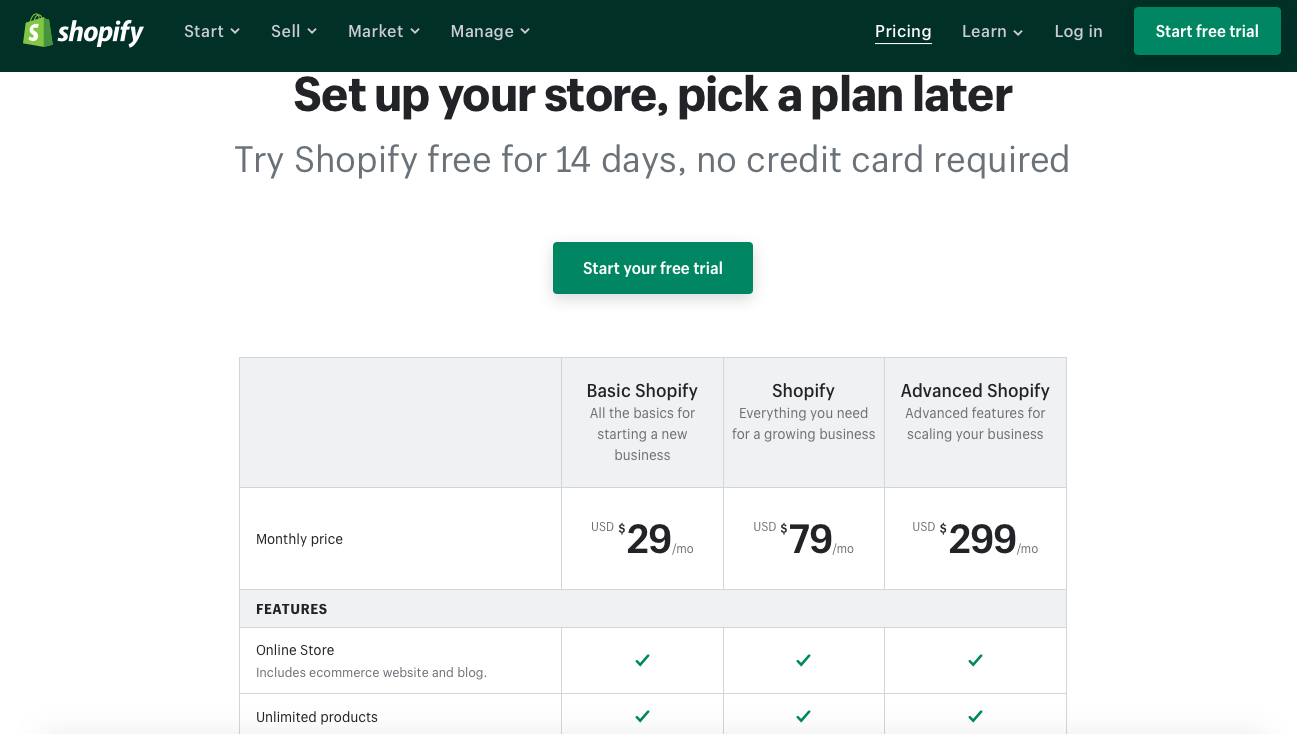
As you integrate your Shopify store with WooCommerce, you can apply the plan Starter, which costs you only $5 per month. In particular, you could still access every powerful feature of Shopify, such as the option of selling products and items on Facebook, app store of Shopify, Shopify POS for Android or iOS, and all-day support from the willing Shopify team.
Step 2: Add your products to the Shopify store
After everything related to your Shopify store has been set up, it is time to add your products to the Shopify store. To execute this step, you will need to hit on the tab “Products” on your right menu. Here, you can see the button “Add product”. Click on it.
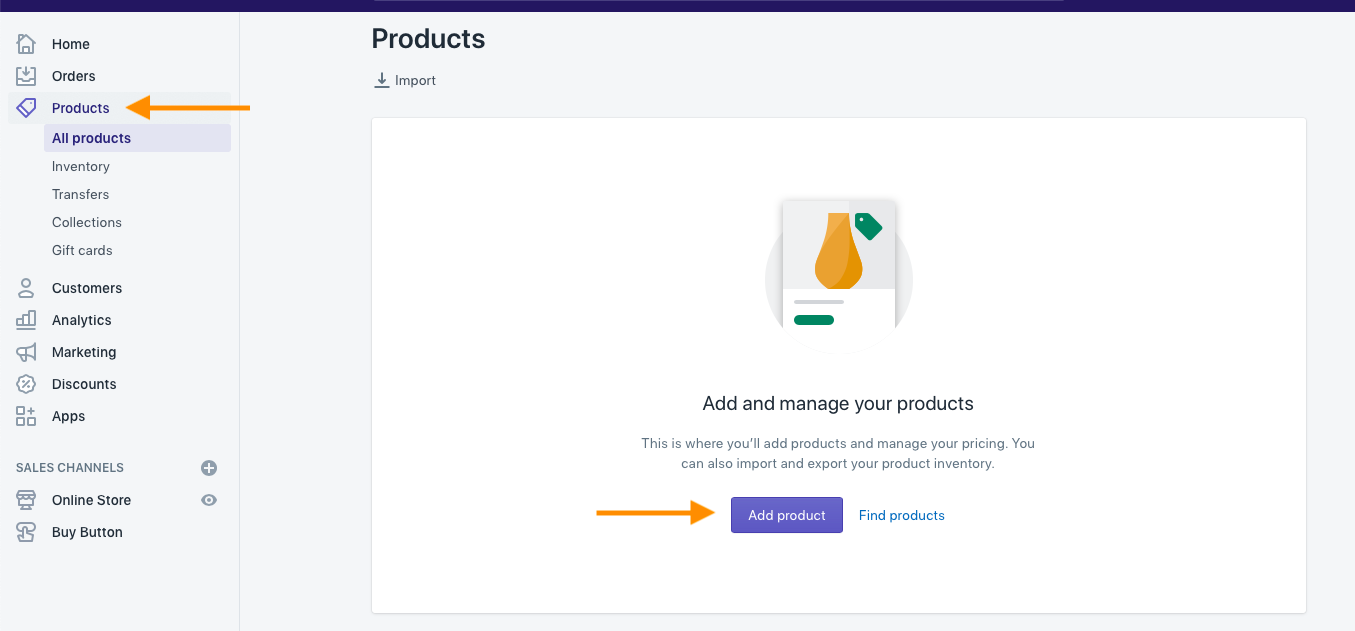
You will proceed to enter information related to your product, such as the title or name of that item, product price, description, and so on. For making it simpler to seek products within your store, you could add your products to a specific collection. After entering the needed information, you will need to choose the button “Save” to save what you have made recent changes.
Step 3: Use Shopify Buy Buttons for customization
Now, you will connect your Shopify store to WooCommerce with the use of Buy Buttons in Shopify. This kind of button allows you to embed the products of your online store on Shopify across multiple platforms, including WooCommerce. Thanks to it, you can embed only one product or even a group of products or items that use this embed code for generating within Shopify.
In using this Buy Button for customization, you need to head to the section “Settings” and hit on the button “Sales channels”. As shown in the following screen, the “Settings” section is at the bottom left corner. Check out this screen to follow easier.
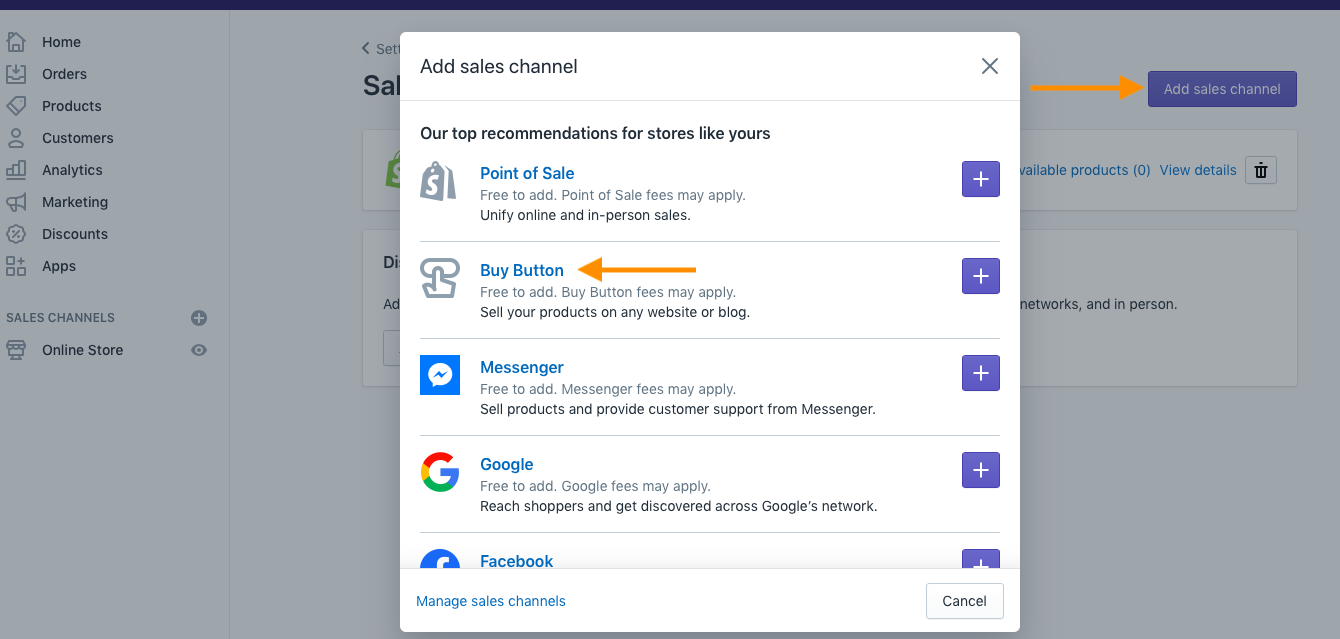
After that, you will have to choose the button “Add sales channel” for going ahead. On this list, you are required to navigate a bit below to look for the channel “Buy Button” before clicking on the button “+” for the installation.
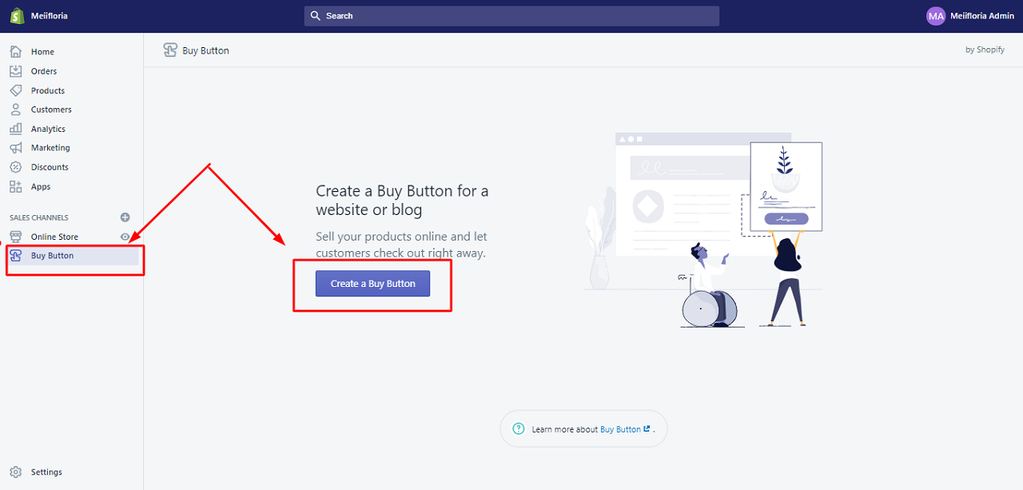
In case you have installed this Buy Button Shopify, go ahead with selecting your product. If not, it is time to set this button up for use. As previously mentioned, the sales channel of the buy button has been installed. Here, you could be able t go back to the left-hand menu only by hitting on the section “Buy Button” as shown in the below screen.
Next, it is your choice to select what you will display on the external sites and blogs: Product or/and Collection. If you are keen on choosing certain products for embedding into your website, you need to pick up the first option. You are supposed to pick up the 2nd element. The great thing is that you could customize this button by choosing myriad colors for the button, text, background, or your cart panel.
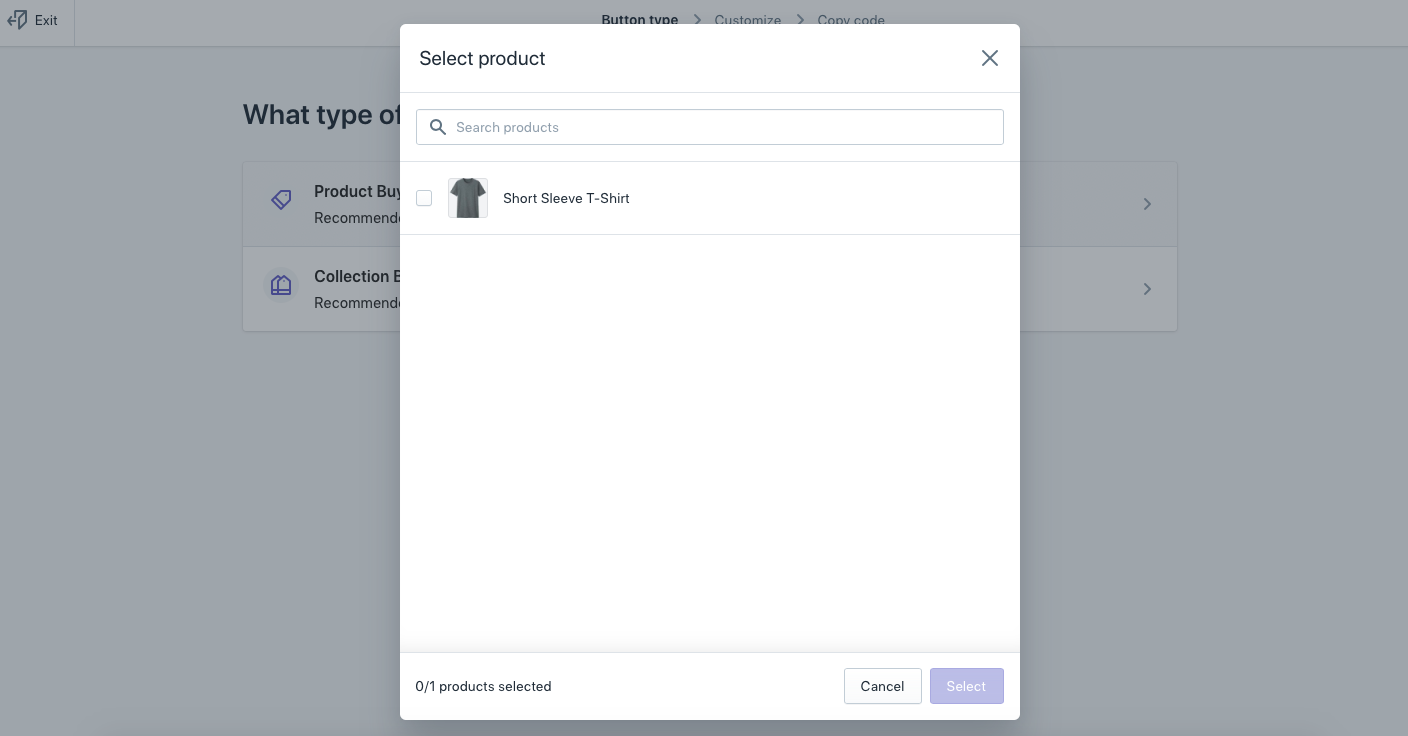
Keep going with the next step to pick what product you are fond of creating this buy button. Then, you will click on the button “Select product”.
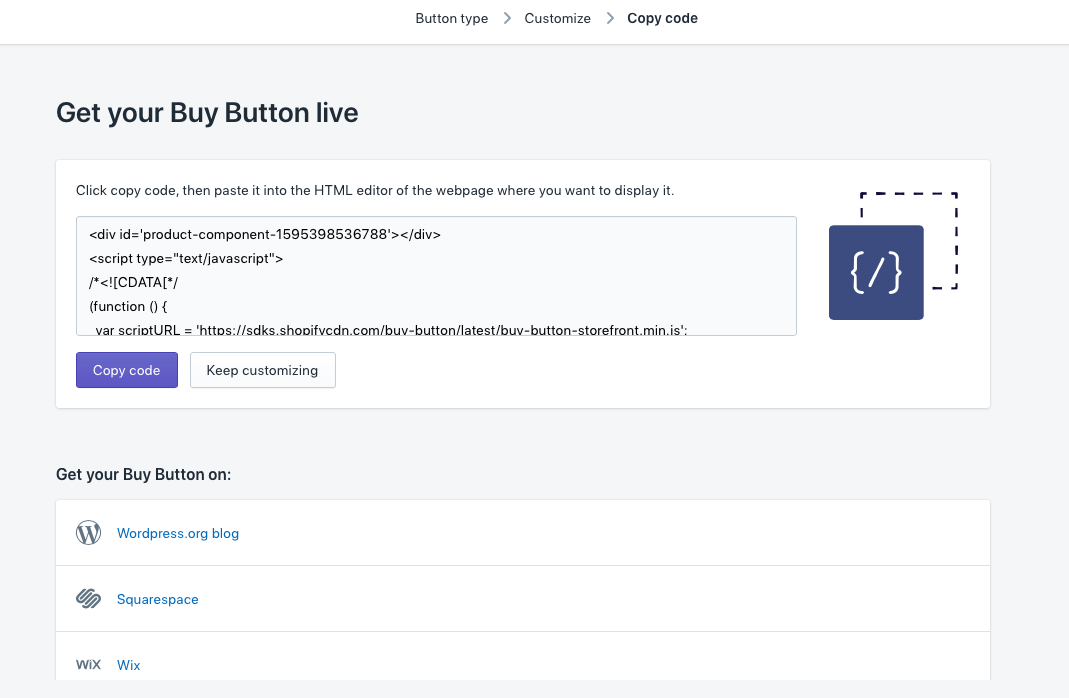
You could even choose to do the configuration of the look for this Buy Button. To be more specific, you can select a favorite template and customize the color and the text of the button. And, that action will happen as soon as a customer clicks on it. As you have completed the customizing process of the button appearance, your next task is to choose “Next” to get the Buy Button code. See the below screen, and you can see what and how the code will be displayed.
Step 4: Add this Buy Button in Shopify to your WooCommerce
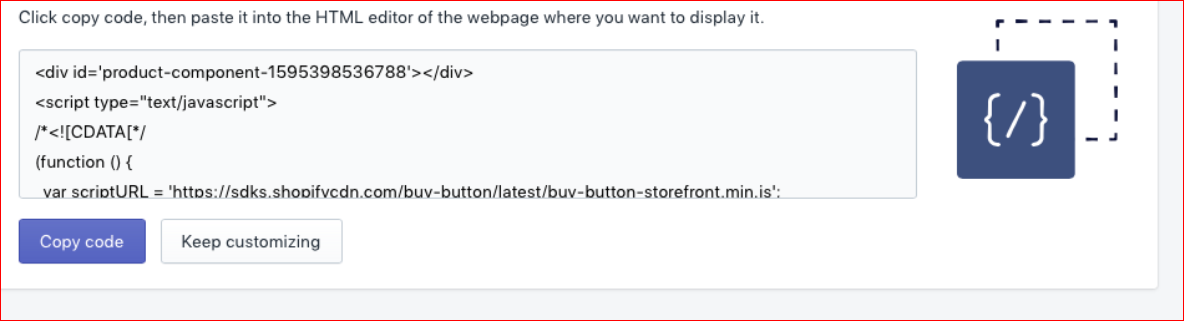
The last step requires you to add the Buy Button of Shopify to your WooCommerce site. After that, you will be asked to hit on the button “Copy Code” to copy the code you have created for that particular product. In doing so, you could start selling your products and use the most advanced features of these two platforms.
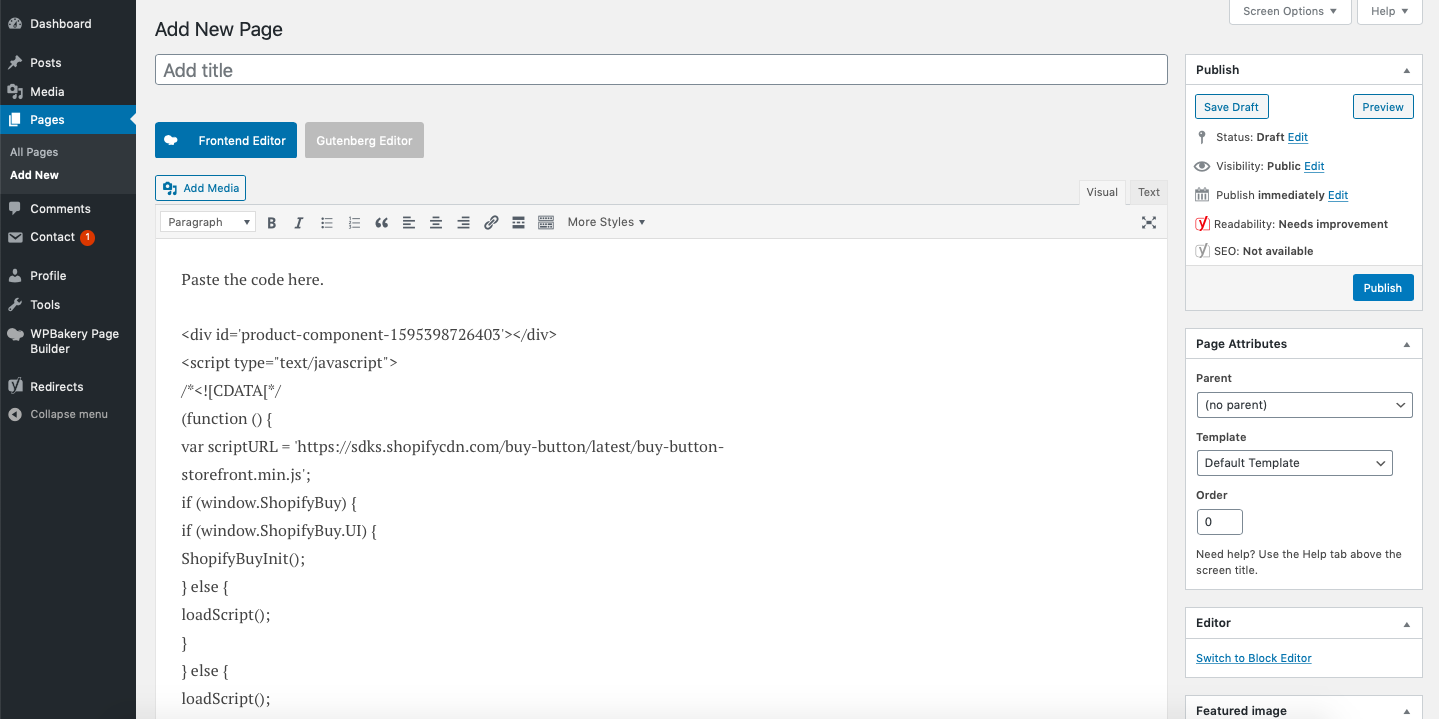
The great thing is that you could be able to paste this kind of code to any location of your WooCommerce site where you want this button to emerge. Let us take an example, you could create one new page for your WooCommerce website as well as paste your embed code for displaying the Buy Button. Next, you should keep on adding extra information related to the product.
Congratulations! You are done connecting your Shopify store to WooCommerce. Now, you are willing to sell products and services on your site. Moreover, it is possible to copy and paste this code to the blog posts and in your WooCommerce sidebar.
Free 1:1 Shopify consultation & 30-day all-app trial FREE
- Shopify Plus Strategy and Consultation
- Personalized E-commerce Solutions
- Conversion Rate Boosting Techniques
- Inventory Management Hacks

Top 3 plugins to integrate your store
There is no denying that there are multiple ways to connect your Shopify to WooCommerce. Nevertheless, using plugins is always a helpful, time-saving, and efficient way to perform this activity. That is why we have mentioned here some of the best plugins to help you integrate your store quickly and effortlessly.
1. WP Shopify
WP Shopify is one of the most popular plugins for assisting store owners in integrating between two eCommerce platforms. With WP Shopify, you are allowed to sell Shopify products or items on your WooCommerce site. It is undeniable that WP Shopify is very effective in syncing the data. Then, you can use it to utilize full power and the best features of the WordPress functionality.
Main features
-
Sync the products or product collections as the native post in WordPress
-
Offer more than 100+ actions as well as filters for customizing any section of your storefront
-
Be able to show products and items with the use of shortcodes and custom pages
-
Provide Shopify’s Buy Button for a built-in experience
-
Boost SEO
-
Give advanced penetration to the Shopify data that is saved in the database tables
Pricing: Free
2. Shopify Connect for WooCommerce
When it comes to integrating Shopify with WooCommerce, you should not miss the plugin Shopify Connect for WooCommerce. It allows you to easily implement the integration between Shopify and WooCommerce so that all products will be synced correctly and effortlessly. Moreover, you could also use the WooCommerce platform as the front-end, while Shopify could be used as the back end.

Main features
-
Customize simply with the use of your WooCommerce interface
-
Let users add products or items, then edit them quickly
-
Utilize the best features and functions of the two eCommerce platforms
-
Allow you to see on Facebook, Pinterest, and Twitter
-
Offer blog posts, static content, the ability to access an amazing and large WordPress community
Pricing: Free
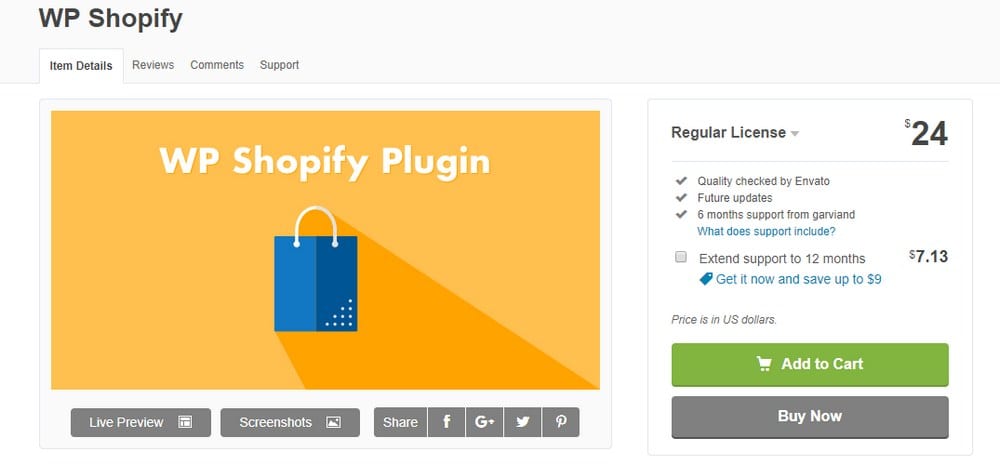
3. Shopify for WordPress
Another great plugin to help you integrate your store is Shopify for WordPress. As one premium plugin with plenty of advanced features and options, it is an awesome plugin to go. Unlike the above two plugins, Shopify for WordPress implements the integration through the API for transferring products as well as collections on Shopify to your WooCommerce site seamlessly. This plugin will especially help store owners to display such products professionally.
Main features
-
Show your products professionally
-
Sync the data between two platforms seamlessly
-
Let you use shortcode for embedding products on every page
-
Come with tons of product pages
-
Offer in-page checkout
Pricing: $24
Conclusion
In short, take no hesitation to start connecting your Shopify store to WooCommerce to boost your sales and improve your store’s performance. There are unlimited benefits awaiting you out there if you choose to do this amazing integration. Let’s make use of those both platforms and see how far your online business could grow. Hope you find it easy to follow our above instructions. Share it with those who are interested and keep following us for more helpful guides.


