
How to Set up TaxJar in WooCommerce?

Numerous WooCommerce business owners all over the world find sales tax administration to be a challenging task. They usually need extra assistance from professionals.
But where else can you look for help? TaxJar is an excellent plugin for managing sales tax on WooCommerce stores. And in today’s article, we’ll walk you through the process of setting up TaxJar in WooCommerce.
Benefits of TaxJar to WooCommerce
TaxJar, which is available in the WooCommerce extension store or the WordPress plugin directory, assists in computing the sales tax that must be collected at checkout. The tax is updated in accordance with the requirements of the relevant state, county, and city. TaxJar also helps you to file your state tax forms (at an extra price).
Here is a rundown of the benefits of TaxJar:
- Eliminates the hassle of manually uploading new tax rates.
- Daily collection of tax rates and organization to help you be ready when tax deadlines are near.
- Sales tax nexus management
- Auto-filing of refunds to help you prevent payment gaps and penalties.
How to Set Up TaxJar in WooCommerce?
Step 1: Install TaxJar
- Get the TaxJar for WooCommerce plugin from this link: https://woocommerce.com/products/taxjar/.
-
Go to WordPress Admin > Plugins > Add New and click on Choose File to Upload Plugin using the file you just downloaded.
-
Select Install Now and then Activate to begin installing and activating the extension.
Step 2: Set up and configure
-
Go to TaxJar from your WooCommerce dashboard.
-
Select Connect button.
If your company processes more than 1,000 orders per month, you’ll be prompted to upgrade to TaxJar Professional to enable real-time sales tax calculations using the TaxJar API.
-
Complete the remaining settings. To calculate sales tax, TaxJar needs to have the name of your city and zip code where you ship your products.
-
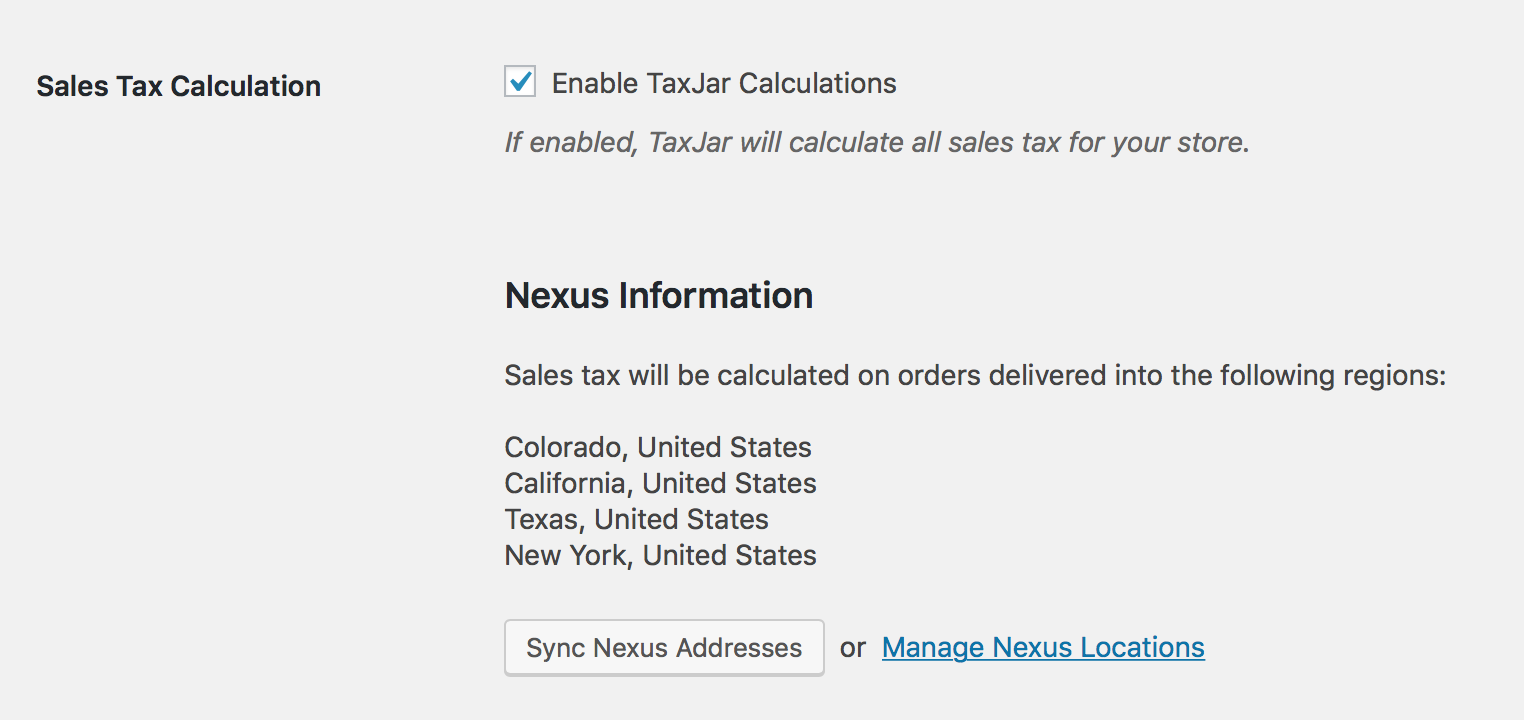
To import your nexus addresses into WooCommerce, click the Sync Nexus Addresses button. Ensure you’ve added all of your nexus states where you need to collect sales tax to your TaxJar account.
-
Click Enable TaxJar Calculations.
-
Select the checkbox next to Enable order downloads to TaxJar to allow TaxJar to connect to your store and download transactions for AutoFile and reporting purposes.
-
Click Save changes.

- Navigate to WooCommerce > Settings > General. You must authenticate your Store Address before enabling TaxJar.
By checking your Store Address, TaxJar automatically detects your Ship From Address.
- Remember to Save changes if you make changes.
- Remember to Save changes if you make changes.
- Return to WooCommerce > Settings > Integration to complete the process.
- Select the Enable TaxJar Calculations box.
- The box for Enable order downloads does not need to be checked at this time because Sales Tax Reporting is covered in the section below.
- Under Debug Log, check the box Enable logging. This is optional, however, it is suggested because it can facilitate troubleshooting.
- Click Save changes.
Configure Nexus Addresses
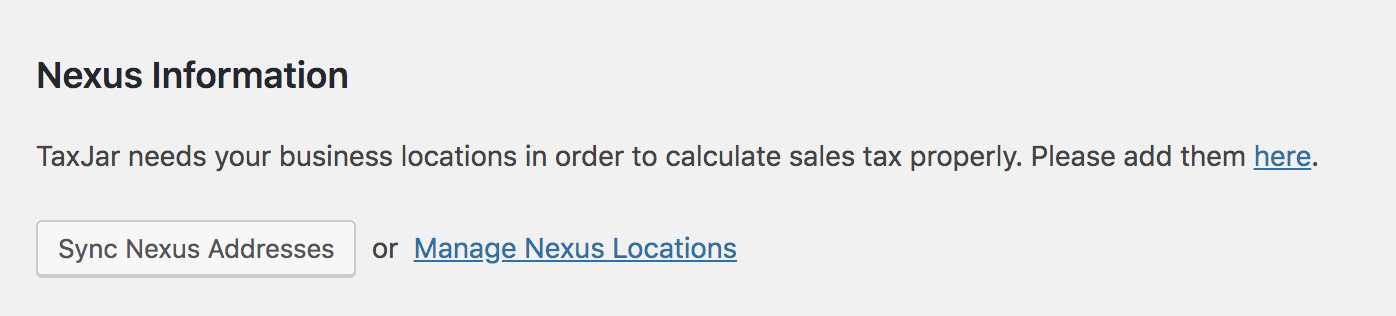
A list of nexus states/regions will emerge from the Sales Tax Calculations checkbox after TaxJar is enabled in your WooCommerce store.
If nothing displays, make the following modifications: If nothing displays, make the following modifications:
- Alternatively, click Manage Nexus Locations in your TaxJar account, edit/delete/add them, and then Sync.
Product Taxability
Here you can create a new tax class and assign it to your items to exempt certain product categories:
- Navigate to WooCommerce > Settings > Tax.
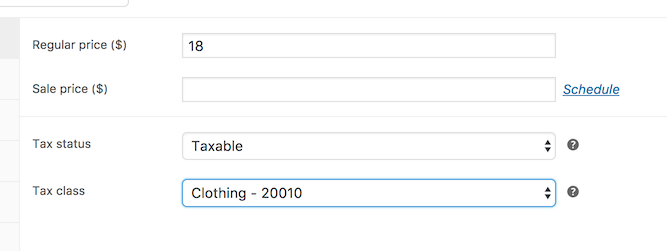
- In the box next to “Additional tax classes,” type a new tax class. For example: Clothing - 20010.
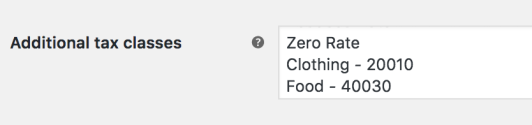
20010 is the exemption code for apparel products supplied to the sales tax API. If your products fall into a different category, you can check out a list of the categories and tax codes WooCommerce supports: https://developers.taxjar.com/api/reference/#categories
- Ensure that your products have been assigned to the new tax class. Change the tax class to “Clothing - 20010” under the General tab when modifying a product and save it.
- When using the sales tax API, include a product tax code along with the product. Each variation tax class for variable products must be set to “Same as parent.”

Customer Taxability
You can also exclude customers from sales tax. To do so, go to the WordPress admin panel and add a specific user, then edit the options under TaxJar Sales Tax Exemptions:
- Select Users > All Users.
- Edit a customer or user.
- Change “Exemption Type” to “Wholesale / Resale”, “Government”, or “Other” to exempt the customer:

- Select the states to exempt the client in one or more states using the multi-select field. If no states are chosen, the consumer is exempt from all of them:

- At the bottom of the screen, click the “Update User” option to save the customer and sync them with TaxJar.
Final Words
TaxJar is a fantastic tool for keeping track of sales tax for your WooCommerce store. We hope that our post How to set up TaxJar in WooCommerce is of great help.
If you have any questions, feel free to reach out to us via the comments section below. We would love to help you out. Thanks a lot for reading and we’ll see you in the next article.


