
How to Setup WooCommerce Photography

Are you looking for a way to sell photos online? If that’s the case, WooCommerce will be an ideal platform for managing it. WooCommerce gives you many options for creating a photography store where consumers can quickly purchase digital prints. It allows users to create a photo collection and sell the photographs as an eCommerce product. Moreover, you will restrict client access so that individual customers may access and select photographs from their own private galleries.
In today’s topic, we will explore how to set up WooCommerce photography as well as some of the best plugins for this work. Let’s get started!
Prerequisites to start selling photos as WooCommerce products
There are some prerequisites before starting, you need to fulfill in order to begin selling photographs as WooCommerce goods.
Register your domain and hosting service
In order to set up a site, you must first register a domain name with one of the popular domain registrars. It’s better to select a domain name that your customers easily remember. In addition, many hosting providers provide free domain registration for the first year as a trial offer.
Next, you need to sign up with a hosting service provider in order to save your website. You can select the appropriate hosting services based on the size and scope of your site, your technical expertise, and the expected traffic.
Install WordPress and WooCommerce
You can install WordPress easily once you have registered your domain name and signed up for a hosting service. It is also extremely simple to download WooCommerce after you have installed WordPress. WooCommerce allows you to sell a variety of product categories, including digital downloads.
Choose a theme
To get started, you must choose a theme that matches your company’s vibe and manner so that your store appears outstanding from the beginning. WooCommerce now offers various free and paid themes that you can quickly install and customize to meet your needs. You should choose a theme that:
- Highlights your photos on your site, blog, and other spots.
- Easy to navigate and mobile-friendly
- Compatible with plugins and has a customizable checkout section
We also offer you some of the most popular free and paid themes currently.
After you’ve completed all of the prerequisites, it’s time to set up WooCommerce photography.
How to set up WooCommerce photography
Step 1: Install and activate the plugin
So first, installing this WooCommerce Photography plugin will allow you to quickly go on to the next stages. You are able to install and activate the plugin in the same way that you would any other WordPress plugin.
Go to WordPress Dashboard > Plugins > Add New. Then search “WooCommerce Photography” in the search bar and click Install Now. Once installed, access to Plugins > Installed Plugins and find it, click Activate under the name of the plugin.
Step 2: Create the photography collections
Once the plugin is installed and activated, creating a photography collection by going to Photography > Collections. You then will see the collection creation interface as shown below.
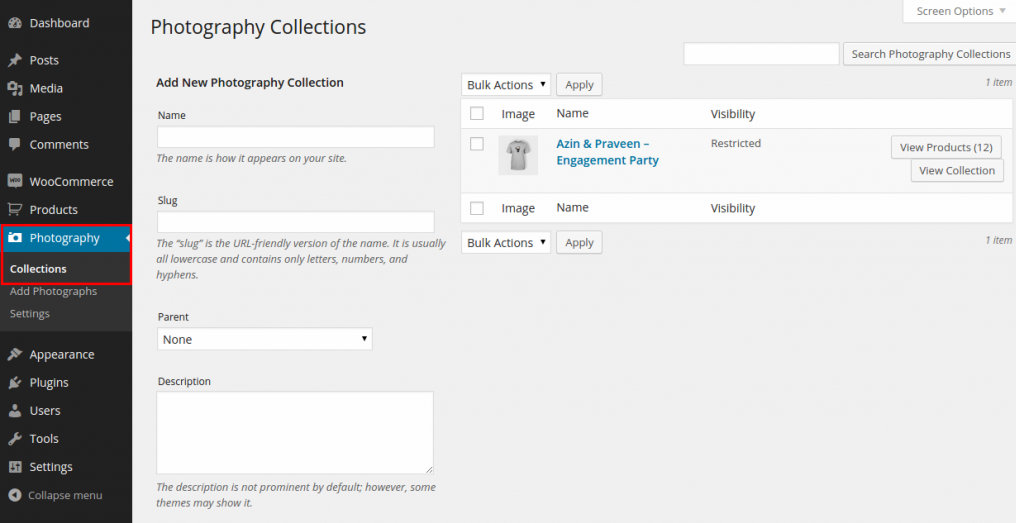
Next, in the Add New Photography Collection section, you need to complete the necessary information, such as a name, a slug, and a collection description.
After filling in the information, you must configure the visibility settings for each collection. There are two options for you - Publish or Restricted. Normally, the ‘Public Collections’ will be accessible to all users on your site. However, only users with access provided in their user profiles will be able to see photographs in a ‘Restricted Collection’

Step 3: Add photos as WooCommerce products
To add photographs, go to Photography > Add photographs

This plugin allows you to bulk upload a collection of images rather than individually uploading them. You can also upload as many images as you want here. Don’t forget to create a collection first so you can assign the batch of photos to it. However, if you haven’t set any collection before this step, you also can create the new one by clicking Add Collection.
Step 4: Assign customers to the collections
Please navigate to Users > Add New to create a new customer profile and assign them to the collections.
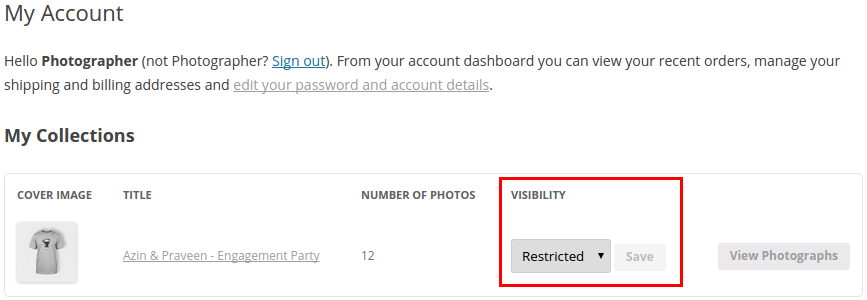
As mentioned before, if you have created a restricted collection for a certain customer, you can also provide access to that customer via their user profile. Customers can now see the collections they have access to in their My Account section and easily choose photos and add them to the cart.
How to create a WooCommerce photography site
The mentioned plugin is a simple method to get a WooCommerce photography website up and running. In this way, we will use the WooCommerce Product Table and WooCommerce Protected Categories to try out an alternate approach.
Step 1: Add photos as WooCommerce products
There are two ways to add photographs:
Manually add photos to WooCommerce
For this, go to WooCommerce > Products > Add New. Then, on the newly opened page, you need to add the basic information for your photo, including the product title, description (optional), select categories, add tags, etc. And don’t forget to upload the photo in the product image box.
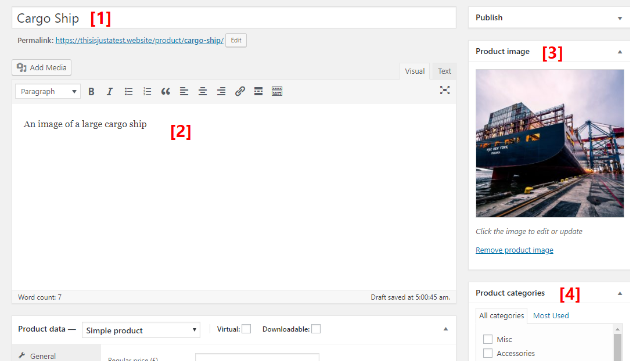
Once you have filled out the basic information, move to the Product data box.
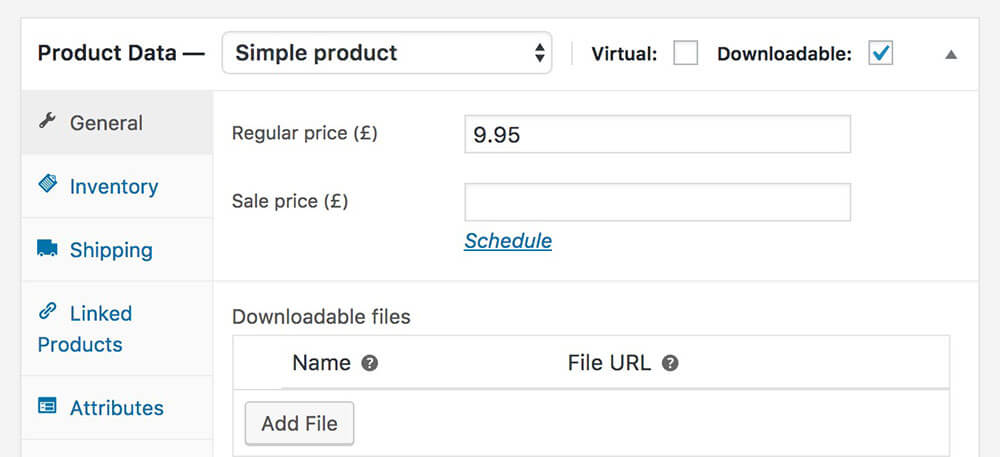
You need to mark them as Virtual and Downloadable in the Product Data box. Then, choose the default Simple product. In the next step, add regular price, select files, create variables, and much more. Furthermore, you can choose whether or not to limit downloads or make the download link expire.
Click Publish to save changes. Then, repeat the process for all of the photographs you want to sell.
Automatically add photos to WooCommerce
If you want to save time by automatically uploading photos as WooCommerce products, using the premium Feed Them Gallery plugin. This plugin will create a WooCommerce product for every photo you upload, saving you a ton of time when working with hundreds of photographs.
Step 2: Display products in table form
Using WooCommerce Product Table allows consumers to get larger samples of the picture while still having access to all of your photographs on one page. This plugin will not only display your photographs nicely but will also include a “add to cart” button and many configurable options to help your photography store stand out.
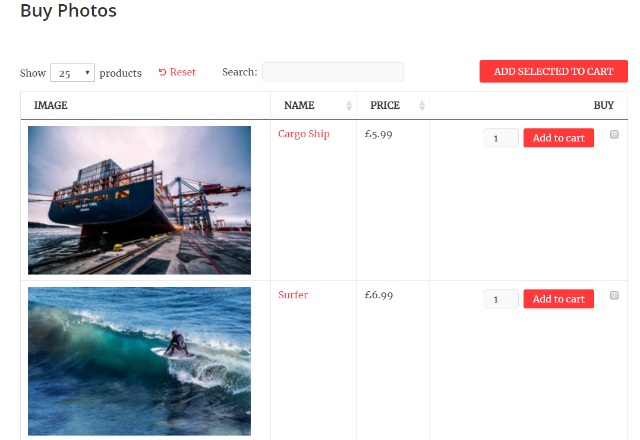
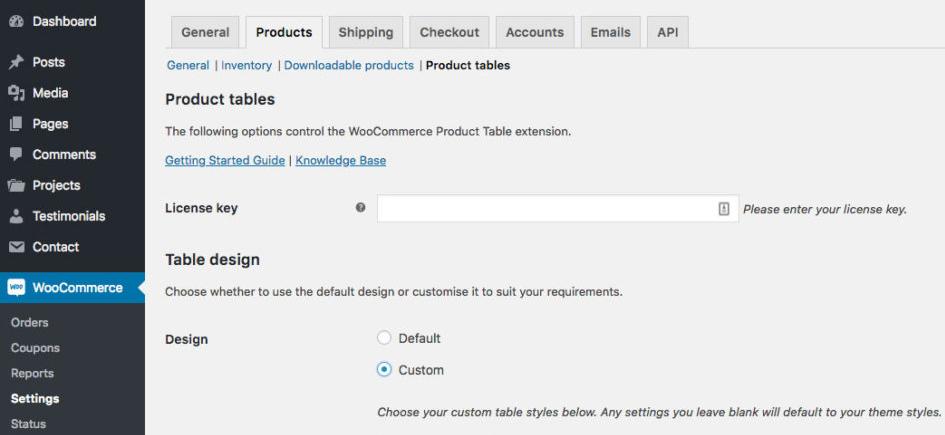
For this, go to WooCommerce > Settings > Products > Product table. Then, in the Table content section, you can edit the design, add or remove columns, choose the image size, and choose how to display the image.
Once you’re finished, save your changes.
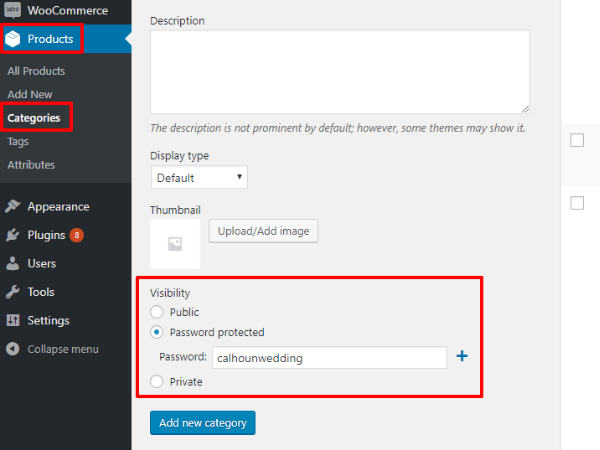
Step 3: Create private categories for clients
In this step, using WooCommerce Protected Categories allows you to set the password for photographs and assign different passwords for different categories. Your clients can select images from the same type of gallery by providing the password – but anonymous visitors will be unable to access those photos.
For this, go to Products > Categories. Next, at the bottom of the newly opened page, you’ll be able to add a unique password for each client’s category. Then, click Add new category.
Top three plugins for setting up WooCommerce photography
Feed Them Gallery
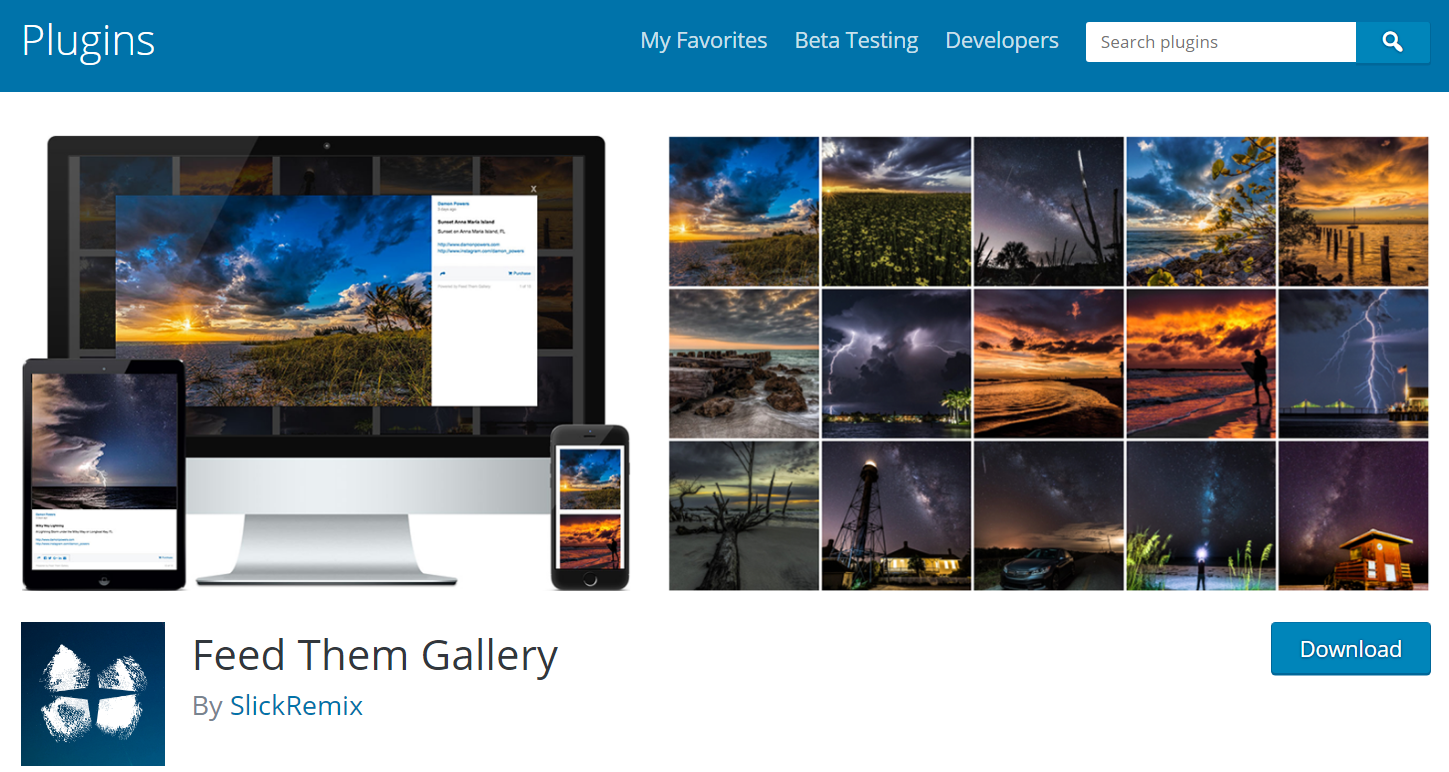
Feed Them Gallery is a fantastic plugin as it will help you greatly improve the look of your photo galleries. This plugin includes a variety of tools for customizing the layout and design of your gallery and showing it in the best way possible. Once integrated with WooCommerce, you can converts each photograph into a product that can be purchased.
Highlight features:
- Provide multiple layouts and image options
- Allow customizing the column size, image size, margin, padding, background color, and so on
- Allow showing the galleries on social media
- Provide an option to add a watermark to your images and set their position
- Automatically create a product for each image uploaded in WooCommerce
Price: free
Sell Media
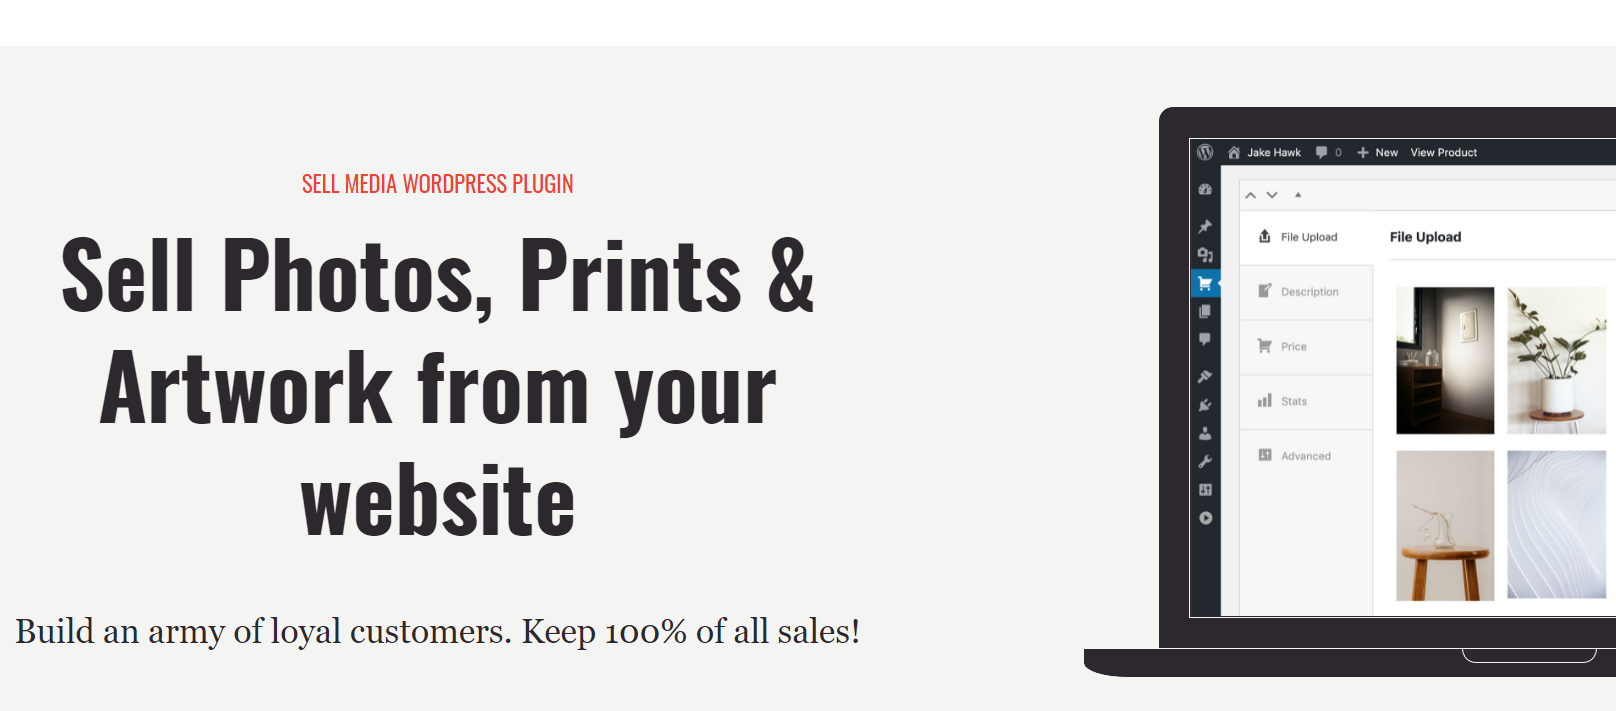
Sell Media is a totally customizable and flexible WooCommerce photography plugin that allows you to create galleries and sell photographs and digital art. Via this plugin, the layout of the store can be customized in a variety of ways. Besides, the plugin is compatible with any WordPress theme.
Highlight features:
- Allow creating galleries, adding photos, printing, and selling
- Having cloud backup available that ensure you never lose data
- Enable adding photos in bulk and assign prices individually or in a group
- Import image from Lightroom and Aperture
- Accept payment online and offer discount
Price: free
Envira Gallery
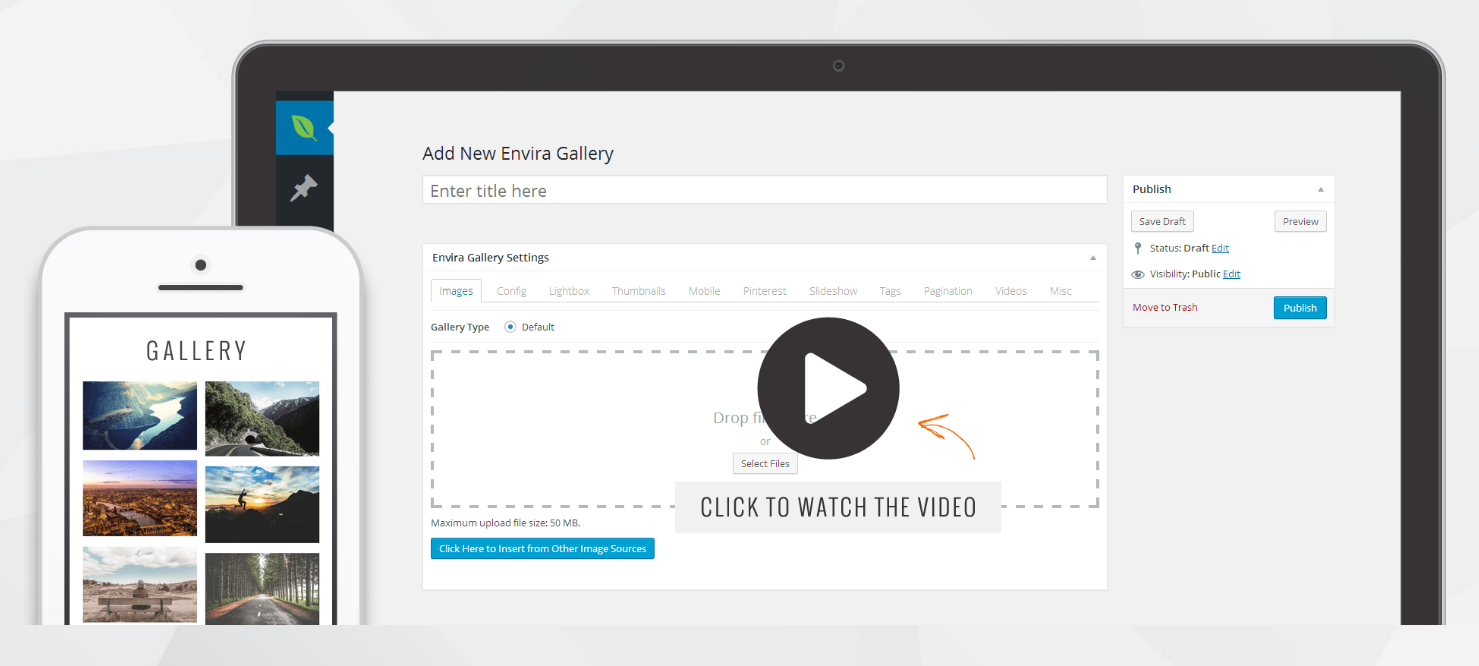
Envira Gallery is a powerful and flexible gallery plugin that will assist you in quickly creating attractive pictures and video galleries on your site. It has a drag-and-drop builder that allows you to construct stunning galleries. Once integrated with WooCommerce, it allows you to sell photographs and enables social network sharing and watermark protection.
Highlight features:
- Allow adding password and watermark protection
- Add social media share buttons
- Allow customizing the layout of the galleries
- Provide the drag and drop builder
- Enable to add video
Price: $26
Final words
With the assistance of WordPress and WooCommerce, selling photographs on a website is no longer a difficult challenge. Photographers also no longer have a headache about creating an excellent site for their business with all the necessary features.
Besides, all of the plugins discussed above can help you show your photographs attractively while also managing eCommerce activities. We hope you find this article helpful and have a deeper understanding of how to set up WooCommerce photography.
Do you have any other questions about creating a WooCommerce photography website? Please leave them in the comments and we will do our best to assist you!


