
How to Set Up a New WooCommerce Store

With the support of technological advancement, eCommerce has developed at an astounding rate over a previous couple of decades. Total eCommerce sales globally hit 3.5 trillion US dollars in 2019, accounting for 14.1% of total retail sales. One of the fundamental causes contributing to such a great quantity is the constant growth of e-commerce platforms in terms of functionality and adaptability. WooCommerce is now the platform that powers 25% of all websites that use eCommerce technology on the internet.
It is pretty straightforward to learn how to set up a new WooCommerce store. The plugin guides you through the majority of the procedure. Even so, if this is your first time managing payment services, shipping options, and other issues, you’ll need some assistance. Installing and setting WooCommerce correctly in the very first place will save you a lot of debugging effort in the future. The sooner you have all of your store’s settings in order, the sooner you can market your items and make sales. So, let’s dive in!
Why choose WooCommerce to start your eCommerce business?
It is undeniable that dozens of eCommerce plugins like WPecommerce, Cart 66, Jigoshop, MarketPress, Shopp, WP shop, and more are available for WordPress. In this instance, the eCommerce plugins we have described provide the appropriate feature set for setting up businesses on the WordPress platform. Nonetheless, WooCommerce shines out as one of the top choices on the market. WooThemes (acquired by Automattic, the inventor of WordPress, in 2015) debuted in 2011, and nowadays, WooCommerce setup is quick and easy. It is the most powerful, versatile, and comprehensive eCommerce plugin for WordPress. As we will explain below in this WooCommerce tutorial, you can do practically anything with WooCommerce.
Remember that establishing a WooCommerce store is not the same as launching an eCommerce store on a platform devoted to eCommerce (Magento, Shopify, Prestashop, etc.). WooCommerce is highly suggested if you want to:
- Have total command of your store. When working with proprietary systems, you are frequently constrained by the platform’s limitations. For example, you cannot constantly set SEO settings (meta tag description, URL, etc.). Then, more broadly, you have a few alternatives for changing the platform code (for example, adding tags in the header). You can update, adjust, and control everything using WooCommerce.
- Having an eCommerce store is more than just a store, but also a website with a blog, multiple pages, and so on. You get the most excellent blog editor in the world when you use WordPress.
- Pay no commissions on sales or a monthly fee (as is the case with Shopify) as is the case with all proprietary platforms.
- You should be able to start modestly and expand your eCommerce site as your company grows. WooCommerce allows you to construct relatively basic stores while simultaneously meeting all of your complicated demands, both now and in the future. For example, in the case of payment handling, you may start with easy-to-manage technologies like PayPal, Amazon Payments, or Google Wallet before installing SSL for improved shop performance.
How to set up a new WooCommerce store in WordPress
Managing a WooCommerce store necessitates some code. This is what you have to put up with in exchange for your store’s limitless customizability and usefulness. As a result, to set up WooCommerce, you must deal with various technical issues. We’ll guide you through the process of installing the plugin and adjusting its settings in the following steps.
Step 1: Select the hosting and domain name
Before configuring the plugin, you must obtain a server and a domain name to establish a WooCommerce website. It is a location where you may keep all of your website’s data. Choosing the appropriate hosting company is critical since the best one will help your online store considerably. A domain name is the address of your website on the internet from which visitors may reach it. It is the address that internet consumers will enter into their computer browser to view your site. For example, the domain name of our website is avada.io. Web hosting is the storage capacity on the internet for your website’s data and resources.

If you consider a domain name your website’s address, then web hosting is the house to which that address leads. When users input your site’s domain name into their web browser to access your site, the hosting server sends the site files across the internet and makes your site available for viewing online. The most fundamental criteria for creating any website are a domain name and a hosting web account. These two services are available from various domain registrars and web hosting providers. A domain name typically costs $14.99 per year, and site hosting costs $7.99 per month. There are multiple alternatives available to you. WordPress recommends Bluehost and Cloudways as hosting providers. Aside from that, A2 Hosting is a viable alternative.
Step 2: Install WordPress
If you implemented our suggestions and selected a hosting provider, the next step in setting up WooCommerce is to install WordPress. With 1-click installation built into several hosting services, the procedure isn’t as tricky as it once was. In this tutorial, we will use Bluehost as an example. Bluehost is an officially approved WordPress hosting company and one of the world’s largest hosting businesses. They are experts in WordPress and offer the most user-friendly WordPress installation method. When you sign up with Bluehost, WordPress is immediately installed on your domain name. When you sign in to your Bluehost account, look for your WordPress site under the My Sites option.
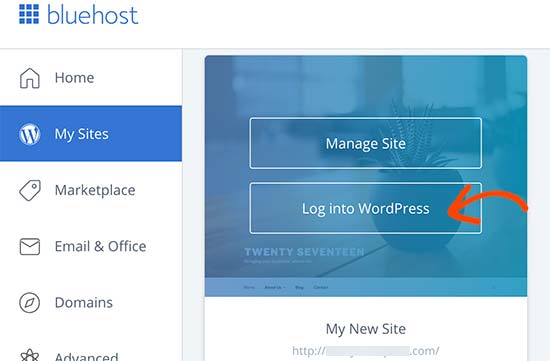
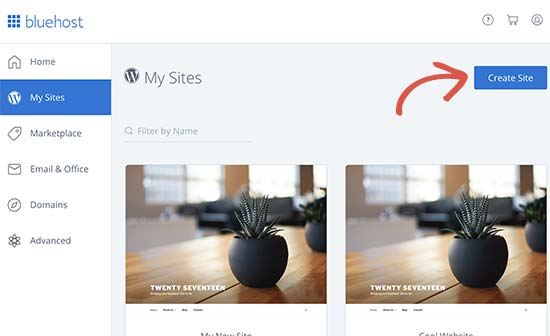
Simply clicking on the Log into WordPress button will take you immediately to the WordPress admin area. Except for their Basic plan, Bluehost allows you to install WordPress on an unlimited number of sites with all of their hosting plans. To begin, go to the My Sites page and select the Create Site option.
The Bluehost-assisted WordPress installation wizard will be launched as a result. First, it will request a site title and, optionally, a motto.
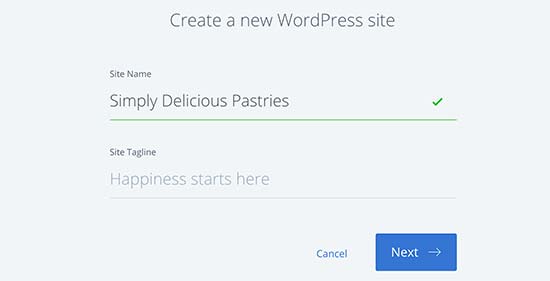
To proceed, click the Next button. Following that, you will be prompted to determine a domain name and a route for your website. If you already own a domain name, you can select it from the dropdown menu. You may always buy and add new web addresses to your account by going to the Domains tab in the hosting administration.
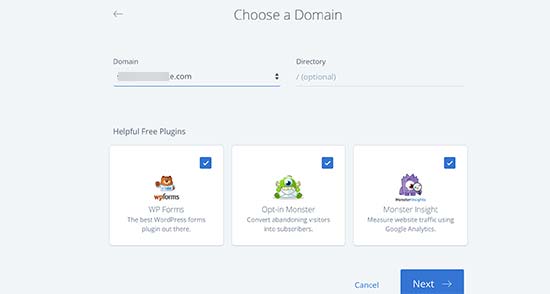
After you’ve chosen your domain name, you may leave the directory path field blank, and Bluehost will determine it for you. The application will also show you a few necessary plugins that you may install. You may now proceed by clicking the Next button. The installer will install WordPress on your site, which may take a few seconds. Following that, you will get a success message with the specifics of your WordPress site.
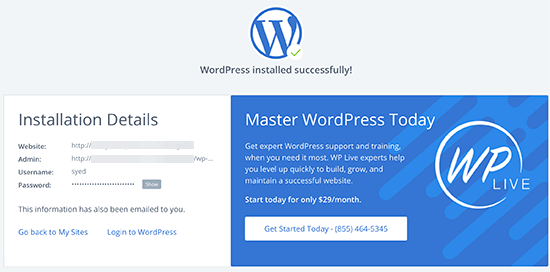
This information will also be sent to you through email. You may now enter the admin area of your new site by clicking the login to WordPress button. You have successfully installed WordPress on your Bluehost hosting account.
Step 3: Activate WooCommerce
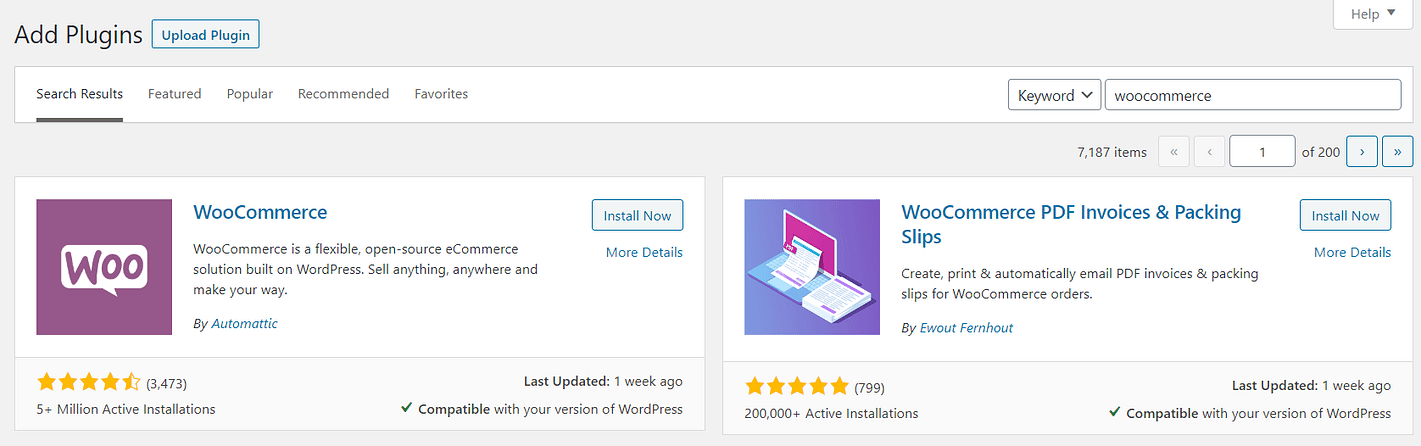
Let’s look at how to install WooCommerce since you now have a WordPress website! There are various methods to accomplish this, but we will, of course, choose the simplest. Navigate to Plugins > Add new from your website’s dashboard.
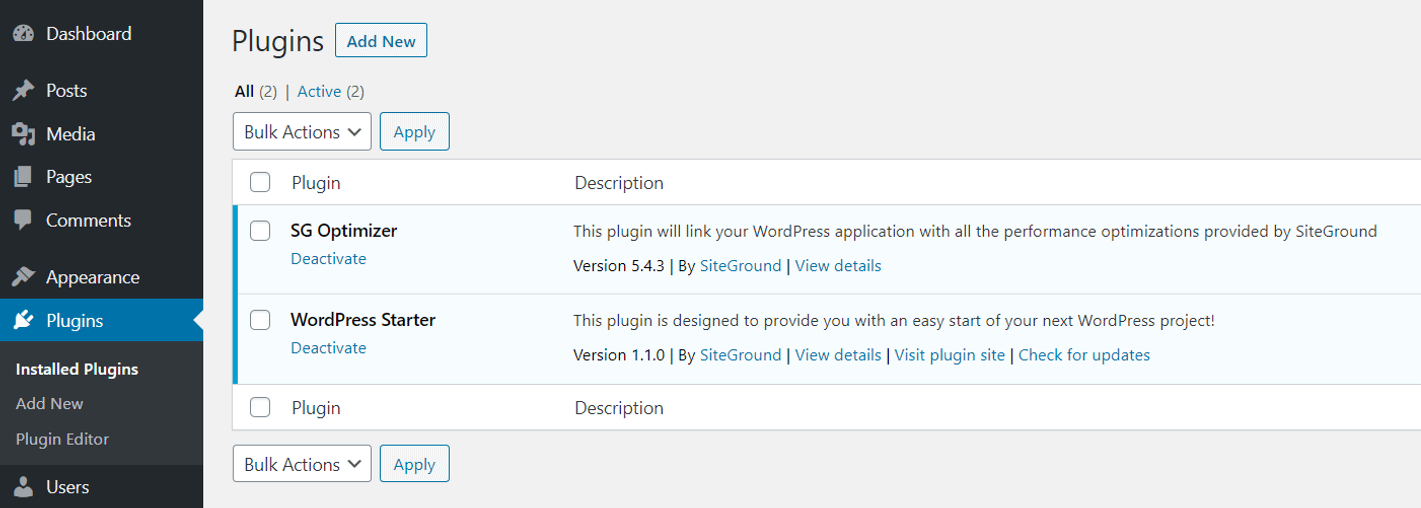
Then, go to the search bar and enter “WooCommerce.” The plugin should display immediately away as the first result. Wait a few seconds after clicking Install Now. Then, to activate the plugin, click Activate.
After you activate the plugin, you’ll be sent to WooCommerce’s setup process. To configure your store, you will need to submit certain information there. There are several sections, such as Store Details, Industry, Product Types, Business Details, and Theme. Following the installation of WooCommerce, you will be requested to go through a setup wizard. It’s optional; however, we encourage going through it to adjust specific essential options. The following should appear on the first page of the WooCommerce setup wizard:
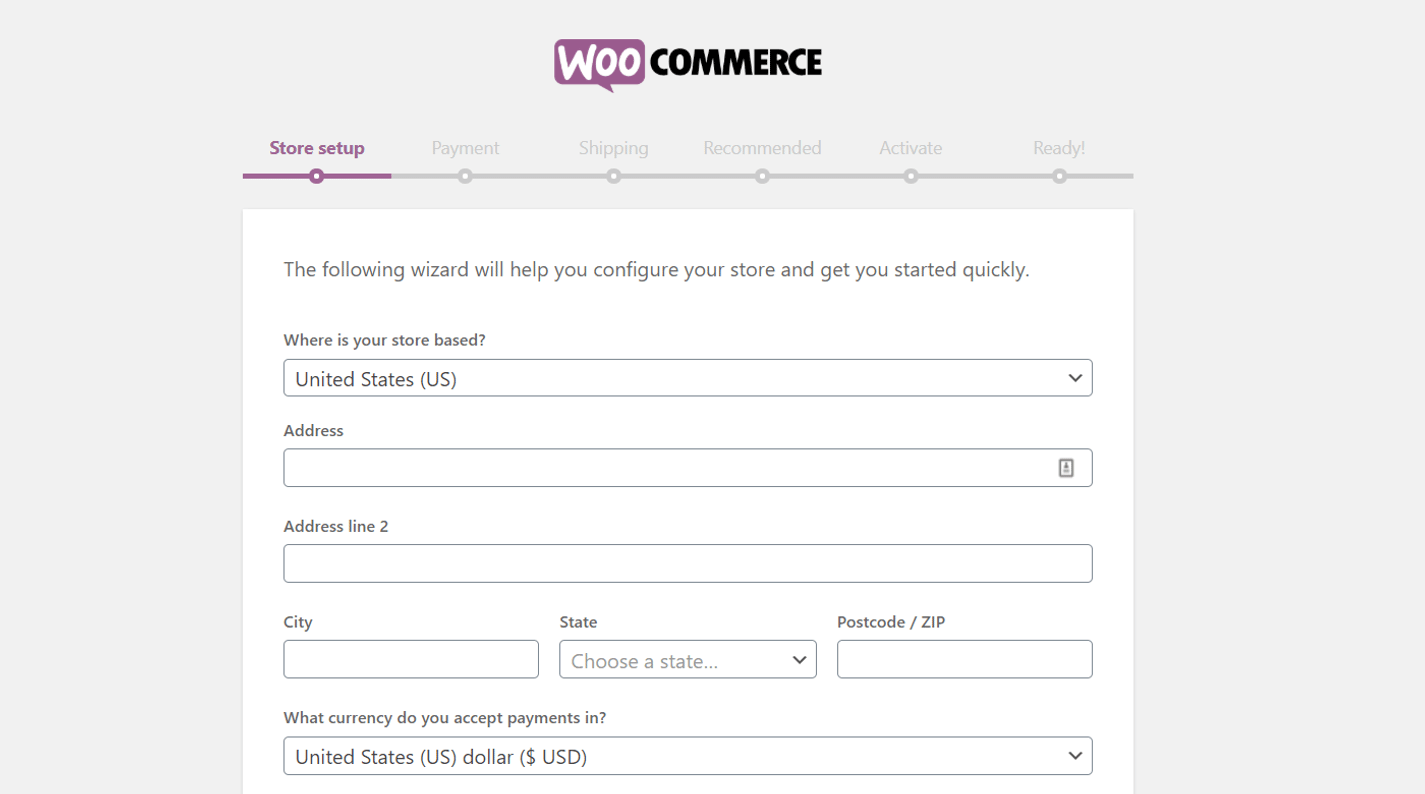
WooCommerce prompts you to add some basic information about your business here. This includes its location, the currency you intend to employ, and whether you want to sell digital or real goods (or both).
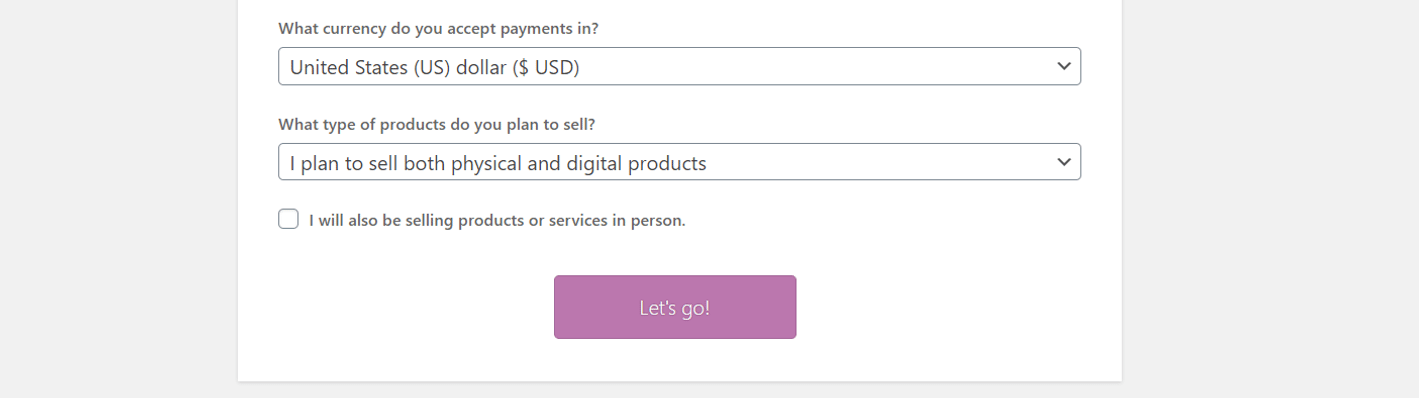
Remember that whatever you select here (or throughout the setup tutorial) may be adjusted later in your WooCommerce settings if required. For the time being, the following step in our WooCommerce tutorial 2021 is to click Let’s Go.
Step 4: Select your payment method
Following that, you may choose which payment processor you want your business to utilize. WooCommerce offers Stripe, PayPal, and offline payments out of the box:
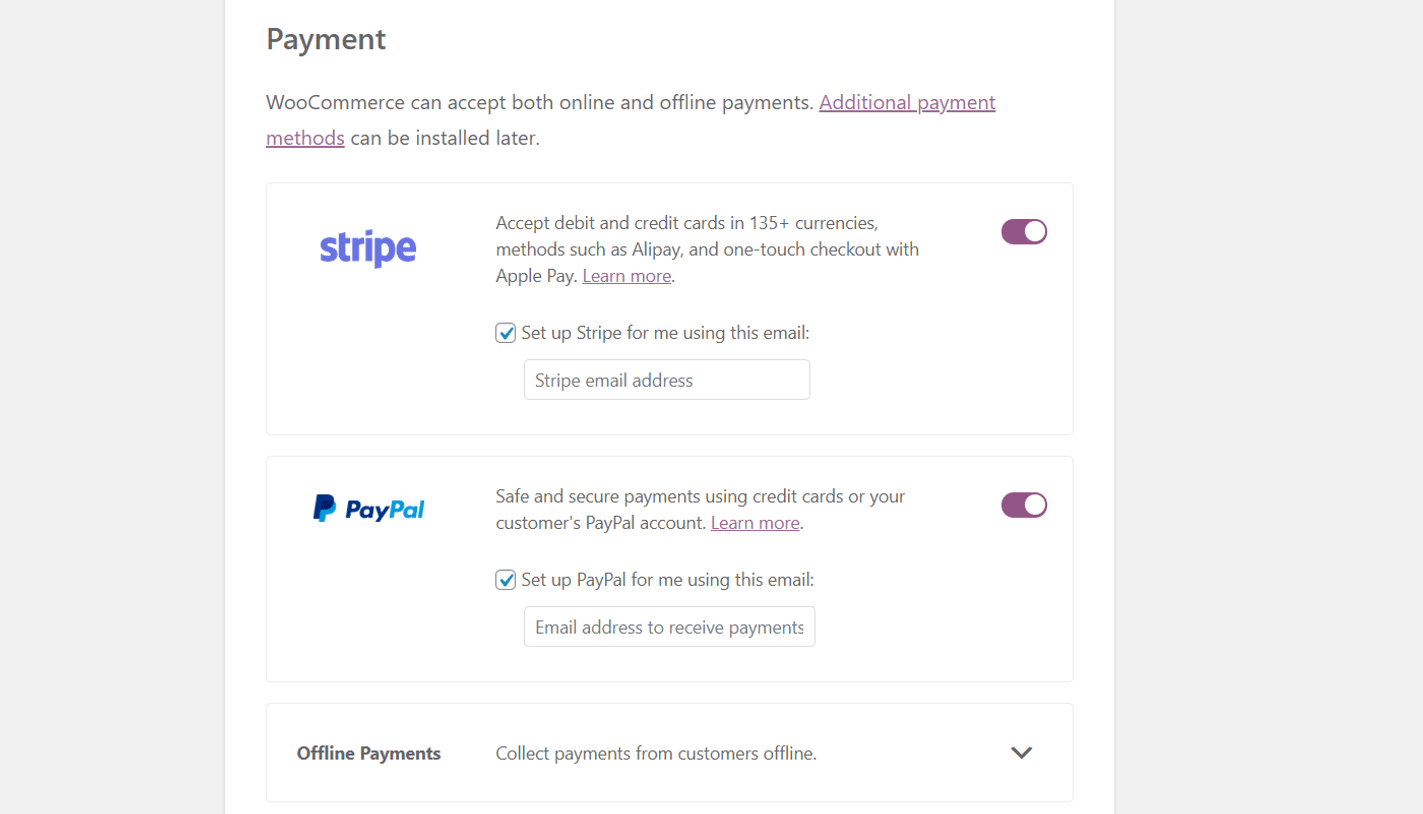
Because you’re presumably not interested in dealing with offline payments, let’s concentrate on the other two choices. WooCommerce will install plugins to allow integration with the gateway of your choice. You can use either one or both. If you choose the last option, you can subsequently set up an alternate platform. Stripe and PayPal are both excellent alternatives, so you can’t go wrong with either. Select the choices you desire and proceed to the next page. The remainder of your payment settings will be configured later.
Step 5: Set up shipping options
After you’ve completed payment processing, it’s time to establish your store’s shipping options. WooCommerce will ask you which “zones” you want to send your items to and what rates you want to use:
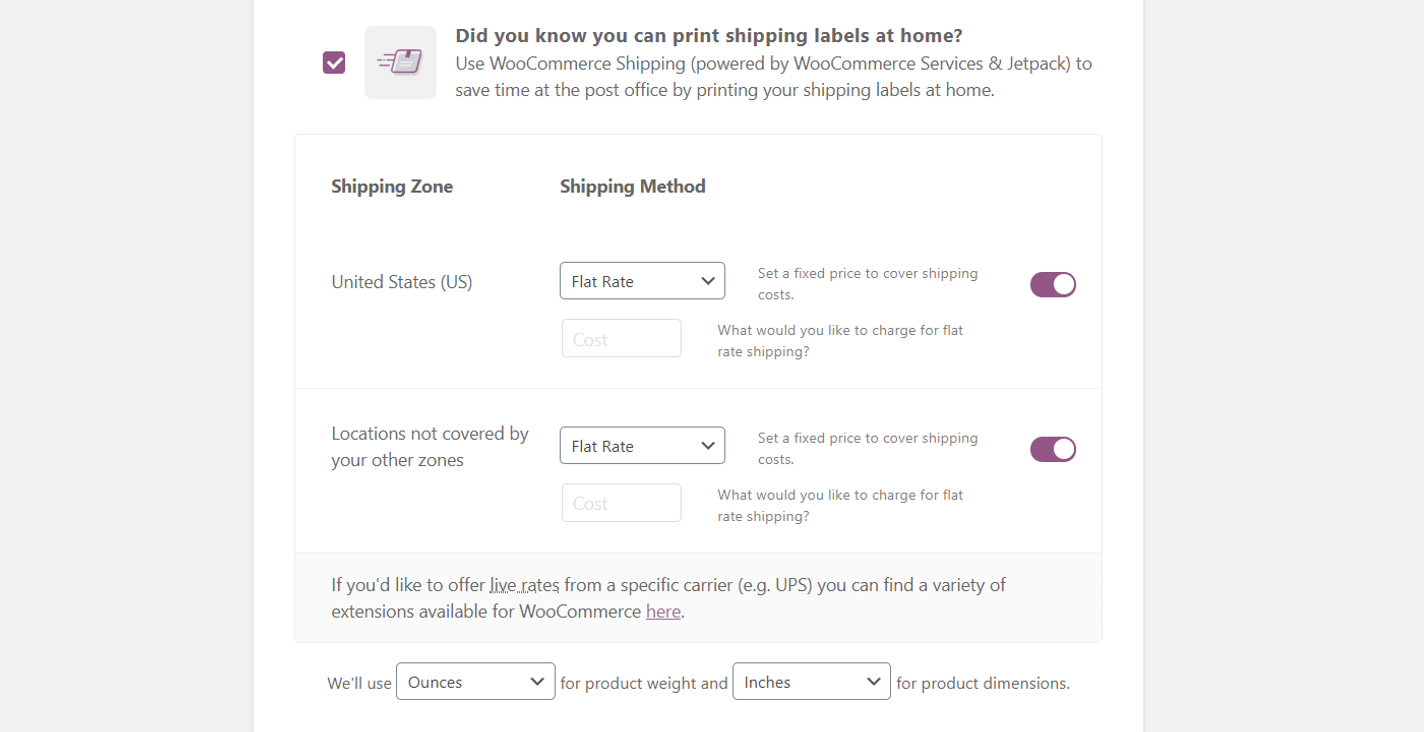
A shipping zone is essentially a geographic place to which you wish to apply a specific delivery rate. For example, you may provide:
- A pricing rate inside your state or province.
- A price rate within your country.
- A third price rate for overseas sales.
How much you charge for shipping is dependent on the zones you want to serve and the items you intend to sell. If you’re not sure what to charge, we recommend checking the rates at your local post office. You may also modify these values at any time. International shipping may be complex, so we recommend you start local unless you already have experience in this area. Finally, WooCommerce allows you to print labels at home and save time by utilizing its Shipping plugin. It has the potential to be a helpful efficiency enhancer. Therefore it is worth investigating. Once you’ve determined your shipping zones and pricing, click the Continue button.
Step 6: Configure add-ons
WooCommerce is a complete eCommerce platform in itself. However, you’ll nearly still want to enhance its capability with extra plugins. At this point, you’ve set up the foundation for your online WooCommerce store. The following page of the setup procedure offers you a few potential add-ons. You’ll see that WooCommerce suggests installing a particular theme. For the time being, it may be best to continue with the default. Then you may look for a WooCommerce theme that matches your branding. Disable this option until you’ve decided which one to use. Other plugins to consider are Automated Taxes, WooCommerce Admin, and Mailchimp. The Automated Taxes extension can help you save time on administrative tasks. Therefore it’s a good idea to enable it.

Similarly, we recommend installing WooCommerce Admin, which provides simplified statistics and analytics for your store. However, whether you utilize Mailchimp or not will be determined by the email marketing platform you want to employ. Disable this option if you haven’t already. When you’re finished, proceed to the next screen. WooCommerce will install the plugins you chose in the background. If you enable Automatic Taxes, the wizard will ask if you wish to link your store to Jetpack before proceeding to the last step. A WordPress.com account is required for Jetpack to function. WooCommerce will urge you to log in to WordPress.com and, if necessary, establish an account.
Step 7: Choose a theme
The following step is to select a theme for displaying your items. There are several WordPress themes available, both free and premium. When you set up WooCommerce, you must decide how your store will seem to your consumers. While the frightening importance of your store’s appearance should not be underestimated, it’s pretty acceptable if you still have no ideas for the time being. WooCommerce provides a few eCommerce-specific themes to help you get started quickly.
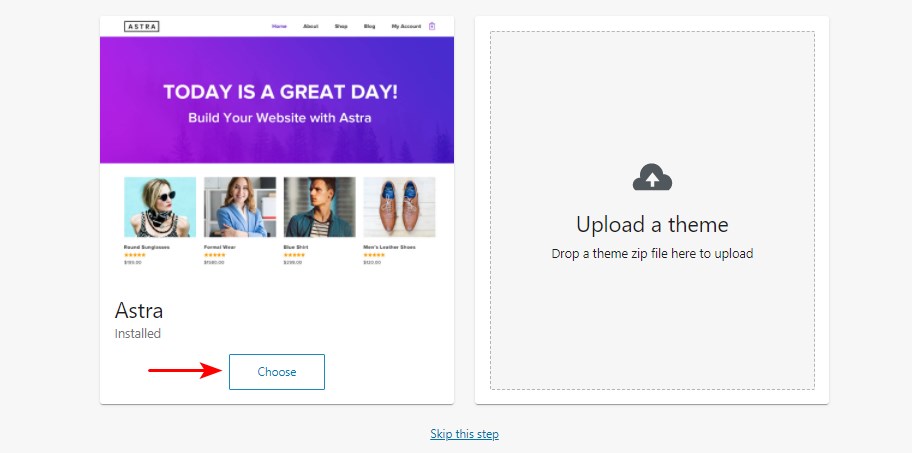
If you decide to invest more money in giving your site a professional appearance, you can permanently alter your theme later (which you probably should). Because there are dozens of sites competing in every given business, a tailored premium theme that stands out is never obsolete. You can go through the Official WooCommerce Marketplace for a premium theme that appeals to you.
Step 8: Configure the default settings
Since your business is already neatly set up, let’s adjust a few more parameters to ensure it runs correctly before adding the first items. Go to WooCommerce > Settings from your dashboard. On the page, you should notice several tabs. Also, before making a change, drag your mouse over the question marks beside the settings for an explanation.
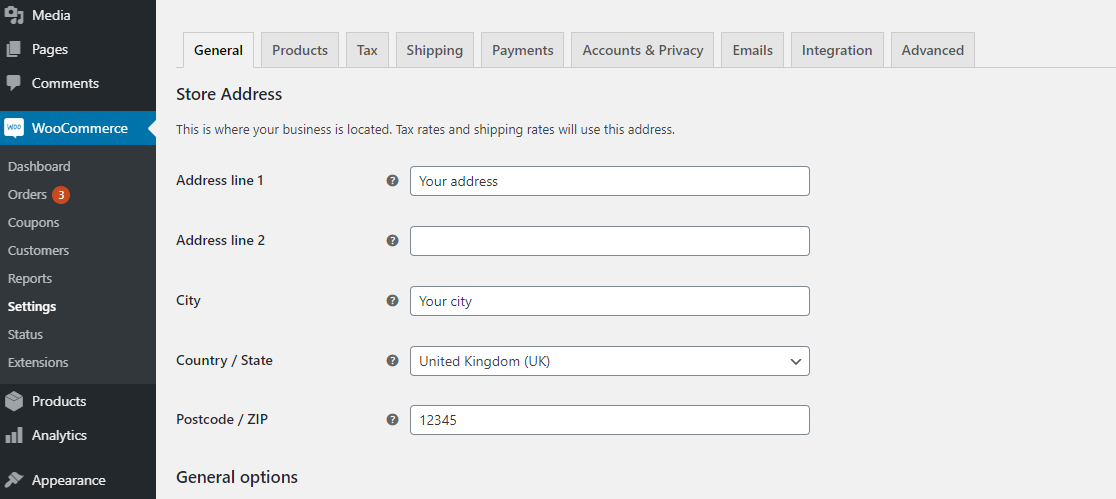
Some options that were configured in the setup process should be shown in the General tab. Aside from that, you will be able to:
- Limit the nations to which you are willing to sell or export.
- Allow tax rates and calculations to be used.
- Choose whether or not to apply promo codes.
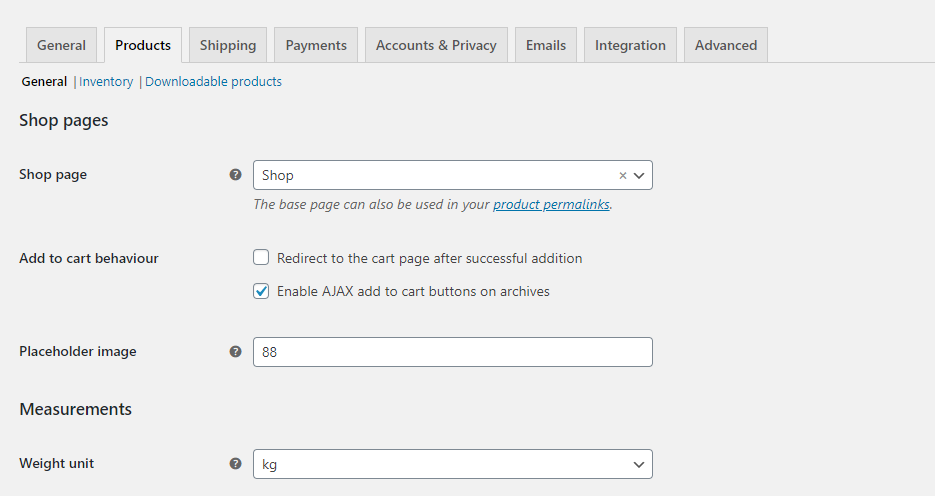
- Set up currency choices. It’s worth noting that selecting Geolocate under the Default customer location option may slow down your loading speed because you depend on data from a third source. The Items category is divided into three categories: general, inventory, and downloadable products. Configuration settings for Shop pages, Measurements, and Reviews may be found on the General tab. In the Inventory area, you may enable stock management and set up low stock notifications. Finally, the Downloadable items area allows you to customize your download settings.
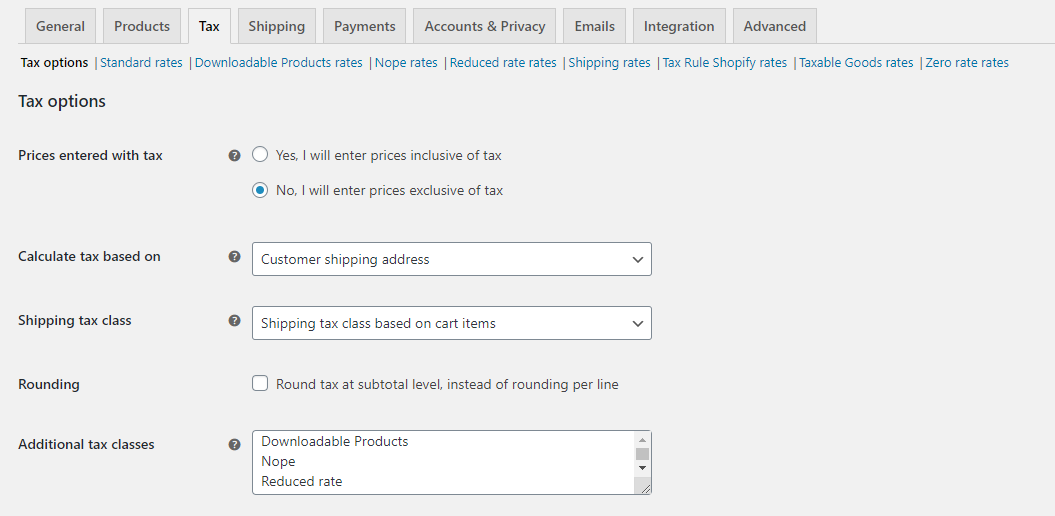
The Tax tab is subdivided into several parts, as seen in the figure below. Each area allows you to specify a particular sort of tax rate. It should be noted that the tax section is only available if tax rates and computations are enabled in the General tab.
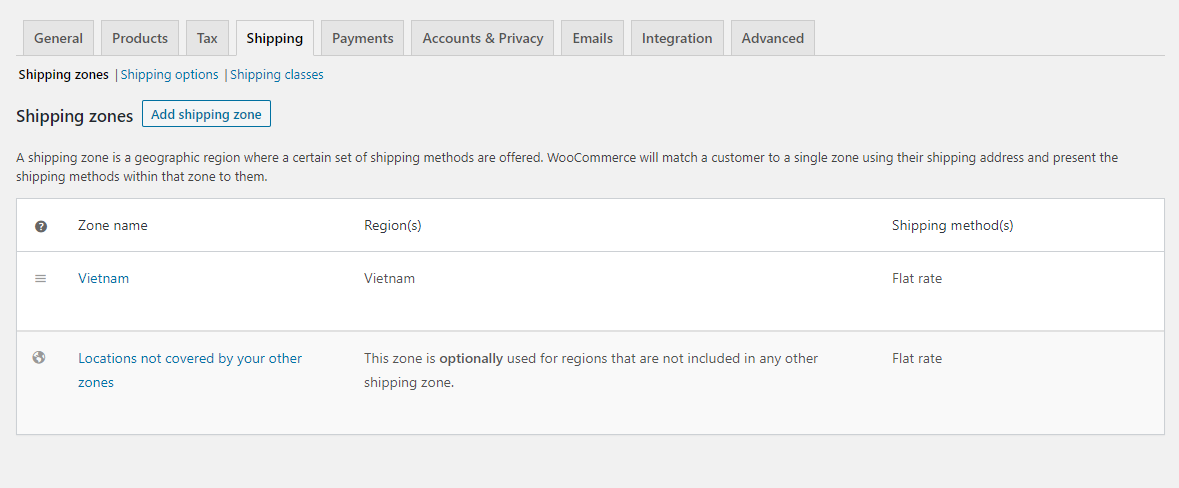
Moving on to the next stage, the Shipping options are only required if you sell tangible goods. The first part is dedicated to shipping zones. You can enter the geographical locations you send your things, the methods for each zone, and the pricing for each way here. You can specify several zones, as well as different delivery methods and fees for each location. The Shipping choices allow you to choose whether or not to display the Shipping calculator. You may also decide whether you want to ship to the billing address or the customer shipping address by default or simply to the user’s billing address. Finally, the Shipping classes area enables you to arrange items of similar sorts and charge varying rates for different classes of products.
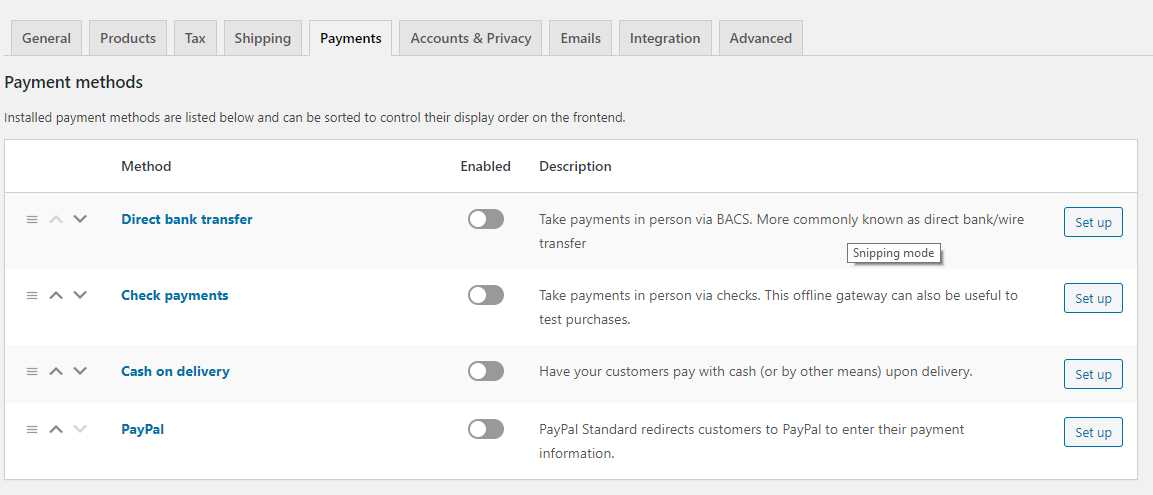
On the Payments page, you may specify your payment methods. This is where you select which payment gateways to activate and display to your consumers throughout the checkout process. By clicking on any gateway, you will be sent to its configuration screen, where you may change its title, description, and instructions.
Step 9: Add your products to WooCommerce
Next, let’s add the first product to your online store and start selling. After running WooCommerce, you’ll see two new tabs on the side menu of your dashboard. WooCommerce (your general settings section) and Products are their terms (your products settings area). To begin configuring your online store, click the link after the setup procedure or go to Products > Add New. In any case, you’ll be able to add your first product using the same WordPress editor:
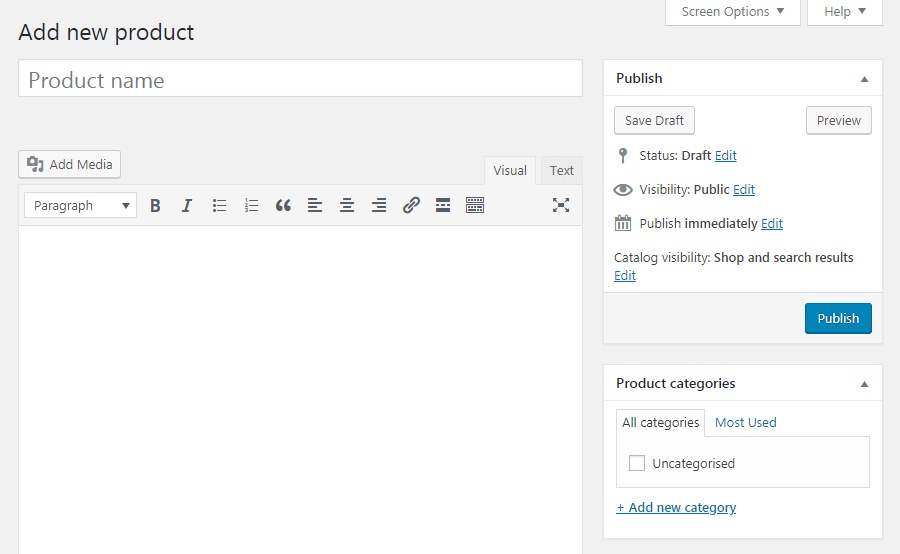
The first thing you should do is configure a title and a brief description of the product. In a live preview, here’s what a title and description look like:
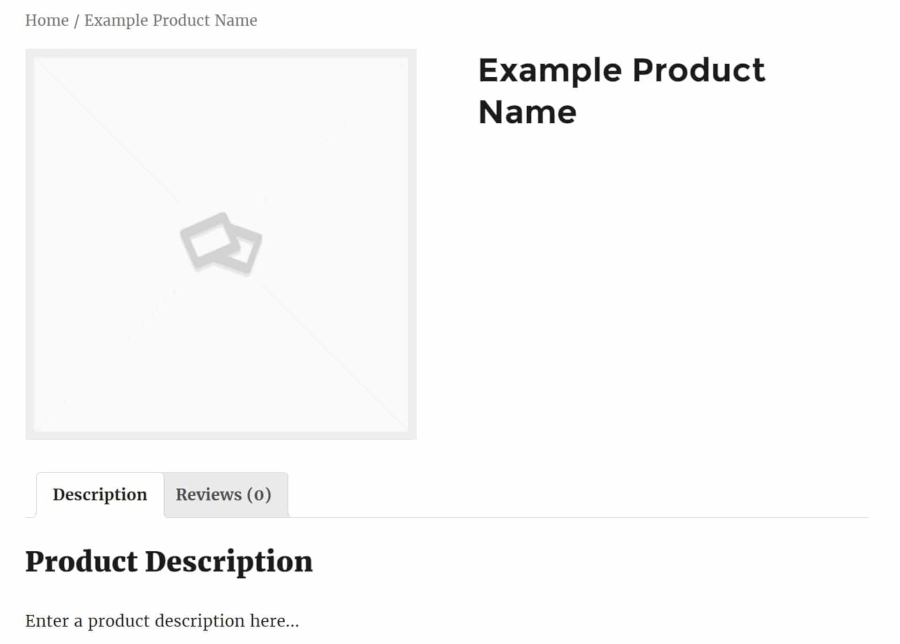
If you scroll down below the post editor, you’ll see two additional widgets that aren’t available on standard posts or pages. The first is the Product data section, which includes the following information:
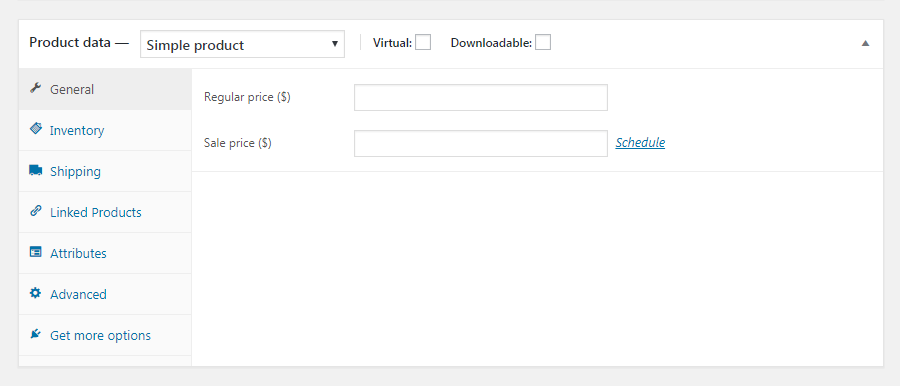
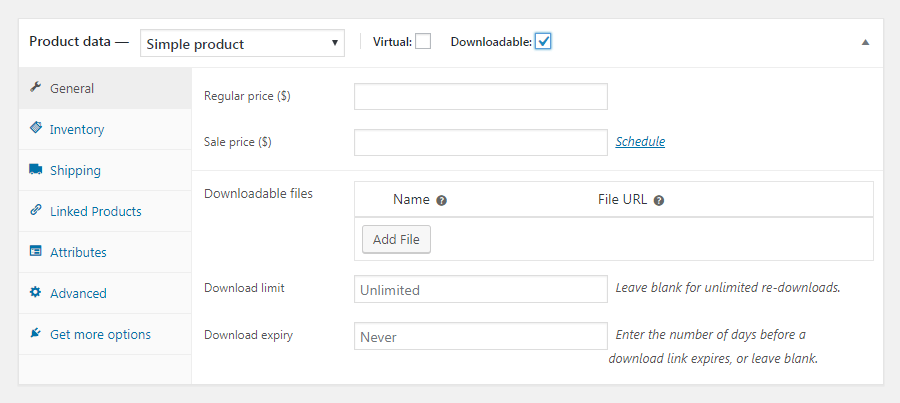
You may fill in the blanks with any information about your product. At the top, you may choose whether the product is virtual (which disables the Shipping option) or downloaded. Then, put your regular and sale pricing (sales can be time-sensitive). If you offer digital items, you must additionally upload the file to be purchased, set the download limit (leave it blank to identify it as unlimited), and set the download expiration (leave it blank to make it available indefinitely):
Then, on the Inventory tab, you can organize your stock by adding the amount of the product, stock status (in/out of stock), and whether or not you want to enable backorders:

You may also label the product as separately sold, which means that only one can be purchased in a single order. You may also insert the product’s SKU (identifying number) here if you have one. There are a few other vital tabs here as well. You can input the item’s weight, dimensions, and shipment class in the Shipping area. You may add up-sells and cross-sells in the Linked Products tab, and you can define the product’s qualities in Attributes. Lastly, you may add unique purchase comments on the Advanced page, assign the product to a particular place in your menu, and activate or disable reviews. You may also examine recommended extensions from the Get more choices page if you like.
Step 10: Manage your products and start selling
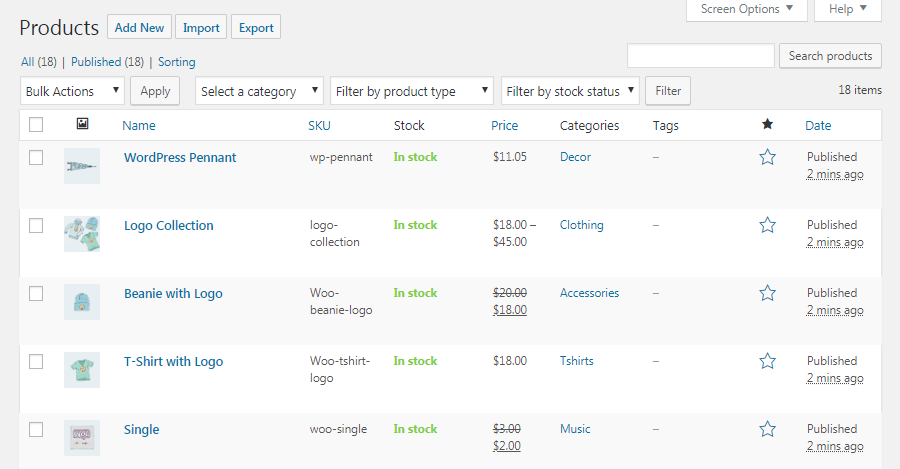
You’ll almost certainly include several things in your WooCommerce shop, which necessitates a simple approach to handle them. Fortunately, you can do this from your dashboard’s Products tab. You may, for example, choose All Products to see every item presently listed in your store. As needed, you may add, update, and delete goods here:
You may access your product categories, tags, and characteristics on the other pages in the Products area. Each of these pages resembles the basic WordPress Posts > Categories page and may help you arrange your whole inventory.
Conclusion
Without question, WooCommerce is the most outstanding free eCommerce solution for WordPress. On the appearance, the plugin boasts incredible metrics. However, the actual power of the plugin is only seen when you go further into its numerous settings. WooCommerce gives you total control over the appearance and feel of your shop. It has many choices for creating your business, selling things, accepting payments, and managing the delivery. It includes everything you need to run a successful online business.
We hope this tutorial will help you understand how to set up a new WooCommerce store. The benefit of adopting WooCommerce, and hence WordPress, is that they become more simplistic. With this popular plugin, you’ll have access to a configuration wizard that will walk you through the entire process until you’re ready to publish your first product. You might also be interested in learning about conversion tracking, how to add a metrics dashboard to your WordPress site, and the list of the top WooCommerce plugins for expanding your business.


