
How to Setup WooCommerce Multilingual and Translate

Up to the present, more than a billion non-English websites across the globe rely on WordPress. That is why the total number of WooCommerce multilingual stores has jumped significantly in recent years. If you ever thought about expanding your online business and attracting more visitors, this article welcomes you.
Today we will introduce you to How to set up a WooCommerce multilingual website coupled with several potential plugins you can use during the process. Keep reading to find out more!
Why should you set up a WooCommerce multilingual site?
Do you know that nearly three-fourths of the online buyers would rather purchase items in their native language, according to a recent survey? This implies that to make a buying choice quicker; consumers may read product information in their native language. It leads to increased revenue due to improved consumer experiences.
Setting your store as a WooCommerce multilingual has become even more substantial when international shipping and digital products in multiple languages are offered on your website. Other benefits of translating your WooCommerce store can be listed are:
- SEO efficiency: you may improve your website’s ability to rank by using only one additional language. Most major e-commerce sites have already put this to good use.
- Attract more customers: as we have stated previously, there are a wide range of customers who prefer to browse in their mother tongue instead of another language. Therefore, when you send your goods to locations with people who speak a different language, you may be overlooking more consumers. By having your store’s site translated, you are able to convert those visitors.
- Better shopping experience: With a translated website into local languages, you can provide a better shopping experience to your multilingual clients.
How to translate a WooCommerce multilingual business?
Clearly, the biggest advantage of setting up a WooCommerce multilingual site is its possibility of gaining more consumers across the globe. But creating an effective online presence is a different story. Our tutorial is going to help you not only build a successful WooCommerce multilingual business but also make it fully responsive.
It might take you quite a while to finish all the setting up steps, so make sure that you follow each of them carefully to avoid wasting your precious time.
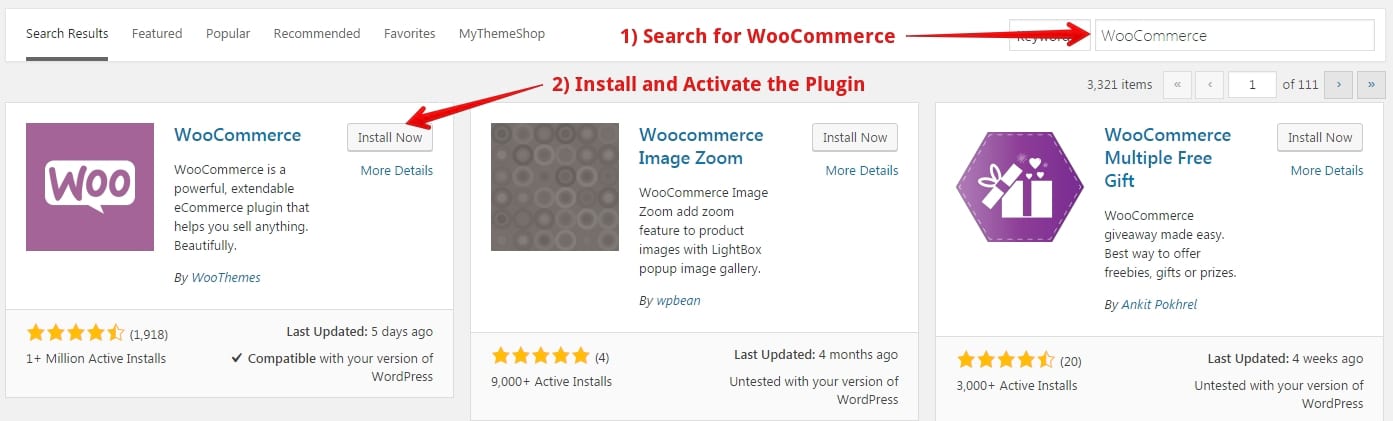
Step 1: Install the plugin
If you have worked on WooCommerce for some time, installing a plugin is no big deal. Online store owners can either use the same plugin as us - TranslatePress, or pick out the best one based on their preferences. Check out our last section for some fulfilling extensions that you can not miss out on!
On the other hand, for those of you who are newcomers, after downloading the file for your plugin, go to Plugins > Add New page from your WooCommerce dashboard and upload the file by clicking on the “Choose File” button:

Wait for a few seconds and select “Install Now” and “Activate” to make use of the extension!
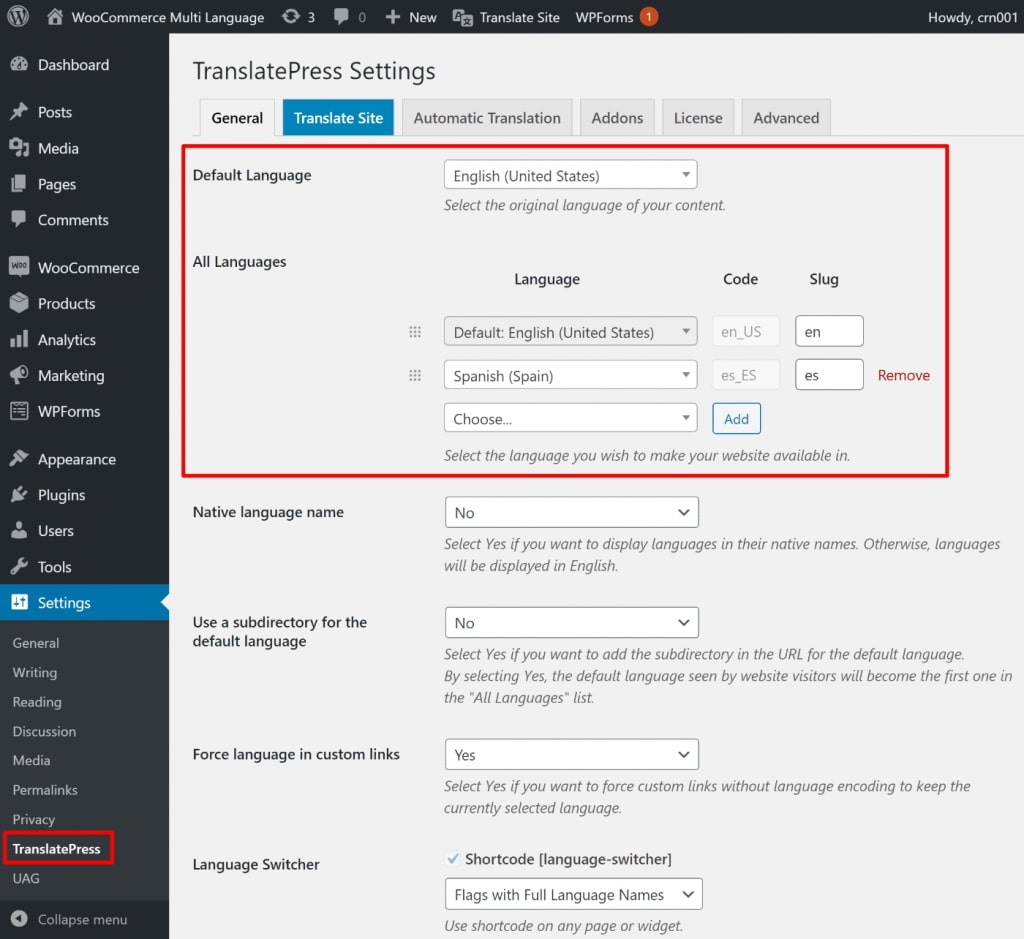
Step 2: Select the language
After installing and activating the plugin, go to Settings > TranslatePress > Translate Site tab to choose the languages that you want to use:
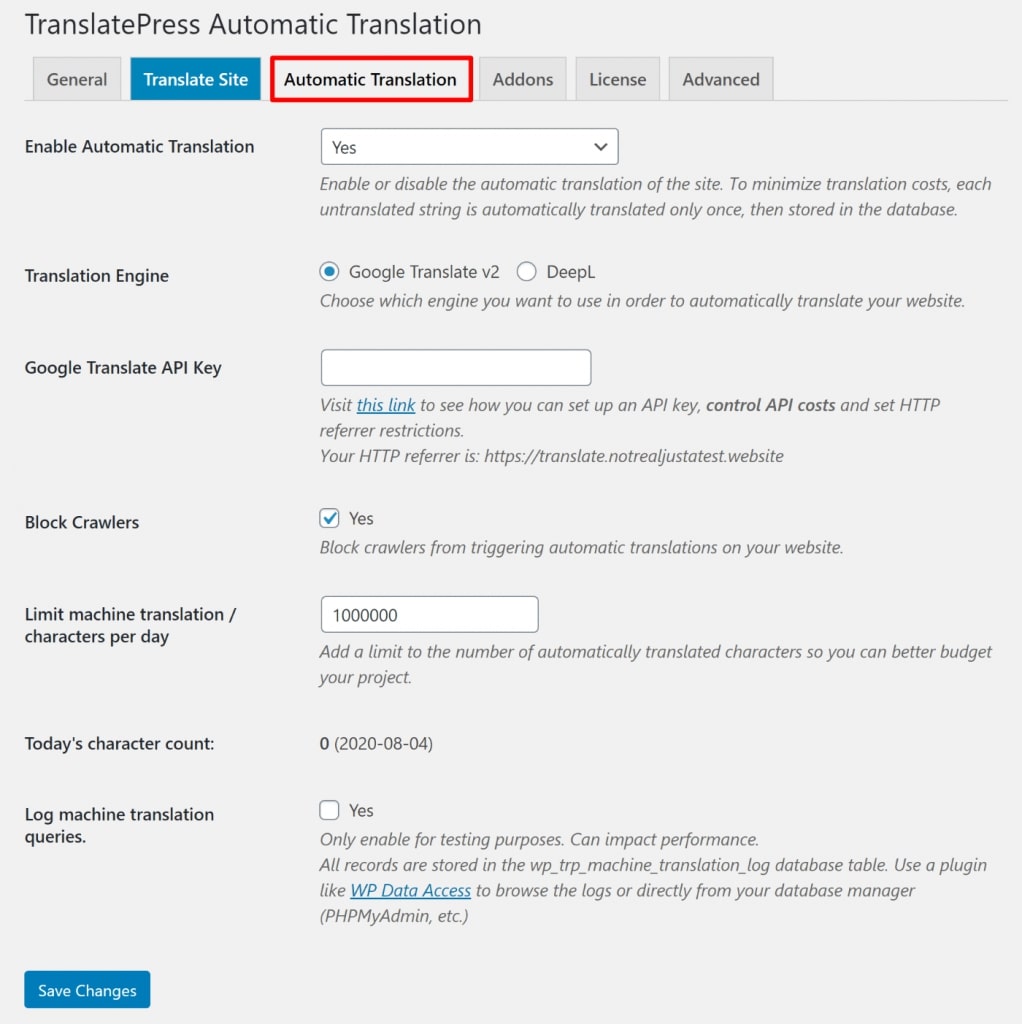
Step 3: Set up translation automatically (if needed)
You may choose to utilize machine translation if you want to save time and bypass translating your WooCommerce shop. This is the foundation for your site’s translation. Then, you may use the remainder of this guide to go back and correct your translations whenever you like.
Your other sections will be similar if you do not utilize the automated translation – the only difference is that you will not have any standard translations to base your work on, and so you’ll have to create every translation from the start.
If you are using TranslatePress, they provide two translating services for you to choose from: Google Translate and DeepL. If Google Translate system is free to every online merchant, then the DeepL selection requires another add-on from DeepL activated in your website beforehand. To pick out one, navigate to the “Automatic Translation” tab and feel free to change the settings on your choice:
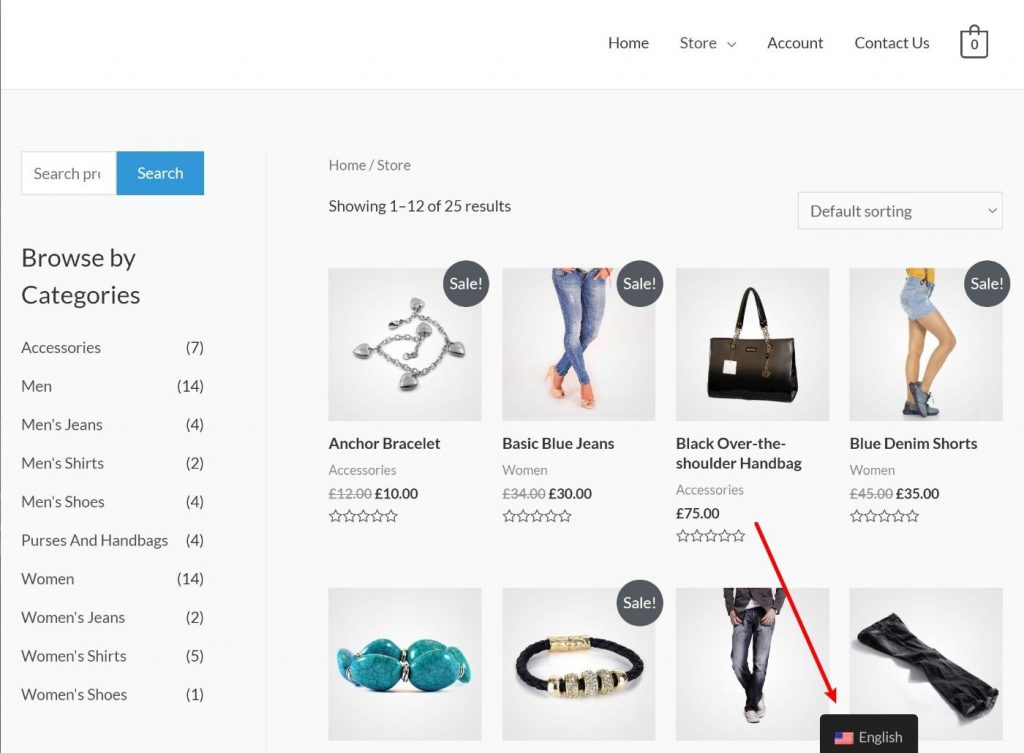
Step 4: Configuring translating button
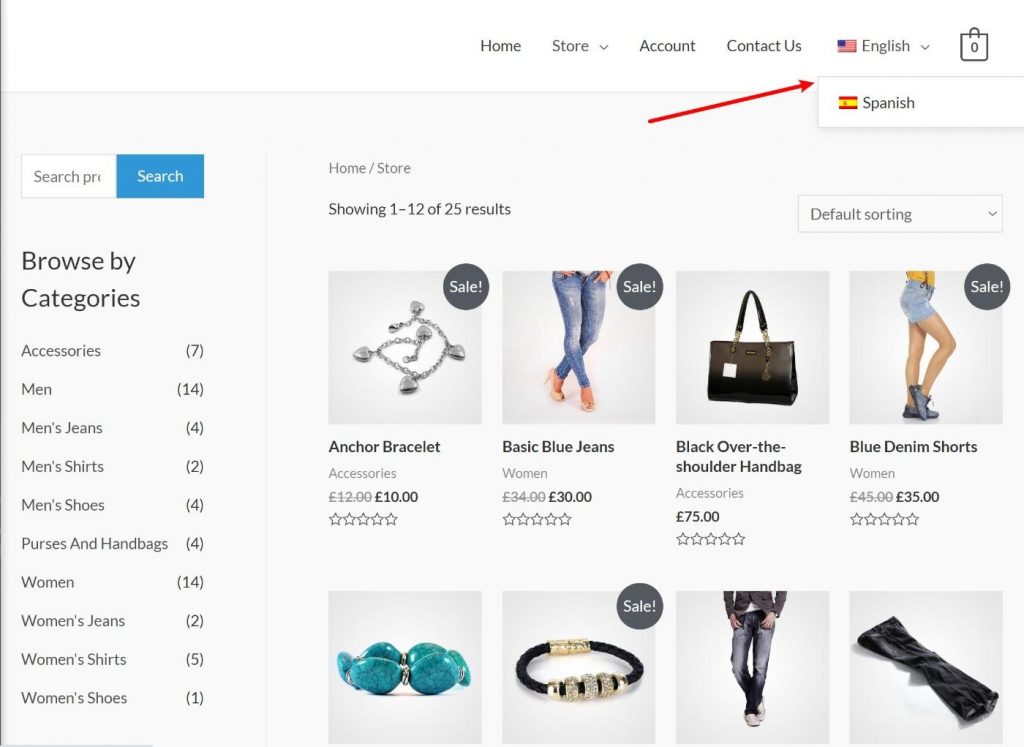
TranslatePress lets you easily install a language selector on your business, so that customers may pick their favorite languages. A language switcher, as you can see, is set to appear in the bottom-right corner by default, like so:
In case you wish to change the location of your language switcher button, then quickly go to the Appearance > Menus page to do so:
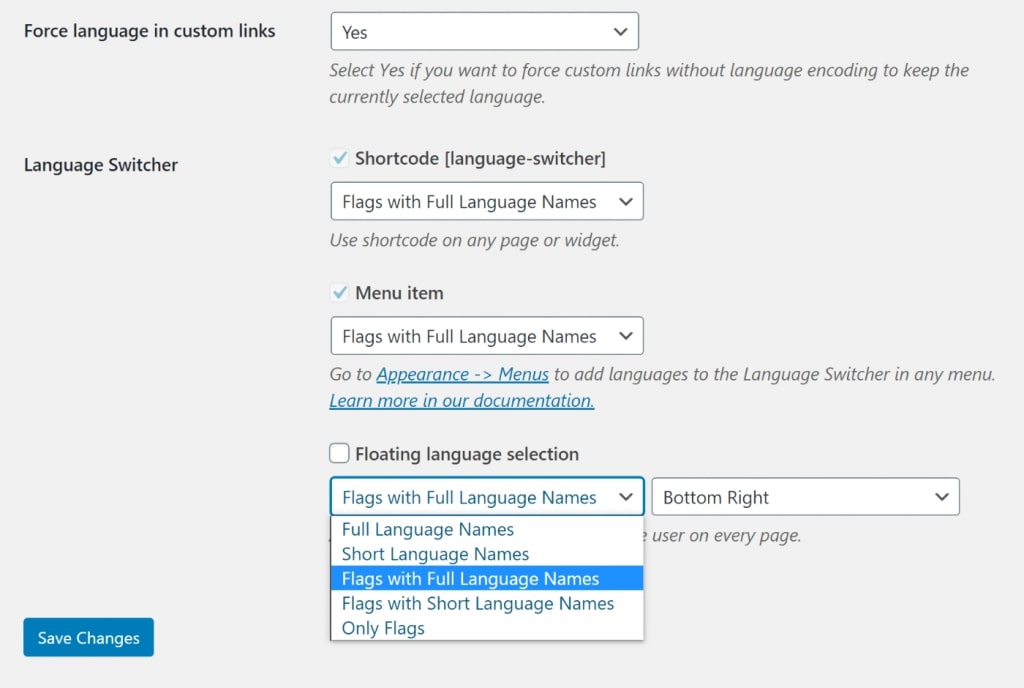
In addition, there are many options available in the TranslatePress Settings to customize the look of the language switcher. You may, for instance, hide/show nation flags, choose between utilizing language names or two-letter language codes, and select other settings when going to the “General” tab:
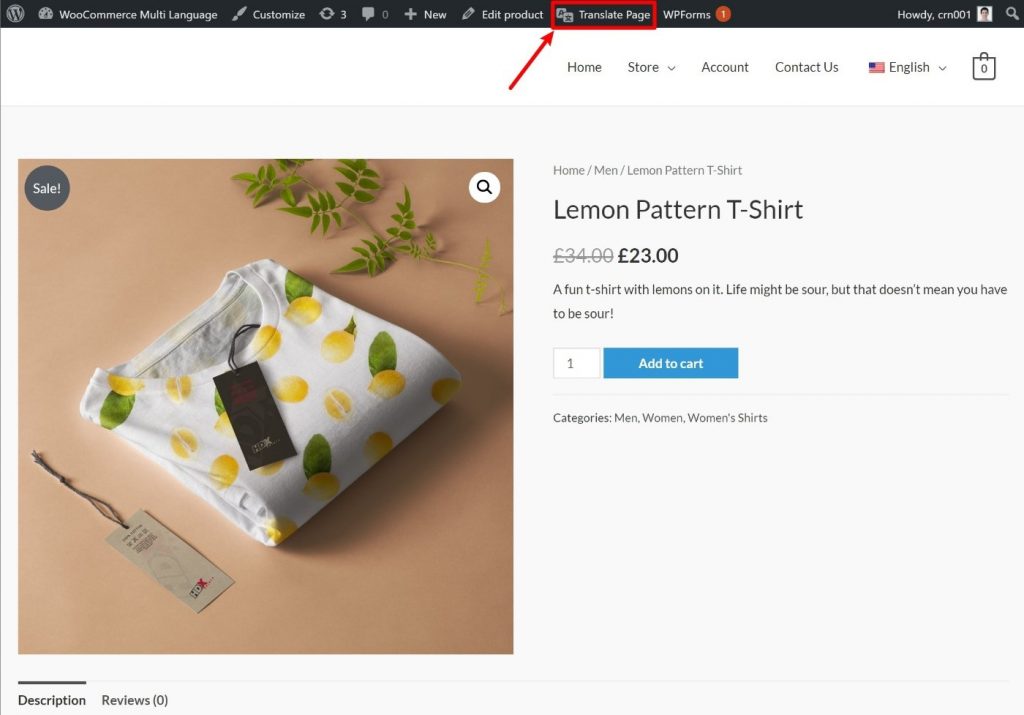
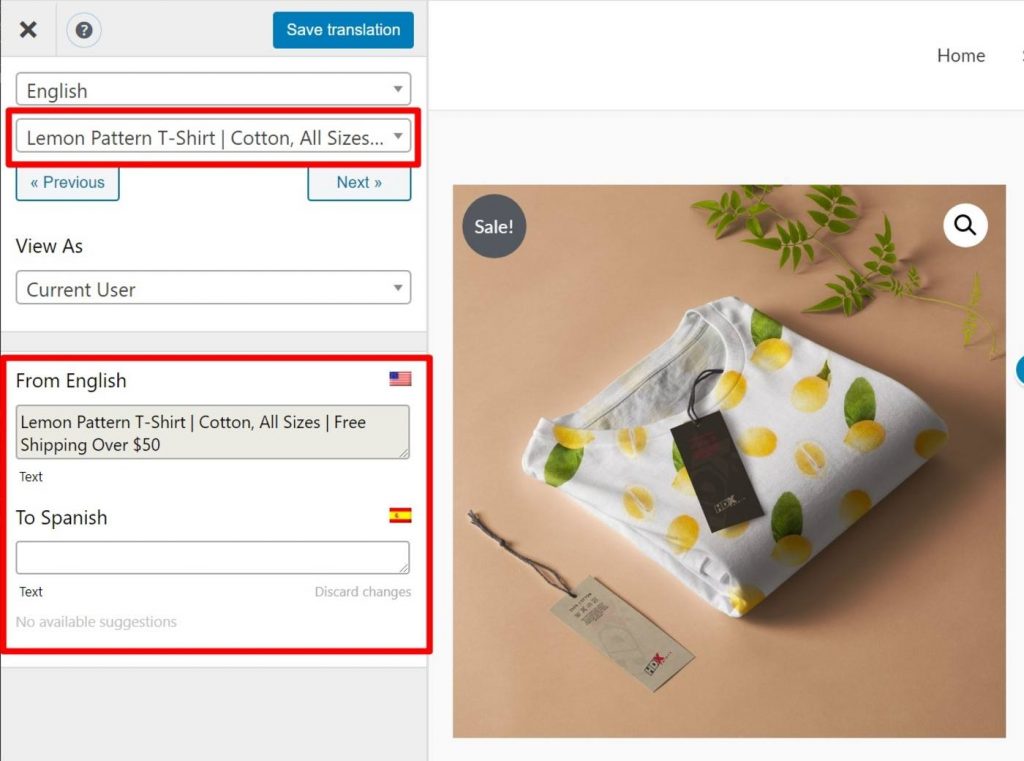
Step 5: Translate your content
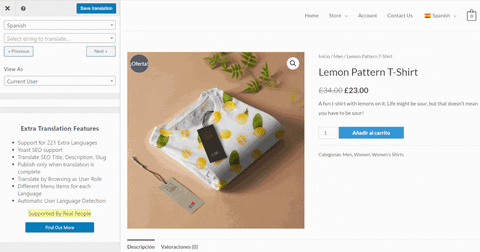
When you are on the front end of your site, it’s time to go to the page you want to change. Then, use TranslatePress’ visual editor to begin editing. This could be your store page, a single product, or even your homepage. Hover over the “Translate page” button just like what we did here:
You can get a translated version of your post by only clicking on a pencil symbol on the live preview and applying it to any product you wish. Open the translation on the sidebar by doing so. You should be able to input your translation once you get there. You may also choose to have the translation filled automatically from your translation provider if you’re using the automatic translation feature:
Step 6: Translating extra buttons
Not only the content alone, but online retailers also have to translate other gettext strings including “Add to Cart”, headings, or notifications. You can notice the difference is that the pencil icon now turns into green instead of the blue color and you can customize both the original and translated text for these buttons:
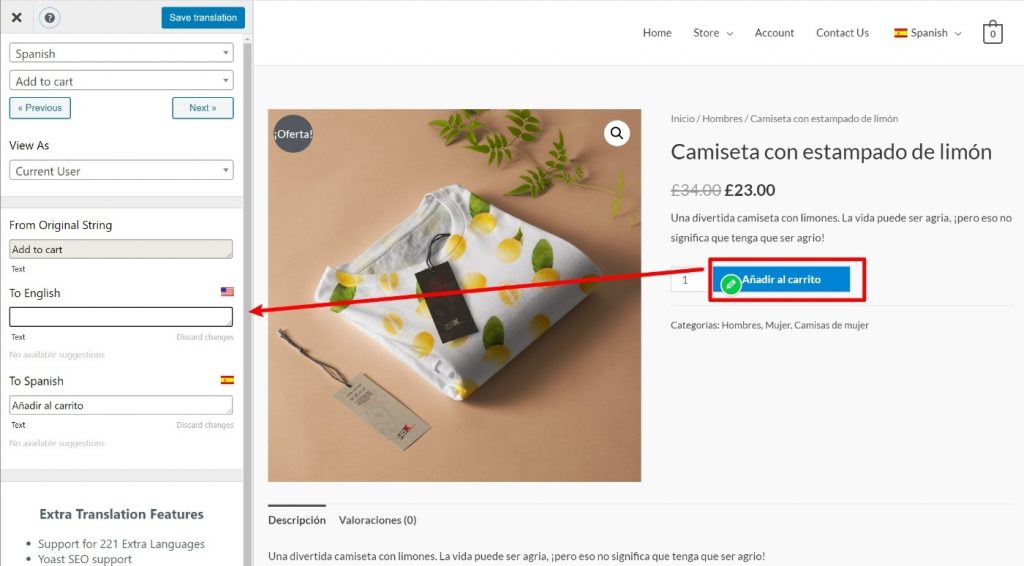
TranslatePress will fill in the translations for your shopping cart and checkout since they share the same gettext strings as the WooCommerce language pack (if available). Even if you decide not to use the auto-correction feature, you’ll still be able to modify them independently.
Step 7: Translating SEO elements
One of the benefits of using a WooCommerce multilingual is that it helps your website rank higher in search results. However, in order to do this, you will need to translate your store’s information and hidden metadata such as SEO keywords, meta descriptions, URLs or even information about your social networks.
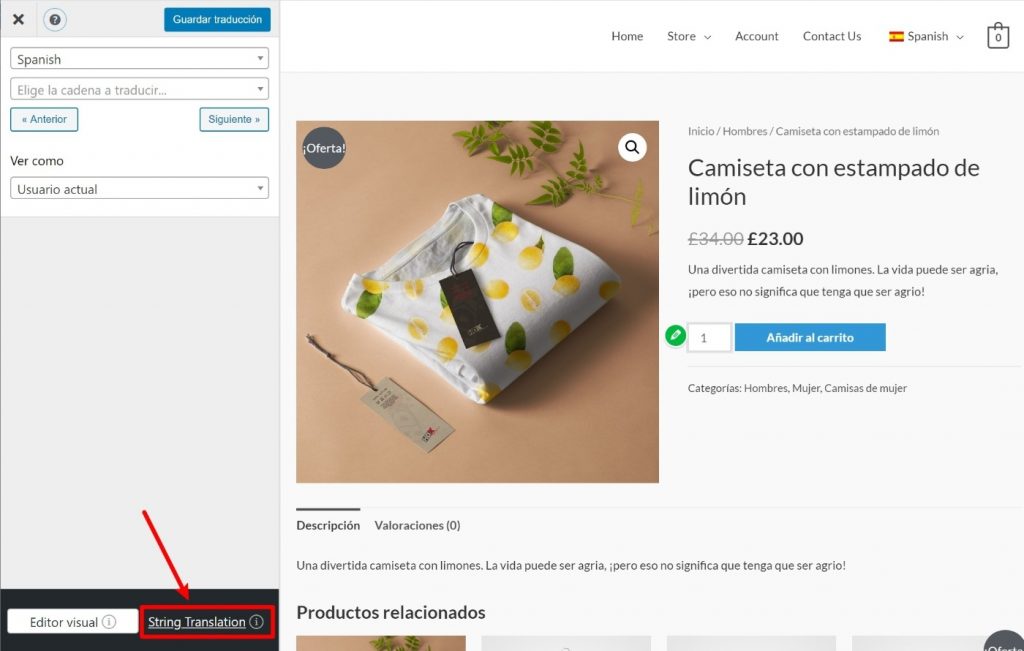
You might need to download a plugin called SEO Pack to perform the translating feature. Once you have installed and activated the extension, look for the new “String Translation” menu item in the TranslatePress editor and use it to discover sitewide slug translations:
The system will redirect you to a pop-up page for the URL slugs customization:
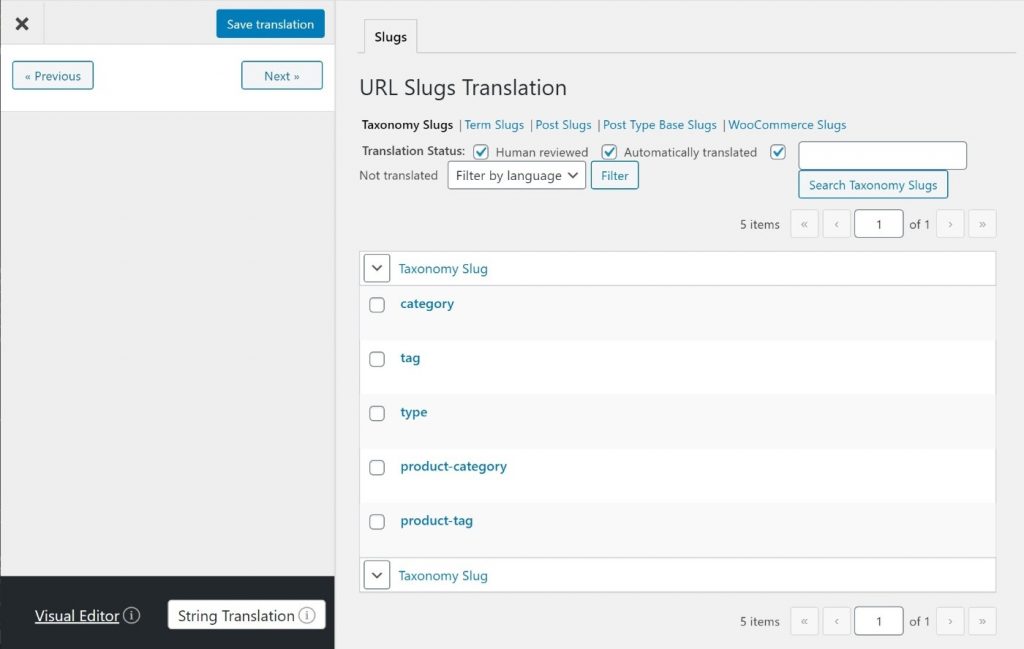
The normal editor has a tool for translating social networking information, product URL slugs, and SEO metadata. The “Meta Information” part of the string translation drop-down lets you modify this information with the SEO Pack addon installed:
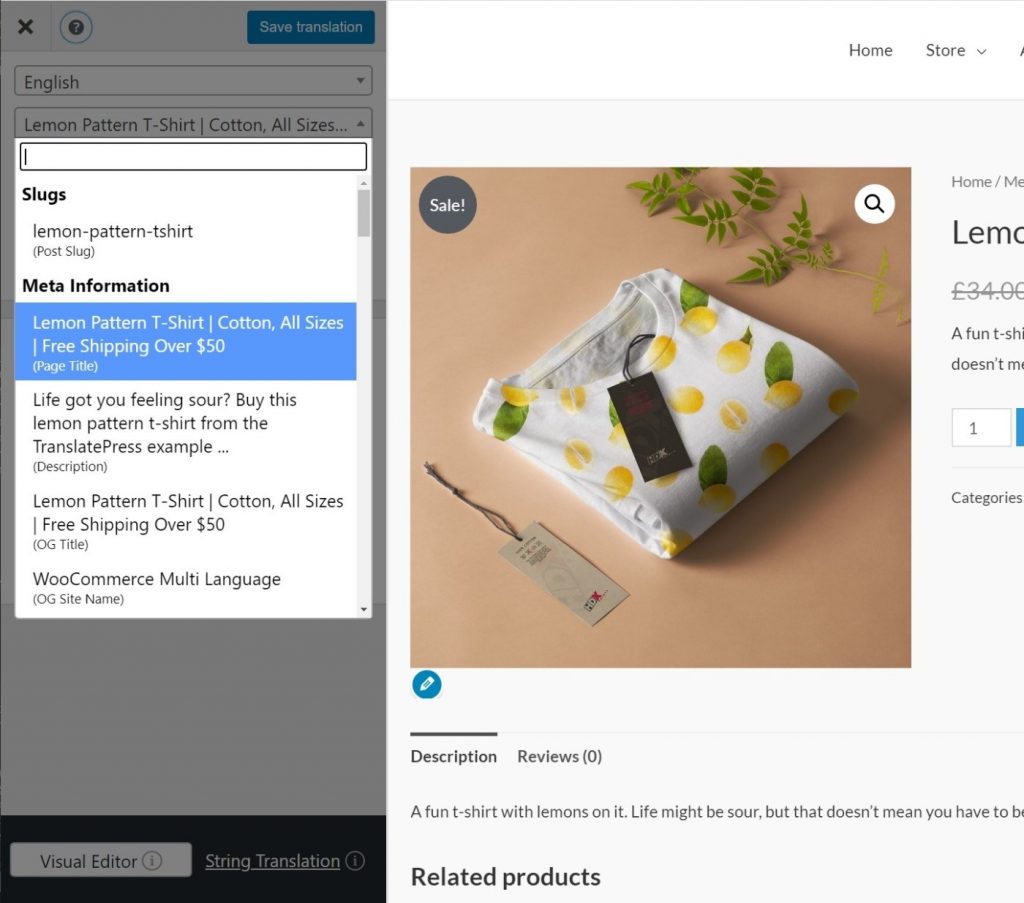
That will do what you’ve already done in previous translations and display info in the sidebar:
Step 8: Save your changes
Before leaving the site, don’t forget to “Save” all of your previous changes or else you may have to start all over again!
Best 4 plugins for WooCommerce multilingual stores
Translating all of your website’s content seems impossible. That is why it is best recommended for you to use a plugin rather than doing all of it manually. On the basis of the rankings, customer reviews, features and efficiency, we have picked out top 4 must-try plugins for WooCommerce multilingual stores.
WPML
WPML is a very popular WordPress plugin that supports multilingual websites. The software is strong enough to handle anything from text translation to even theme and plugin translation.
WPML has licenses that are designated to blogs and CMS sites for many languages. To help with managing translations, choose the eCommerce option, which will help with many useful tools such as the website builder, translation teams, and custom fields.
Furthermore, you will get the chance to try out all of the following features while using this plugin:
- It helps ensure everything runs well for your customers and includes support for popular WordPress themes like Elegant Themes and Genesis.
- WPML can help you create a more SEO-friendly site by allowing you to do SEO work on each language individually. You can make your site even more SEO-friendly by using one of the most popular SEO plugins, WordPress SEO by Yoast.
- WPML has good documentation that shows you how to set up your Woocommerce multilingual shop, along with all the details about prerequisites and procedures.
- Accept payments in several currencies or payment methods in each language.
PolyLang

PolyLang is a useful plugin to make your WordPress website multilingual. To add translations, all you have to do is use the easy user interface provided. Its ability to build up unique, SEO-optimized URLs in each language is a benefit since it is compatible with WordPress SEO plugins. A sidebar widget is perfect for adding language options to your website.
Other features offered by PolyLang which will increase your WooCommerce multilingual website’s performance are:
- Installing language packs takes just a few seconds since they’re instantly downloaded and installed for you.
- Translation is done for a variety of content, including pages, images, posts, categories, menus, post tags, widgets, and the like.
- It is completely free.
TranslatePress

TranslatePress is also what we have used for the tutorial today. TranslatePress is a translation plugin for WordPress that can handle anything on your website. TranslatePress has the ability to translate content immediately on the front end.
It’s easy to switch languages and have the live preview update immediately. This method also lets you translate content, theme, plugins, and even meta-data while keeping the appearance of the interface intact.
You may see other outstanding and helpful features from TranslatePress in the tutorial, too.
Weglot
Weglot is a cloud-based translation software designed to provide website translation capabilities. You can utilize this plugin to do so many tasks, including translating the entire content on your website along with the SEO-friendly supported features.
When you start using Weglot, you will need to link your WordPress site to their platform via their API. Following that, you may choose the preferred language, site language, and other languages.
Conclusion
In a nutshell, running a WooCommerce multilingual website might cost you a while to create a fully responsive character, yet you can attract both local and international consumers from around the world. We hope that our article on How to set up a WooCommerce multilingual store will clear your mind on this matter and make full use of it to gain higher profits in the future.


