
How to Set up Table Rate Shipping for WooCommerce

As you have launched your WooCommerce site, that platform offers a set of basic shipping options that you can use by default. However, it would be a significant difference if you set up table rate shipping on WooCommerce. Since more and more customers come to your store and purchase, the orders start getting complex. So, if you install an advanced shipping plugin, you will have better control over the shipping expense. This is the reason why the tutorial on How to set up table rate shipping for WooCommerce is planned to be put into this picture.
In our post, we are going to look at the most convenient and affordable way to connect table rate shipping plugins, and also suggest some of the best WooCommerce table rate shipping plugins as well as their features to consider adding to cart.
Nevertheless, before jumping into the most essential part of this article, let’s make sure that you have basic information about what the table rate shipping is and how it works on your site.
What is table rate shipping?
Table rate shipping is a sort of shipping method displayed through a table of data to calculate the shipping rate. It facilitates one or more shipping rates depending on different factors flexibly. That can explain why the shipping fees are based not only on the packages’ weight but also on many rules you have set when you install the table rate plugin.

Unlike flat rate shipping, with table rate shipping, you can add more rules to the shipping table where the shipment fee can be less than or more than the flat rate fee. Thus, the fee can be changed from what you have settled down to the rules of shipment.
How it works
Every store is a novelty, with its own products and shipping requirements, so every setup is different as well. However, in general, the way they set up the table rate shipping plugin is similar in terms of how that plugin works. Let’s have a glance at its functionalities if you install the plugin in WooCommerce:
-
After the checkout process, the plugin comes to the destination of calculating the total shipping of that item
-
Each destination is different based on its own rules and even your shipping needs
For much more detailed information on how to connect the plugin and practice this platform on your site, let us take you to the main body of this article in the next section.
How to set up table rate shipping for WooCommerce
Step 1: Download the plugin
In the first stage, navigate to Plugins > Add new to start searching for the plugin you want to integrate. In case you have already downloaded the plugin file to your computer, just click on the Upload Plugin.
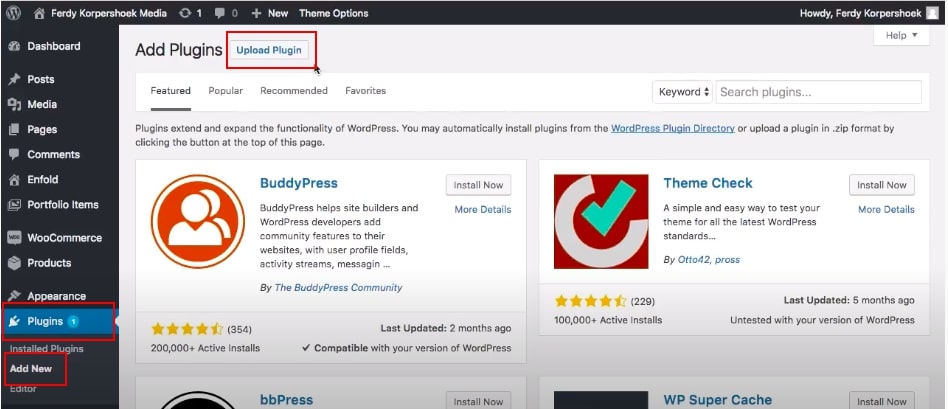
Or else choose Install Now for the plugin you will connect.
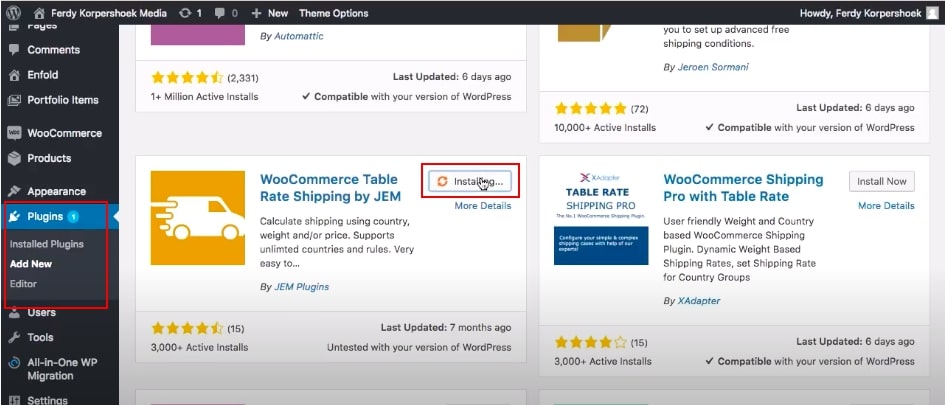
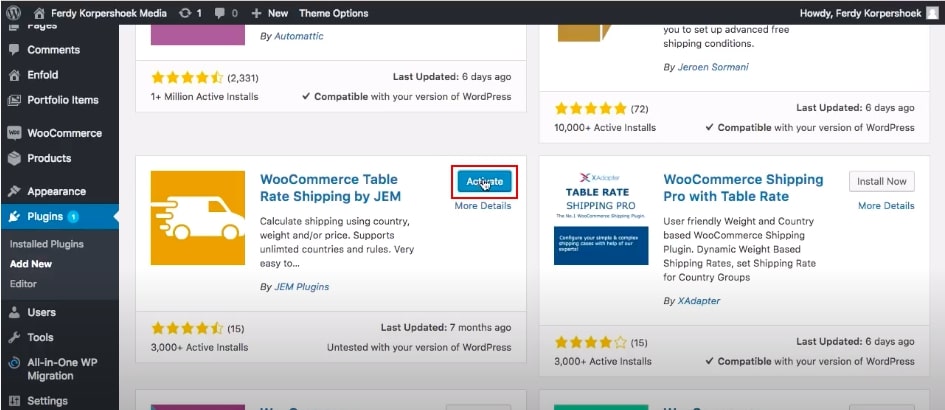
Next step is definitely familiar for your experience if you have done this once. After installation successfully, continue to choose Activate to enable that plugin in your WooCommerce store:
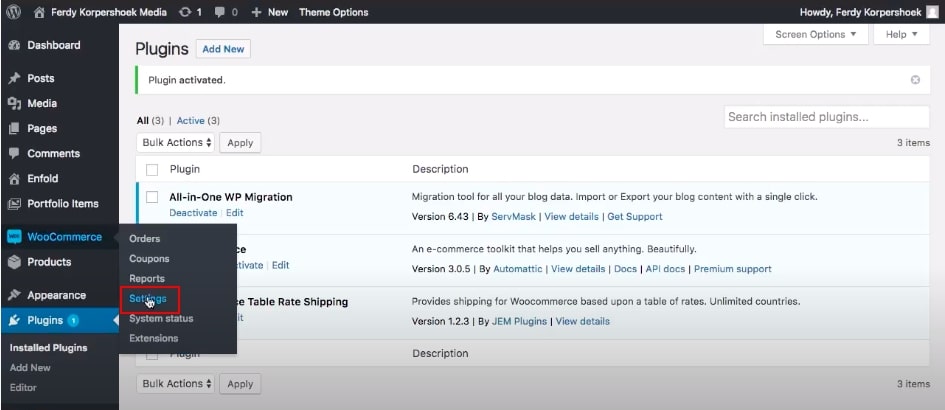
In the second stage, go to WooCommerce > Settings and heading to the Shipping section:
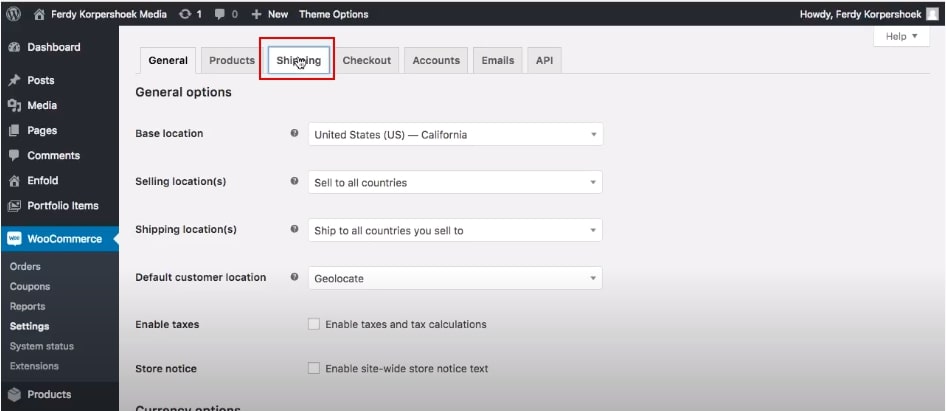
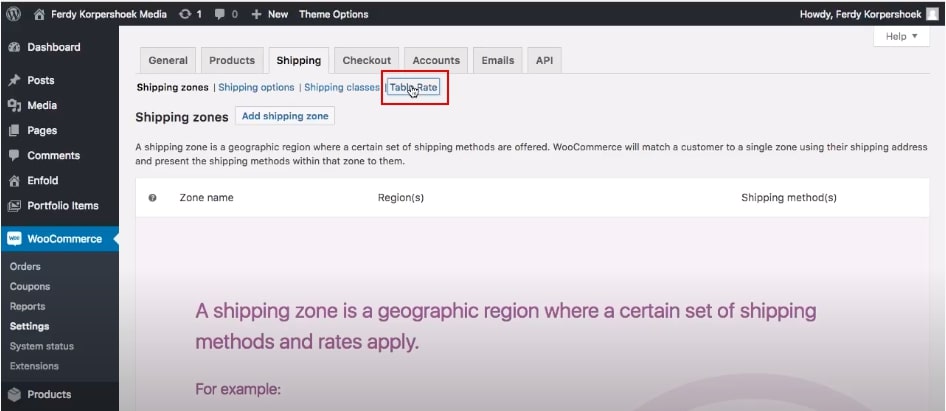
Now choose the Table Rate term in the section to enable the shipping method that can apply to your products on the next orders. It is crucial to do it right after connecting to the table rate plugin.
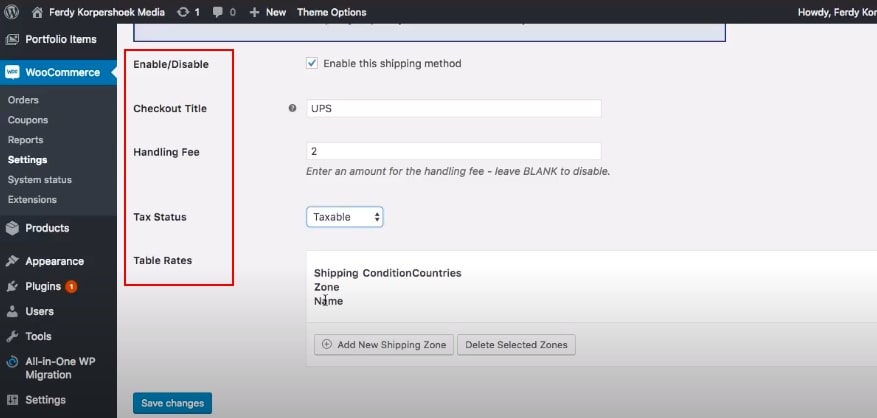
Furthermore, you have to fill out detailed information such as handling fee, tax status checkout title (UPS or FedEx, others) and table rates.
Step 2: Set up shipping zones
In case you install the plugin
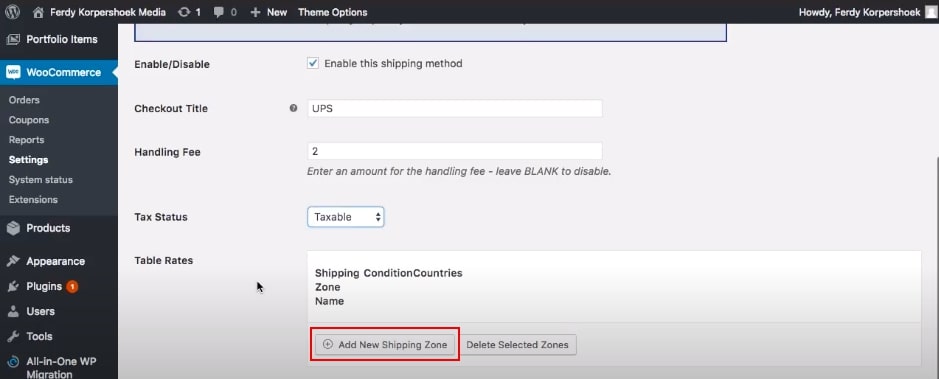
If you want to add more rules for the shipment, just add a new shipping zone.
Here is one example for you of what you need to jot down the information:
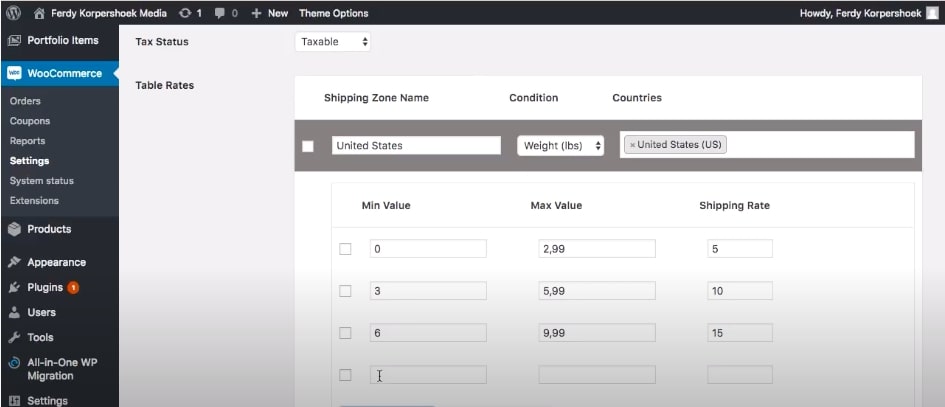
To calculate the shipping correctly, it is necessary that you had better create shipping zones and shipping rules. The plugin will take care of all the calculations for you from that point after setting.
You can have as many new rates as you want, depending on your demands in your product’s shipping.
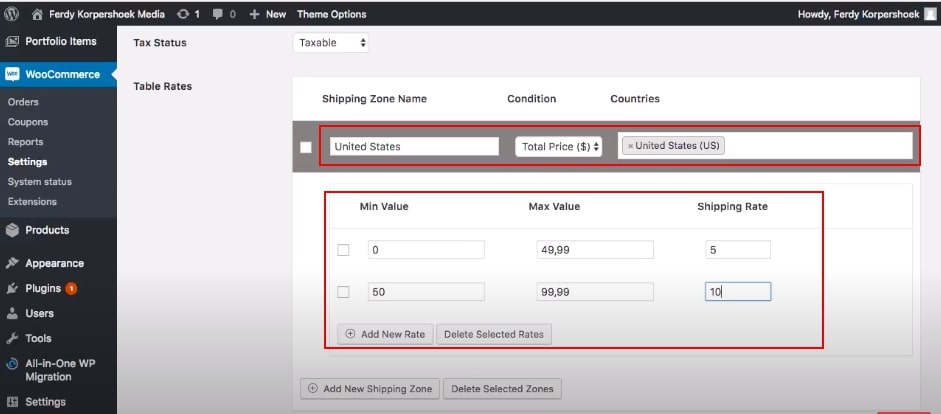
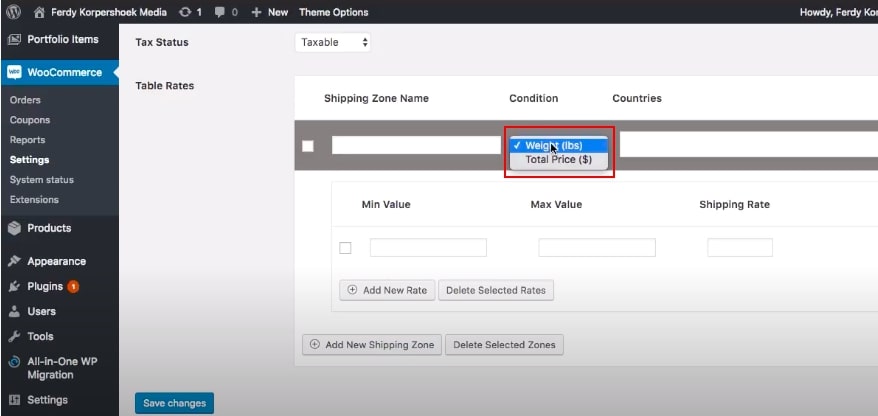
Moreover, with the above example, we are setting the shipping fee as “Total price” but if you want to have one more rule with another status, then you can change!
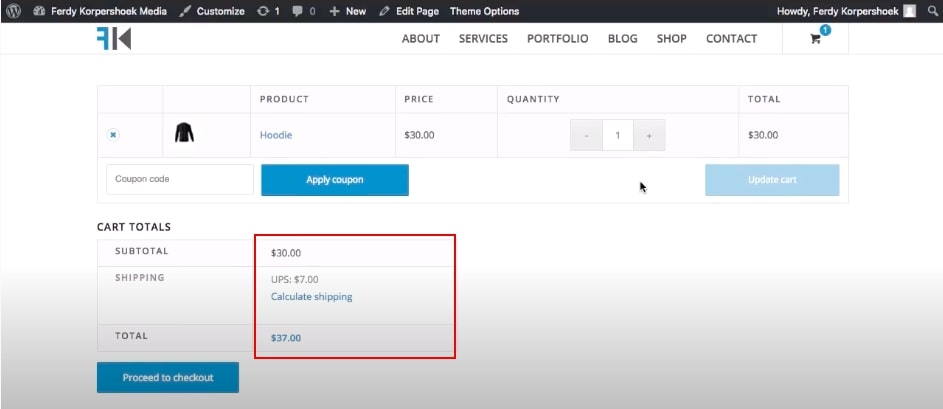
Now just view the product shipping after customers add products to their cart as a reference below:
However, when setting up the table rate shipping, itt needs some thorough planning out the fee. Therefore, before getting started with the plugin, you should follow doing the needs below:
-
Set up your shipping classes if you need different rules for different classes of products.
-
Determine your shipping zones.
-
Get shipping rates from your chosen courier service, so you know how you want to charge.
If you don’t want to install the plugin
Basically, it has much more benefit when you integrate your WooCommerce store with the plugin as you desired. However, a default WooCommerce offers a table rate shipping that you can set on your own. Though there are some shortcomings when you cannot optimize its functionalities 100% and makes your store work less effective.
But it’s okay to spend time talking about how to set table rate shipping in a default WooCommerce. It is appropriate for any beginners who do not take risks in purchasing a plugin.
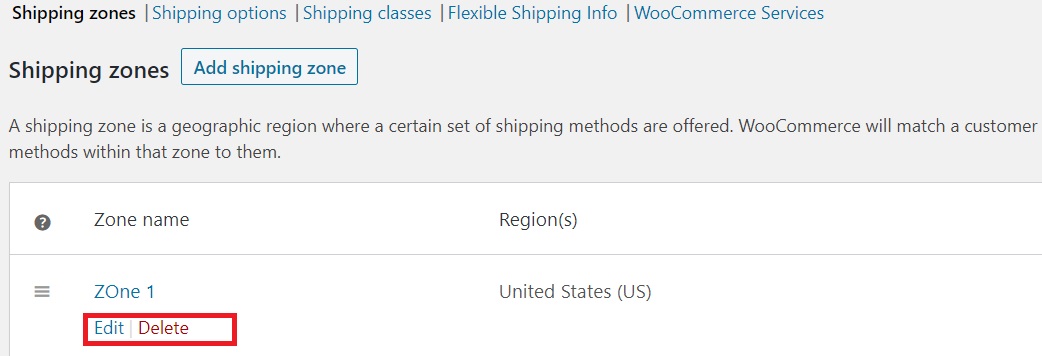
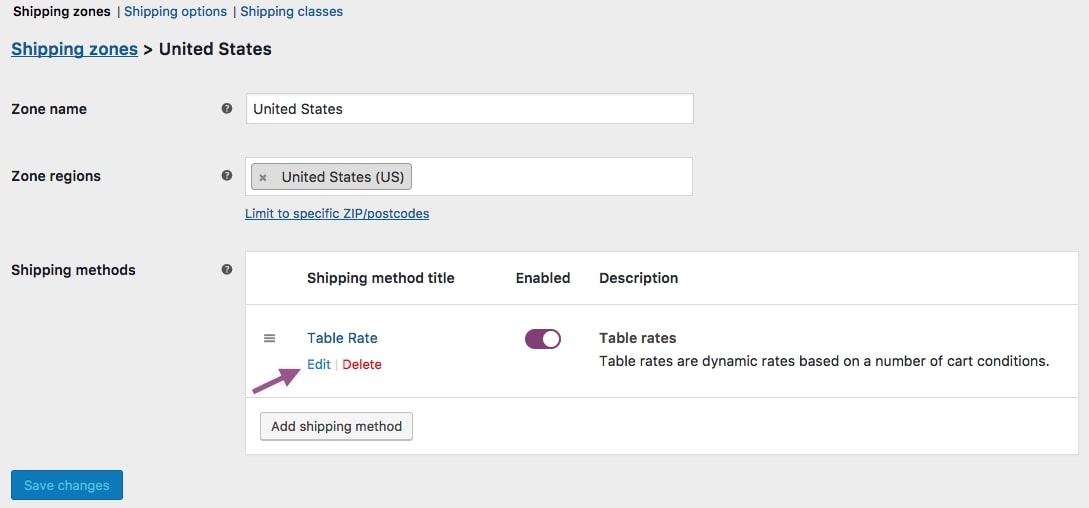
First, go to WooCommerce > Settings > Shipping. Next, select the “Shipping zone” section to set the table rate.
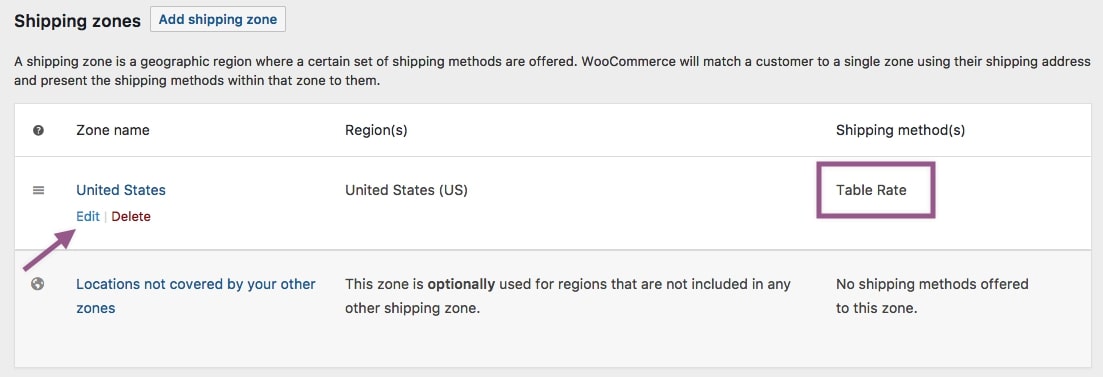
If you have your shipping zone before and want to change them into a table rate method, click on “Edit” below the name of the shipping zone you wish to add rates.
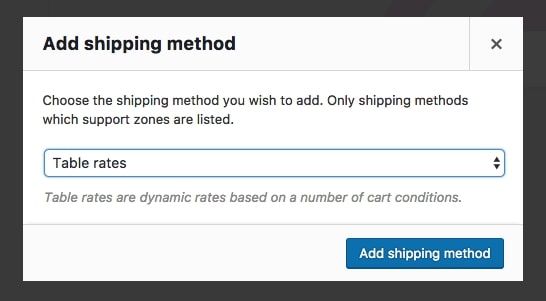
Choose the “Add shipping method” then a window will appear which requires you to pick up one payment method. Obviously, we will get the table rate method:
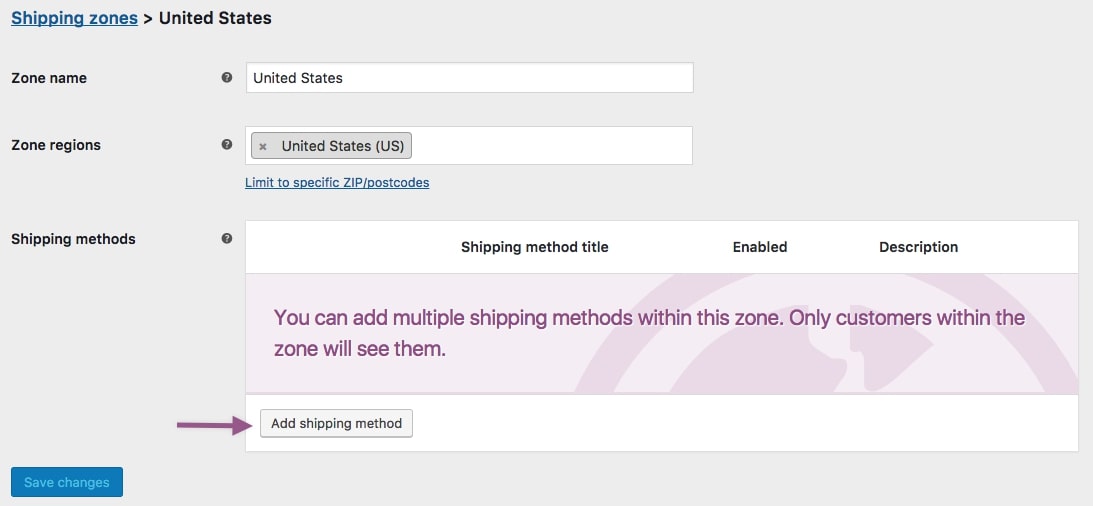
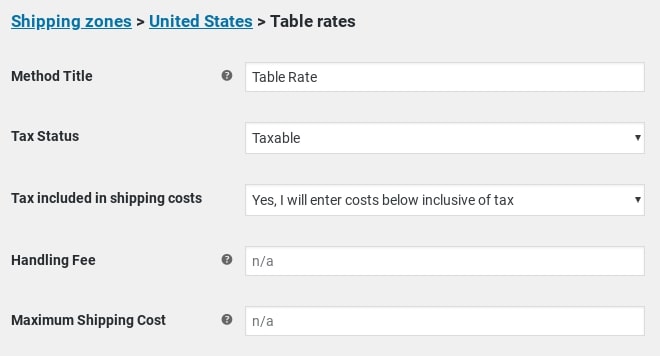
Now in order to fill out detailed information, you choose Edit for the zone name and you will be prompted to a new screen containing the shipping methods, zone name and zone regions:
Then you will see there are some features of that table rate that you need to type down, however, it is basically similar to the features that you install the plugin for setting up the table rate. Thus, it is easy to follow what it asks you for.
In terms of the rate settings, it can calculate shipping on customer’s cart:
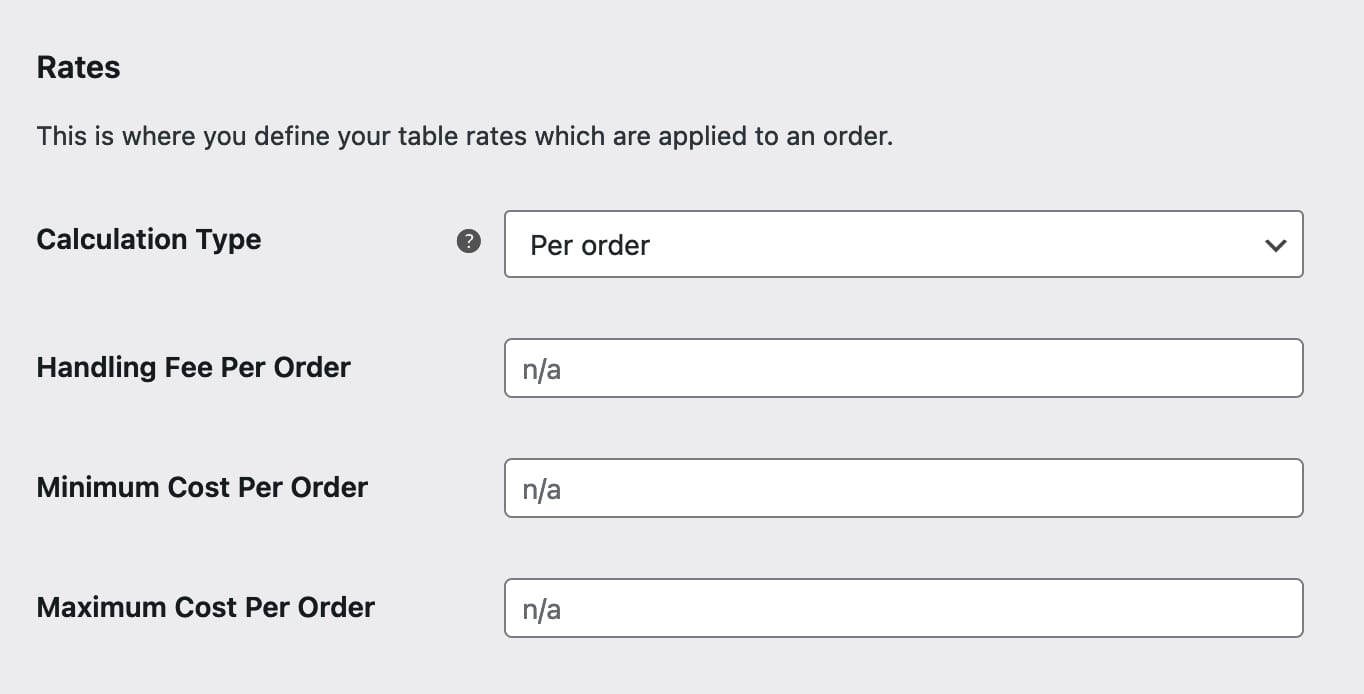
Don’t forget to save your change to update the shipping fee!
Step 3: Display the table rate
After setting the shipping fee, it is the right time to display the table rate. As mentioned before, it is up to you to end up creating your own shipping classes in case you need rules for specific classes of your products.
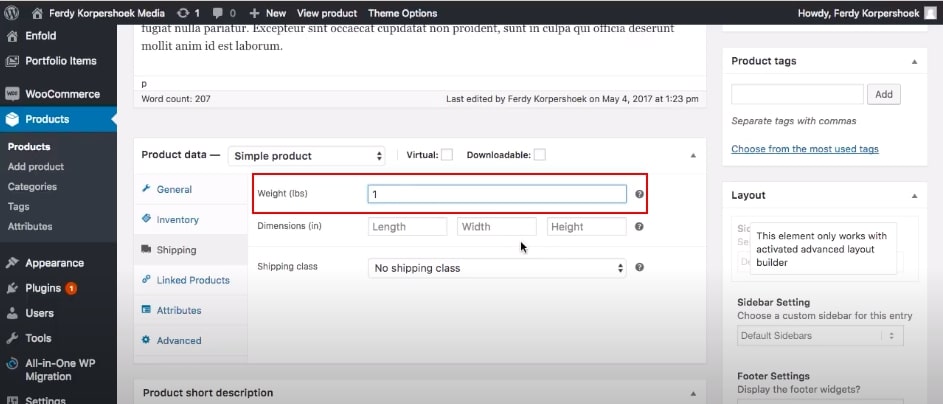
But we just guide you on how to display the table rate on your product page. To do that, choose Products and head to product data to select the Shipping term.
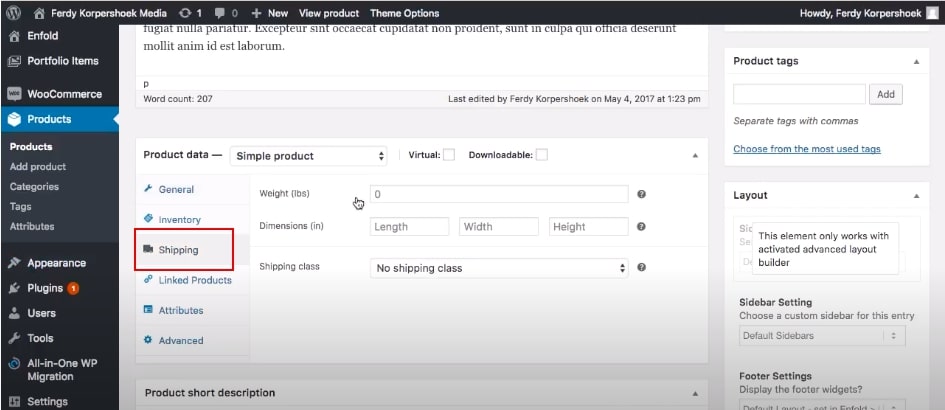
The table rate applied to the total price has been modified based on the weight, dimensions, or even shipping class by doing that shipping fee if you add. For example, if we add the weight combining with the table rate that you filled out before, then it turns out to be like this:

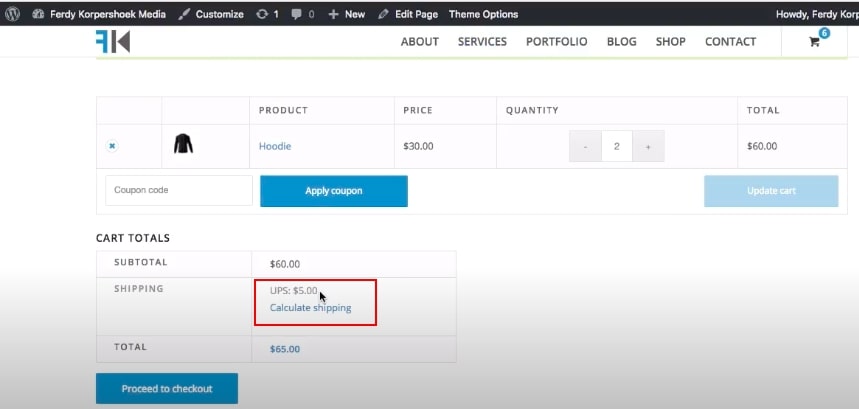
Finally, the result of the checkout process will be marked as the image below:
4 best Table Rate shipping plugins for WooCommerce
Table rate shipping for WooCommerce
By far, Table rate shipping for WooCommerce is one of the best recommended plugins for your store to install. This plugin permits you to configure multiple shipping rates based on your customers’ needs in different conditions (such as price, weight, shipping destination, total cart, etc.). When you install it, it will be put in your WooCommerce settings which is very convenient to set up the Table rate and use it along with other shipping zones.
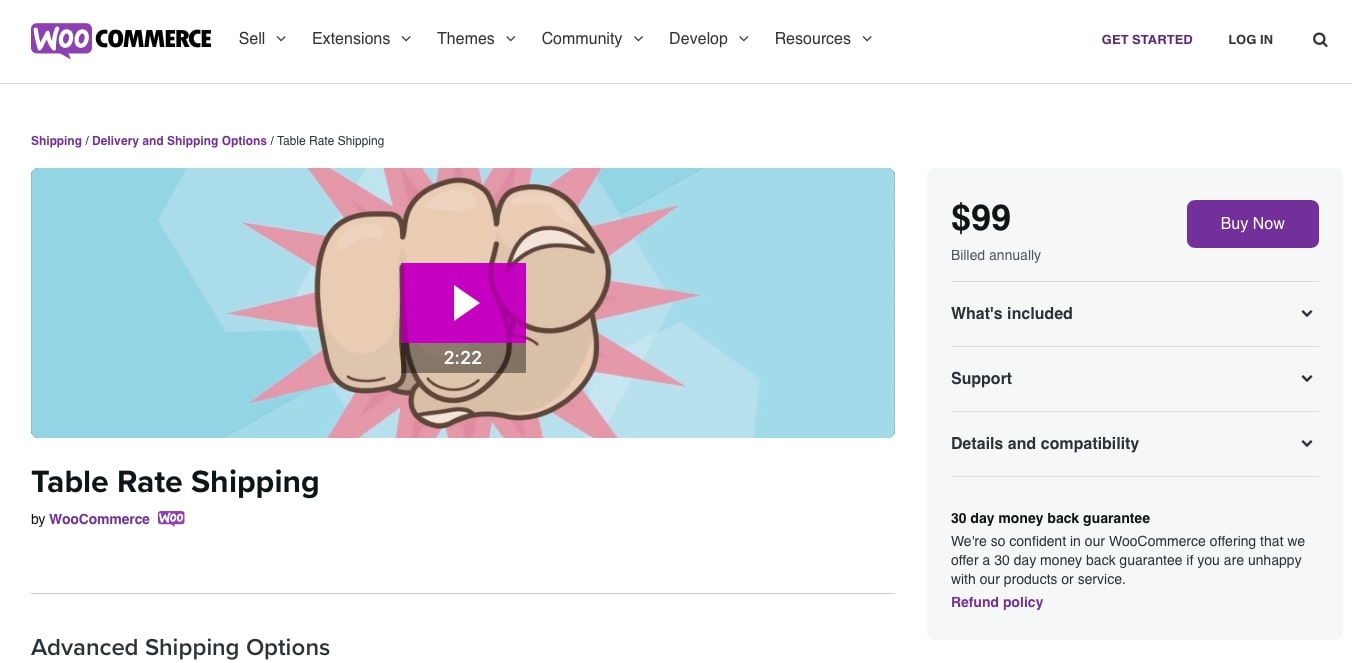
It is a simple solution that backs you up in terms of effective shipping strategy robust by calculating shipping costs based on cart weight, order weight or shipping destination.
Price: $99
Advanced flat rate shipping method
With the same price as the above plugin, you can set up multiple free shipping rules on your store based on a variety of quantity, subtotal, user roles or shipping classes, among others.
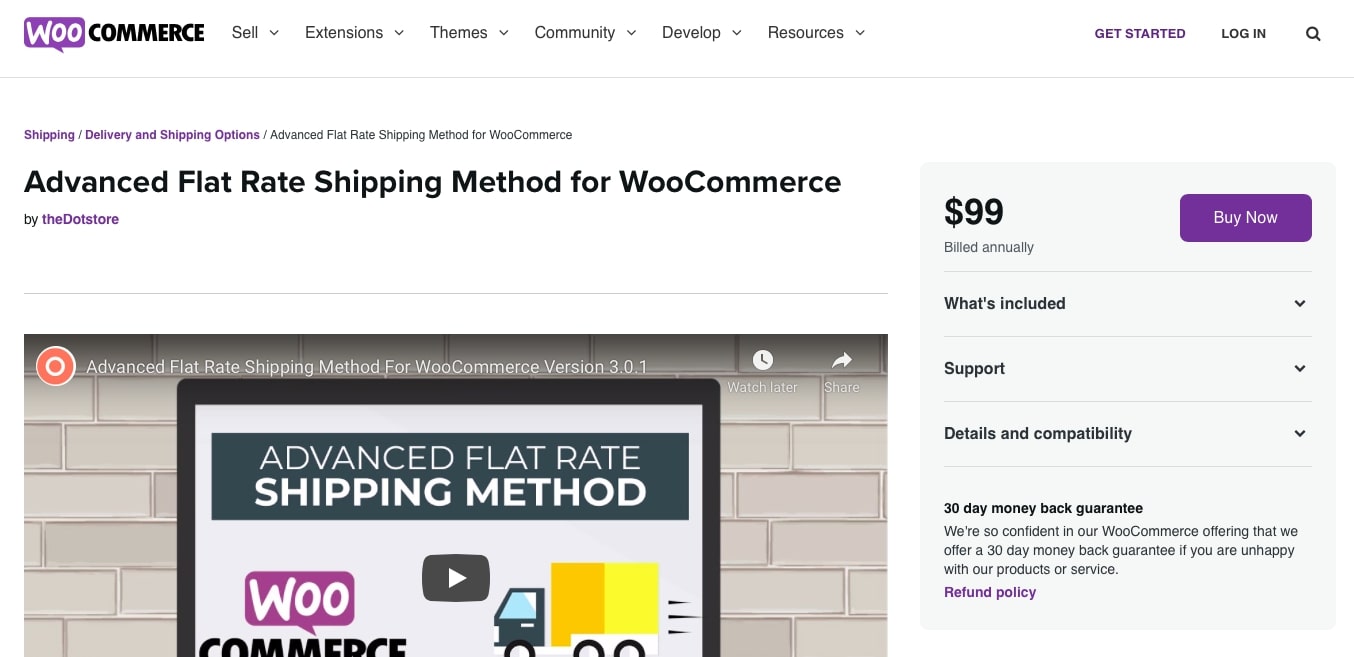
One of the major advantages of Advanced flat rate shipping is that it is relatively friendly and flexible. Furthermore, you can extend the functionalities of this plugin through using code snippets in CSS design.
Price: $99
WooCommerce advanced free shipping
Coming to one free version, you can install WooCommerce advanced free shipping in an easy way. Similar to other plugins, it is clear that the plugin provides diverse shipping methods on your product depending on many factors as you wish.
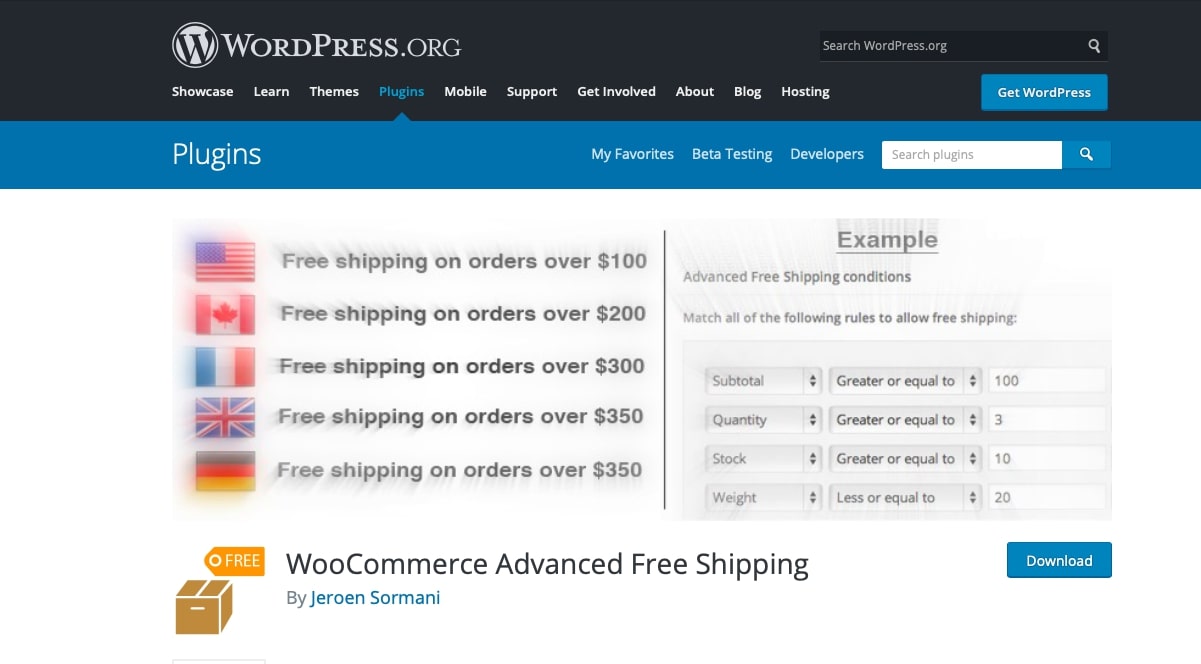
On the other hand, you are able to apply a specific shipping method from either a certain category or shipping class.
So this plugin is developed easily extensible, like Advanced flat rate shipping, which points out that you can customize the shipping method through code snippets!
Flexible shipping for WooCommerce
Last but not least, as for this plugin, a major number of users have been experiencing Flexible shipping for WooCommerce. It has received many positive reviews on the WordPress plugin marketplace with many beneficial features and smooth integration.
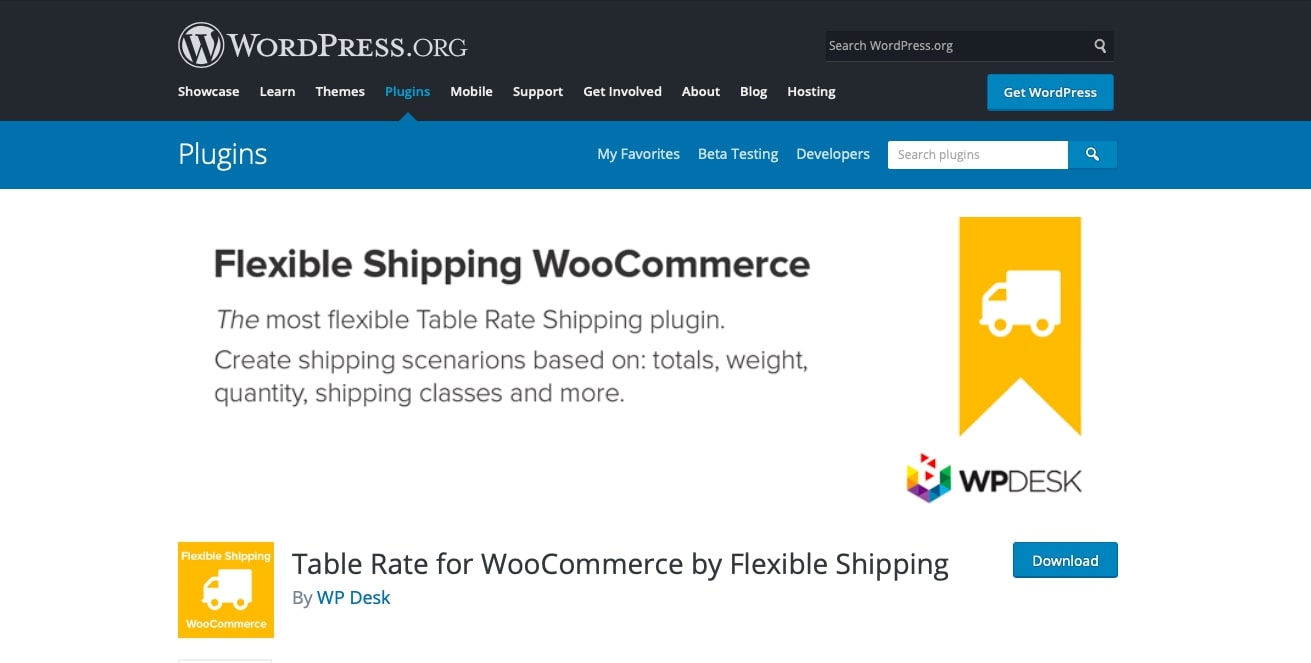
The same as all the above plugins that we have suggested, the plugin allows you to add extra handling charges or insurance costs for a particular amount of the orders. Using this plugin, you can add infinite shipping methods, and also add custom titles and descriptions if you want to take note. Additionally, you are able to sum up the costs of the 2 orders at once seamlessly.
In all, they are all the potential participants, which you can consider, although the first 2 plugins cost a considerate budget for a small-sized business. It doesn’t matter if you can afford it since it provides many amazing functions that you cannot find in the default WooCommerce shipping settings.
Final words
We are really grateful if you still read this article at the end. Hope that with our thorough guide of How to set up table rate shipping for WooCommerce you can find the shipping method easier. In particular, if you want to install a WooCommerce shipping plugin rather than keep using the default one, then our share can resolve that issue for you.
We also suggested 4 best table rate shipping for WooCommerce stores that you can take into consideration. And if you have any problems relating to your practice while configuring, please let us know to support you as soon as possible! We hope that our recommendations are helpful for your plan.


