
How To Install And Set up WordPress Multisite In WooCommerce

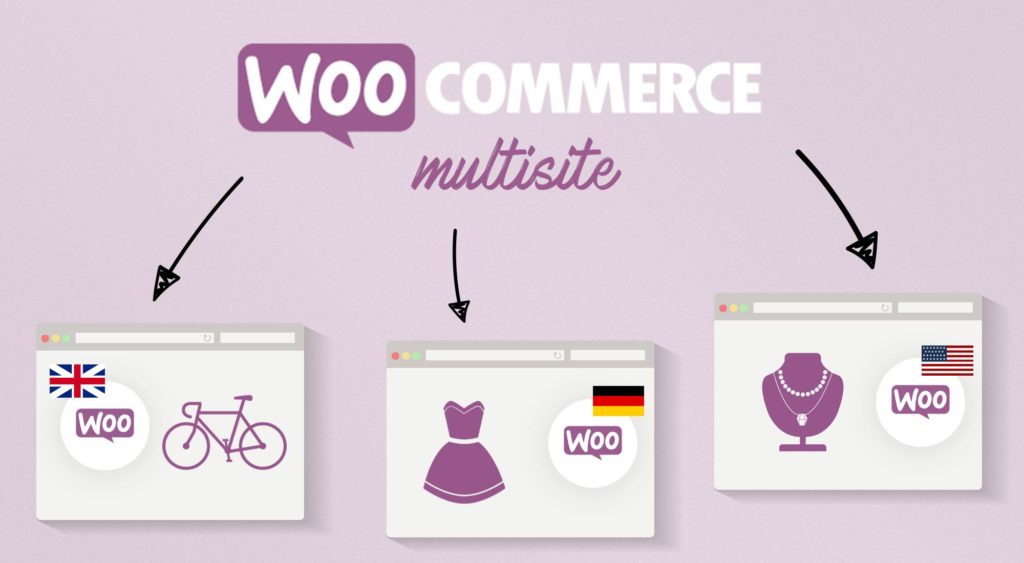
With such a large user base, WooCommerce is continually focused on providing optimum solutions for various companies. As a result, the WooCommerce multisite capability is available - an outstanding solution for eCommerce retailers looking to expand their business. WooCommerce multi-store is ideal for store owners who wish to separate their large-scale operations into different storefronts to meet unique customers’ needs.
Today’s tutorial will show you how to install and set up WordPress multisite in WooCommerce. WooCommerce is multisite compatible by itself. This implies that if WooCommerce is enabled on a site, it will be available to all subsites. These businesses, however, are distinct individuals since each site is self-reliant of the others. So, let’s dive in to get more detailed instructions about this topic.
What is WordPress Multisite?
WordPress Multisite enables users to construct numerous connected sites using a single WordPress installation. You may have an unlimited number of child sites by using a subdirectory or a subdomain. Multisites are usually used to build a centralized system for a Super admin to administer numerous places at once. The Super Admin gets access to the plugins and themes that will be installed on the site.
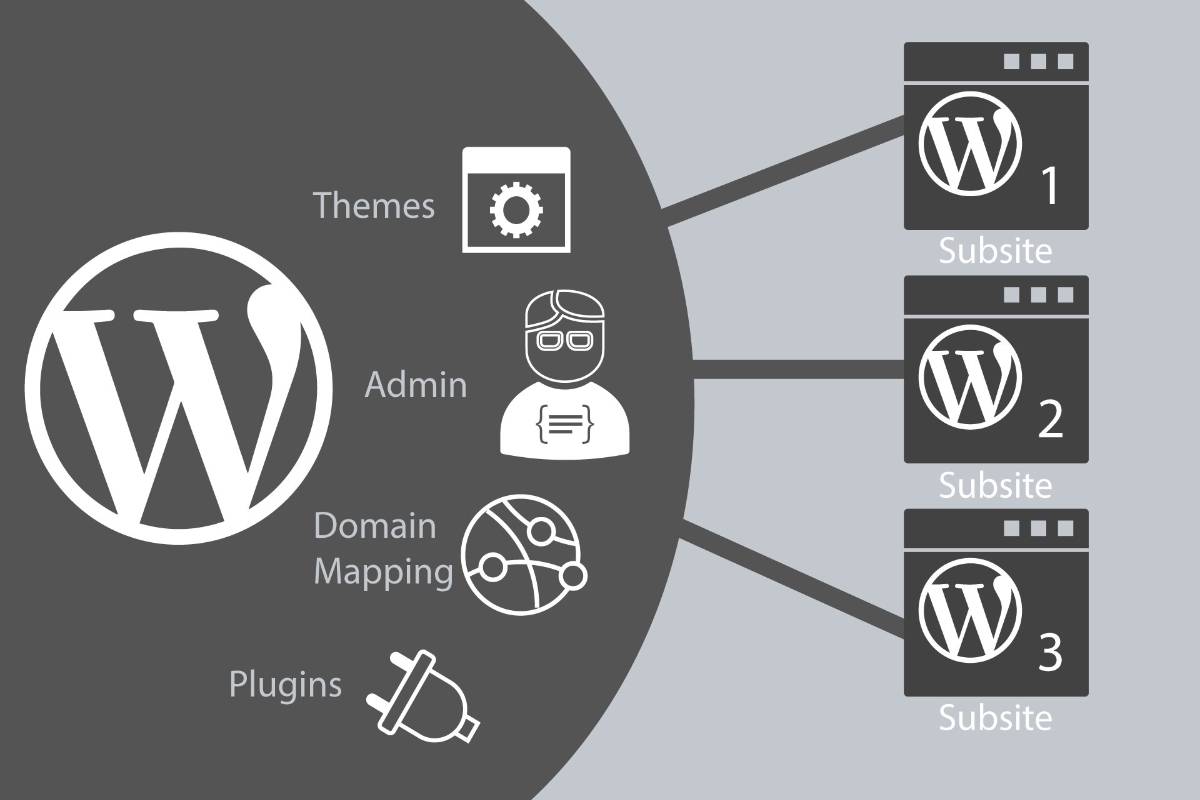
This offers you complete control over the site and prevents problems with plugins and themes added by other users. If you have a blog, an eCommerce business, or other connected sites, multisite will save you time and money (no need for multiple installations). When you wish to backup the site, you may keep all of the data in a single backup for all of your child sites rather than storing data for each site separately.
Benefits and drawbacks of enabling WordPress multisite in WooCommerce
In many cases, administering a WordPress multisite network is preferable to managing many independent WordPress sites. The following are some of the benefits of adopting a WordPress multisite network:
- You can effortlessly administer many sites as the network administrator from a single dashboard.
- Each network site can have its administrator. The site administrators will only be able to administer their website.
- With a single download, you may install and activate plugins and themes for several sites.
- You can also handle updates more efficiently with a multisite network. You need to update WordPress, plugins, and themes on a single “master” installation.
Implementing a WordPress multisite network is not always advantageous when managing many sites. Here are some of the drawbacks to consider before establishing a multisite network:
- All sites share the network’s resources. This implies that if your network goes down, all other sites will also go offline.
- For novice users, managing traffic and server resources is difficult. If one of your websites has unanticipated traffic, it will impact the other websites in the network.
- If one of your websites is hacked, all of the sites on your network will likely be compromised as well.
- Some WordPress plugins may not function correctly in a multisite network.
- All web hosting companies do not effectively support the WordPress multisite network, which limits your possibilities.
How to install and set up WordPress multisite in WooCommerce
Step 1: Check for the requirements of setting up WordPress multisite
On a WordPress multisite network, multiple websites utilize the same server resources. This implies that the most critical thing you’ll need is a reliable WordPress hosting service. If you plan on having a handful of low-traffic websites, you can get away with shared hosting.
However, because of the structure of a multisite network, you will want VPS hosting or dedicated hosting as your sites develop. We suggest Bluehost since they provide shared hosting and VPS/Dedicated servers and are an official WordPress hosting provider. If you’re looking for something different, SiteGround and WP Engine offer great WordPress multisite network hosting.
Step 2: Download and activate WordPress
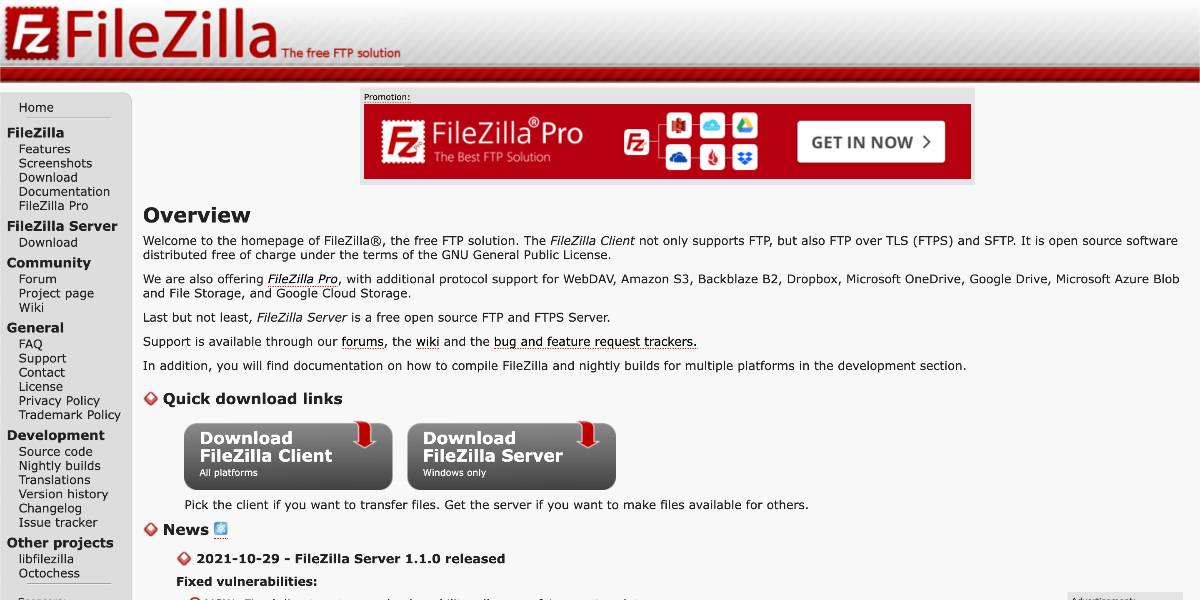
There are many methods to install WordPress. For today’s tutorial, you may upload your WordPress folder to your website using FTP Client Software such as FileZilla or CyberDuck. Assume you’re using the FileZilla program. What you must do is as follows:
- Install FileZilla.
- Set up the configuration to connect to your hosting server.
- WordPress software may be downloaded from the official website.
- Compress the WordPress file you downloaded and upload the folder to your domain.
- On your MySQL database, create a database.
- Enter the URL of your website into the browser’s URL bar and proceed with the installation procedure.
Step 3: Enable the multisite feature on the coding side
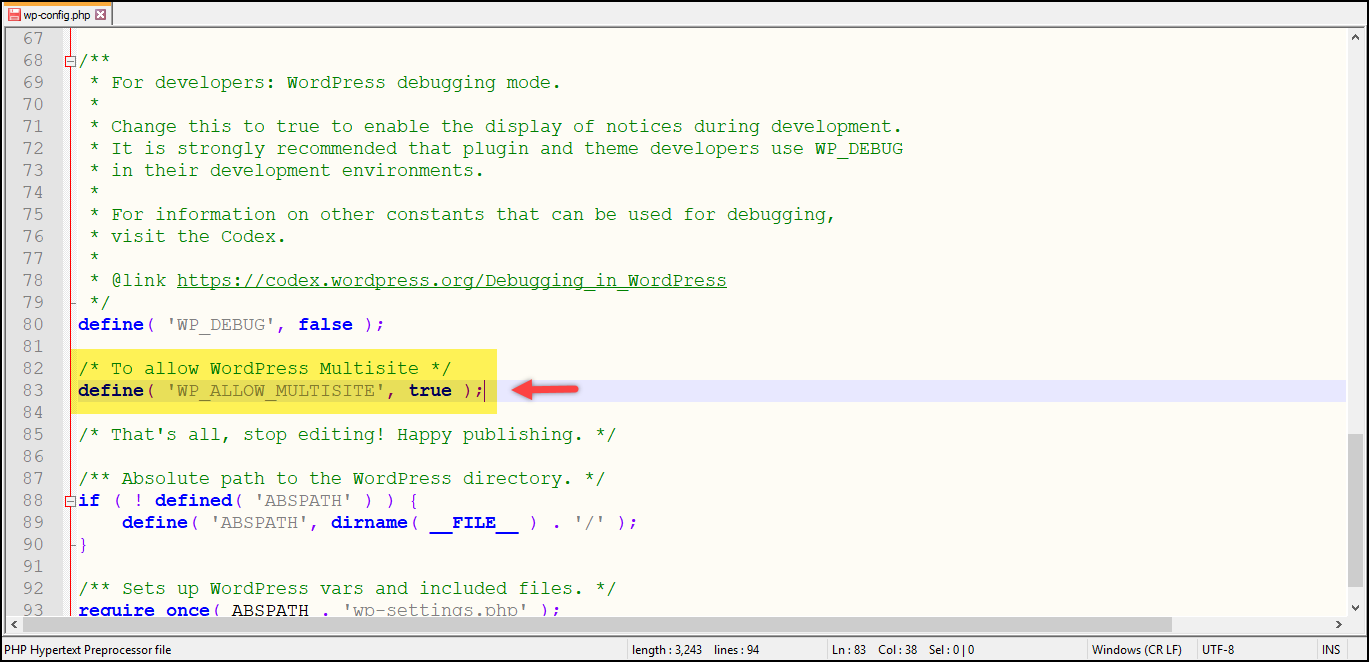
Moving on to the next step, you must make a backup of your WordPress site. This is critical if you do not want to lose any previously saved data and settings. Connect to your site using an FTP client or the cPanel file manager, and access the wp-config.php file for modification. The following code should be placed just before the line code: */ That’s all, stop editing! Happy blogging. */ **
/* To allow WordPress Multisite */
define( 'WP_ALLOW_MULTISITE', true );
After that, save and upload your wp-config.php file to allow it to be updated from the WordPress server. WordPress Multisite is ready to utilize after your code command has been modified.
Step 4: Set up your WordPress network
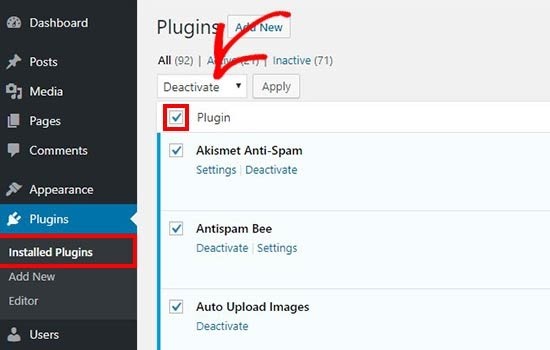
Now that you’ve successfully activated the Multisite Network functionality on your WordPress site, it’s time to set up your network. To make it function, you must disable all plugins on your site. Select all plugins from the Plugins > Installed Plugins page. Select Deactivate from the Bulk Actions dropdown option before clicking the Apply button.
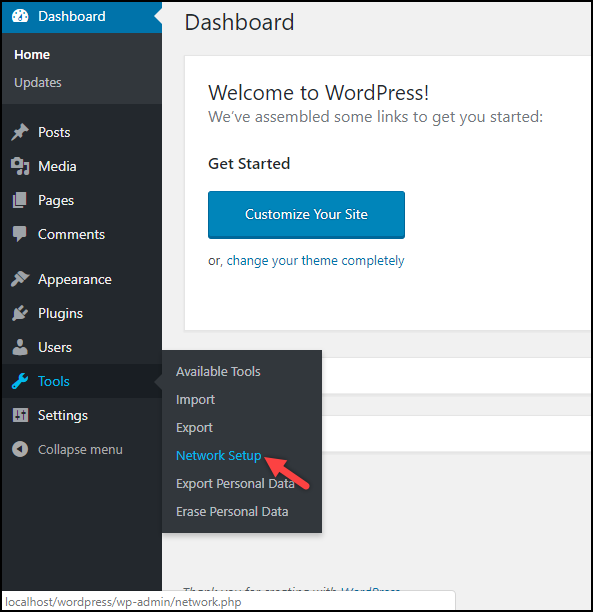
Next, navigate to Tools > Network Setup from the WordPress sidebar menu. This option will show in the Tools menu only once you’ve pasted the code snippet from step 3 into your WordPress site.
You are given two code snippets that must be inserted into two separate files on your website.
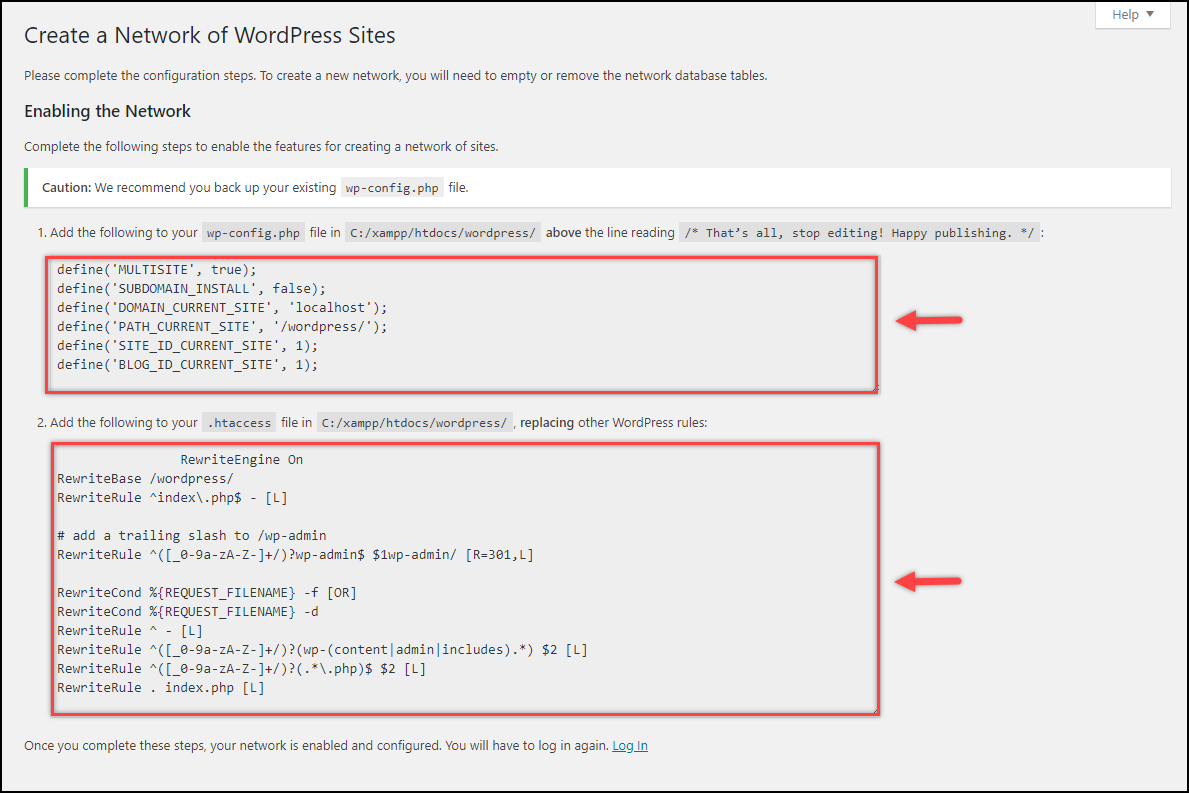
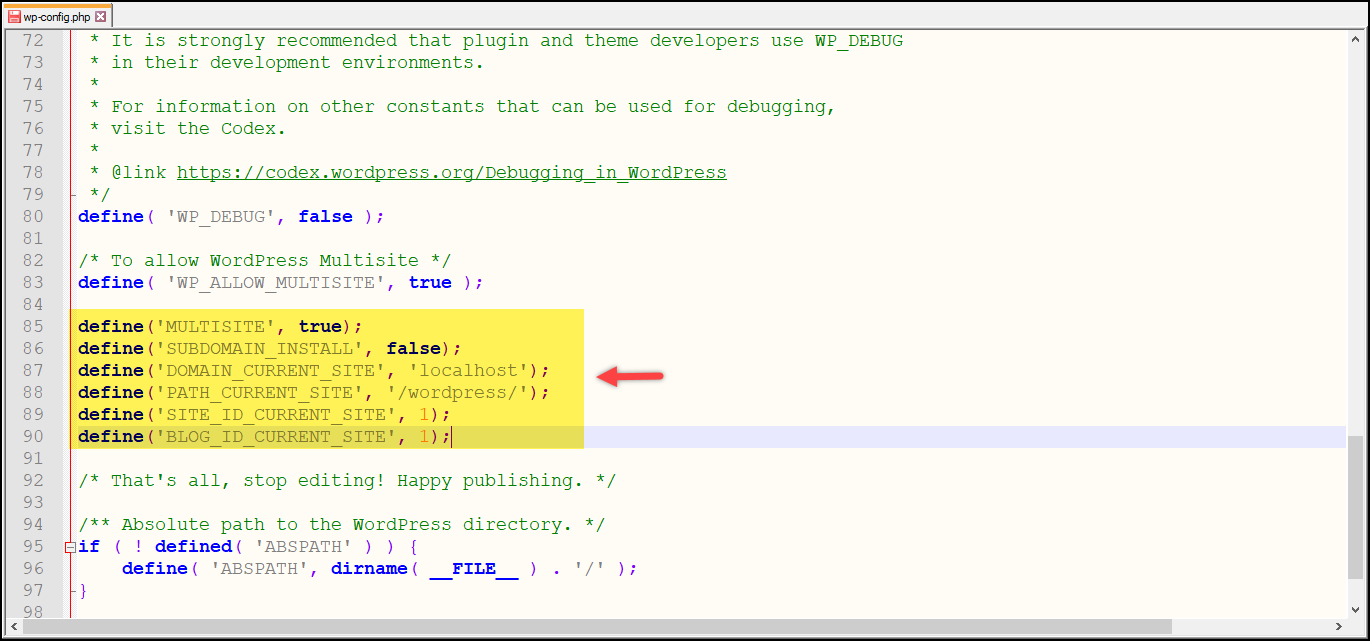
To begin, put the following code snippet above the line That’s all, stop editing! Happy blogging in the same wp-config.php file as in step 3.
define('MULTISITE', true);
define('SUBDOMAIN_INSTALL', false);
define('DOMAIN_CURRENT_SITE', 'localhost');
define('PATH_CURRENT_SITE', '/wordpress/');
define('SITE_ID_CURRENT_SITE', 1);
define('BLOG_ID_CURRENT_SITE', 1);
The screenshot below explains how to insert the code snippet into the file.
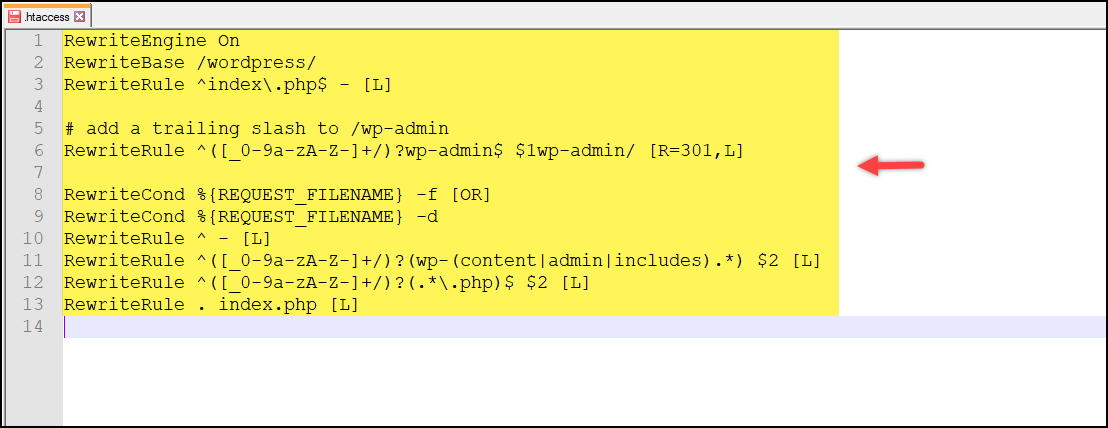
Then, replace the code excerpt below with the entire contents of the .htaccess file. This file is located in the WordPress site folder.
RewriteEngine On
RewriteBase /wordpress/
RewriteRule ^index\.php$ - [L]

# add a trailing slash to /wp-admin
RewriteRule ^([_0-9a-zA-Z-]+/)?wp-admin$ $1wp-admin/ [R=301,L]

RewriteCond %{REQUEST_FILENAME} -f [OR]
RewriteCond %{REQUEST_FILENAME} -d
RewriteRule ^ - [L]
RewriteRule ^([_0-9a-zA-Z-]+/)?(wp-(content|admin|includes).*) $2 [L]
RewriteRule ^([_0-9a-zA-Z-]+/)?(.*\.php)$ $2 [L]
RewriteRule . index.php [L]
The screenshot below explains how to add the previous code snippet to the file.
When you save both files, your site is set up to be multisite. To get started, you must log in again.
Step 5: Modify the Network Administrator settings
After logging in, look for the My Sites logo on the top left side of the page. It will display the Network Admin site as well as any kid sites you have developed. This is a permanent feature that allows super administrators to access all sites effortlessly.
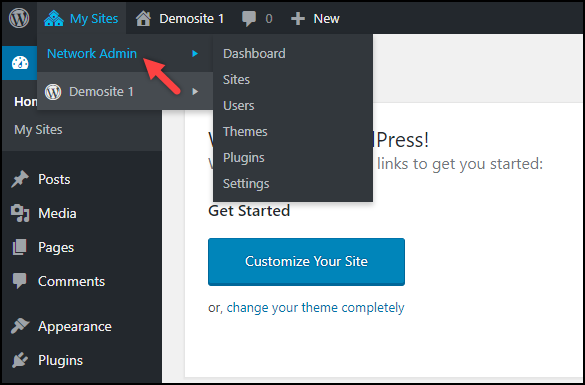
Only the super admin has access to the Network Admin settings, which allow them to install extensions, templates and modify other critical site settings. When you click over one of your child’s websites (Demo site 1 in the sample picture below), you can see the basic settings that the network administrator will have access to.

To begin controlling all sites, navigate to My Sites > Network Admin > Sites. All of your child’s sites may be seen on the All Sites dashboard, as illustrated in the picture below.
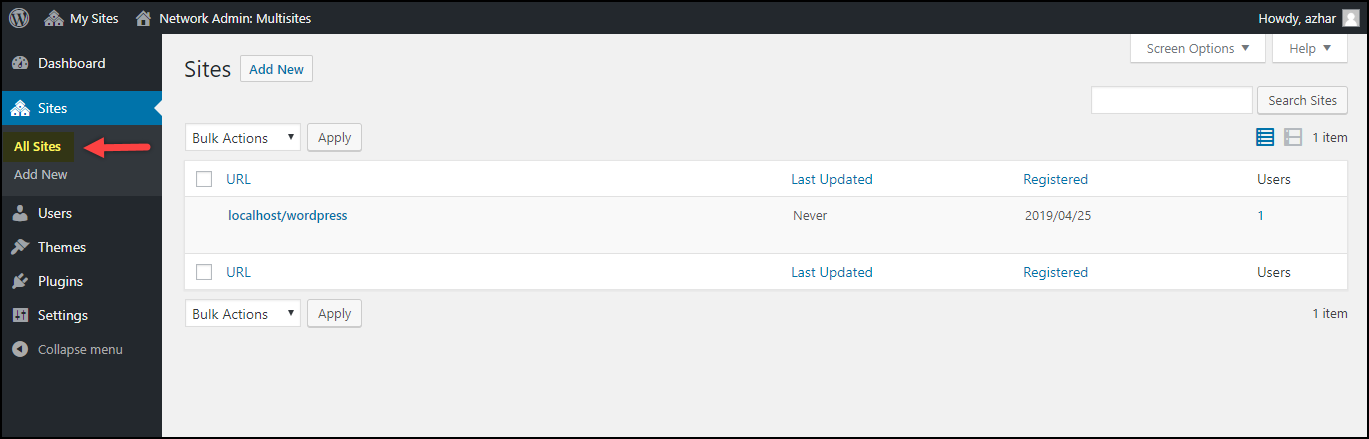
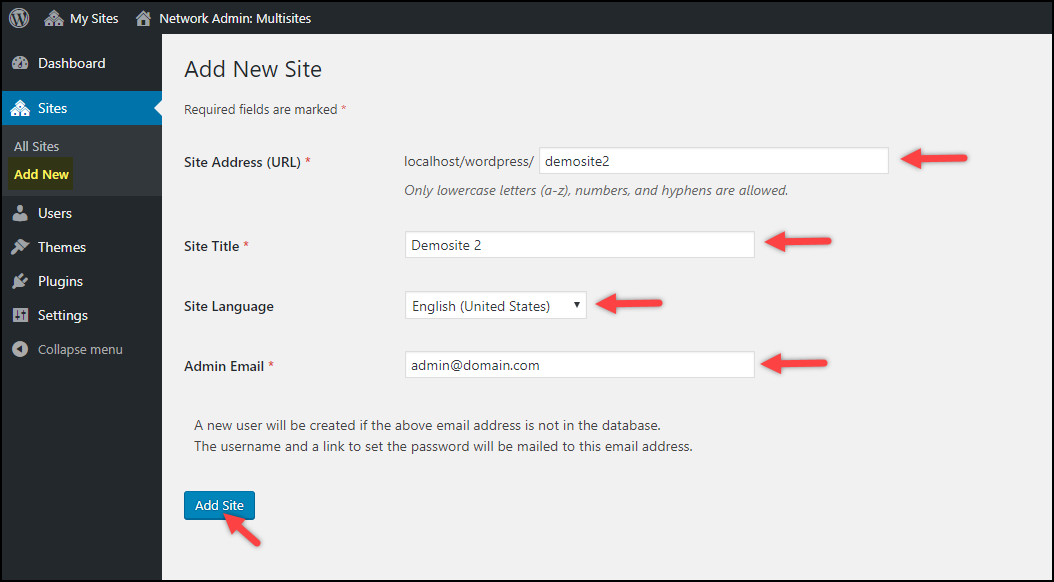
To create a new site, click the Add New button and enter further information such as the URL, site title, site language, and admin email address. When you’re through with the settings, select the Add Site button.
Step 6: Activate the WooCommerce plugin
If you haven’t installed WooCommerce, you obviously can’t have a WooCommerce multisite. You’ll be guided through the installation of WooCommerce in this stage, so make sure you’ve joined your websites to your WordPress network.
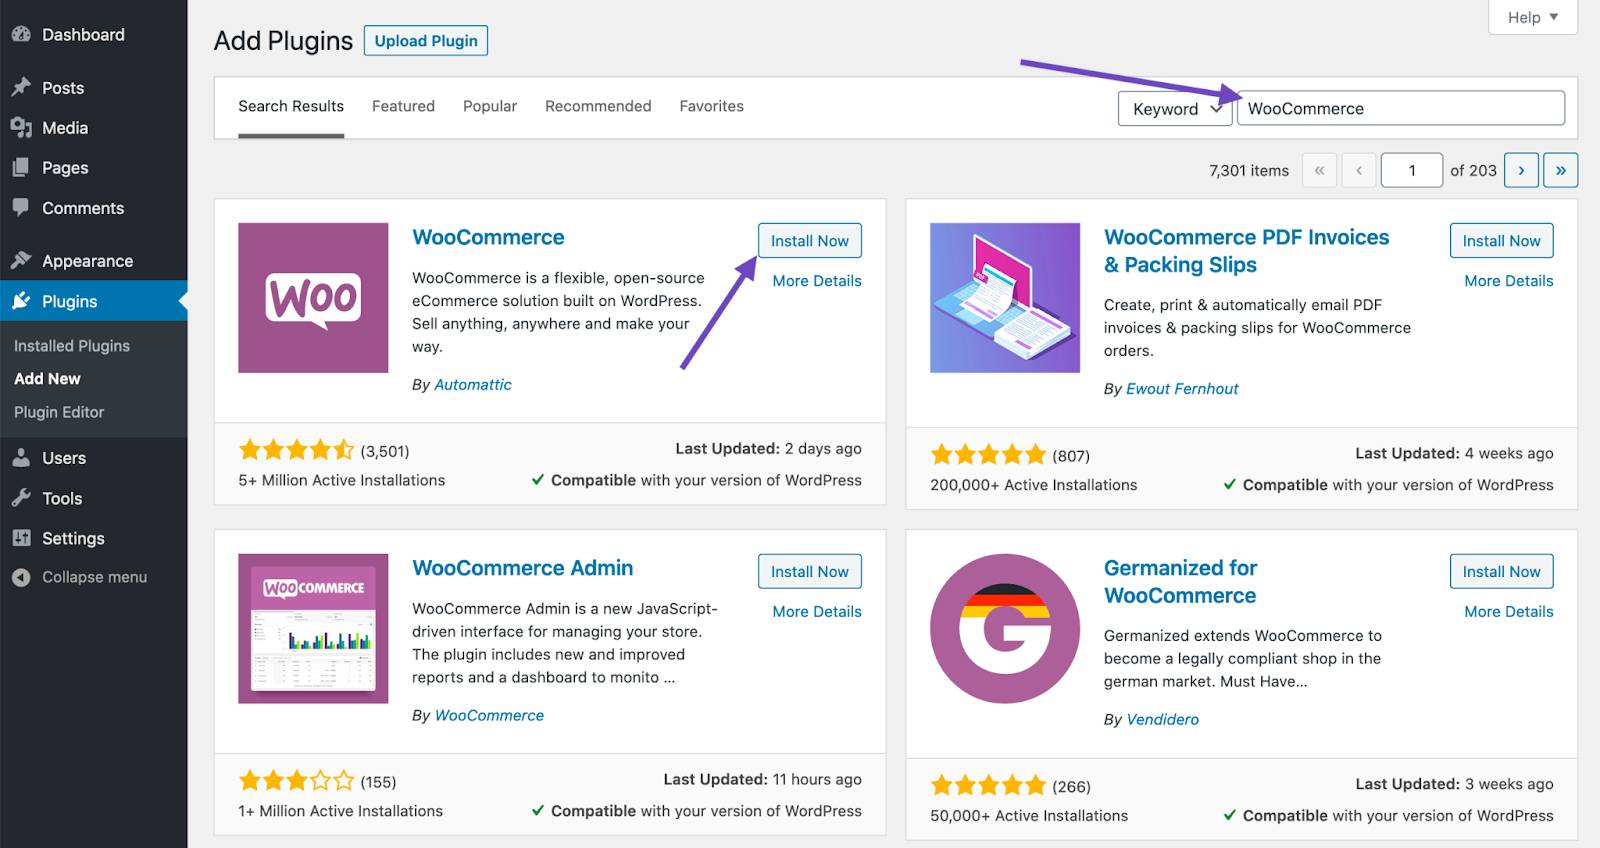
- Navigate to Plugins > Add New.
- Look for WooCommerce.
- Install Now should be selected.
- When you click Activate Now, you’ll be sent to the WooCommerce Wizard.
Even though multisite operates on the same network, each site is independent of the others. As a result, depending on your needs, you may set up your WooCommerce site individually.
Step 7: Add WordPress multisite in WooCommerce
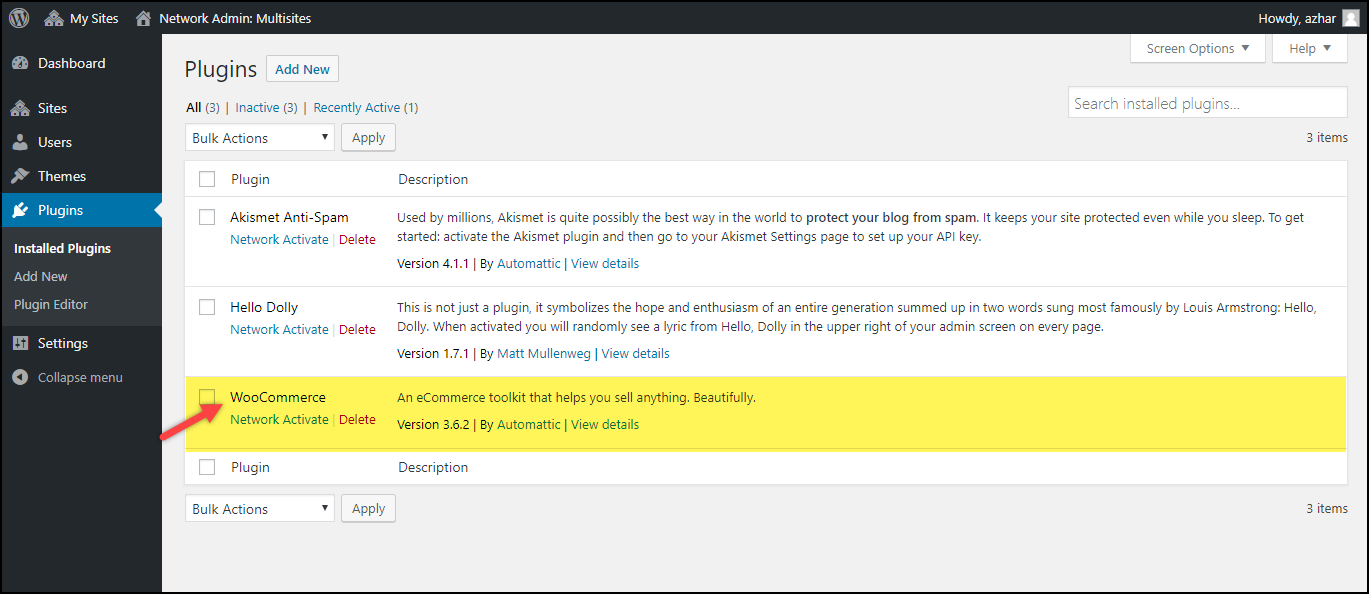
Unlike the standard plugin installation procedure in WordPress, plugin installation in multisite works differently. You can only install plugins from the Network Admin dashboard since the super admin user has permission to do so. The plugin installation option will be hidden from site admins. Plugins and themes, on the other hand, may be activated and deactivated at the site level. Similarly, go to Network Admin > Plugins to install WooCommerce. Click Add New and proceed with the standard installation method until WooCommerce is installed and ready to use. You have the option of activating WooCommerce on all child sites or just one. To accomplish this, make sure that WooCommerce is not enabled in the Network Admin settings.
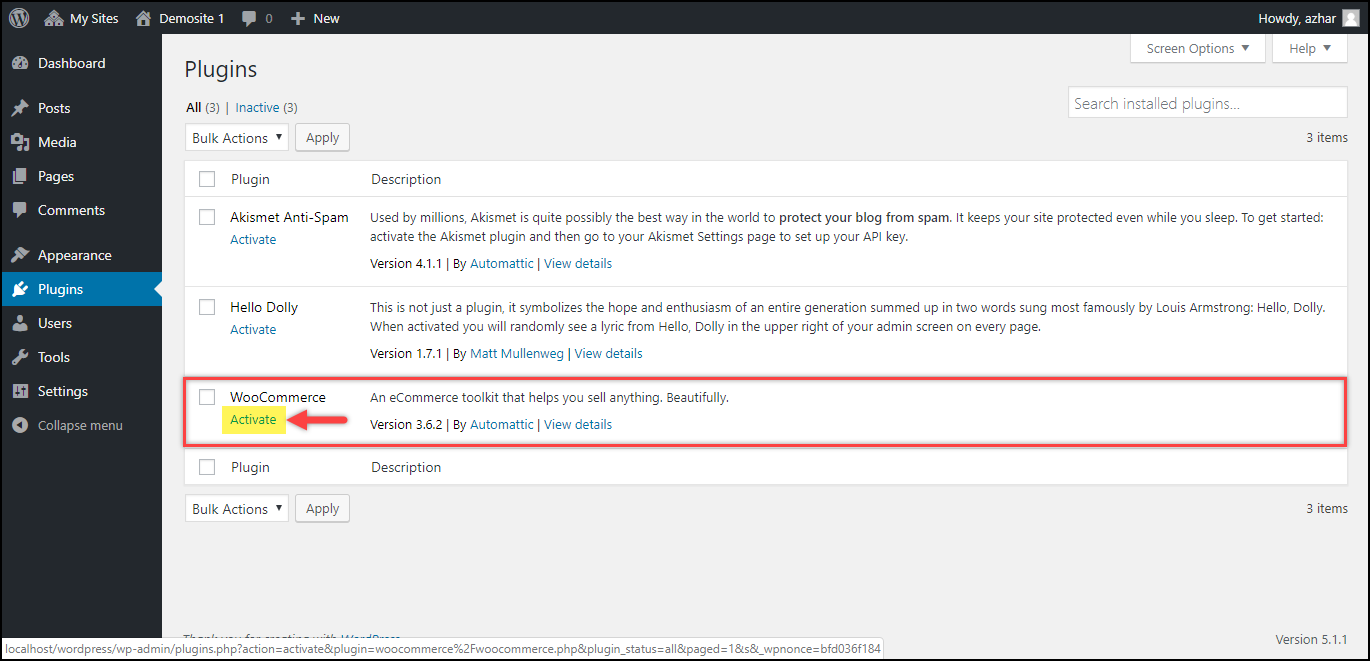
To activate WooCommerce in the selected child site, navigate to the site’s dashboard. Click on the Plugins tab on the left sidebar menu and then on the Activate WooCommerce button, as seen in the picture below.
WooCommerce will then walk you through the short store setup procedure. Set up your WooCommerce store by following the steps. The plugin will only be active on the site you’ve selected. And that’s it, you now obtain the WooCommerce multisite for your online business.
Conclusion
Lastly, WooCommerce multi businesses make it easy for online retailers to increase product visibility. A customer engaged with one site cannot register or be connected to another location on the same system by default. This is because they are already registered in the common WordPress database. On other sites, however, they do not have any user role privileges.
We hope this article will help you understand how to install and set up WordPress multisite in WooCommerce. Configuring the multisite systems will enhance your management inventory and customer satisfaction at the same time. WooCommerce may be the ideal solution for any business, huge sellers with a large number of items. So, let’s do some research and start to set up your multi-channel business right now!


