
How to Set Up Instagram Shop for WooCommerce

Since Instagram Shop was announced, this platform is still growing in popularity. It is still being continually rolled out globally and plays a vital role in the eCommerce industry. And as a WooCommerce store owner, you can take advantage of Instagram to emerge your products and enhance sales.
That is why today’s tutorial will show you How to set up Instagram Shop for WooCommerce straightforwardly and efficiently to maximize your total profits. So, let us dive in!
Beneficial of setting up an Instagram Shop for WooCommerce business
For those of you who still doubt the necessity of Instagram Shop for WooCommerce business. Here is the list of the most popular benefits that would change your mind:
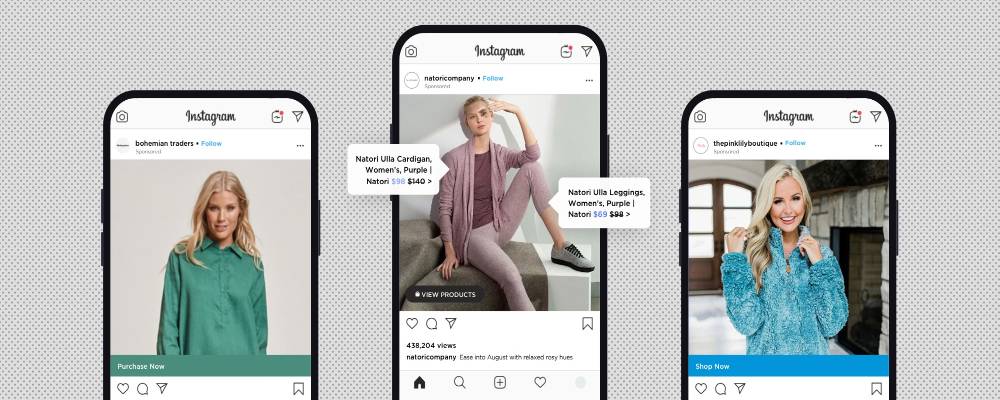
- Instagram shoppable tags are a fantastic way to discover the details and pricing of your WooCommerce products.
- Provide authentic advertising to gain trust from potential customers.
- Provide realistic pictures of WooCommerce products with aesthetic details and reviews that help build brand advocacy and sales.
- Provide a simple, quick, and short buyer journey with an easy checkout process to avoid cart abandonment issues.
- Increase user engagement and total sales.
How to set up and connect Instagram Shop for your WooCommerce online store
Step 1: Activate WooCommerce
The first step to set up and connect Instagram Shop is to own and activate your WooCommerce store. For those of you who are new to this industry, here are the simple guides of creating your account:
- Step 1: Select hosting for your website.
- Step 2: Instal WordPress from the Internet.
- Step 3: Go to WooCommerce.com and create your account.
- Step 4: Download and activate WooCommerce on your WordPress dashboard.
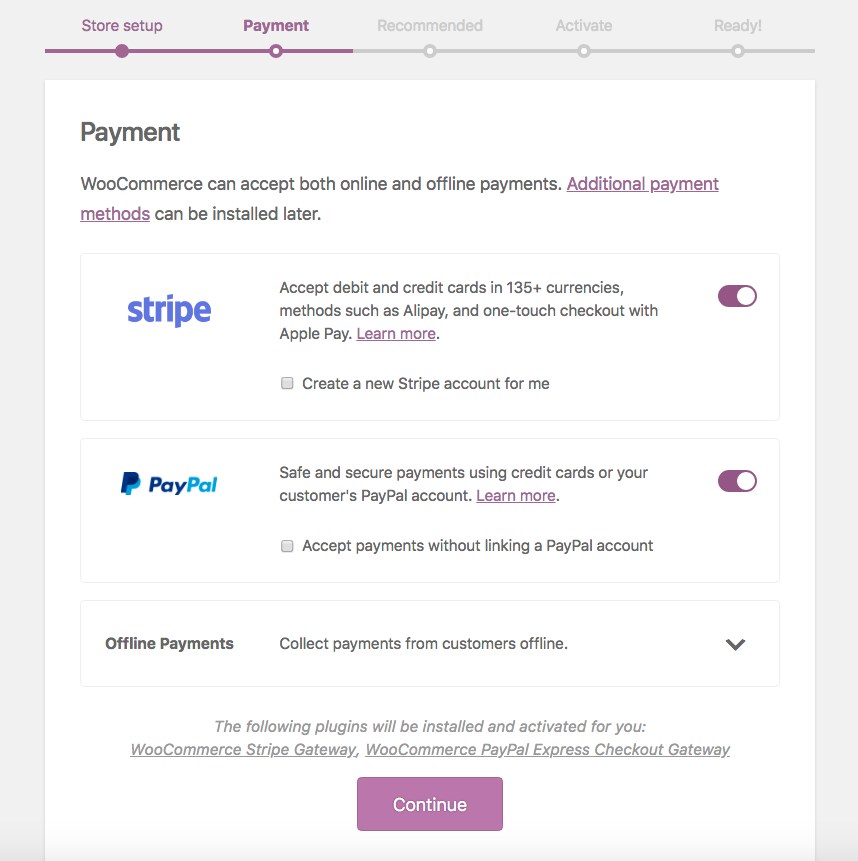
- Step 5: Setup the WooCommerce wizard, payment method, themes, and other functionality.
Once you finish five of those steps below, your WooCommerce online store is now ready to live.
Step 2: Set up a Facebook business fan page
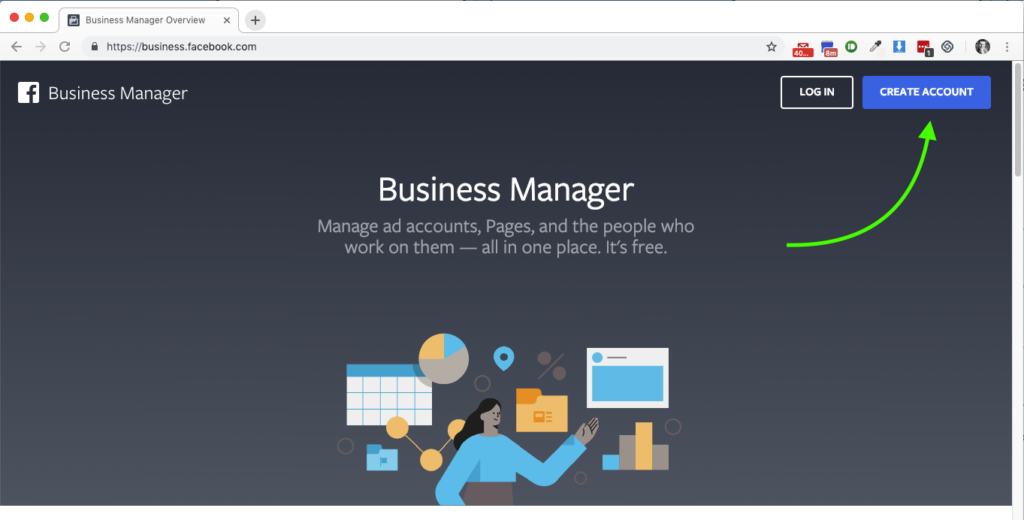
Moving to the next step, you will need a Facebook page for your business. Having an account on Facebook is simple; go to its homepage and create one for your own. Remember, never use your private account to link with Instagram. You should try a new one to secure and protect your privacy settings. The best way is to create a business manager on business.facebook.com/overview. Go to this specific page and assign an account by following the instructions. Moreover, an Ad account on Facebook is also necessary. Go to the Facebook homepage and create a new one.
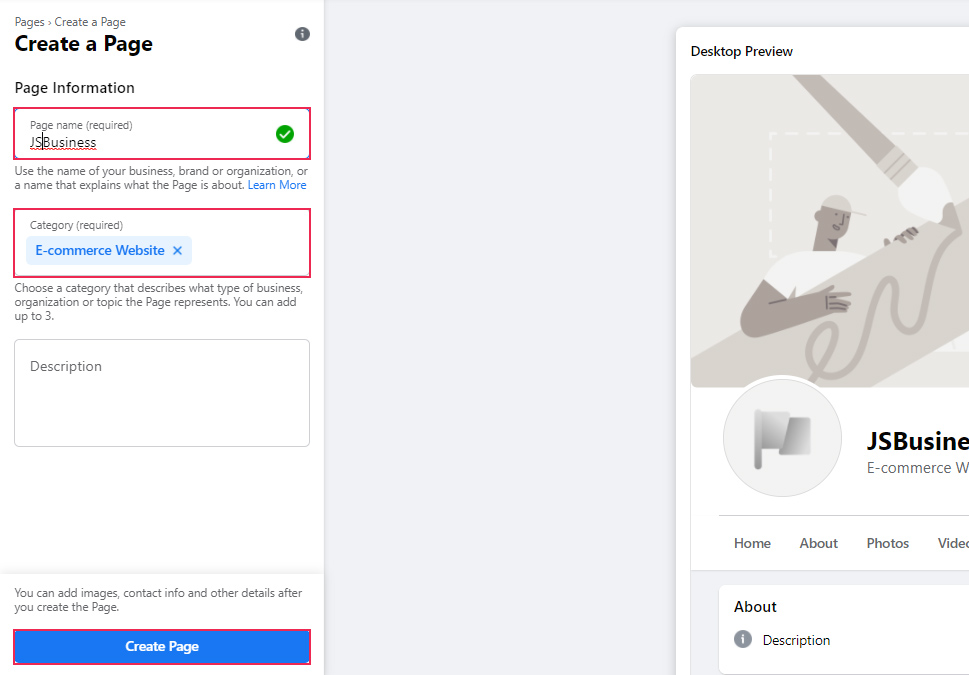
When having a new account, head to Facebook.com/create. On this page, navigate to the left side and choose the Business or Brand option. Continue to fill out the information about your online store and add some photos so Facebook can identify it. Do not miss any blank box, and remember to create your username. It will be the extended part of your Facebook link after the slash. Once you have checked all the setting requirements, select the Publish Page button. Wait a moment for the process, and now you have got a business page on Facebook. Then click on the Add Ad Account button and follow the instructions on the page. After setting up your Ad Account, click on the Add People button and activate the administrators for the account.
Step 3: Set up a Catalog on Facebook
Once setting up everything on the business Facebook page, it is time to create a Catalog. The Catalog is where you put items to sell and advertise on Facebook. It will be the connection between your WooCommerce store with Facebook and Instagram. There are 2 different ways to create a Catalog:
- Head to the Catalog Manager page and select the Get Started button. On the new dashboard, click on the Create a Catalog option and choose the Get Started button again.
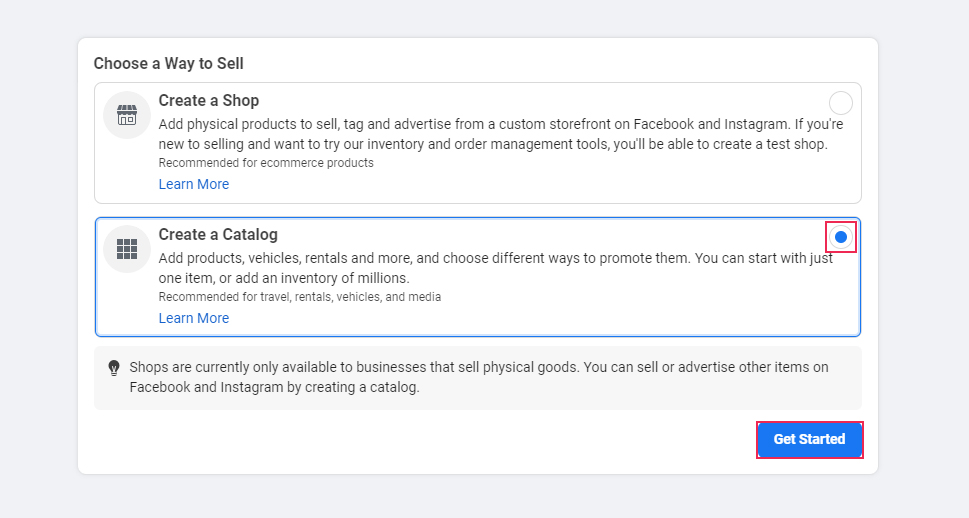
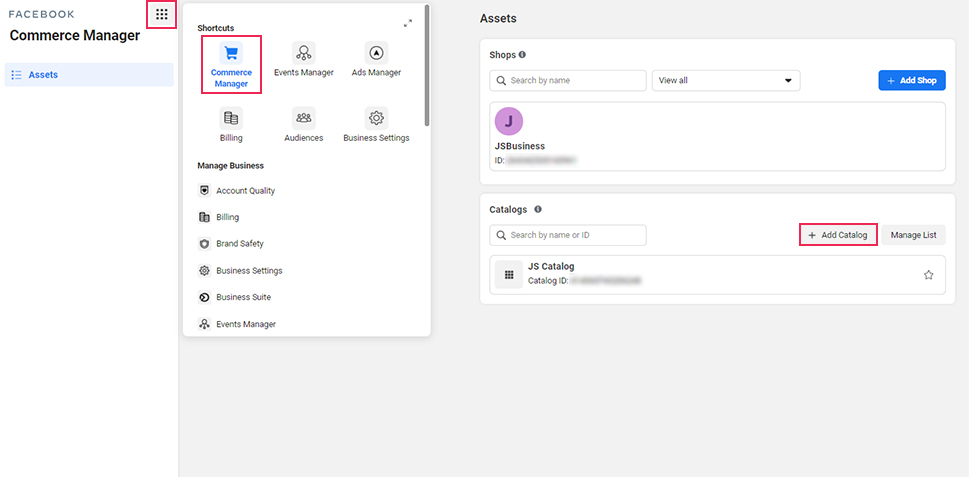
- Access to the Pages tab on your Facebook page, then select the Commerce Manager option. After that, you will see the Assets window. On the right side of the dashboard, find and click on the Add Catalog button.
Then, you will see the Select Type window, tick on the Ecommerce option to sell products online, and click on the Next button.

It will transfer you to the Configure Settings dashboard. Find and select the Connect Ecommerce Platform option. On the dropdown menu, choose WooCommerce.
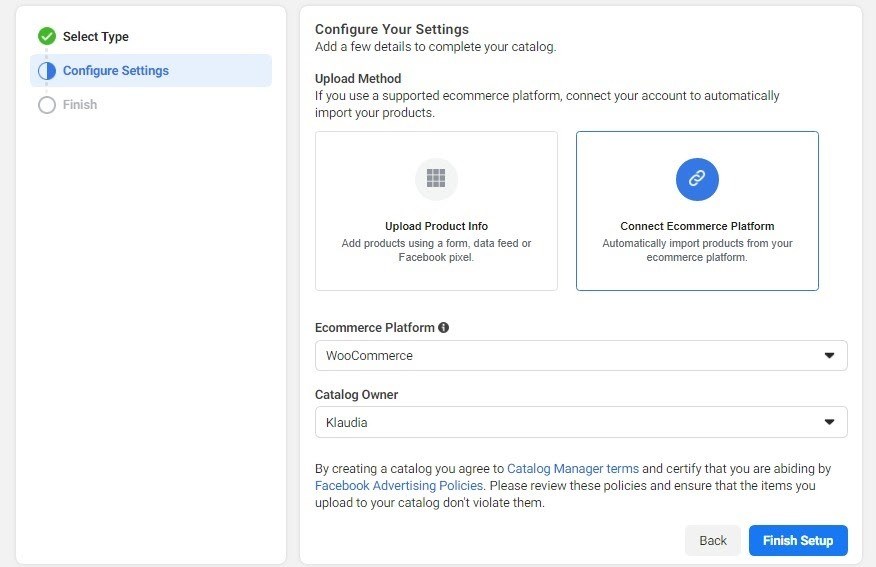
Finally, click on the Finish Setup button to end this step.
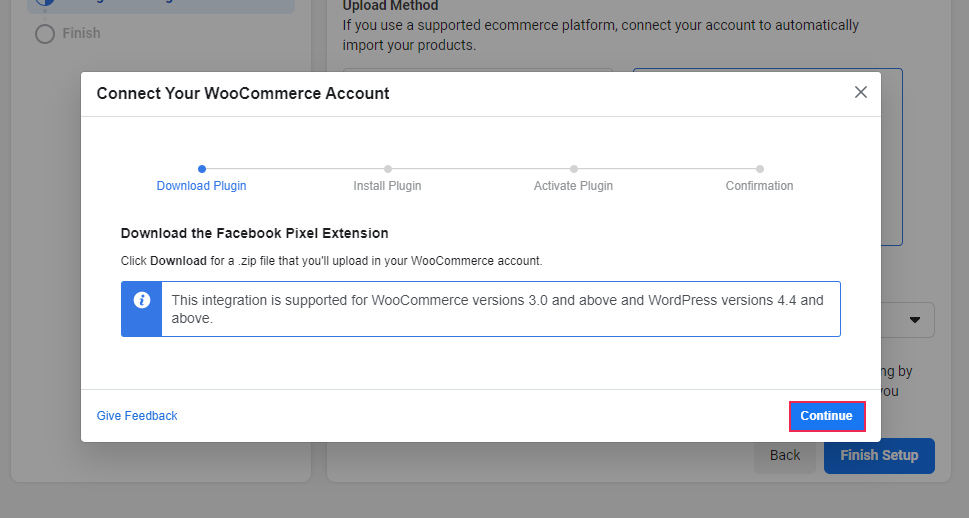
Step 4: Install and activate the connection plugin between Facebook and WooCommerce
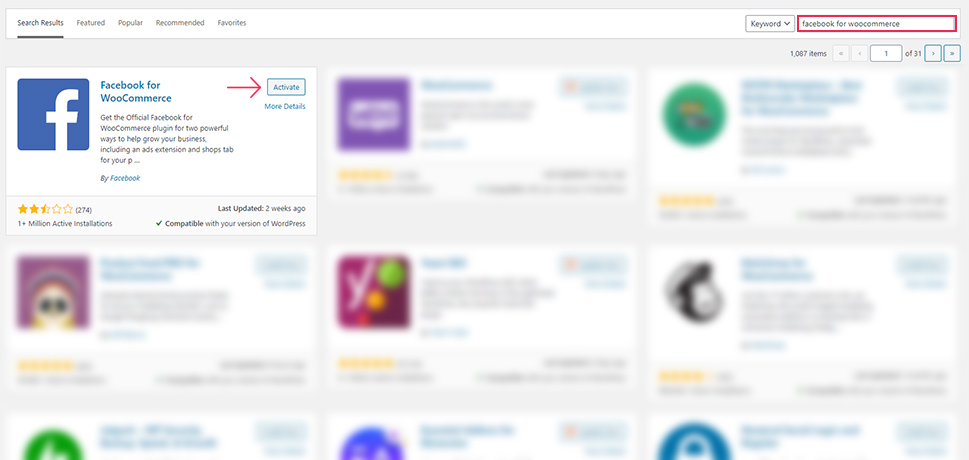
You will need to use a plugin called Facebook for WooCommerce to connect your WooCommerce store with Facebook in this stage. When you click on the Finish Setup button in step 3, the Connect Your WooCommerce Account window will appear on your main screen. The first stage of the setup process is to download the plugin. There will be a download link right below the line “Download the Facebook Pixel extension.” Click on it, then follow the instructions to install and activate the plugin.
If your computer does not have the zip reader software, you can still traditionally install the plugin. Go to your WordPress dashboard and head to the Plugins tab. Select the Add New option and enter the name of the plugin in the searching box. Install and activate the plugin following all the instructions from the developer.
Step 5: Connect WooCommerce with the Facebook page for business
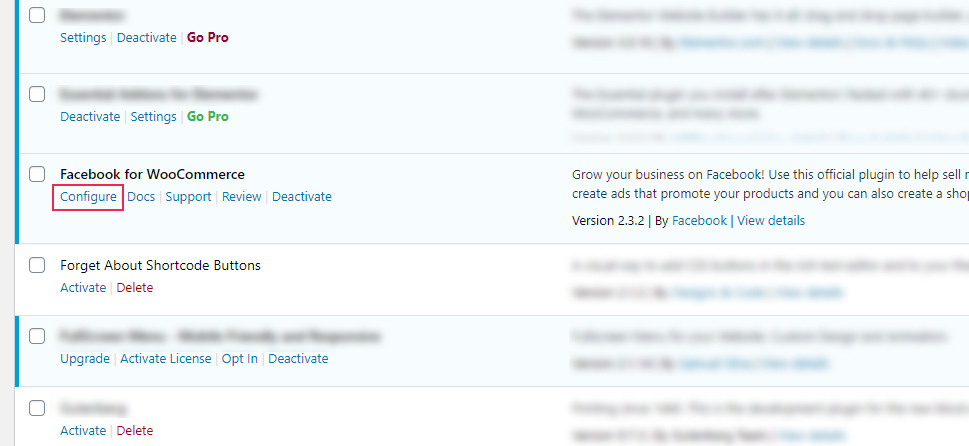
In this step, we will connect the Facebook Business Page to your WooCommerce store. On your WordPress dashboard, navigate to the Plugins tab. Open the Plugins page, find the plugin Facebook for WooCommerce and click on the Configure button. The Connection window will appear on your screen. Click on the Get Started button to move to the next stage.
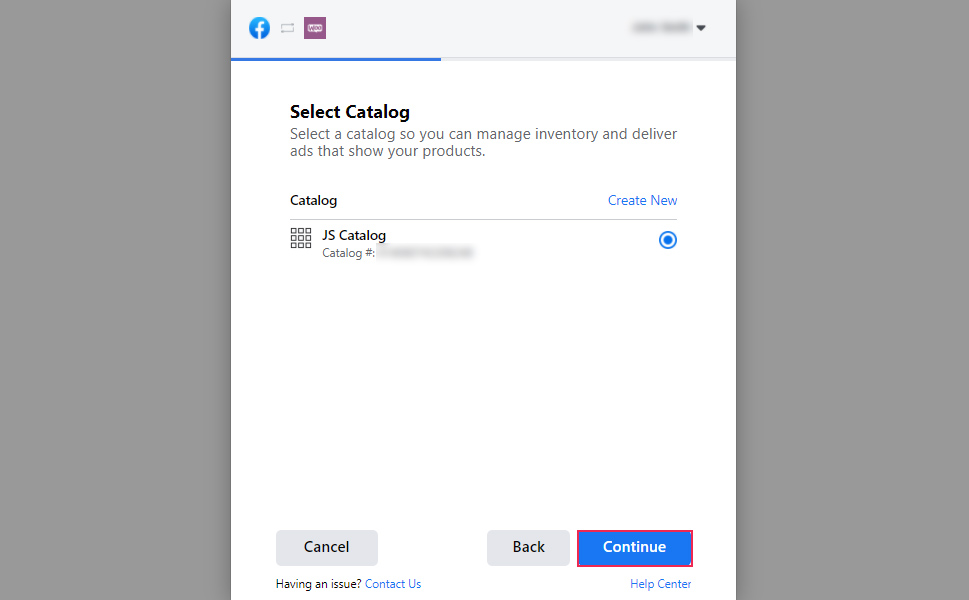
In the next stage, you will need to log in to your Facebook account to run the process. Remember to choose the Business account that you create in step 2. Now you will see the integration window, tick on all the blank boxes that appear on your screen, and select the Get Started button. Moving to the following window, you will need to select the business manager account that already exists. Click on that page and hit the Continue button. After that, you will choose the Catalog that you want to list on Instagram Shop.
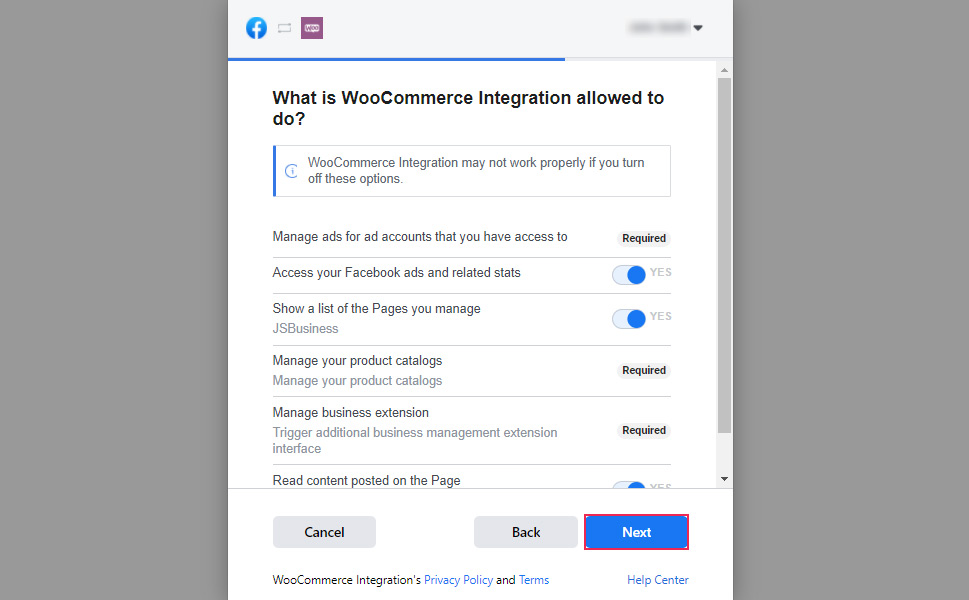
Click on the Continue button two more times to reach the Confirmation page. It is where you decide what your WooCommerce integration will be able to do. It will ask you, the administrator, to access your Facebook Ads, related stats, and product lists. It would be best if you also let Facebook manage your business extensions and product catalogs. Follow all other instructions and click on the Next button. Finally, click on the Continue button to complete the connection between Facebook and your WooCommerce store.
Step 6: Create and set up an Instagram account for your business
Like the Facebook Business Page, you should use a new Instagram account to start your business. Download the Instagram app and create an account. After that, access your Settings, select the Account tab and choose the Switch to Professional Account option.
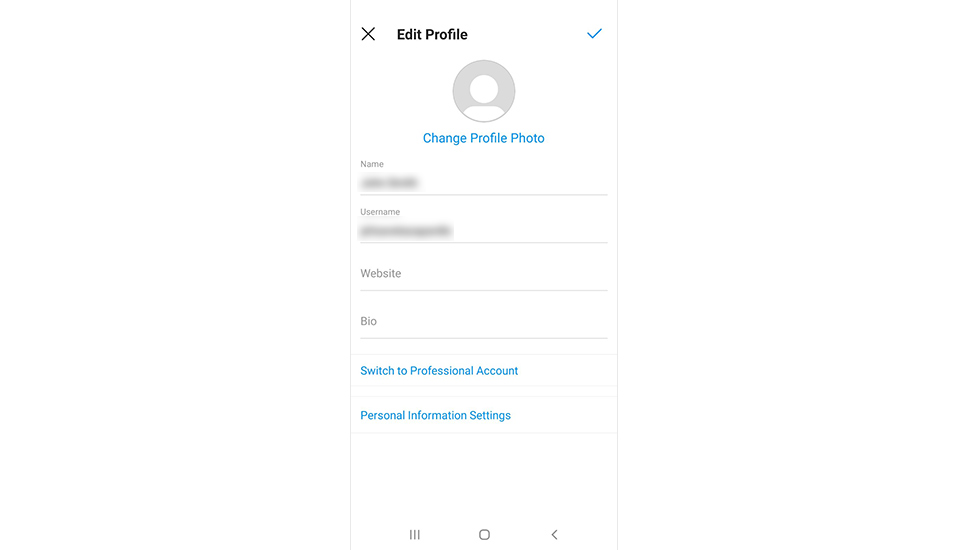
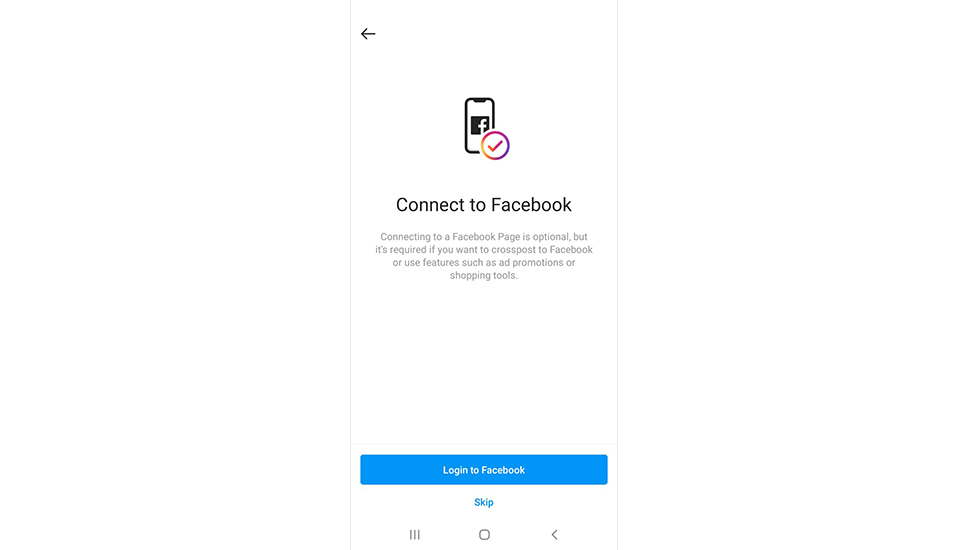
Next, you will take the setting process to create your profile. It is time to select your category, business type and consume your additional business information. Follow the instructions from Instagram until you get an option to sync your Facebook account. Keep moving by choosing the Business Facebook account to complete the process.
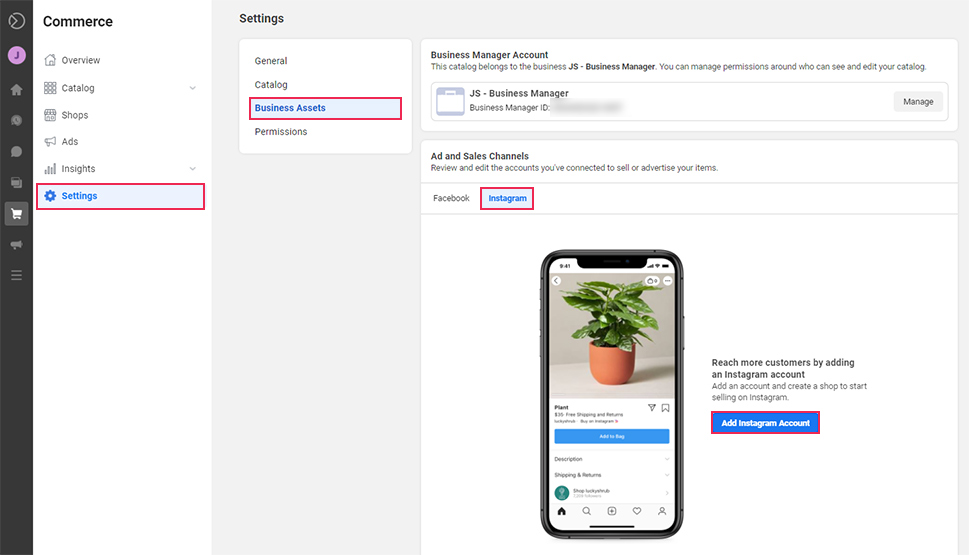
Once finishing setting up your Instagram account for business, head back to your Catalog page. Find the Settings tab and select the Business Assets option. Navigate to the Instagram tab and then click on the Add Instagram Account button.
Step 7: Connect your WooCommerce website to Instagram Shopping
When the process is complete, go back to the Settings panel on Instagram, select the Business tab and click on the Set Up Instagram Shopping at the end of the list. Click on the Get Started button, then follow the instructions and submit all of your information.
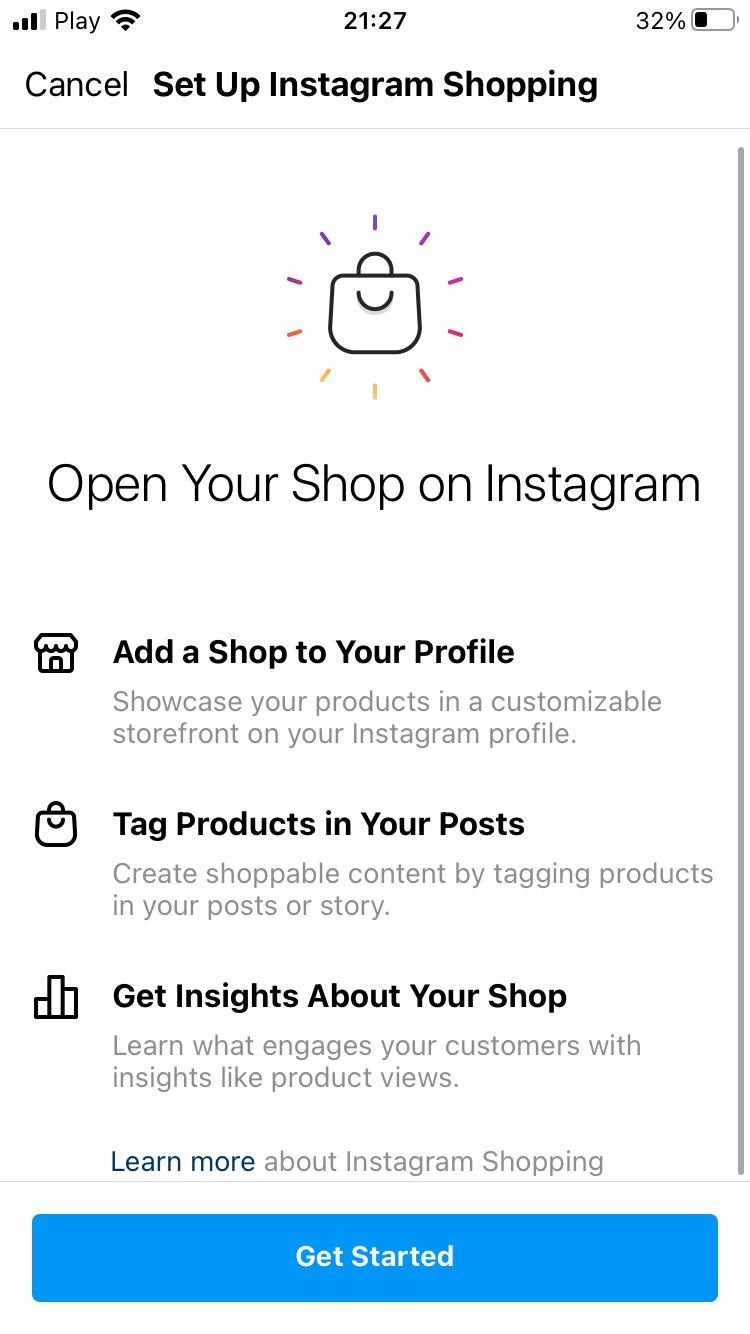
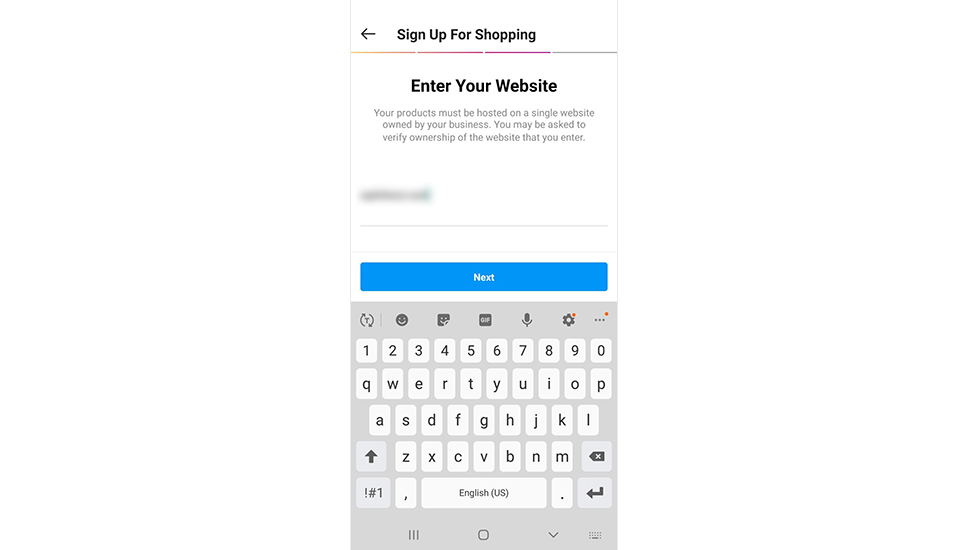
Finally, you will reach the Enter Your Website page. Fill in your WooCommerce website and click on the Submit for Review button. It will take you a few days to complete the process because Facebook will need to look at your account to see if it meets its requirements. After completing the connection and getting approved by Instagram, you now can start tagging your products and integrating them into your WooCommerce store.
Conclusion
Allowing consumers to access your WooCommerce catalog on your Instagram feed will enable them to continue surfing Instagram while simultaneously viewing and purchasing your products. As a result, using Instagram shoppable posts to promote your products online and broaden the reach of your e-commerce business is a marvelous idea.
We hope that this article will show you How to set up Instagram Shop for WooCommerce in a clear and detailed manner. Remember to fulfill all the requirements from Facebook to get a smooth process and peak your sales!


