
How to Create & Set WooCommerce Pagination?

Each component on an eCommerce site has its own features, so the mission of store owners is to know how to leverage it. However, there is a tiny element that is often ignored in the online shop - It is pagination.
In the majority of eCommerce stores, entrepreneurs tend to keep the number of products per row or row per page by default without realizing that it also plays a particular role in improving customer experience and increasing sales.
So, from this post, you will be able to create and customize pagination in your WooCommerce stores easily and acknowledge clearly the advantages of pagination in your WooCommerce store.
Benefits of Pagnations for WooCommerce Stores
- Increase sales conversions: With pagination, merchants can customize the number of products displayed on their page. This helps merchants increase the likelihood that visitors purchase the products they like instead of browsing the content.
- Keep track of content easily: By using pagination, merchants can rapidly be aware of the amount of content on each page, making it easier for them to figure out the item’s locations or bookmark links.
How to Create & customize by WooCommerce default themes
Step 1: Open Customize
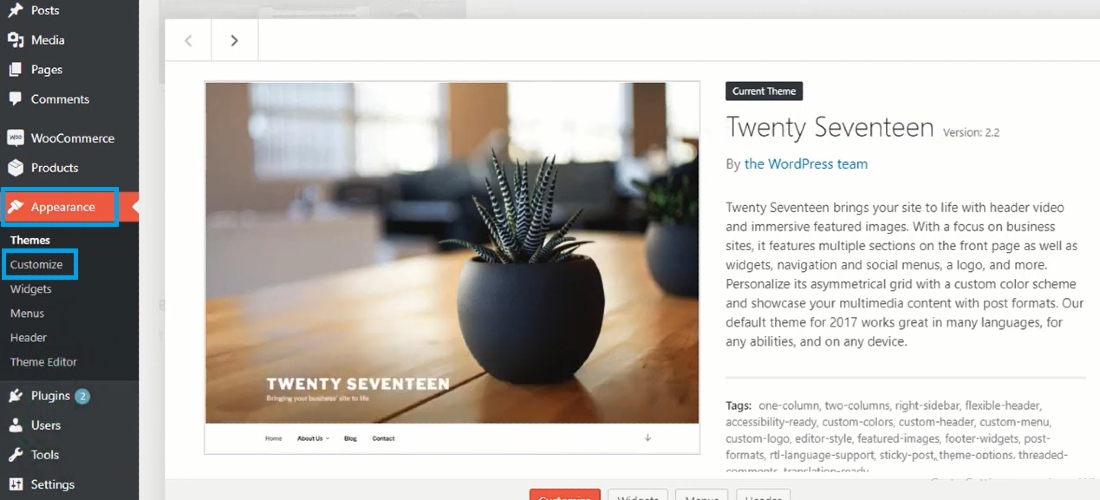
Log in to your WordPress account and open the control panel. Go to Appearance and select Customize.
Step 2: Open Product catalog
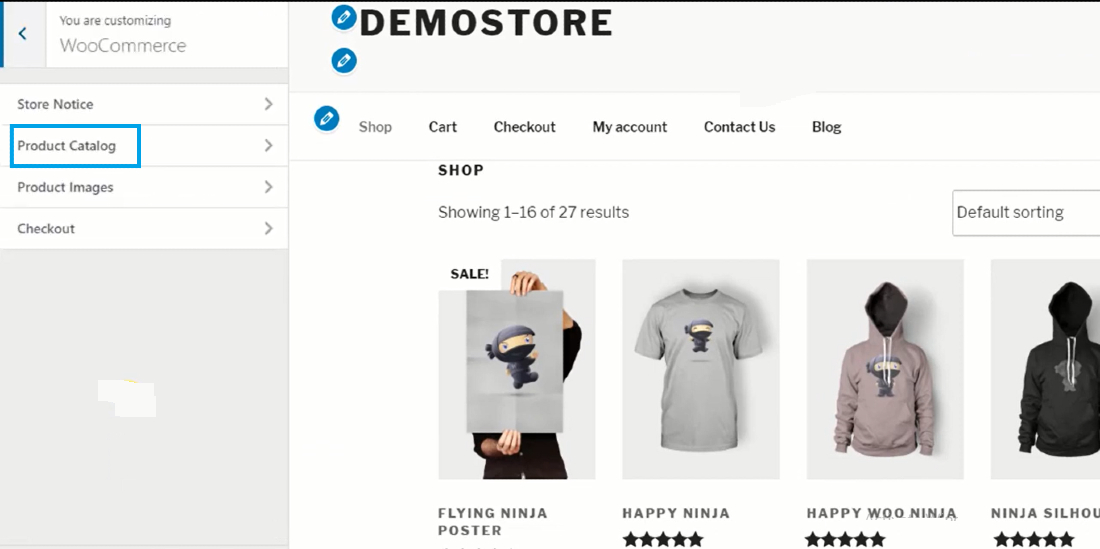
You will be navigated to the demo store. There, click on WooCommerce in the left bar of the screen and open Product Catalog.
Step 3: Set WooCommerce pagination
In Product Catalog, scroll down to Product per row and enter the number of items you want to display in a row. You can also change the number of rows on each page by clicking on the box under Row per page and filling in the number you want.
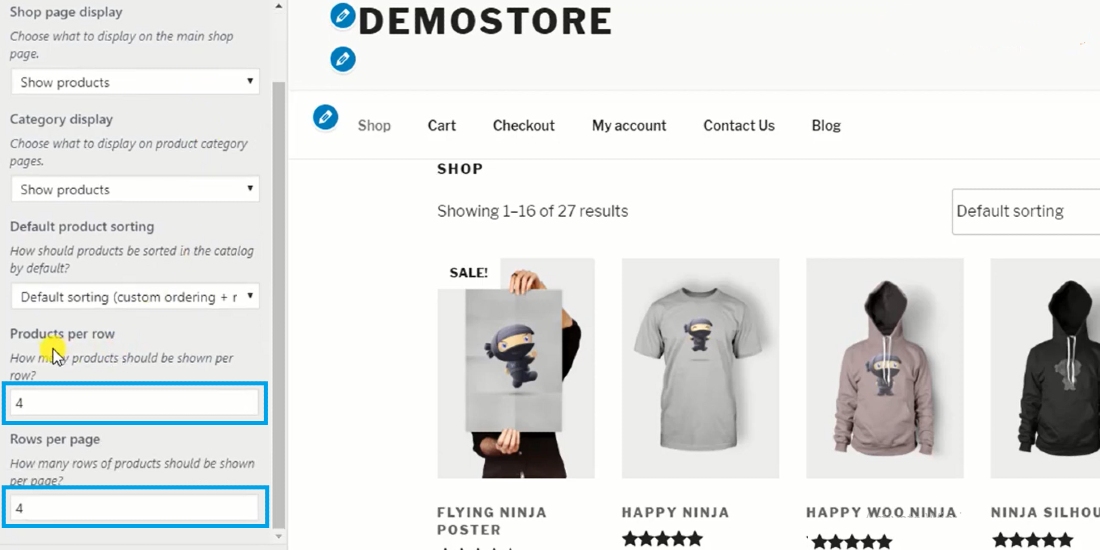
The changes will immediately be shown in the demo store, so you can modify the number until it meets your expectations.
Finally, choose Publish to save the changes.
How to Create & customize with code snippets
Step 1: Open Theme editor
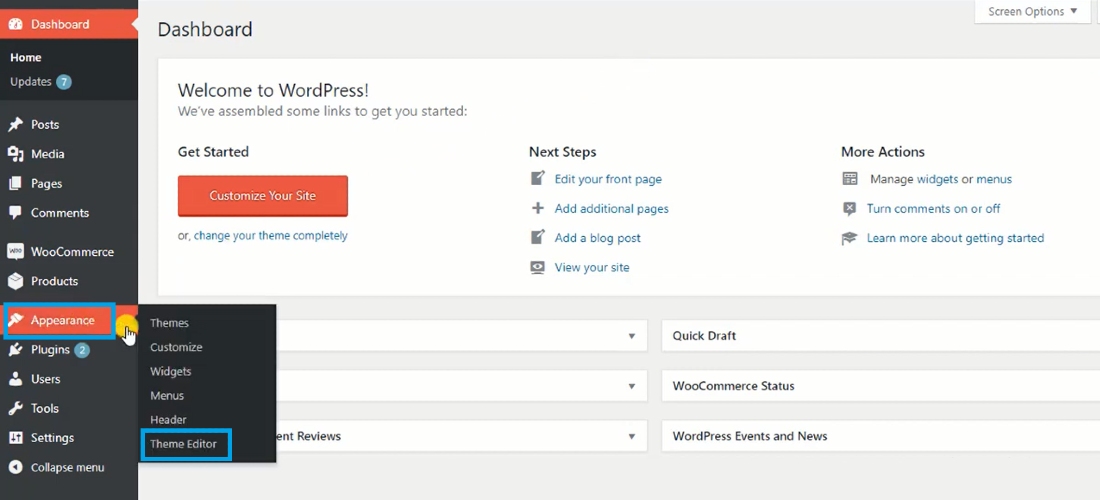
First, log in to your WordPress account and navigate to Appearance. There, click on Theme editor, and you can start editing your activated store themes.
Step 2: Open functions.php
In Theme editor, you will see the Theme files in the right bar of the screen, scroll down and select functions.php.

Step 3: Edit the pagination in the store
To change the number of products on each page, copy and paste this code snippet into the functions.php
// Change the Number of WooCommerce Products Displayed Per Page
add_filter( 'loop_shop_per_page', 'lw_loop_shop_per_page', 30 );

function lw_loop_shop_per_page( $products ) {
 $products = ...;
 return $products;
}
Replace ... with the number you want. Then, open your storefront to see how it changes, in case this snippet doesn’t work, use the following codes:
// Change the Number of WooCommerce Products Displayed Per Page
add_filter( 'loop_shop_per_page', create_function( '$products', 'return ...;' ), 30 );
Likewise, enter your desired number on ...
To customize the number of columns per page, copy and paste this code snippet into functions.php:
// Change the Number of Columns Displayed Per Page
add_filter( 'loop_shop_columns', 'lw_loop_shop_columns' );

function lw_loop_shop_columns( $columns ) {
 $columns = ...;
 return $columns;
}
Replace the ... with your desired columns.
After all, don’t forget to save all the changes.
Final words
Overall, there are various ways to create and customize pagination in a WooCommerce store, but the two methods above are the most convenient and rapid. You can easily edit the number of products on a page based on your desire without installing a third-party plugin or store template. Hence, read through the guide and select the suitable method for your store.


